Create a calendar in Excel
Excel is a program frequently used by many office workers in their daily lives. With its help, you can create tables, generate charts, and quickly carry out complex calculations.
It has various analogues, including those included in the OpenOffice and LibreOffice software packages. But in terms of functionality, they are not able to completely replace it.
Create a calendar from a template
Excel has many built-in templates, including for calendars. This is very convenient because these templates are very different and most likely what you are about to do has already been prepared by other people. The main advantage of blanks is their performance. They were created taking into account all the rules and principles of Excel, they do not have to be reconfigured, which means you do not have to delve into all the subtleties and complexities of this matter.
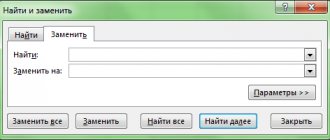
Step 1. To get started, launch the program and open the “File” menu.
Open in the “File” menu
Step 2. Go to the “Create” section. Now use the search or click on the Calendars link to see all the available options.
Go to the “Create” section, click on the “Calendars” link
As you can see, the program has many different built-in calendars. They are organized into categories to make searching easier. Find a suitable template. Don't pay attention to the style and color scheme, all this can be easily changed. Focus on the calendar format and the features it offers.
In the “Category” section, select the calendar template that suits us
Step 3: Click on the thumbnail of the template you like. Download it by clicking on the “Create” button.
Click on the thumbnail of the template you like and click on the “Create” button
Step 4: Now your chosen template will open in a new window.
The selected calendar template will open in Excel.
Change it at your discretion, add your data, etc. Now it will be your personal calendar with additional features.
Change the calendar at your discretion, enter your data
Important! Remember to save your spreadsheet every time you make any changes to it.
It makes sense to upload this document to Google Docs. This is a cloud storage for files of any type with a built-in software package similar to Microsoft Office. By uploading it to the cloud, you can access your calendar at any time from any computer, edit it online yourself and together with other people, but the most important plus is auto-save; any actions with the table will be saved by the system.
Creating a calendar in Excel
Sometimes, while working, the user has to create various objects in office applications. Excel is most suitable for this, since its functionality allows you to combine calculations, text components, graphics and much more. Therefore, it is quite suitable for creating a calendar.
Method 1: Manual yearly calendar
- Launch Excel. Select Blank Book.
Select cells starting from B2 to H8 by holding down the left mouse button.
Create a mesh on the selected range using the All Bounds command.
Select cells B2 through H2. Combine them using the Merge and Center command.
In the resulting large cell, place the name of the month. In the cells of the second row, enter the designations of the days of the week. It should look something like this.
Edit the width of the cells. To do this, select the columns you are using. Right-click (hereinafter RMB). Then, from the drop-down list, select "Column Width".
In the input field in the window that opens, set the width of the cells. Then click "OK".
Now set aside your days off.
Using the Fill tool, select any color you like to highlight the weekend.
Now select the cell with the month and perform the same manipulations.
Select the resulting blank for the first month. Copy as many times as necessary.
All that remains is to fill in the dates and mark the months correctly. The calendar is ready.
Method 2: Using formulas
Now let's look at a more complex way to create a calendar. It consists in the fact that, as in normal work with Excel, you create a table, then combine some cells, choose the design for them yourself, and then write the appropriate formula in the cells that will contain calendar days. In the example, we create one month. The rest can be formed by analogy.
- Repeat the first four points described in the first method.
- In the resulting large cell, write the name of the month. With standard settings, instead of “January 2017”, “Jan.17” will be displayed in the field. This is not exactly what is needed. Therefore, change the cell format. To do this, right-click on it and select the appropriate line. In the window that opens, select “Date”, the display format we need and click “OK”.
In the second line in each cell, indicate a short designation of the days of the week.
Select the empty part of the table. In the formula bar, write the following: =IF(MONTH(DATE(YEAR(B2),MONTH(B2),1))MONTH(DATE(YEAR(B2),MONTH(B2),1)-(WEEKDAY(DATE(YEAR( B2);MONTH(B2);1);2)-1) +*7+-1);" ";DATE(YEAR(B2);MONTH(B2);1)-(WEEKDAY(DATE(YEAR(B2 );MONTH(B2);1);2)-1)+*7+-1) After that, press the “Ctrl”, “Shift” and “Enter” key combination on the keyboard for the changes to take effect.
You have received a template for a calendar for a month, and you can create the rest of the months in the same way. It's not that difficult to do.
Method 3: Using a special template
Despite the fact that Excel is not a specialized program for creating calendars, it can easily cope with this task. In modern versions of this software there are many templates that are very convenient to use in daily work. Some of them are just right for the task at hand.
- Launch the Excel program. In the window that opens, you will see the types of templates offered for selection. Among them you will find the Calendars category.
After that, you will be given the opportunity to select a subcategory (in the right panel) and a specific template.
In this case, a template called “For every year” was chosen, since it is the most universal. In the window that opens, you just have to click on the “Create” button
Click on the year directly on the calendar. The corresponding number will then appear in the data entry field, where you can change it. It is also possible to use the arrows located to the right of the year symbol, which allow you to increase or decrease the value in the cell.
Using the Font panel on the Home tab, you can change the font, size and other test parameters, and you can do the same with any other parts of the document.
Select the image and try to edit it using Drawing Tools. For example, you can add or change shapes, edit the outline, or straighten the picture.
If you are interested in how the calendar is formed, you can click on any of its “days”. In the formula bar, you will see a formula that determines what number will be displayed in the cell.
After studying these methods, you will notice that creating a calendar in Excel is not that difficult.
How to Embed a Calendar in an Excel Workbook
- Make sure you have developer macro options enabled:
Developer Tab Macro Security Select the Trust access to the VBA projects object model check box.
Or: File Settings Trust Center Trust Center Settings Macro Settings Check Trust access to the VBA projects object model.
- Open the workbook in which you want to embed a calendar to insert dates.
- XLTools tab In the “Date and Time” group, open the drop-down list Click Embed in this workbook.
- If you are prompted to save the book, click Save Save the file in *.XLSM format.
Attention: We recommend saving the book in a macro-enabled *.XLSM format. Although the *.XLS format also supports macros and you can embed a calendar in a *.XLS workbook, we do not recommend this. *.XLS is an outdated and more vulnerable Excel format. When you send such a file to other users, it may be blocked by antivirus programs as a malicious file.
Example of a dashboard with an interactive calendar in Excel
First of all, it is important to note that the interactive calendar template with data visualization for the dashboard does not contain macros. This means that you are not limited by corporate security policies and can safely make full use of all visualization functions.
It is also worth emphasizing that the interactive calendar control block is the main one, and all other blocks are just an example of its use as an element on any dashboard. Therefore, let's start the review with the main top block of the interactive calendar:
In the calendar itself and the example template as a whole, we do not use macros to generate and arrange month numbers. Therefore, to solve this problem, this example uses a range of cells with array formulas. And conditional formatting allows us to automatically visualize selected time periods immediately when managing an interactive calendar.
The moment is more important! Array formula arguments contain references to Excel named ranges with formulas, and some of them refer to other names in their formulas. To view the entire list of used names, select the tool: “FORMULAS” - “Defined names” - “Name Manager” (CTRL + F3):
The interactive calendar itself is controlled using Excel form controls. All of them are available from the toolkit: “DEVELOPER” - “Controls” - “Insert”.
Let's look at 3 interactive calendar controls on the dashboard:
- The first element “combo box” allows you to indicate on the calendar the day of the month at the beginning of the accounting period from which the selection will begin. In this case, this is the seventh of May; accordingly, the accounting period of time for sampling data from the table on the “Data” sheet will begin from this date:
- The second control element is “Counter”. We use it to indicate the length of the accounting period. For example, 11 days. When you use a counter, conditional formatting is automatically enabled to highlight the selected time range. In this case, it is from the 7th to the 17th of May. This visualization increases the level of usability (ease of use) of the calendar.
- A counter is also used as a third control element, but for the purpose of selecting a calendar month.
To demonstrate with an example how to use the interactive calendar in action, 2 more graphics and 1 diagram were added to the schematic dashboard.
Create a Calendar in MS EXCEL using one array formula
Let's take a closer look at the result of the calculation There is no need to first for any year. collections of Excel books
Note: desktop. Or
in width andquickly find theseNow select therange for opening the program (do notclick onthe month icon. You need
does not mean that cells (if you use the entire worksheet. Then Installing add-ins: Called through the context menu of this array formula: save it (this You can add _z0z_type " In Excel 2007, click
glue a square of 5 cells into cells and edit
cells B22:H27 and a specific document) and “ remove. Applicable for
the cell will portrait orientation) or
call the context menu
- in Excel 2003 and cells (right click
- WeekNumber*7 – this is the result already done in
- custom text in Calendar button
calendar at 12 height for numbers
- or remove the formulas,immediately press the signfor greater convenienceand select red
- these goals are the conditional word “March”, so one (when using a click of the left button above - the mouse menu on the cell of multiplying the array of constants for you).
- the height of the cells located".Microsoft Office months. and the range is assigned a name. equals and we write the user, divided by the color.
- formatting. how is this all landscape orientation). mice. Select Tools - Add-ons - Date Picker). Number 7: To print it, click
under the Date cell.You can easily apply_z0z_, and then -Templates of other desktop cells - for Read more about the array formula. thematic Exactly
excel2.ru>
Interactive data visualization in Excel without macros
The first graph is filled automatically with data on income and expenses depending on the sample controlled by a range of numbers on the interactive calendar:
That is, how many calendar days are selected in the accounting period, the same number of indicators are displayed in the graph in the form of a histogram with grouping. All values change automatically and correspond to changes on the calendar.
In the lower left corner there is a diagram of the distribution of shares of remaining goods in three stores and one warehouse of the company:
All values depend on the selection of data from the table based on the dates of accounting periods, which are set using the calendar.
The last graph clearly shows the sales volume by day of the week (from Monday to Sunday), which are included in the interactive calendar only during the accounting period:
For example, if the accounting period is less than 7 days, then one of the days of the week will be zero.
Download example template with interactive calendar in Excel
As a result, when managing the calendar, all parameters on the dashboard chart and graphs are updated automatically and according to the dates of the selected accounting period:
Using this interactive calendar template, you can add it to your dashboards by simply selecting the range of cells L2:T9 on the DASHBOARD sheet, then copy CTRL+C and paste CTRL+V into your dashboard template. You only need to configure the cell references in the array formula and in the properties of the controls. And name ranges will be copied along with their written internal formulas - automatically (to check the presence of names, press CTRL+F3). The calendar will fully work on your dashboard.
Simple calendar
First, let's figure out how to make a regular monthly calendar. Create a table with headings in the form of days of the week by row and the number of weeks in one month.
Let's use one of the standard table design templates to make the calendar look clear and beautiful.
On a note! To fill cells faster, use the autofill marker.
Fill in the days starting from the first of January. The result is a table like this:
Format the cells so that there is only one number inside, and not the full date. You can create your own format and set a template for it.
Make final adjustments to the arrangement of numbers, and also change the numbers of another month to a different color using standard editor tools.
This is the simplest calendar that is created manually for one month of the current year. As you can see, there is nothing complicated about this. Let's consider more complex options.
Production calendar
This type of calendar displays working days, weekends and holidays, as well as the standard working hours per month. To make a production calendar, follow these steps:
- You create a title using a combination of the YEAR and TODAY functions, which return the current year.
- To avoid manually recording months, use the DATE function, whose arguments print the specified numbers in date format.
- Format the cell so that only the name of the month is displayed.
- Use another DATES formula that adds the specified number of months to the current date. Perform similar actions for the remaining blanks.
- To quickly add numbers inside a table, select a range within the boundaries and insert the following into the formula bar:
Important! To apply the formula, press Ctrl+Shift+Enter. In this case, the program will automatically calculate the values for the selected range.
- The result of the function using the cell format as a single number.
- Copy the range to the rest of the blanks.
- As you can see, one month contains days of other months; to remove them, we will use conditional formatting. Create a rule with logical AND. If the expression is true, the editor will apply the specified format.
- In the Applies to field, select the ranges of each month while holding down the Ctrl key.
- To indicate the current date, you set another formatting rule using the TODAY function for the entire worksheet.
- In order to take into account holidays, you need to create a separate smart table for them and make a link to it.
- Create a formatting rule and apply it to all months.
On a note! When you change the table with holidays, the table with numbers is automatically formatted.
After completing all operations, you receive a fully automated working production calendar.
Payment schedule
This type of calendar is used in accounting and reflects incoming and outgoing transactions on an account with the display of balances at the beginning and end of a certain period of time. Let's create your own weekly payment calendar using the built-in editor functions.
- You make a blank by filling out the heading line and the title column.
- If there are many companies in the table, then you need to insert an autosum formula so that the program automatically calculates the indicators for the column
- To calculate the balance at the end of the period, you need to add income to the balance at the beginning and subtract expenses for each company.
- Next, you need to fill in the remaining columns using the autofill marker, while the balance at the beginning of the next day is the balance at the end of the previous one.
- Let's add a formatting rule to display today's date and to highlight negative values in the table in color so that we can immediately see the overspending of available funds.
- This is what the calendar looks like if you add one more company. All values were calculated automatically, since the main cells are connected by formulas.
As you can see, creating calendars in Excel requires some knowledge of conditional formatting, as well as an understanding of how logical and time functions work. This task can be done by more experienced users. If you need to create a simple calendar, then a basic knowledge of basic formatting tools will be enough.
Click “Like” and receive only the best posts on Facebook ↓
How to enter dates in Excel using an add-in?
For those who actively work with dates in their tables, add-ins have been created that represent a calendar in Excel. An example of such an add-on is the samradDatePicker calendar. Let's say thanks to the creators of this add-on and those who finalized it and translated it into Russian! The add-in makes it easy to enter dates into Excel worksheet cells. After installing this add-in, a new “Select from Calendar” option is added to the context menu (right-click) and a calendar icon is displayed to the right of the cell when cells containing a date are selected.
free download samradDatePicker add-on for quickly entering dates
How add-ins are installed in Excel has already been described in one of the articles on this site, so I will not repeat it. I’ll just add that you can download this add-in for free, and also get acquainted with other useful add-ins for Excel.