What is the difference between full and quick disk formatting in Windows , what happens in both cases and how to choose the right formatting method. Using computer devices, we, one way or another, are faced with formatting disks, partitions or external connected devices for storing data. For example, you planned to assemble your own personal computer and fill it with components, depending on the tasks that you intend to solve with its help. Or you have replaced your old hard drive with a new modern drive. Or you yourself decided to reinstall the Windows
and configure it initially at your discretion.
Formatting a Disk in Windows
At some point, you will have to format your drive. Disk formatting is the process of programmatically marking a data storage area for any electronic storage media. Its essence is to check and correct the integrity of the media, as well as form and update file system structures.
The formatting process is divided into two main types: low-level formatting and high-level formatting.
Low-level formatting involves the basic layout of a data storage area. It runs at the factory and is not available to the user or operating system services. This marking remains unchanged throughout the life of the disk.
High-level formatting forms the logical structures of the disk, which are responsible for the correct storage of files and allow the disk to be used for recording and storing data.
It is the latter type of formatting that is performed by the standard disk formatting service of the Windows operating system.
or third party programs.
The choice of available disk formatting options in the Windows
is presented by two possible algorithms.
You either fully format the drive to "NTFS"
or
"FAT"
(any derivative thereof), or you format the drive to
"NTFS"
or
"FAT"
in a quick way. Have you ever wondered what the difference is between a quick format and a full disk format?
Which formatting type to choose
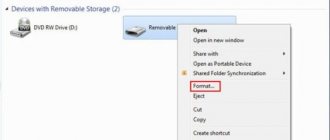
Quick and full formatting are two full-fledged options. Quick formatting is worth choosing if you want to save time, you don’t have any problems with the disk and you don’t worry that deleted files can be easily recovered. Quick Format is the most popular choice. Moreover, this formatting type is the default formatting type. And to carry out a complete formatting, you need to take additional steps. To be precise, uncheck the box next to “Quick formatting”.
Full formatting is a much more reliable option, but it is also not 100% secure in terms of data safety. If you are selling a computer and are worried that someone will be able to use the data from your hard drive, then you need to do a full format. Experts recommend that after formatting, it is advisable to write new files to the disk and format it again. In this case, it will be extremely difficult to recover the original files that you wanted to delete.
File system - FAT32, NTFS, ExFAT, does not affect the choice of formatting type. You can choose quick or full format on any file system. Full formatting is one of the tools to “cure a disk”. During formatting, the system performs a full scan of the disk. And if there are damaged clusters, then it marks them. Therefore, we recommend using this formatting method if you are formatting a disk to install an operating system.
Full formatting of SSD drives is harmful. Windows 10 will not perform a full format if you are using an SSD drive. But if you have earlier versions of the OS, then remember that this type of formatting cannot be used. This is due to the fact that the full format method involves deleting zeros, not ones, and such partial deletion is harmful to the structure of the SSD disk.
And if your disk refuses to be formatted and Windows displays an error, then we recommend reading this article. https://credit-n.ru/potreb-kredit.html https://credit-n.ru/kurs-cb.html
What is the difference between these options?
You should understand that Microsoft
will not overload the operating system in unnecessary ways.
And comparing quick and complete formatting methods is not limited to comparing the statements “quick and easy”
in the first case versus
“a waste of time”
in the second.
Yes, there are indeed technological differences between the two methods and the set of actions that each algorithm performs during the formatting process. The ability to choose the right formatting method can be a really important component of the correct operation of the device and depend on the type of tasks that you will have to solve. In order not to make a mistake with your choice, we will consider and analyze both options so that you understand what happens in each specific case.
What problems does pseudo-low-level formatting help solve?
The operation is used:
- To prepare a computer for transfer into the wrong hands, so that the new owner cannot restore the files of the previous one.
- To correct software (logical) and emerging bad problems that cannot be removed using non-destructive methods.
- For the treatment of certain types of boot viruses.
It is effective:
- If the appearance of “broken” sectors is not associated with a malfunction of the mechanical and electrical components of the hard drive. For example, they formed after a short-term overheating of a disk or a sudden power outage of the computer, and their number is not growing.
- If there are relatively few defects.
An example of detecting several unstable sectors when scanning a hard drive with the HD Tune utility:
It's useless:
- If the hard drive has suffered from a fall, drowning, or depressurization of the case (hermetic unit).
- If it makes grinding, knocking, grunting and other unnatural sounds when turned on or is poorly detected by the computer (disappears periodically).
The main area of this disk is occupied by unreadable sectors. Treatment with homemade “low-level” formatting will most likely not help him:
This is interesting: Error DISC BOOT FAILURE, INSERT SYSTEM DISK AND PRESS ENTER [reasons and solution]
What happens during a full format?
Most experts say that choosing the full-format feature (preferably the NTFS file system) is better for your computer. For a number of reasons this statement is true. A full format completely clears your hard drive and resets the “Master File Table”
, containing information about all files on the volume. As a result of such actions, all user information stored on the disk becomes inaccessible and cannot be restored.
With full formatting, the integrity of the physical surface of the media is diagnosed and the hard drive is checked for the presence of bad sectors. If bad sectors are detected, the system will try to fix them. If successful, your hard drive will be fully functional and all the space on it can be used to store your data. If unsuccessful, the system marks such sectors as faulty. Subsequently, the system will not record information on such sectors. Once completed, the new file system table is written to the hard drive and verified before the physical installation begins.
Quick or full formatting - which one to use and when
As noted above, it is often better and faster to use a quick format, but there may be exceptions where a full format may be preferable. The next two points, when full formatting may be required - only for HDD and USB flash drives, about SSD solid state drives - immediately after this.
- If you plan to give the drive to someone and you are concerned that someone else might be able to recover data from it, it is better to perform a full format. Files can be recovered quite easily after quick formatting; see, for example, The Best Free Data Recovery Programs.
- If you need to check the disk or when, during a simple quick format (for example, when installing Windows), subsequent copying of files occurs with errors, causing speculation that the disk may contain bad sectors. However, you can manually check the disk for bad sectors, and after that use quick formatting: How to check your hard drive for errors.
Formatting SSD drives
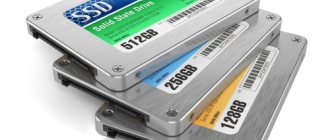
SSDs stand apart in this regard. For them, in all cases it is better to use quick rather than full formatting:
- If you do this on a modern operating system, then the data cannot be recovered from the SSD after quick formatting (starting with Windows 7, the TRIM command is used when formatting SSDs).
- Full formatting and writing zeros can be harmful to the SSD. However, I’m not sure that Windows 10 - 7 will do this on a solid-state drive even if you select full formatting (unfortunately, I didn’t find any factual information on this issue, but there is reason to assume that this is taken into account, like many other things, see Settings SSD for Windows 10).
I conclude with this: I hope some of the readers found the information useful. If you have any questions, you can ask them in the comments to this article.
Hello dear readers, today I will show you formatting methods and tell you how full formatting differs from quick formatting, and I will also show you a good program for low-level formatting of a hard drive and flash drives. I think everyone should know this in order to gain time in one moment, and in another to keep the hard drive or your flash drive healthy.
People often wonder what full and quick formatting is . And usually when installing Windows or simply formatting a disk or flash drive on a computer. But sometimes you don’t need full formatting, which can take hours. Remember how much time you wasted waiting for your disk or flash drive to be formatted for a long time. But full formatting is also a necessary thing.
What happens during quick formatting?
Quick formatting is a greatly simplified form of the full formatting method. This option lacks almost all of its main actions. The quick formatting algorithm focuses only on removing the “journal part”
file system.
In case you don't know, "NTFS"
,
"ext3"
and
"ext4"
, as well as
"HFS+"
are all
"journaled file systems"
.
This means that the system keeps a "log"
that keeps track of what files exist and where they might be located on the hard drive. A quick format simply erases this log and writes a new, simple and empty file system on top.
In fact, this formatting option does not restore the file system, does not scan damaged sectors and does not delete the data that is there, but simply marks the disk area as ready for writing new data. Therefore, knowing that existing files remain on the disk without being deleted, you can use a data recovery program to find and resave almost all the files that were on the hard drive before the quick formatting process began. As you might have guessed, this is not the best choice if you are concerned about the security of your data.
What is it really?
Low level formatting today is called something completely different from what it actually is.
In fact, this is one of the stages of manufacturing disk drives, and it is carried out at the factory. As you know, all information on the hard drive is stored in a certain order. Each piece of data has a unique address where it can be found. Creating areas for recording data on a clean magnetic surface and assigning addresses to them is low-level formatting.
More precisely, this is the process of physically dividing the disk surface into tracks (circles or tracks along which the read/write heads move), their sectors (track sections are the smallest information storage areas on a disk drive with its own address) and inter-sector intervals . And also - applying servo marks - service records between sectors and within them, according to which the head control system ( servo system ) can position the latter.
This is interesting: How to connect a hard drive from a laptop to a computer
After marking, the disk surface is thoroughly scanned to identify defects in the magnetic layer (physically “broken” sectors), which must be excluded from addressing. Based on the test results, a list of defects and a translator are formed - a table correlating good physical sectors with logical (numbered) ones. This is also part of the factory formatting.
A long time ago, this entire procedure could be performed using the BIOS of a home PC. Today there are practically no such computers and storage devices left. Modern HDDs cannot be physically repartitioned without special equipment and software, and low-level formatting is the operation of “filling” the logical space with zeros (without access to the service areas in which the translator is stored).
As a result of this formatting:
- All information (except for service information) is deleted from the hard drive.
- A custom defect list is created with the addresses of bad sectors that will be hidden - excluded from subsequent read and write operations.
- Defective sectors are replaced with “healthy” ones from the reserve area (remap).
What and how to carry out “low-level” formatting at home
Any utility designed for this can fill the surface of the hard drive with zeros and replace the “broken” sectors with normal ones.
Even created by a manufacturer of hard drives of a different brand. Rewriting and remapping operations are launched by a standard algorithm that is understood by all disk controllers (the final decision on reassigning bad sectors is made by the controller). These utilities do not have the ability to use highly specific technological commands, so they are not able to cause any harm to the device. Which utility will do the job you need best? It’s not a fact that the native version of your hard drive will work more accurately than the universal one. One didn’t help, try another. There will be no harm from this, but there may be some benefit, since to correct one defective block sometimes you need to make several attempts.
Let's figure out how to perform “low-level” HDD formatting using three free utilities.
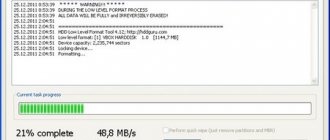
Universal HDD Low Level Format Tool (HDDLLFT) for Windows
- Let's connect the problem disk to a PC running Windows.
- Download and install the HDDLLFT . After installation, select “ Continue for free ”.
- In the list of drives, select the one that you are going to format and click the “ Continue >>>” button.
- In the next window, go to the “ Low level Format ” section and click “ Format this device ”
- Let's confirm the operation again and wait for it to finish.
SeaTools for DOS for HDD Seagate
SeaTools for DOS is released in iso image format for recording on bootable DVDs, flash drives and floppy disks. After starting the computer from such media, the main window of the utility immediately opens. For convenience, switch it to Russian, mark the problematic drive in the list, go to the “Advanced Features” menu and click “ Erase all”.
This is interesting: The external hard drive is detected, but does not open (does not appear in Explorer)
Windows Data Lifeguard Diagnostics for WD hard drives
Windows Data Lifeguard Diagnostics is one of Western Digital's proprietary applications with the function of “low-level” disk formatting. In addition to it, this function is supported by utilities (bootable image for DVDs and flash drives) and.
- Let's connect the problematic HDD to a working computer. Let's install and run Data Lifeguard Diagnostics.
- In the list of disks, mark the one to be formatted and click on the “ Test ” button.
- In the “ Select an option ” window, o (Erase). In older releases of the program it was called “ Write zeros ”.
- Next, confirm your consent to delete the information and select “ Full erase Erase .
As you can see, there is nothing complicated in the so-called “low-level” formatting of disks using the “home” method. The main thing is not to confuse anything, since it is almost impossible to restore information erased in this way.
Problems and solutions when formatting
How to quickly format a disk without losing data?
Unfortunately this is not possible. All stored information will be deleted. Only part of the data can be recovered.
Which drive is better: external or external?
Formatting external drives is performed in the same way as for a regular hard drive. During this process, all information will be deleted, including windows, after execution the disk will be like new without windows.
Unable to format hard drive
If you did everything according to the instructions, but did not achieve results, do not sound the alarm. This doesn't always mean something bad.
- format command - cannot be used for a system disk if it is in its environment;
- if the operating system is located in another partition of the HDD, it cannot be deleted;
- The settings of the anti-virus program can block access to different partitions of the hard drive;
- various applications and viruses can block access.
If you have removed the factors described above, but still cannot format your hard drive, you will have to resort to special programs. The most popular tool is HDDscan, which is easy to install and free.
Algorithm of actions:
- download the utility;
- open and install;
- run as administrator;
- click on the icon in the form of a sphere located in the center of the interface;
- select Surface tests;
- check the box next to Erase;
- go to the Add test tab;
- click on Scan;
- in the lower right corner, write down the error data;
- set the EraseWAITs option to ON and select Scan again;
- repeat until the error is cleared.
You can also use Acronis Disk Director. If it is impossible to format a portable hard drive using this program, most likely the hard drive is partially damaged. And the entire procedure can sometimes be performed only from bootable media, that is, not in the operating system.
How to force format a flash drive?
HP USB Disk Storage Format Tool to format flash drives
- provide the necessary set of functions;
- They have a fairly simple interface that will be easy for novice users to work with.

![Error [Steam API dll is missing]](https://rec-ip.ru/wp-content/uploads/oshibka-steam-api-dll-otsutstvuet-330x140.jpg)
