If the computer no longer recognizes a USB drive (popularly a “flash drive”) and “requires” formatting, this does not necessarily mean that the data on the flash drive is lost forever.
If there is information on the drive that is important to recover, you can try successful solutions that have already been tested by users.
How to open a flash drive if it requires formatting
Using a different USB port
This may seem obvious, but the first thing to try is to insert the USB drive into a different USB port. Over time, USB ports become dirty and wear out. Therefore, there is a possibility that the problem is related to the USB port, and not to the flash drive itself.
Insert the USB drive into another USB port
Low-level formatting
If a flash drive malfunctions, the usual, including its complete formatting, is not always feasible and does not always solve the problem that has arisen with it.
In this case, formatting at a “low logical level” can “cure” the flash drive. However, after such formatting, it will no longer be possible to recover files from the media.
HDD Low Level Format Tool
Using the program:
- After launching the utility, in the device selection window, you must mark the problematic flash drive and click “Continue” at the bottom right.
Click on the problematic flash drive and click “Continue”
- In the next window, go to the “LOW-LEVEL FORMAT” tab and click “FORMAT THIS DEVISE” at the bottom right (format device).
Click on the “LOW-LEVEL FORMAT” tab, click on the bottom right “FORMAT THIS DEVISE” (format device)
- When a warning message appears that all information on the device will be deleted, click “Yes.”
Confirm the action by clicking “Yes”
- The low level formatting process will begin. When the message “100% complete” appears, it will be completed.
The formatting process will be completed when the message “100% complete” appears
The operating system will recognize a formatted USB drive as an unformatted USB device with a capacity of 0 bytes.
To format a drive in Windows, you can quickly format it following the instructions described above.
On a note! Considering the serious, including financial, costs of restoring lost information, today experts recommend creating backup copies of important data located on any digital media.
Checking for errors using chkdsk
You can also check for errors in reading a USB drive through the operating system command line by running the “chkdsk” command.
- You need to press the key combination “Win + R”.
Press the “Win + R” keys to open the “Run” window
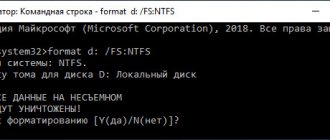
- In the “Run” window that opens, enter: “chkdsk H:/F/R” and click “OK”.
In the “Open” field, enter the command “chkdsk H:/F/R”, click “OK”
The "chkdsk" command can also be executed by entering the "cmd" command in the Run window and clicking "OK". After launching the command interpreter window, enter in it: “chkdsk H:/F/R” and press the “Enter” key.
Press the “Win+R” key to open the “Run” window, enter the “cmd” command, click “OK”
In the field, enter the command “chkdsk H:/F/R” and press the “Enter” key
Reference! Instead of the letter “H”, you need to substitute the letter with which the “problem” flash drive is “signed” in “Computer”. Substituting the letter “/F” into the command starts troubleshooting file system errors, and the letter “/R” starts troubleshooting problems with bad sectors.
The “chkdsk” command will check the USB drive for errors and restore the necessary data if possible, displaying a report on the results when completed.
Report on the results of the "chkdsk" command
Recovering data from a USB drive using special utilities
There are specialized programs (utilities) designed to scan USB drives and restore individual files found without the help of Windows.
Recuva
One of the leaders in data recovery programs is the free Recuva utility. It is easy to install on your computer and quickly and easily performs all the necessary actions.
Features of Recuva:
- user-friendly interface;
- advanced file scanning;
- recovery from damaged media;
- preview of found files;
- recovery from a recent “quick” format.
Using Recuva:
- Download the program from a reliable source.
To download the Recuva program, go to a reliable site and click “Download”
- Run the installation file and follow the installer's instructions.
Click on the downloaded file
Select the language, click “Install”, follow the installation instructions
- Launch the program and click “Next”.
Click “Next”
- Select "All files" to display. Click "Next".
Check the box “All files” and click “Next”
- Select “In a specified location” and find the USB drive by clicking the “Browse” button. Click "Next".
Click on the item “In the specified location” and find the USB drive by clicking the “Browse” button, then “Next”
- Select "Enable advanced analysis". Click "Start".
Check the box “Enable in-depth analysis” and click “Start”
- After the list of found files appears, check the boxes next to the ones you need and click “Recover”.
Check the box next to the required files and click “Recover”
- Once the necessary files have been extracted, you can format the USB drive for further work.
Handy Recovery
This utility is paid, but it has a free 30-day period of use.
Using Handy Recovery:
- Download and install the program from a reliable site.
Go to the developer’s website, download the program and install it on your computer
- Launch the utility and in the window displaying a list of disks, select the desired USB drive. Click "Analysis".
Select the desired USB drive, click on it, click “Analyze”
- After analysis and a list of found folders and files appears, check the boxes next to the ones you need and click “Recover”.
Check the boxes for the required files and click “Recover”
Reference! A convenient feature of Handy Recovery is that red crosses in the program mark files previously deleted from a USB drive, which can also be recovered.
Also recommended for the above tasks are the fast and universal utilities Stellar Data Recovery and Wondershare Data Recovery.
The flash drive does not open (writes: “Format?”). What to do first?
So, let's start with the simplest thing. Let's assume that instead of prompting you to perform some action when you connect the device to the corresponding port, the flash drive writes: “Format the disk?” It is clear that for some reason the operating system does not recognize the media as operational and containing information. This may be partly due to short-term glitches in the OS itself. In this case, you should try connecting the USB flash drive to a different port or simply rebooting the computer system.
What to do if nothing helps?
Finally, let's assume that neither technique worked. What else can be pointed out as the reason for this phenomenon? Most likely, the USB interface drivers have failed.
To fix the problem, you need to call the “Device Manager” and, at least through the standard procedure, update the drivers of absolutely all devices presented in the list of USB controllers. If it is not possible to perform such a procedure using the operating system, and Windows, even when using the search for updated drivers, will report that the most suitable software is already installed, you can use automated programs like Driver Booster or DriverPack Solution, which are able to independently find the necessary drivers after recognizing devices and install them into the system without direct user participation. If this doesn’t give any results, you will probably have to check both the USB ports and the flash drive for mechanical damage.
How to open an external hard drive without formatting
Option 1
- Open the Disk Management folder and view the status of the device you need. Most likely, it will be described as follows: “type: primary, file system: RAW, good.” This means that the file system has been corrupted in some way, which is where the problem with reading data lies.
- System recovery programs will help correct the situation. Acronis Disc Director or RawRecovery, one of the internal Easy Recovery plugins, will do.
- Install the selected program on your computer and enable scanning of the damaged device.
- Run file system recovery.
- After the manipulations have been carried out, the content will be available for viewing and other actions.
Option 2
This method helps if the device is detected, it is possible to safely remove it, but it is not displayed in Explorer. This method will help if the problem is caused by missing partitions on the hard drive. Everything is corrected by creating partitions; for this, a standard Windows tool is used:
- Click the "Start" button and select the "Computer" tab from the main menu, then "Management".
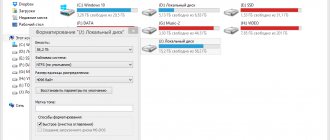
- In the drop-down menu that appears, click on the Disk Management tab. A window will open in which the status of the hard drives is described: under the designation “Disk 0” the built-in hard drive is hidden, and under “Disk 1” is the external one. Opposite the latter you will see the inscription “Not distributed”.
- Right-click on the inscription and a menu will appear, the first line of which will be the command “Create a simple volume...”. Choose this command.
- The Simple Volume Wizard window appears. From this point on, you need to follow the instructions of the system, or, more simply, click the “Next” button.
- After completing the wizard, the data you need will immediately appear in the “Explorer” folder.
Driver Update
Perhaps the flash drive is unreadable and requires formatting due to the fact that the system does not recognize the drive. To test this theory, you need to take a known working flash drive and insert it into the PC. If it opens easily, then you need to update the drivers. It is recommended to proceed according to the following scheme:
- Go to “ This Computer ”.
- Open the drive properties using the right mouse button.
- On the “ Hardware ” tab, click on the next device and go to its properties.
- Click on the button to change settings .
- Go to the drivers tab and start the update.
- Select automatic search .
- Follow the system instructions .
Then you need to restart the computer and use the flash drive for its intended purpose.
How to format a flash drive using Acronis Disk Director
Well, I can’t ignore another excellent set of tools, Acronis Disk Director. We launch Acronis Disk Director, on the desired partition that needs to be formatted, right-click and find the corresponding item.
Set the parameters you need and click “Ok”.
In the upper left corner you will see a button “Apply pending operations”, click it.
We continue our operation.
This is what the process of formatting a flash drive looks like in Acronis Disk Director.
How to format a flash drive using Windows
As I wrote above, the simplest method is to use the built-in tools provided by the operating system developers. In Windows, formatting a USB is very simple; to do this, open My Computer (This Computer). Find your flash drive among local disks. In my case, this is a drive with the letter E:\ and a capacity of 16 GB.
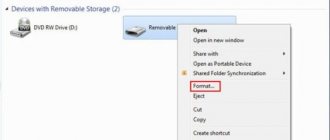
Right-click on it and select “Format” from the context menu.
In the format device window, you must select two important points:
- Selecting a file system, there will be several options: FAT32, NTFS, ExFAT. If you do not find the FAT16 item, it is because on partitions larger than 4 GB , it cannot be selected. Below I have provided a screenshot of the differences between different file systems.
- Block size (Distribution unit size), the default is 4096 bytes, for 99% of users this parameter does not need to be changed.
If you wish, you can give a name label for the flash drive, and be sure to check the “Quick formatting (clear table of contents)” checkbox, otherwise you will have to wait quite a bit. when your flash drive is formatted. To start the formatting process, click the “ Start ” button.
You will be notified that:
Attention! Formatting will destroy ALL data on that drive. Click "OK" to start formatting, "Cancel" to cancel.
We see that the formatting was completed successfully , our flash drive is now completely clean. I would like to note that, if you wish, you can restore data from it; if you want to destroy the data without the possibility of recovery, you can see how this is done at the link.
I also want to note that if you made a mistake with the file system when formatting and have already put a lot of files on the flash drive, you can easily convert FAT32 to NTFS without losing data