Preparing to downgrade Windows 10
Before returning to a previous version of Windows, you should complete a number of preparations. They are required specifically when rolling back to an older version of Windows; when returning to a restore point, these actions will not be relevant. It is worth taking care of the following points:
- ensure a stable connection to the Internet - in some cases, files must be downloaded from the network during a rollback. This means that without a constant and stable Internet connection, you will not be able to roll back Windows to a previous version. However, if you perform all actions using a system image or files remaining after installation, then an Internet connection will not be required;
- prepare drivers before rolling back - if new versions of Windows are able to download drivers for the equipment independently from the Internet, then in an older version you will have to do this manually. Of course, you can download most of the drivers after installation, but without a network card driver you will not be able to access the Internet. This means that you should download it in advance and save it to a portable drive;
- Make sure that the device's power supply is stable - if we are talking about a laptop, be sure to connect it to a power outlet during installation. If the battery dies during a rollback, a number of problems may arise;
- save valuable files - despite the fact that the rollback is performed without formatting the system, there is a risk of losing files if problems occur. It's better to play it safe and save your most valuable data to a flash drive. In addition, please note that you will have to reinstall all games and programs if the version of Windows changes.
When you are done with all the preparatory steps, you can proceed directly to the system rollback.
Full recovery
Finally, instead of rolling back your Windows 10 system to a restore or reset point, you can resort to restoring it completely from a backup. This is the most time-consuming and resource-consuming method, but it is also the most reliable. The whole difficulty here is that you must have a pre-prepared backup of the system, created using special tools. To create such backup copies (images) and restore from them, it is better to use third-party programs like Acronis True Image. We will tell you more about this procedure in a separate article.
- 7shared
- 0Facebook
- 7Twitter
- 0VKontakte
- 0Odnoklassniki
Downgrade Windows 10 to an earlier version of Windows
Returning to a previous system from Microsoft is important if you installed a build curve or you simply didn’t like Windows 10. Within thirty days after installing the system, you can perform a rollback. It’s worth clarifying here that if you installed Windows 10 over Windows 7, then you will return to it. The same is true for Windows 8. That is, when you roll back, you will not be able to directly select which version of the operating system you want to return to. Do the following:
- Open the Start menu.
Find the gear icon there and click on it to open Windows settings. Click on the gear icon in the Start menu - In Windows Settings, find “Update and Security” and left-click on it.
In Windows Settings, open Update & Security
- Go to the "Recovery" tab. There you will see which version of Windows you can roll back to. Click on the "Start" button to return to the previous version of Windows. At the same time, to collect statistics, you will be asked the reason for your actions, but regardless of the option chosen, the rollback will be performed.
In the “Recovery” tab, click on the “Start” button
- Wait for the process to complete. It may take a long time.
Files for restoring the previous operating system are stored for no more than a month. After this, the current function will be unavailable.
Function "Return the computer to its original state"
If simply accessing restore points does not help, there is an option to obtain a working OS by accessing the built-in function - “Return the computer to its original state.” In this case, a rollback to the primary settings occurs.
For your information! When performing a factory reset, the user can keep personal files, but all programs or drivers will be available.
To reset your computer to its factory state, you must:
- Go to “Settings”.
- Go to the “Update and Security” tab.
- Select the “Recovery” section.
- Under the heading “Reset the computer to its original state,” click the Start button.
- You will be asked to choose a type - with saving personal files or completely deleting all information.
Upon completion of the process, the user receives an OS that can be considered new.
Rollback Windows 10 using Command Prompt
Windows 10 Command Prompt won't let you go back to a previous version of the operating system, but it can help you restore your current version by rolling back the state of certain files to their original state. To do this, you will also need to burn a bootable disk with the exact version of Windows 10 that is installed on your computer. Refer to the instructions in the previous section if you have problems with this step. Then do the following:
- Insert the boot disk or drive into the system and restart the computer.
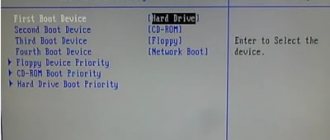
- When you turn on your computer, select a startup method. The button for this is usually F8, but in any case it will be shown on the screen at a certain moment.
- We need to boot the computer in safe mode with Command Line support, so select the appropriate item.
Among the additional boot options, select launch in safe mode with Command Prompt support
To restore, simply enter one or more of the following commands:
- fixboot - will repair the Windows boot utility;
- bootcfg /rebuild - will restore a damaged operating system boot file;
- cd repair copy SYSTEM C:\windows\system32\config - will repair the settings of your operating system and return them to the default value;
- copy J:\i386\ntldr C:\ - will restore correct reading of Windows files necessary for operation. Moreover, in this command, instead of the letter J there should be the letter of your CD/DVD-ROM itself, and instead of the letter C - the system drive.
After this, your computer should at least turn on and load the operating system. But if you want to fix other problems, you should perform a full system scan for errors:
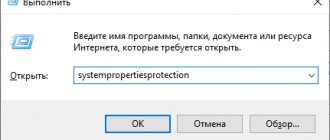
- Press Win + R to open the Run window.
- Enter the command “cmd” to launch “Command Prompt” and confirm the entry.
Open the Run window and enter the cmd command
- In the Command Prompt, enter the command “sfc /scannow” and press Enter.
Enter the command “sfc /scannow” into the “Command Prompt” and confirm the entry
Wait until the files are scanned. To replace damaged or missing data, you must also have a boot disk inserted for your current operating system.
This method will restore the functionality of all key services by rolling them back to their initial value.
What you need to know
The recovery procedure requires the user to have certain knowledge and ability to navigate the computer. There are some aspects that are important.
Adding restore points (manually and automatically)
By default, the function of creating restore points in the OS is provided in automatic mode. If this option is missing, it is possible to configure:
- Go to the “Control Panel”.
- Go to the “Security” tab.
- Open the “Recovery” item.
- Select the System Protection option.
- In the window that opens, select the desired disk on which the OS is installed.
- Click Configure...
- Activate the “Enable protection” item.
Some users disable restore points to save disk space. But sometimes you may need to create them manually. This requires you to follow steps 1 to 5 from the guide above. Next, all you have to do is select Create... All you have to do is enter the name of the point to be created and click Next.
Using the Command Line
There is a more complex way to restore the OS, which is to use the Command Line. This is the ability to roll back the OS at a “low level” without the need to boot. To take advantage of this opportunity, you will need:
- Start installing the system from the boot disk.
- Enter the recovery environment.
- Click on “Troubleshooting” > “Advanced Settings”.
- Go to “Command Line”.
- Determine the system drive letter. This can be done by sequentially executing the diskpart and list volume commands.
- Type exit command.
- Start a rollback by typing bcdboot x:\windows in the Command Line, where X is the system drive letter.
- To restart a computer.
Creating a Windows 10 Recovery Disc
To quickly return the operating system to functionality, it is recommended to create a recovery disk. The easiest way is to use built-in tools:
- Go to the “Control Panel”.
- Go to the “System and Security” menu.
- Select the “Backup” tab.
- Click on the line “Create a system repair disk”.
- Insert a DVD/CD into the drive.
- Select the desired drive letter.
- Start the process.
In the future, if problems arise, the user can restore the system from the recorded image.
Actions when an error occurs
Sometimes when the system is rolled back, the process is interrupted due to an error. Most often this is caused by the fact that the recovery points themselves are damaged by a virus or incorrect user actions.
In such a situation, it is recommended to check the integrity of system files. This can be done using the SFC utility, which is launched from the Command Line with administrator rights. To check system files, you will need to enter the command sfc /scannow and wait until it finishes.
If this method does not help, the only way is to completely reinstall the system.
Recovering deleted points
Some users delete restore points out of ignorance or inexperience. The system does not provide tools for returning files, so you should be careful when working on the computer.
Adding new restore points
Before you make any major changes to your computer, you should create a new restore point. This is done as follows:
- Go to system protection settings. How to do this is described in the previous instructions.
- Click on the “Create” button to add a new point.
- Name it. You can set any name, but it is better that the name makes it clear why it was created. This will make it easy to find the point in the future. After entering your name, confirm it.
Click the "Create" button and specify a name for the recovery point
How to perform a system rollback on Windows 10
- First of all, you need to open the “Control Panel”. You can do this in several ways:
- By pressing the Windows key combination - Pause Break
- Having opened the properties item, after right-clicking on the “My Computer” icon
- By typing the corresponding query in the search
- Selecting the “Control Panel” line and right-clicking on the “Start” button
- After that, go to the viewing type - categories
- Click on “System and Security”
- Select “System”
- In the left column, click on the line “System protection”
- Select your system drive (with the Windows icon) and click on the configure button
- Check the “Enable system protection” checkbox and indicate the amount of space that you are willing to allocate on your hard drive to create a copy of the OS (we recommend that you allocate at least 20GB if your hardware allows). Confirm “OK”
- After that, click on the “Create” button. The parameters will be saved and the process of creating a checkpoint will begin (usually takes no more than 5-10 minutes).
Programs for rolling back Windows 10
Sometimes it is worth using programs to roll back Windows 10 to previous versions, since, for example, there is an annoying bug in which, even if the thirty-day period has not expired, the rollback to previous version button does not work.
Rollback Utility
This program will allow you to easily use the files of the old system on your hard drive to perform a rollback. It is very simple to use, but it is distributed as an image and requires writing to the boot drive in order to work correctly. This article has already indicated how to do this.
The rollback process in the Rollback Utility program occurs without user intervention
The main advantages of this program:
- the rollback process is very simple - the program itself determines the versions of Windows to which a rollback is possible;
- accessibility - the program is distributed on the official website for free;
- saving files - when rolling back, the program saves the files of your current OS. This means that in case of failure, you can always return everything as it was.
Windows Repair
The difference between this program is that it will not help you return to your previous operating system, but it will solve many other problems. It allows:
- reset your operating system to its original form;
- roll back registry edits and other changes to system files;
- fix various errors;
- restore the system.
The program has a paid version, but the free version will also be sufficient to perform system recovery. As a result, this is an excellent solution for both experienced users and beginners.
With Windows Repair you can restore every element of your computer
How to delete restore points
If you need to delete existing restore points, go back to the System Protection settings window, select the drive, click Configure, and then use the Delete button to do so. This will delete all recovery points for that drive.
The same can be done using the Windows 10 Disk Cleanup utility, to launch it, press Win + R and enter cleanmgr, and after the utility opens, click “Clean up system files”, select the disk to clean, and then go to the “Advanced” tab " There you can delete all restore points except the most recent one.
And finally, there is a way to delete specific restore points on your computer, you can do this using the free CCleaner program. In the program, go to “Tools” - “System Restore” and select the restore points that you want to delete.
What is a restore point
System Restore is a Windows OS utility that is designed to restore the functionality of the operating system by restoring the state of the computer at the time a checkpoint was created. After starting the program, it independently restores service files, registry keys, installed programs, user-created documents and other files.
The system for restoring the previous state of a PC running Windows 10 is based on Shadow Copy technology, which allows you to track and restore the original state of files regardless of their location.
A restore point can be created:
- at the user's request;
- automatically after 24 hours;
- when installing drivers without a digital signature Windows Hardware Quality Labs;
- when updating the operating system
How to restore the system using safe mode?
It is noteworthy that this option is suitable not only for the “seven”, but also for Windows 8, 10, XP and Vista. Detailed instructions:
- We restart your computer or laptop as soon as it starts to turn on - press F8;
- An interface will appear with a choice of boot type, click “Safe Mode”;
- Wait until the system starts and go to Start;
- Enter the text “recovery” in the search bar and select the appropriate item;
- A menu will appear in which you should click “Select another Windows 7 system restore point”;
- Specify the desired point in the list to return to its original state, click “Next”, then “Finish”;
- Give your consent to make the necessary changes to the parameters and click OK;
- The device will reboot, now you can check the OS for troubleshooting.
System Tools
The first way to answer the question: “How to roll back the system to Windows 7?” - This is recovery using system means. Typically, this method works well when viruses have not damaged important system files.
Before you roll back Windows 7, check your computer for viruses. If there are any, it is best to clean the system and only then get down to business. When the process is complete, recovery can be carried out.
To answer the question of how to perform a system rollback in Windows 7, go to the Start menu. There, find "Standards". Go to the "Service" tab. All you need to do next is select Windows 7″. Now a window should pop up in which you will need to select the date for which the rollback is carried out. Click Next and wait for the computer to restart.
In order for you to complete this process, you need to ensure that your system creates a feature that is enabled by default. You can use special programs that allow you to make these points yourself.
Roll back Windows using a boot disk (flash drive)
First of all, to implement this task, we need a system image with the required version of the Windows system. You can download the original distribution on our website or on the official Microsoft web resource; you can also download the OS using the Windows ISO Downloader utility. Don't forget to make sure that your drive has enough free space to store the ISO image (4 GB or more is recommended).
To create a bootable flash drive with the distribution, we recommend using one of the following utilities: UltraISO, WinSetupFromUS B or Rufus . The software is not demanding on PC resources, is great for beginners and amateurs, and includes a convenient menu, clear tips, and a useful backup function. Here you will find all the necessary information on the topic of how to burn Windows to a flash drive. Below are examples with GUI applications.
The process of restoring from a system image will avoid a complete reinstallation of the OS and will help even in cases where none of the above methods brought any results. Follow our instructions:
- Connect the installation flash drive with the same edition of Windows;
- When rebooting/turning on the PC, enter the BIOS by pressing the F9 or F11 buttons;
- In the BIOS, go to the device selection section and specify the source with the distribution, save the settings and exit the BIOS;
- Wait for the Windows 7 installation window; at the bottom of it you need to select “OS Recovery”;
- In the options menu, click on the item with the same name (as shown in the screenshot);
- Now we perform the usual actions similar to the first point in our article (select a control point, agree with the warnings in the notification window, and so on);
- After starting the recovery, be sure to wait for it to finish;
- Now you can check if your computer is working properly.
Other recovery methods
There are several other ways to solve this problem:
- If the OS does not boot and it is impossible to roll back using the method already described, then this can be done by booting into safe mode;
- Use TVs created by third-party programs, for example, Acronis True Image Home, but this requires installing it and running this program to create another TV. This will take some time, depending on the speed of the system.
Related posts:
Windows 7 System Recovery
is a renewal of OS system files that dates back to a specific time in the past. This method is one of the most optimal ways to fix problems that arose due to unsuccessful installation of a driver or program, and led to the system freezing and slowing down. Rolling back a Windows 7 system in some cases can “revive” even a system that does not boot at all.
At the moment, there are three
Windows 7
system recovery services : rollback using safe mode, using the system boot disk, and using the system utility that is built into the system. You can use any of them to roll back Windows 7.
Recover Windows 7 using System Utility
This method of restoring Windows 7 can only be used if the system files were not particularly damaged and it starts normally after turning on the computer. In order to roll back the system using this method, you should do the following:
- Right-click on the “My Computer” icon and select “Properties”. After that, in the window that opens, go to the “System Protection” tab;
- in the “System Properties” window that opens, go to the “System Protection” tab and click on the “Recovery” button;
- after that, the “Restore system files and settings” utility will start on your computer; in order to get to the rollback points window, you should press the “Next” button;
- Currently, not all existing Windows 7 system restore points are displayed; in order to see everything, you need to check the box next to “Show other restore points”;
- Now you should select the recovery point to which you want to perform a system rollback and click “Next” again;
- You will see all the information about the selected OS restore point. The date it was created will be displayed, and a little information about what system changes it was created under. If you are satisfied with the selected Windows 7
system rollback , click the “Finish” button. After this, a window will appear warning you that it will be impossible to interrupt System Restore once you start it. Click “Yes” and the system will begin recovery;
- the system will begin to roll back to the selected point. At the very beginning, all applications and documents will close, and then the computer will restart. If no Windows 7
system recovery errors , then after a while a window will appear on your computer indicating that the rollback was completed successfully.
Restoring Windows 7 system through safe mode
In the event that an error in your OS has led to the fact that it cannot even boot, then this method can help you. To use the system rollback method using safe mode, follow these steps:
- Reboot the computer and press the “F8” key several times when it starts. After you do this, a window will appear with a list of additional options for loading the operating system;
- using the cursor keys, select any of the proposed options for starting the system in “Safe Mode” and press the “Enter” button;
- After starting the system, click on the “My Computer” icon and select “Properties”. Next, you need to click on the “Control Panel” section;
- After this, a new window will open in which you should select “Recovery”;
- Now you can configure the system rollback settings; to do this, click on the “Advanced recovery methods” item. After changing the settings, you must click on “Start system recovery”;
- The already familiar “Restore system files and settings” utility will open in front of you;
- follow the same steps as described in the first method of system rollback.
Rolling back a Windows 7 system
using a boot disk
There are cases when the operating system does not boot even in safe mode, then you cannot roll it back even using the second method. But if you have a Windows 7 boot disk, you can restore the system using it.
To roll back the operating system using this method, you should do the following:
- When you start the computer, go to the BIOS settings and set the boot priority to the DVD drive. Then insert the Windows 7 installation disc and restart the device. A window will appear on your computer asking you to press any button to boot from the CD or DVD. Click on any button;
- a certain amount of time will pass before Windows downloads the files;
- After this, a window will open in which you need to set the time format and keyboard layout. Then, after clicking on the “Next” button, the Windows 7 welcome window will appear on your computer. In this window, you must select the “System Restore” item and the “System Recovery Options” window will appear in front of you;
- Now you need to select the “Startup Repair” utility, which should fix problems associated with OS startup problems. If this utility did not help solve the problem, you should select the “System Restore” item. After selecting this item, the already familiar “Restore system files and settings” utility will open on your computer, with which you will need to perform the actions described in the first paragraph. If this utility does not give the expected result, namely, does not bring the operating system into working condition, then you can use the “Restore system image” item. But you should know that this method will only help if you have previously created an image of your system.
It should be noted that Windows 7 system recovery
does not entail the deletion of your personal files and folders. This process only resets system settings and installed applications.
So, you bought a computer and decided to immediately try it out. But then suddenly some kind of problem occurs and the system stops starting. This is where the question comes to mind: “How to do it on Windows 7?” The answer is quite simple. But first, let's talk about when it's actually necessary to perform and why it might be required.
Using a boot disk to restore the system
To perform a rollback, you will need a pre-prepared boot disk with version “7”. This is a complex method, however, it can be used even if Safe Mode is not started.
- A flash drive or disk with boot programs must be connected to the computer and loaded into the BIOS.
- Select a language and click the “next” button.
- Select “System Restore”, after which the program will automatically search for previously installed versions.
- Click “next” and select the most suitable rollback point and select the “done” button.
- If warning windows appear on the screen, you must select the answer “yes”.
- Wait until the workflow ends and restart the computer.
- Remove the disk from the drive, the computer should work normally, in standard mode.
Rollback points
Rollback points (RO) or otherwise recovery points (RP) are what the Windows 7 system is rolled back from in the event of any malfunctions in its operation. Everyone can ask where they come from. And they are created in two ways:
- They are created automatically by the operating OS itself;
- They are created by a person who cares about the “healthy” state of his computer.
The OS independently creates TV when critical changes are made to the OS, for example, when installing new software (programs and drivers).
This process cannot be controlled, so further we will consider only the actions of a reasonable user to maintain the working state of his computer.
Rollback update images.
The recovery image is a direct copy of the OS, which includes all installed programs, drivers, and files (if you want to return them, in their original state). The files will be updated only if they are included in the image created earlier.
Image recovery is available on all modern computers and laptops with the updated version installed. All images are located on the hard drive, in a special hidden section and contain all the operating files and programs necessary for the correct operation of the computer.
You can easily perform a system restore yourself; it is best to do this immediately after resetting your computer to its original settings.
If your hard drive does not have the required recovery partition, you can create one by making an image.
If Windows 8 has not been reinstalled on the computer before and the settings have not been touched, which means it is running its original operating system, you can use the recovery service, which is located in the settings change tab. In case of malfunctions, you need to select the “Delete and reinstall all files” option. That's it, nothing more is needed, since the whole process is basically automatic.
Anyone can restore and roll back faulty work, even without special knowledge and experience in this matter.