For what?
It was said earlier that there are many reasons to format an SSD. Each user may have their own unique case. However, it is also worth noting the most common options for the purpose for which you need to format an SSD, new or old. Here is their list:
- for the purpose of creating markup. To be able to work with the hard drive in the future. The process occurs after the drive is first attached to the computer. If formatting is not completed, the SSD will not appear among other local media;
- complete cleaning of accumulated debris. This procedure helps to clean the device of all those files that have accumulated on it over the years of operation. If Windows is installed on the disk (for example), this will help increase the speed of the computer;
- the need to install an operating system. The best option for maximum computer performance on a new OS would be to install it on a completely clean disk;
- troubleshooting errors and malfunctions. If the device is infected with viruses that cannot be removed, then you should resort to the formatting procedure.
Formatting to delete data
The term “format” is often used to refer to the procedure of specifically removing data from a disk partition.
Quick formatting occurs in a few seconds. In this case, the boot sector and an empty file system table (for example, NTFS) are written to the drive, and the disk space is marked as unused. This does not delete data. After quick formatting, data on the HDD can be restored using special programs.
Full formatting involves rewriting the boot sector and an empty file system table, as well as zeros are written to all sectors of the disk, bad sectors are marked, which are not subsequently used for writing data.
When quickly formatting an SSD, the system uses the TRIM command: the SSD controller erases all data on the drive and re-creates the list of sectors. In fact, for an SSD, quick formatting is the same as for an HDD - full formatting.
Full formatting of the SSD makes no sense (after all, quick formatting erases everything), and this can even harm the SSD - it will slow down its speed. Why is this happening? The operating principles of HDD and SSD are very different: in the case of solid-state drives, writing zeros to all cells will mean that the cells are not empty - they are occupied by zeros. Therefore, before writing anything to the cells, the SSD controller will first have to remove zeros, and then write new information there. And this greatly reduces the speed of the SSD.
Thus, it is necessary to format the SSD before installing the operating system, and to delete data from the SSD, use quick formatting.
Formatting involves the process of deleting all data from a selected partition or drive entirely. Advanced users of hard drives know what this procedure is and how it is performed, and also understand that there are practically no restrictions on the number of formatting performed on HDDs. The opposite situation is with SSDs - due to design features, namely a limited number of information rewriting cycles, many people are unclear whether it is possible to format a solid-state drive?
What types are there?
At the moment, there are two options for how to format an SSD on Windows 10 or another operating system. These are the methods:
- quick formatting. From the name it becomes clear that this procedure does not take much time from the user. However, this form has big disadvantages. The fast option does not include optimization. All existing files are not deleted anywhere. And if any errors or malfunctions arise in the operation of the SSD, they will not be corrected;
- full formatting. The method helps optimize the disk. During the full cleaning procedure, files are completely deleted. The system is checked and all detected violations, malfunctions and errors are corrected.
Now it’s worth moving on to the instructions on how to properly format an SSD.
What is TCG Opal?
The TCG security subsystem class is a hardware feature for self-encrypting SED SSDs that helps speed up data encryption on the drive.
Unlike software, hardware encryption relieves the processor or operating system of the burden of the encryption and decryption process, so overall performance is not degraded. The Opal SSC specification itself provides a set of security management standards to protect data from theft and hacking by unscrupulous parties who can gain access to the storage device or the host system in which it is installed. It is worth noting that the TCG Opal function does not work on its own, but requires the installation of special software on the drive (from Symantec, McAfee, WinMagic and other companies), which ensures that security settings are configured and the user is initialized every time the computer is turned on. Opal SSC specifications are designed to protect data at rest when the storage device has been turned off and the user has logged out. In this case, you should not associate the state of rest with “sleep mode”, when the user does not exit the system. As a result: you have to make compromises and give up the convenient use of StandBy mode. It's also worth considering that SED SSDs are not designed to protect against access to data once the storage device has been unlocked using valid credentials.
At rest, the main area of the disk is completely blocked and inaccessible. However, when the system boots, the encrypted disk starts a shadow copy of the main boot partition to perform pre-boot identification. This shadow MBR is a small operating system that prompts the user for the drive password, which is then passed to the SSD controller via OPAL commands. If the password is valid, the drive is unlocked and then the actual operating system is loaded. As a result, only authorized users can access data on a device to which they have added password protection; this minimizes the likelihood of data theft, tampering or loss.
Simple option
In this case, only those tools that are initially installed in the operating system itself are needed. To format in this way, simply follow the instructions:
- launch the My Computer program using the shortcut or Explorer;
- Find the required SSD among the list of drives connected to the device;
- right-click on it to open the context menu;
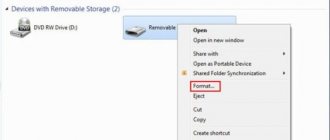
- From the list of actions, select “Format”;
- a window will open. Before you format your SSD, you need to set some parameters. If you don’t know how and what to change, just leave all the points untouched;
- Once configured, you can begin the procedure.
Method 2: Formatting an SSD drive in Mac OS X
Make sure the SSD drive you want to format is either installed on your computer or connected to your computer via a USB cable
Open Finder to make sure the SSD drive appears in the list of devices
Click Applications, then click Utilities
Launch the Disk Utility application
Click on your SSD drive's name in the left pane of Disk Utility
Go to the "Erase" tab
then notice the value next to "Partition Map Scheme" located at the bottom of the window
Make sure that the value shown next to
with the partition maps map, read "Master Boot Record" or "Apple Partition Map", then click the "Partition" tab
- If the value listed next to Partition Maps reads, "Partition Table GUID", select "Mac OS X Extended (Journaled)" from the Format drop-down menu, click "Erase", then go to step #13
Select the number of partitions you want from the Partition Layout drop-down menu
Enter the name of the partition or SSD drive
under Partition Information, then select Mac OS Extended (Journals) from the Format drop-down menu
Click the SSD drive name in the middle window, then click Settings
Select "GUID Partition Table" then click "OK"
Click "Apply" then click "Partition" to make sure you want to format the SSD drive
Wait while Disk Utility formats your SSD drive
- The drive name will appear in Finder when completed
Complicated version
This method to format a new SSD (or old) suggests using the administration. The procedure is performed as follows:
- Having activated the “Start” menu, launch “Control Panel”;
- here you need to find a section called “System and Security”;
- in it go to “Administration”;
- now double-click on the computer control point;
- on the left side of the window, find and activate the “Disk Management” section;
- after opening the list, select the one you need for formatting. Right-click on it and launch the corresponding process in the context menu;
- The settings window will appear in front of you again. Parameter values can be changed. But if you are not sure, then just leave it as is;
- press the button to start the procedure and just wait for it to finish.
Now let's figure out how to format an SSD via BIOS.
Working with BIOS
To perform the formatting procedure using this method, you must use third-party software. Among the variety of specialized programs, you can pay attention to a utility called Acronics Disk Director. Let's look at formatting an SSD via BIOS using its example:
- First you need to install this software on a disk or flash drive. After this, connect the media and restart the computer;
- When the system starts, quickly press the BIOS launch key. It is worth keeping in mind that each motherboard has its own set. But in some cases, the desired key is written on the start screen, at the very bottom;
- then the BIOS program menu will open in front of you. Using your keyboard, find and activate the tab called Boot;
- after that, display the media with the installed utility in the first position. The drive that needs to be formatted should be on the second or third line;
- Now press the F10 button. The program will exit, saving all changes;
- then restart your computer. If all the steps given earlier are performed correctly, the media with the installed software will start first. In this case, you can begin the formatting procedure;
- select the full version of Acronics Disk Director. After opening the window, before formatting the SSD, place a checkmark next to the item that activates manual mode;
- then mark the required disk;
- Select a formatting operation from the list on the left. A settings window will appear. You can leave everything as default or change it depending on your needs;
- confirm the changes made. Click on the checkbox located in the top panel of the window. And click on the “Proceed” button, thereby starting the formatting process.
Now let's look at how to format an SSD using the command line.
Method 1: Formatting an SSD Drive in Windows
Make sure the SSD drive you want to format is either installed on your computer or connected to your computer via a USB cable
Go to Start and click Control Panel
Click "System and Maintenance" then click "Administration"
Open the Computer Management application
Click Disk Management in the left pane of the Computer Management window
Click on the name of your SSD drive in the list of drives displayed on the screen
Right-click on the SSD drive, then select Format
Select your preferred values from the File System and Cluster Size drop-down menus
Check the box next to “Perform a quick format” and then click on the “OK” button
- Your computer will format your SSD drive.
Quite a risky option
It is worth noting that formatting via the command line, as well as working with the registry editor, is a rather risky method. Making the wrong changes can cause the system to either freeze or stop working altogether. So the following example of how to format a hard drive via the command line can be implemented by you at your own risk:
- click on the “Start” key;
- after that, go to the all programs section;
- there, open the standard applications folder and select the “Run” command;
- now type cmd and Ok;
- After this, a command prompt window will open. Find the line that ends with the phrase format;
- here enter your drive letter followed by a colon. Press the enter button;
- you will be shown a message warning that all information and files will be permanently destroyed;
- You will also need to agree to start the formatting procedure by entering the letter Y.
Next, let's look at several ways to format an SSD in Windows 10.
This computer
This is the shortest and easiest way. In fact, it can be called formatting directly. This is done as follows:
- Launch This PC. Use a shortcut or “Explorer”;
- From the list of connected media, select the one that needs to be formatted. Click on it with the right mouse button;
- in the context menu that opens, select the formatting function;
- After this, the already familiar settings window will open. Everything is the same here, if you are not sure, leave all the items as default;
- press the button to start the procedure and just wait for it to finish.
Disk Management
Next, let's talk about a more complex way to format an SSD. Now you will need to work with the previously mentioned administration:
- via the search bar, launch the “Control Panel” application. Among all the elements, find the administration section;
- after the transition, find the computer management section;
- On the left, find the paragraph called “Disk Management”. Here, find the required device and, after selecting it, launch the formatting window. Configure the parameters and activate the procedure.
Now let's talk about how to format an SSD if it is an external drive.
Formatting an external drive
This option for performing the procedure is not too complicated, but it involves working with disk volumes. To format an SSD using this method, you must perform the following steps:
- Through the Start menu, launch the standard programs section. There, activate “Run”;
- in the window that appears, enter compmgmt.msc and confirm your action;
- The Computer Management program will open in front of you. On the left side, open Disk Management. Determine the required disk in the pop-up subroutine;
- now activate the MBR and confirm the changes made again;
- right-click on the media and select the option to create a new volume. The “Wizard Assistant” will be activated. Here click the “Next” button;
- leave the size option at the value that is already set (maximum);
- in the next step, select the letter that will be used to name the drive. Confirm the action and continue setting up;
- A new window will open in front of you. There will be a section formatting line here. Enter the drive letter into it and start the formatting process.
How to properly format an SSDIs there detailed information about SSD hard drives?
Before we begin describing how to format an SSD, let's tell you a little about what an SSD is. This is a solid-state storage device that does not have mechanical elements, the operation of which is based on the functioning of microcircuits.
Now let's look at how such media is formatted if the SSD is an external drive:
- First of all, click “Start” and go to the “All Programs” section, in which we select the “Accessories” folder, and then “Run”;
- In this window, enter the command compmgmt.msc and click “Ok”;
- The “Computer Management” window will appear, on the left side select “Disk Management”, a pop-up window will appear asking you to identify the SSD disk;
- Next, select MBR (Master Boot Record) and click “OK”;
- Right-click on the capacity and select “Create a new volume”;
- “Wizard Assistant” will appear, follow “Next”;
- Leave the “Specify Volume Size” option unchanged (maximum) and click “Continue”;
- Select the drive letter and click “Next”;
- A window appears where in the line “Format partitions” we write the name of the disk and click “Next”.


![Error [Steam API dll is missing]](https://rec-ip.ru/wp-content/uploads/oshibka-steam-api-dll-otsutstvuet-330x140.jpg)


