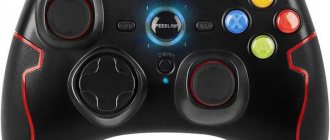
Bluetooth mouse
A wireless mouse without an adapter is great for a computer or laptop that does not have enough USB ports for all devices. To do this, it must have a Bluetooth module installed. You can connect a Bluetooth mouse to your PC as follows:
- Open Start and select the Devices and Printers tab if you're using Windows 7. In Win10, you'll first need to open Control Panel.
"Devices and Printers"
- Turn on the mouse and click on “Add device”.
"Adding a device"
- Wait until your computer detects the device.
Device discovery
- Now you need to install the drivers - to do this, simply select your device from the list of found ones and click “Next”.
Now you need to install the drivers
- The system will automatically begin searching and installing drivers. Wait for the process to complete and check the functionality of the mouse.
All subsequent connections of the wireless Bluetooth mouse will occur automatically after it and the PC are turned on.
Possible problems and solutions
Wireless equipment may not connect for a variety of reasons, from incorrectly installed drivers to defects. We recommend the following setup steps:
- turn the mouse on and off several times and then check again;
- check if the battery is charged;
- Check the functionality of the USB port into which the adapter is installed (try connecting another device to it).
- make sure the bluetooth module is working properly (connect your phone or tablet to your laptop);
- install the driver (be sure to restart your computer after this);
- Make sure that the operation of the wireless adapter or Bluetooth module is not blocked by administrator rights or other software (antivirus).
Some hardware problems can be solved with specialized software, for example, MS Fix IT or Connection Tools. After launch, the program prompts the user to check the system for the absence or presence of malfunctions. The software will scan. If problems are detected, a window will appear asking you to fix them. Before answering positively, carefully read what exactly the program will correct.
Now you know all the troubleshooting methods. Having solved them, you will be able to freely use a wireless mouse. If the described methods do not help, take the mouse to the purchase store and present your claims about its inoperability (if the product is under warranty). Alternative options are to take the device to a service center or simply buy a new mouse.
RF mouse
These mice work via a USB adapter that comes with it. To connect an RF mouse to your computer, follow the instructions:
- Plug the adapter into any USB port on your PC.
Insert adapter
- In this case, the search for drivers will start automatically, just wait.
- Check whether there are batteries in the mouse or whether the battery is charged.
- Don't forget to turn on the device - usually such a button or switch is located somewhere at the bottom.
Don't forget to turn on your device
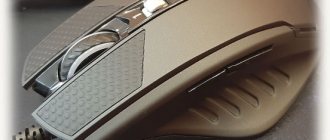
- If there is a round button on the top of the mouse, press it to connect. Don't confuse this with the DPI switch. If there is no such button, just wait.
Round button on the mouse
- When the drivers are installed, check the functionality of the mouse.
Possible connection difficulties
The main problem when connecting and using a mouse is the lack of signal from the module or the device itself. In this case, the first thing you need to do is check the functionality of the device on another PC. If another computer detects the connected mouse without any problems, and it works properly on it, then the problem may be a malfunction of the USB port or software.
Also, before connecting, you should check that the wireless mouse has power. Typically, the power supply is either AAA batteries or rechargeable batteries. The device will not work if there is no power.
Subscribe to our Social networks
How to set up a wireless mouse: pointer speed, cursor type and more
To configure the mouse, open the corresponding tab in the settings:
- In the search on your computer (Win + S), type “Cursor”.
- Select a search result, which will take you to the “Cursor and Pointer” settings section.
"Cursor and Pointer"
- Here you can configure the cursor icon, its thickness, the speed of movement and rotation of the mouse wheel.
- The pointer speed can also be adjusted on some mice using the button on top in front of the wheel. It can be signed as DPI.
Rules for connecting a wireless mouse to a laptop
When the mouse is not in use, to conserve battery power, it is recommended that you turn it off using the power off button on the mouse unless it has an automatic shutdown feature.
You can also set the mouse to turn off using Windows controls.
Step 1. Click “Start” and select “Control Panel” in the “Windows System” directory.
Open “Start”, then expand the “Windows System” folder, select “Control Panel”
Step 2. Click on the “Mouse” icon.
In the “View” mode, set the “Small Icons” category, find and open the “Mouse” section
Step 3. Select the “Hardware” tab and click “Properties”.
Select the “Hardware” tab and click “Properties”
Step 4: In Mouse Properties, go to Power Management and select Allow the computer to turn off this device to save power by clicking OK.
Go to the "Power Management" tab, select "Allow the computer to turn off this device to save energy" and click "OK"
Reference! When using a wireless mouse, it takes some time to detect it when the operating system starts, so it may not start working with the mouse right away, which is normal.
What to do if your wireless mouse doesn't work
If your wireless mouse suddenly refuses to work on its own, there may be several reasons for this:
- There is a problem with the computer itself. If the keyboard also does not respond to calls, and the image on the screen is simply frozen, restart the computer - even if it is trivial, but most problems are solved this way.
- The batteries are dead or the battery is dead. If your wireless mouse runs on batteries, change them and check if everything works. If it has a battery, check if it is charged - just connect the mouse to a power outlet or PC via a USB cable.
- The USB connector is broken. No less banal advice than rebooting, but just as effective - insert the Bluetooth adapter from the mouse into another port on the computer. Perhaps there is nothing wrong with the outlet, and it is simply clogged - carefully clean it.
- The drivers have fallen off. Open “Device Manager” (right-click on the “Start” button), find your mouse there and check the status of the drivers for it. If necessary, update or reinstall them.
- Viruses in the computer. Have you scanned your PC for malware lately? Use antivirus or Windows Defender to check your system.
- The mouse itself is broken. To check this, connect it to another PC. If it doesn't help, then the device is faulty.
Rules for connecting a wired mouse
The mouse can be connected to the computer using a wire, or it can be absent. This article talks about connecting a manipulator via a wire.
Note! A wireless mouse is a device that requires periodic battery replacement; if the current batteries run out, it will stop working altogether. Of course, wired mice do not experience such problems; if they stop working, it means that it is broken.
Wired computer mice are divided into two main types. Some of them are equipped with a USB cable, while others have a PS/2 plug. It is required to install these devices by placing the plug in the required socket.
It should be borne in mind that the PS/2 format is currently considered obsolete. For this reason, it makes sense to purchase mice of this type only if the user knows for sure that his computer device has a similar connector. In general, the rule is that desktops are equipped with this socket, and among laptops it is present in models that were manufactured relatively long ago.
At the same time, the USB connectors are all the same, and if the computer is equipped with sockets of this particular type, then both a mouse and a keyboard and headphones can be connected by inserting the plug into any connector. On the other hand, PS/2 connectors for mouse and keyboard have the same configuration, but in this case each of the slots is specialized. Therefore, although the mouse plug will fit into the keyboard connector, the mouse will not work in this case. It is necessary to pay attention to the color of the nest. In the standard case, the mouse is blue, and the keyboard is green.
Attention! At the same time, there are also PS/2 sockets of a combined type. They are designed to connect both a mouse and a keyboard. They can be identified because they are painted in two colors at once.
An important rule is not to put pressure on the plug when inserting it into the socket. If you apply excessive force to it, the leg may be damaged. If it gets wrinkled, it will be very difficult to straighten it in the future.
Finally, the most correct method of installing a mouse involves first disconnecting the computer device. This rule may seem unnecessary and in practice, users connect the manipulator without this precaution. But experts recommend not to neglect this recommendation.
Connect a wireless radio mouse via a USB adapter
If your mouse comes with a USB receiver, and this is the only connection interface (or Bluetooth is not available/not working on your computer), then you need to connect this receiver to the USB port of your laptop or desktop computer.
After connecting, Windows should install the drivers. I have already connected many wireless mice, and I have never encountered a problem when Windows cannot find or install the required driver. If it happens that the system does not recognize the device, then you can try downloading the driver or software from the manufacturer’s website. We write in the search the name and model of our mouse. For example, “Logitech M185” and in the search results we go to the official Logitech website. There we already look for the downloads section and download the necessary driver. But you probably won't have to do this.
We insert a battery into the mouse, or charge it and turn it on. The indicator may then light up (but it may not).
After this, the mouse should work immediately. If it turns out that after connecting the wireless mouse does not work, then first of all:
- Make sure that the battery is not dead (by replacing it) and that it is installed correctly.
- Disconnect and reconnect the USB receiver.
- Restart your computer.
- You can go to Device Manager and see if the adapter appears in the “HID Devices” section. If we connect an adapter from a Logitech mouse, then the “Logitech USB Input Device” adapter should appear there. The name may vary.
- You can test the adapter and mouse on another computer/laptop. Perhaps you have come across a defect. This also happens.
In most cases, these devices connect and work without any problems at all. Especially in Windows 10, Windows 8, Windows 7.
How to connect a wireless mouse to a laptop or computer?
I've been using exclusively wireless mice for quite some time now. They are very convenient to use with both a laptop and a desktop computer. I've probably replaced about five already. True, I had to spend money on batteries, but I bought the latest model with charging capabilities and am very pleased. Today the article is not about my gadgets, but about how to connect a wireless mouse to a PC or laptop on Windows. The connection process itself is not very complicated, but since people ask, it means it’s not always possible to connect. I will try to make a universal instruction that is suitable for different mice (Logitech, Rapoo, Trust, Microsoft, Maxxter, Defender, HP, A4Tech, Razer, Speedlink, etc.), with different connection interfaces. Wireless, of course.
Today, the market mainly offers wireless mice with the following wireless connection interfaces:
- Radio interface (Wireless) are those mice that are connected via a special USB adapter (receiver). It comes with a mouse. The connection itself most often operates at a frequency of 2.4 GHz and often suffers from interference (from the same Wi-Fi routers). The connection is very simple: insert the receiver into the USB port of your computer/laptop, turn on the mouse and everything works. This is the most popular interface for connecting wireless manipulators.
- Bluetooth – there are much fewer mice with this connectivity option compared to a conventional radio interface (which comes with a receiver). These are mainly more expensive models. They are very convenient to use with laptops, as they have a built-in Bluetooth module. And such a mouse connects without a receiver. But for a PC you will have to buy a USB Bluetooth adapter.
- Wireless + Bluetooth is when the mouse supports two connection options. Via a regular USB radio adapter and via Bluetooth (without an adapter on laptops). To choose from.
I think you know which connection interface your wireless mouse supports. If not, see the instructions and information on the official website.
Let's look separately at the process of connecting via a radio interface (USB adapter) and separately via Bluetooth using the example of a laptop with Windows 10. There are differences. I will enter when connected via Bluetooth.