- 67shared
- 0Facebook
- 63Twitter
- 4VKontakte
- 0Odnoklassniki
A front panel with audio and USB ports is an integral part of any modern computer. This is a very convenient thing that allows you to connect removable media, headphones or a microphone without unnecessary movements. However, it is often with the front panel that problems arise, as a result of which the sound stops working and you can no longer use the computer as usual. In this article we will try to understand the possible causes of such malfunctions.
Before you start troubleshooting problems with the front headphone and microphone jacks, you need to make sure that all drivers are installed correctly and the sound is working properly on the back panel of the computer. If there is no sound when you connect headphones to the back of the system unit, then the problem is more global and, therefore, requires a different approach to the solution and a separate conversation. We will devote this article entirely to the front panel.
Why doesn't the sound on the front panel work?
We begin diagnostics by remembering at what point the inputs stopped functioning. For example, if the computer was only recently assembled and you have never used headphones with a microphone, then perhaps during assembly the connectors were incorrectly connected (or not connected at all) to the motherboard, i.e. The front panel is simply not connected properly. If the panel worked properly before, then try to determine the action after which the problems probably began. Perhaps some settings were made in the Control Panel or BIOS. If nothing comes to mind, follow the recommendations below.
How to check driver operation and restore sound
When there is no sound when properly connected to the motherboard, you need to check the drivers and sound parameters.
Realtek is required for audio to work. After launch, you need to select the “speakers” section. Next, you need to open the yellow folder icon located in the upper right corner. In the “connector parameters” check the device definition. If it does not function as desired, check the box to disable device detection. Performance should be restored. You can also fix the problem in advanced settings. This window allows you to adjust headphones, headsets and other audio devices.
The soundbar operates according to the outdated AC97 standard, introduced to the world by Intel back in 1997, and the motherboard's audio subsystem operates according to the new HD standard. Therefore, the front audio device on your computer may not work. To troubleshoot the problem, you need to go to the BIOS and follow the steps:
- Advanced;
- Onboard Devices Configuration;
- Front Panel Type, characterized by the position of HD Audio, which needs to be switched to AC97;
- The last step is to restart the PC.
After turning on the PC, sound will appear. When the front audio device operates in HD Audio mode, the Front Panel Type option needs to be switched.
Windows 10
A common way to enable the front headphone panel on Windows 10 is through Realtek.
For the headphones to function, click on the “Speakers” tab and go to additional settings. The window that appears indicates that the output sockets are separated and that automatic socket detection is disabled.
After the above described manipulations, the headphones will work. Another reason why the computer does not see the headphones is the lack of a driver. You need to start Device Manager. Make sure you have an audio driver.
Checking the headphone and microphone input connections
This item will be relevant for those cases when the computer was disassembled/assembled and after that the sound on the front panel stopped working. You need to make sure that the panel is really connected - the connector is connected to the correct contacts on the motherboard, and the integrity of the supply wires is not broken. To connect the front panel, you can use either a solid block of two types - AC'97 and HD Audio, or separate connectors with markings.
The AC'97 format is obsolete and is now rarely seen. At the same time, the HD Audio (High Definition Audio) standard is now used everywhere. On the motherboard, the connector for connecting the front panel HD Audio plug usually has a letter designation, for example, F_Audio.
If you are still not sure where to connect the header, use your motherboard manual. Below we provide the AC'97 and HD Audio pinouts.
Connection diagram of individual connectors to AC'97:
Front Panel Configuration in BIOS
Sometimes it happens that the front panel works according to the old AC'97 standard, but the motherboard provides the new High Definition Audio specification. By the way, both connectors are similar, and the user may not notice this discrepancy. At the same time, no problems should arise when connecting a panel with AC'97 to a motherboard with High Definition Audio. True, in some cases you will have to change the operating mode through the BIOS.
We go into the BIOS by pressing the F2 or DEL key when booting the computer. Next, go to the “Advanced” section and look for the “Onboard Devices Configuration” item. Just below is the “Front Panel Type” parameter (it can also be called High Definition Front Panel Audio or Legacy Front Panel Audio). Switch it from the HD Audio position to the AC97 position. If your front panel uses the HD Audio standard and the BIOS is set to AC97, then switch back.
Some motherboards do not provide the ability to change the operating mode of the front panel, but only allow you to disable or enable the sound controller. The Onboard Audio Function parameter (may have a different name) is responsible for this function, providing only the “Enabled” and “Disabled” values. In such a situation, you do not need to reconfigure anything in the BIOS, and the sound should work without additional manipulations.
Solution
A step-by-step search for the cause allows you to detect malfunctions of audio equipment and drivers.
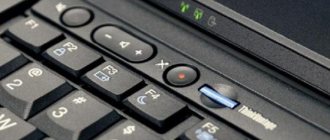
Connecting the cable to the motherboard
Troubleshooting starts with making sure the connection is correct. The headset port is marked in green and has a corresponding icon on the case. For audio recording devices, the input is represented by a pink connector and a microphone icon. The headphones are plugged into the green port.
After connecting the headset correctly, you need to check the connection between the HD Audio/AC'97 cable and the motherboard. Need to:
- Disconnect the computer from the power source.
- Remove the side panel of the housing.
- Find the wire labeled HD Audio or AC'97.
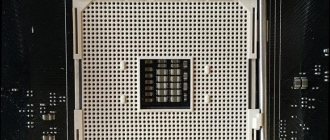
- Connect to the connector marked AAFP, AAFP COM1, F_AUDIO or FP_AUDIO1 - depends on the specific model.
Example of a connector on a motherboard for an HD Audio cable
Attention! Please read your motherboard's user manual before testing the hardware.
Enabling in BIOS
When, after connecting the wires, the system does not see the headphones in the front input on Windows 10, you should check the BIOS settings:
- When starting the PC, press the button to go to BIOS (F10, F9, Del, F2). There is a tooltip with a button on the home screen.
- Open advanced options and find the Onboard Devices Configuration section.
- Select Front Panel Configuration. In different BIOS versions, the item is called Onboard Audio Function or Front Panel Type.
- Press Enter and set the value to Enabled.
- Save the setting and restart the PC using the F10 key.
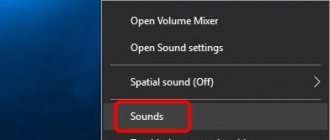
Selecting a device in the “Control Panel”
To turn on devices connected to the PC case, you need to:
- Press Win + R.
- Enter control and click on the OK button.
- Go to “Hardware and Sound” (view type “Category”).
- Go to the “Playback” tab.
- Open the context menu by clicking on an empty space.
- Activate display of disabled and disconnected devices.
- Find broken headphones. The properties indicate a 3.5 mm jack.
- Through the context menu, make the “Set as default” item active.
Enable display of disabled and disconnected devices in Sound settings
Note! You need to check the volume level of the system and individual windows through the mixer on the taskbar.
Driver Update
An audio driver problem is a common cause of no sound. The problem can be resolved by reinstalling the software. First, the old version is removed. Need to:
- Open the Run window using the Win + R combination.
- Enter devmgmt.msc and launch the application by clicking OK.
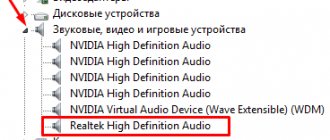
- Open the “Sound, gaming and video devices” branch.
- Double-click NVIDIA High Definition Audio, Realtek HD Audio, or VIA HD Audio (depending on your installed hardware).
- Open "Driver" and click Remove device.
- Restart your computer.
Uninstalling an audio card driver in Device Manager
Attention! If there is an unknown device in the manager, you should proceed to install the software.
The driver can be found in the support section on the online resource of the motherboard manufacturer (MSI, Asus, Gigabyte, ASRock). To search by series name and equipment model:
- On the website, find the “Drivers” or “Software and Support” tab.
- Open the appropriate hardware category or specify the motherboard model in the search field.
- Select the Windows bit depth and download the driver installer.
- Run the installer and follow the instructions.
- To restart a computer.
Presence of viruses
To eliminate viruses that affect sound playback, you need to scan the system using a third-party antivirus. Panda Antivirus, Kaspersky Free, AVG Antivirus, Avast are suitable.
Performing a deep scan:
- Run the program.
- Select a section to check.
- Start deep scan.
Registry error
Failures in system files and the registry can cause audio jacks to turn off. To fix it you need:
- Go to Command Prompt as administrator.
- Type sfc /scannow and press Enter.
- Wait for the analysis and recovery to complete.
- Reboot the system.
Scanning the system via the Command Line
Changing settings via Realtek HD driver
The Realtek software package includes a control panel for audio devices. The tool will help you configure the connected headphones. Need to:
- Launch "Control Panel"
- Go to the “Hardware and Sound” section.
- Go to “Realtek HD Manager”.
- Open Connector Settings.
- Check the box next to “Disable front panel socket detection.”
Lack of compatibility
Problems arise when using a telephone headset that combines speakers with a microphone. It is necessary to familiarize yourself with the official characteristics of the equipment and check the compatibility of the device with the computer. If the front headphone panel on Windows 10 does not work for this reason, replacing the headset will help.
Other ways to solve the problem
Other methods:
- Checking Windows Audio. The component must be launched through the standard Services application.
- System rollback to a checkpoint. Return Windows to the state before the problem occurred.
- Return to factory settings. The option restores Windows to its original state, but retains user files.
- Testing the equipment on another computer to identify problems with audio equipment.
- Connecting other headphones to the case. Allows you to diagnose a breakdown of the front panel.
- Search for a driver in the DevID database. The service provides a wide list of branded and custom drivers.
- Disabling virtual channels and devices. This is done through the Sound window.
- Removing third-party programs that affect the audio settings in the system.
If correct connection and software changes do not help, you should contact a specialist to diagnose the equipment.
Setting up sound devices in the Windows 7/10 Control Panel
If you are one hundred percent sure that the front inputs for headphones and microphone are connected correctly and everything is set correctly in the BIOS, it’s time to move on to the sound settings in the Windows 7/10 environment itself. First of all, go to the Control Panel, and then to the “Sound” section. On the “Playback” and “Record” tabs, make sure that the default devices are installed.
To display all devices, right-click anywhere in the window and check the “Show disconnected devices” and “Show disconnected devices” checkboxes.
On the “Playback” tab, click the same right button on the active device and select “Properties”. In the “General” section, look at the list of connectors - the item “Front panel 3.5 mm connector” should be present.
In the same way, we check the microphone properties on the “Recording” tab.