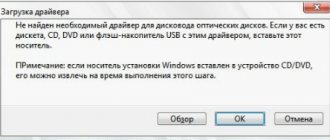
The problem with the text “Universal Audio Driver: Not Fixed” in the Windows 10 operating system appears when trying to play any sound or from time to time in the notification format. It means that the sound device cannot start working correctly due to problems with the software. Because of this, the user will have to manually find the cause of this problem and fix it. It is better to start with the simplest and most effective methods, gradually moving on to those that are difficult to implement and ineffective.
Method 1: Run the troubleshooter
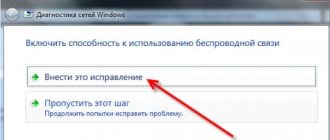
The most obvious possible solution is to run the Audio Troubleshooter. This built-in tool checks problems only superficially, but automatically, so the user only needs to launch a scan and wait for the results to be received, which is done like this:
- Open the Start menu and go to Settings.
- Here, select the last option called “Update and Security”.
- Through the left panel, navigate to the “Troubleshooting” category.
- Here, select the first diagnostic type called “Sound Playback”.
- Click on the “Run the troubleshooter” button that appears.
- Wait for the scan to begin.
- If several audio devices are connected to your computer, you should mark the one you are using with a marker, and only then click “Next”.
- You will be notified of the results of the verification. You may need to perform some manual steps; do so by following the instructions that appear.
If any errors have been found and corrected, proceed to interact with the computer, checking the functionality of the sound device. Otherwise, please pay attention to the following instructions.
Fixing bugs in the Windows 10 update
So, if there is no sound on your laptop after updating the drivers using the operating system, you will need to completely reinstall them. However, we will not download them manually from the manufacturer’s website. We use the capabilities of the operating system:
- Open the “Control Panel”.
- Click on the “Device Manager” item.
- In the list of devices, look for sound devices and select them.
- Right-click on the name of the audio device and select “Update Driver” from the menu that appears.
- Next, select “Search for drivers on this computer.”
- Click “Next” and wait for the installation to complete.
- Reboot your PC or laptop.
This option will help if the problem is not global. By reinstalling the drivers in this way, you can count on them to be fully functional after rebooting the machine. However, it also happens that this method does not help. Then you can use a more advanced method.
Method 2: Installing sound drivers
The next option is to install the missing sound drivers if this has not been done previously. Please note that it is best to download such software only from the official website of the manufacturer of the motherboard, laptop or sound card, giving priority to the latest driver version. However, in some situations you can use standard operating system tools or solutions from third-party developers.
Read more: Download and install sound drivers
Free installation of sound drivers on Windows 10
The problem of no sound on the computer can be encountered when reinstalling the operating system, or when the device is infected with viruses or malware is installed. First of all, if the sound disappears, you need to make sure that the speakers, headphones or other headset are connected correctly, and also check that they are working properly.
How to check if your sound drivers are working properly
First, you need to make sure that the playback devices are working; to do this, you will need to right-click on the Start menu, select “Control Panel”, and in the window that opens, find the “Sound” option. Then carefully study the properties of the speakers.
Then select “Properties”, in the “Advanced” tab, check the sound in all formats. If the sound appears in some version and you are satisfied with it, then you can leave everything as it is.
If you have a special program installed on your PC that supports your sound card, open it and check if the sound is disabled. The optical output may interfere with sound playback while your speakers may be working.
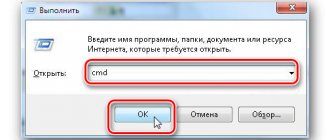
By simultaneously pressing the Win+R keys, the “Run” window will appear, type devmgmt.msc in the row, clicking OK will open the “Device Manager”,
There you will need to look at the properties of the sound card from the “Sound, gaming and video devices” section by double-clicking on it.
How to update drivers
The main reason for the development of this problem is a missing sound driver, incorrect installation or error during the update; it is responsible for the correct operation of the device’s sound card.
By right-clicking on the start menu and selecting “Device Manager”, you can see the availability of sound cards on Windows.
By selecting the “Audio inputs and audio outputs” section, begin updating all audio devices in order.
We do the same in the “Sound, gaming and video devices” section, where sound cards will be presented. Select the one you need and double-click to open its parameters. Go to the “Driver” tab and click “Update drivers...”.
This will start searching for software on your computer. Select “Automatically search for updated drivers” and click “Install”.
After which you need to close all windows and restart the computer.
If Windows 10 does not find drivers suitable for your device, then you need to go to the manufacturer’s website and look for new driver releases there. You can find out information about the manufacturer in its properties in Device Manager. If the manufacturer is not specified, you will have to open the system unit and find what is written on the board itself.
How to easily and quickly update drivers
The easiest way to update is to use the Driver Pack Solution utility, which can detect the sound card and install all drivers automatically. If sound devices are not installed on Windows 10, then with its help you can do this in a matter of minutes.
Sometimes an operational glitch may occur where audio is disabled in the BIOS. To check the BIOS settings, you need to enter it. After turning on the computer, you will need to press the “Del”, “F2” or “Esc” key. Then the message “Press Del (?) to enter Setup” should appear. Instead of “Del” the required key will be indicated.
In the menu that appears, select the “Devices Configuration” section. The “High Definition Audio” item should be located here. If everything is fine, the value “Enabled” will be indicated. If there is “Disabled”, then the problem was hidden here, you just need to change the value to “Enabled”. This will result in sound appearing on the device without installing or updating drivers.
You will have to look for audio drivers for the built-in sound card and the connected device. You will need to know your motherboard model. Each manufacturer has its own website with a “Drivers” section.
To find the appropriate audio device software for your device, follow these steps:
- You will need to go to the developer’s website and select the “Support” section there.
- After that, click on the “Software and Drivers” section.
- Next, enter the model number of your device and click the “Search Product” button.
- Once the model has been determined, you must select the language and version of the operating system.
- Once you complete the above steps, a list of drivers for your device will become available. Among the listed options there may be a special program for adjusting the sound. Select the “Driver-Audio” item and click on the “Download” button.
- After downloading, run the program on a computer running Windows 10, and after installation is complete, restart the operating system.
When starting the PC, we check the functionality of the microphone, headphones, webcam and speakers for sound. Not all devices may have a sound program (unless they meet the Windows 10 system requirements). Before installing the operating system, check the availability of an audio driver for the required version and bitness of Windows.
A dozen different sound drivers are available for free download from other sites, e.g.
https://programmok.net/drivers/72-zvukovye-drayvera.html or
https://programdownloadfree.com/load/system/drivers/realtek_high_definition_audio_drivers/77-1-0-159.
After downloading (not from the official Windows website), it is recommended to check the installed driver for viruses so that they do not cause even more harm to the system.
secretwindows.ru
Method 3: Reinstalling the audio device
In some cases, Windows 10 automatically installs missing drivers, which also applies to the sound card. Sometimes this process simply fails, or for some reason the added files refuse to work properly. Then the user needs to independently remove the device and install it again, which happens like this:
- Right-click the Start button and select Device Manager.
- In the window that opens, expand the “Audio inputs and outputs” category.
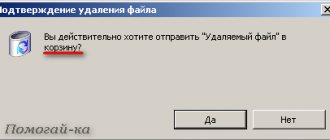
- Select the equipment you are using, right-click on the line with it and in the context menu find the “Remove device” item.
- Confirm the deletion and check the box responsible for parallel uninstallation of drivers, if present.
Now you need to restart your computer for the changes to take effect. If the default device does not play sound, you will need to return to Method 2 and implement it to correctly install compatible drivers.
Driver for a device supporting High Definition Audio – where to download?
Since the driver in question is one of the basic Windows OS drivers, there is no need to specially download it.
- To activate it, just go to “Device Manager” (press Win+R, enter devmgmt.msc and press enter).
- In the list of devices, open the sound devices branch, hover the cursor over your audio device, right-click, and select “Update driver.”
- In the window that opens after this, you will need to click on “Search for drivers...”.
- Next, click on “Select driver from...”.
- And in the list of drivers that opens, point to “Device supporting High Definition Audio.”
The specified device is in the Windows driver database.
The optimal solution to installing the correct driver for a sound card would be to go to the website of the manufacturer of your PC's motherboard (or your sound card). And download the corresponding drivers from there. In particular, the following resources will help us:
- realtek.com – for HD Audio sound cards from Realtek. Go to the resource, select “High Definition Audio Codecs” there, then check the box next to “I accept...” and click on “Next”. In the top two values of the table, select the file corresponding to the bit depth of your OS, and click on “Global” on the right. Download and run the executable file with drivers for Realtek cards;.
Driver versions from Rialtek
- downloadcenter.intel.com – for Intel HD Audio,
- download.viatech.com – for sound cards from VIA;
- support.amd.com – sound drivers for AMD video cards;
- msi.com – for HD Audio for MSI video cards.
Also, “DriverPack Solution” level programs and other analogues that scan and install the latest drivers into the system will help you install the latest driver for your video card.
Use the software tools listed above
Method 4: Check the Windows Audio Service
A service called Windows Audio is directly related to the performance of the equipment in question and is responsible for playing sound and connecting the devices themselves. If it is disabled for some reason, you may see a "Universal Audio Driver: Not Fixed" error on your screen, so it is recommended to check the current settings applied to this service.
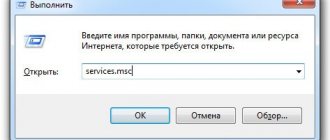
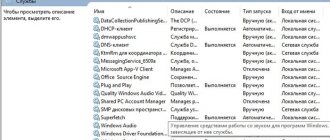
- Open Start and search for the Services application.
- In the list, find the line “Windows Audio” and double-click on it with the left mouse button to open properties.
- Set the startup type to Automatic and ensure that the current status is Running. If the service is stopped, start it yourself and apply the changes.
Installing/updating the sound card driver through OS tools
See also: “How to disable pop-up notifications in Windows 10”
- Open the Start context menu. To do this, you can use one of the options:
- press the Win+X keys on the keyboard.
- right-click on the Start menu.
- Select “Device Manager”.
- In the Manager window that opens, expand the list of sound devices.
- Double-click on our device with the left mouse button to open its properties.
- In the window that appears with the properties of the sound card, go to the “Driver” tab and click the “Update driver” button.
- Click on the “Automatically search for updated drivers” option.
- The system will start searching and, if new drivers are found, download them.
- Next, the installation process of the downloaded drivers will begin.
- When the installation is complete, the system will display a corresponding message. In some cases, you may need to restart your computer after this.
If the steps described above did not help, or the system could not find updated drivers, you can use the following method.
Method 5: Check your computer for viruses
Let's move on to methods that are rarely effective, but in certain situations can provoke the emergence of the problem being considered today. The first is to scan your computer for malicious files, which can be done using special software or web services. If threats are found, remove them and proceed to check audio playback.
Read more: Fighting computer viruses
Method 6: Update the motherboard BIOS
As you know, the BIOS on the motherboard performs an important software function, linking all installed components into a single system. If the version of this component is outdated, problems with drivers and other aspects of the operating system may occur. Checking and installing BIOS updates will not take much time and even a novice user can cope with this procedure, however, we recommend that you refer to the appropriate instructions to complete this operation without causing additional difficulties.
Read more: Updating the BIOS on your computer
Method 7: Checking the integrity of system files
Damage to system files is a situation that almost every active Windows user encounters from time to time. This problem leads to disruptions in the operating system, causing errors of various kinds. The absence or corruption of certain files can also trigger the “Universal Audio Driver: Not Fixed” notification to appear, so as a test, we recommend running a scan via SFC and using DISM if necessary. Read more about all this in a separate article from our author below.
Read more: Using and restoring System File Integrity Check in Windows 10
Method 8: Restore Windows to its original state
The last option for solving the problem being considered today is to return the OS to its original state, which can be done using different methods. If the user (or programs, operating system) created backup copies when the sound was still functioning correctly, they need to be restored. Additionally, you can use the built-in tool, which returns the original state. Here, each user must choose a method, based on personal preferences and the current situation, and all available methods are described in the article below.
Read more: Restoring Windows 10 to its original state
You have just read all the available instructions on how to fix the problem with the text “Universal Audio Driver: Not Fixed”. All that remains is to perform each method in turn to find the effective one. If none of this helps, all that remains is to reinstall the OS, citing the fact that the problem arose during the installation itself.
We are glad that we were able to help you solve the problem. Add the Lumpics.ru website to your bookmarks and we will be useful to you. Thank the author and share the article on social networks.
Describe what didn't work for you. Our specialists will try to answer as quickly as possible.