Delete queue via printer properties
- Go to Start.
- Open the "Devices and Printers" section
- Select a printing printer from the list.
- Right-click on the name. To view all documents sent for printing, select the appropriate option from the drop-down list.
To reset the entire list of printed materials, click on “Printer” - “Clear print queue”.
If many documents have been sent to the queue and you need to cancel printing of a specific one, then select it and use the context menu to cancel.
In Windows 10, the feature can be used in the Settings window.
Cleaning the print queue
1.
Right-click on the “My Computer” icon and select “manage.”
2.
In the window that appears, double-click on the “Services and Applications” item, then double-click on the “Services” item.
3.
A list of services will appear on the right side of the window, among which we need to find “Print Spooler”. Right-click on it and select “stop”.
4.
Then we need to delete all files from the folder:
C: WINDOWSsystem32spoolPRINTERS
5.
Now we return to services and again find “Print Spooler” Right-click on it and select “start”.
6.
Done, now you can go to “Printers and Faxes” and make sure that the list of print jobs is empty.
Forced cleaning
If you cannot cancel the queue through the device menu, you must forcefully reset the tasks. This clears the list on all devices connected to the network. This technique is applied to certain HP and Canon models.
Restarting the Print Service
- Click Start.
- Select "Control Panel". On Windows 10, start typing the name in the search, which is located near the Start menu.
- Go to the “System and Security” - “Administration” section.
- Select Computer Management.
- In the list that opens, find the “Services and Applications” item.
- Click on "Print Manager".
- Click Restart.
For Windows 7, 8 and 10, quick access to “Services” is possible through the “Run” window, which is launched by the Win + R button combination.
Enter the command services.msc. The manager will be cleared after pressing the “Restart” key.
Clearing the temporary Printers folder
Documents for further processing create two temporary archives.
- The first one with the .SHD extension stores settings.
- The extension of the second file is .SPL. It stores working information.
Automatic cleaning of the stack with non-persistent data occurs when the equipment is turned off or rebooted. If the queue is not cleared, the archives must be cleaned manually in the system folder C:\Windows\System32\Spool\Printers.
When you try to delete, you may receive a notification that the file is already in use.
Then stop the print spooler. Delete the files and start the service.
Once data is deleted from a folder, it cannot be restored. The information will appear in the queue only when it is retransmitted to the printer.
Unqueuing via command line
The method is used if the list in the manager is not deleted by previous methods. To enter the Windows 7 line, you need to open “Accessories” through “Start”. Select “Command Prompt” from the drop-down menu. For OS versions 8 and 10, enter the cmd command in the search.
Management is done on behalf of the administrator:
- net stop spooler – stop printing;
- del %systemroot%\system32\spool\printers\*.shd/F/S/Q – deleting the archive with settings;
- del %systemroot%\system32\spool\printers\*.spl/F/S/Q – deletes files with displayed information;
- net start spooler – start the spooler.
If the commands do not work, check your hardware settings. Find out the address for saving current data and edit the code to suit your needs.
Clearing the print queue in Windows 10
This article will discuss two methods for clearing the print queue. The first one is universal and allows you to delete all documents or only a selected one. The second one is useful when a system failure occurs and files are not deleted, and accordingly, the connected equipment cannot begin to function normally. Let's look at these options in more detail.
Method 1: Printer Properties
Interaction with a printing device in the Windows 10 operating system occurs using the standard “Devices and Printers” application. It has many useful utilities and tools built into it. One of them is responsible for forming and working with a queue of elements. Removing them from there is not difficult:
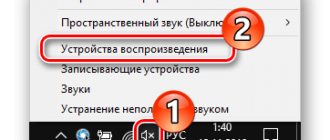
- Find the printer icon on the taskbar, right-click on it and select the device you are using from the list.
The options window will open. Here you will immediately see a list of all documents. If you want to delete only one, right-click on it and select “Cancel.”
If there are a lot of files and it is not very convenient to clear them individually, expand the “Printer” tab and activate the “Clear print queue” command.
Unfortunately, the icon mentioned above is not always displayed on the taskbar. In this situation, you can open the peripheral management menu and clear the queue through it like this:
- Go to Start and open Settings by clicking on the gear button.
A list of Windows settings appears. Here you are interested in the “Devices” section.
In the left panel, go to the “Printers and Scanners” category.
Now you will be taken to a window with parameters. It works exactly the same way as was shown in the previous instructions.
As you can see, the first method is quite simple to perform and does not require much time; cleansing occurs in just a few steps. However, sometimes it happens that records are simply not deleted. Then we recommend that you pay attention to the following guide.
Method 2: Manually clearing the print queue
The Print Manager service is responsible for the correct operation of the printer. Thanks to it, a queue is created, documents are sent for printing, and additional operations occur. Various system or software failures in the device itself cause the entire algorithm to freeze, which is why temporary files do not go anywhere and only interfere with the further functioning of the equipment. If such problems occur, you need to manually remove them, and you can do this as follows:
Restart or cancel printing of individual documents or all at once
You can clear the print queue, restart or remove a specific document from printing in the settings of the printer itself.
1. Go to the “Start” menu, open “Settings” => Devices => on the left side, select “Printers and scanners” => on the right side, left-click on the printer in which you want to cancel or restart printing => after clicking on the printer, Below it, additional options will appear, select “Queue” (you can also find the printer icon on the taskbar, right-click on it and click on the name of the printer itself again to open the print spooler).
2. In this list you will see a list of all documents sent for printing; if printing does not proceed, look at the document that was sent earlier than the others, maybe it is huge, then it will show that it is being downloaded (its volume will change) and you need a little wait. If there is an error written next to it, try restarting the document, right-click on it and select “Restart”.
3. If even after a restart, printing of the document has not started, you can cancel it by right-clicking on it and selecting “ODA” from the menu. After which the document will disappear from the print queue.
4. If you want to remove all documents from the print queue, go to “Printer” at the top left and select “Clear print queue”. Confirm deleting all documents from the print queue by clicking on “Yes”.
That's all for today, if you know other ways or have any additions - write a comment! Good luck to you