Creating an ISO disk image
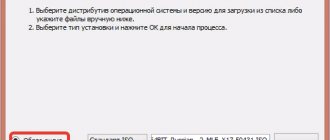
Not all OS versions are distributed as ISO images that are suitable for writing to a flash drive. To create the required format, you need to use a special program, for example ImgBurn. Step-by-step instruction:
- Download the application and install it on your computer.
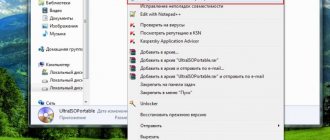
- In the menu that opens, select “Create an image from files.”
- Click on the folder with Windows components.
- Specify the path to save the finished file.
To avoid system errors and failures, you must use only Latin letters in the name of the final file.
How to burn Windows 7 to a USB flash drive?
Greetings, dear readers! When installing a new operating system on a computer, it will be enough to open the DVD drive, then install the installation distribution and after performing some operations in the BIOS (you can read about what a BIOS is here), you can begin to complete the task.
However, what to do if you need to install the operating system on so-called portable netbooks or laptops, which, as you probably know, do not have a disk reader. In this case, the operating system is installed from a USB drive.
Installing Windows from a flash drive itself is no different from installing from a disk, however, the process of writing the installation distribution onto a flash drive has some peculiarities. In this article, we will look at how to burn Windows 7 to a USB flash drive in several ways. It should be noted here that in addition to writing the windows distribution onto a flash drive, you can also write it to a memory card, but not all laptops have the ability to boot from a memory card. Therefore, before creating a bootable flash drive or memory card, you should make sure that your laptop or netbook is capable of booting from a memory card. And how exactly to check you can find out by reading my article:
What is a computer BIOS and how to configure it
In fact, installing Windows from a flash drive is no different from installing from a regular DVD drive.
I Method for creating bootable flash media
So, the first method that we will consider is installation using the command line. This means that by specifying special commands we will create bootable removable media. But first we need a flash drive with a capacity of at least 4 GB. This method is, I would say, the most difficult for beginners, since you will have to sequentially enter commands that are not entirely familiar to novice users. Therefore, you should not be afraid of these unfamiliar commands; the purpose of each command is described below.
1. Connect the flash drive to the computer, and then click on start and select the “Run” command. At the command line, you will need to enter cmd.exe and click OK. In this case, the command must be launched as an administrator.
2. In the window that opens, you will need to type “diskpart” to open the disk management utility. After the utility appears, you need to type the “list disk” command, which allows you to view the list of used disks in your PC. You will need to select your flash drive. Let’s say in my example this is disk 1. So, we write “select disc 1”. Thus, we indicate that all subsequent actions will be performed with this disk.
3. In the next step, we will need to clean the flash media to which we will write. Type the command “clean”.
4. After the message “Disk cleanup completed successfully” appears, the next step is to create a new partition by issuing the “create partition primary” command. Here we indicate to the system that in the future we will work with this particular section - “select partition 1”.
5. In order to select this section as active, set the “active” command.
6. Then, in the next step, you will need to format the partition we created on the flash drive in the NTFS file system - “format fs=NTFS”.
7. After formatting the flash drive is completed (100%), you will need to activate the process of connecting the device by specifying the command “assign letter=Z” and pressing “Enter”.
8. Then, after the “connection successful” message appears, type “Exit” to exit diskpart to the command prompt.
9. Next, you will need to insert the Windows 7 installation distribution into the DVD drive and set the command “xcopy E:Z:/s/e/h/k”, which will begin copying files from the Windows installation product to the USB flash drive.
E – Disk partition containing the windows distribution;
Z – Designation of USB storage device.
The copying process itself takes about 50 minutes. After the copying is complete, all that remains is to restart the computer and go into the BIOS. And then, having set the appropriate settings in the BIOS, you can begin installing the operating system.
II Method for creating bootable flash media
Let's consider the second method of how to write Windows 7 to a USB flash drive. The essence of this method is that to create a bootable flash drive we will need the UltraISO program, with which we will create bootable removable media with the Windows 7 operating system.
If you do not have this program installed, then you can download it from the Internet, and it is distributed on a paid basis. However, you can use the demo version of this program and use this program during the trial period.
So, open the program and click “File – Open”.
In the window that opens, you will need to go to the operating system image and click “Open”. We will look at what an image is and how to create it in one of the future lessons. By the way, let me remind you that various competitions and tournaments are held on the blog, participate and win cash prizes. To have a better chance of becoming a WINNER, you should Subscribe to blog updates so as not to miss new articles. You can read about how to properly subscribe to blog updates by following this link.
Then, in the top menu, click “Boot” and select “Burn hard disk image” from the drop-down menu.
Next, insert the flash drive or memory card into the USB port of the computer. As a result, a window will open in which you should click “Format” and select the file system type (NTFS).
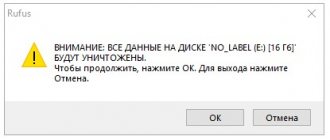
Next, click “Start” and in the window that opens, the system will warn you that all data on the flash drive will be destroyed.
Therefore, before formatting, copy the data that is important to you to your hard drive.
After formatting is successfully completed, click “Burn”.
The image will be written to a flash drive or memory card for a certain time. This method is the simplest compared to the first method.
In general, in addition to the above methods for creating bootable flash media, there are also other various methods. For example, to write a Windows distribution to a memory card or flash drive, use a utility called WinToFlash.
Plus, I suggest you also watch the live video:
The essence of this utility is similar to the previously discussed UltraIso program. That is, you open the program, specify the path to the location of the windows distribution image, copy and write. What methods of creating bootable flash media do you know? In addition, I recommend that you read the article on installing Windows 7 on your computer. From this article you will learn how to properly install the Windows 7 operating system.
Having considered in this article the question of how to write Windows 7 to a flash drive, you can thereby independently reinstall the operating system on your netbook or laptop using a flash drive.
This is where I will conclude this article. I hope the material was useful and interesting for you.
In the next article I will tell you => How I won one competition in Chelyabinsk in the Nomination...
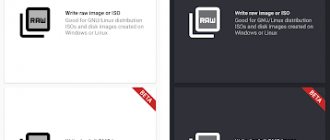
Dear users, if after reading this article you have any questions or would like to add something regarding the subject of this article or the entire Internet resource as a whole, then you can use the comment form. Also ask your questions, suggestions, wishes..
So, for today, that’s actually all I wanted to tell you about in today’s episode. I can only hope that you found interesting and useful information in this article. Well, I, in turn, am waiting for your questions, wishes or suggestions regarding this article or the entire site as a whole ==>
temowind.ru
Possible problems and solutions
Before recording an OS image, you must ensure that the drive can perform boot functions. To check this, you need to transfer the ISO file to a USB flash drive. The installation media can be made using the programs mentioned above.
If you can't create a Windows image on a USB drive, the problem may be a faulty USB port. In this case, it is better to use another input or computer.
An important factor is the availability of free space on the drive. To correctly record an image, 4 to 8 GB is required, depending on the OS version.
How to write windows to a flash drive for installation (bootable)
In this article, I will tell you how to burn an image to a USB flash drive (in this case, a Windows image) for subsequent installation of the system on a computer. Nowadays, many people have laptops and netbooks that simply do not have an optical drive, or there is no way to install windows from a disk; this is where creating a bootable Windows 7 flash drive comes to the rescue. This article is primarily aimed at these tasks.
We will write the image to a flash drive in two ways. The first method will be implemented using a very good ultra iso program, and the second using WinSetup From USB. We will start by looking at the steps to work with ultra iso, since this method is less labor-intensive and the process of creating a bootable Windows 7 flash drive will be quite fast. The second method will remain for those who, for some reason, “didn’t work out” with the first option.
Method No. 1
So, let's go. First, download the Ultra ISO program. After the program has been downloaded, installed and launched (click on the trial period if you don’t want to buy), you can begin the fairly simple process of writing Windows to a flash drive:
1. You must specify the path to the image that should be placed on your hard drive: Click “File” => Open (Fig. 1)
Fig.1
2. Then, select: Boot => Burn Hard Disk Image (Fig. 2)
Rice. 2
Next, set USB-HDD+ and click Write (if the flash drive is already formatted) (Fig. 3)
Rice. 3
Method No. 2
This method will also tell you how to write windows to a flash drive. What you will need for this option:
1. A little free time;
2. Computer (with hardware that supports booting from a flash drive);
3. Program for preparing a flash drive (download);
4. The flash drive itself (even an SD card will do);
5. An image of the operating system that we want to install.
As an example, I will show how we will record an image of the Microsoft windows 7 Home Premium 64-bit operating system onto a 4GB SD card. I would like to immediately draw your attention to the choice of operating system. If your computer has less than 4GB of RAM, then you should install a 32-bit (x86) version of the operating system, since a 64-bit version will simply clutter up the RAM with unnecessary processes.
We insert the flash drive into the USB port and format it to FAT32 or NTFS using Windows. To do this, you need to go to My Computer, find the flash drive there and right-click on its icon. In the context menu, select “Format...”. In the formatting window, select the file system FAT32 or NTFS (the latter will be better if the flash drive has a capacity of more than 4GB), and also select the cluster size “Standard cluster size” and click the “Start” button. Everything is shown in the picture:
Next, we download a small program in which we will do all the operations we need. There are several programs of this type, but I chose WinSetupFromUSB because it requires no installation, takes up almost no disk space, and is easy to use.
Let's launch the program. First, we need to select the device on which we will burn the image. This is done in the drop-down menu at the top (if the flash drive is not displayed in this menu, click on the Refresh button). Next, we need to prepare the flash drive for recording the image, because if we simply copy the image, it will be impossible to enter the system installer, because there is no boot sector. To create it, click on the Bootice button.
In the Bootice utility window that opens, click the Process MBR button, then see if the Grub4Dos checkbox is checked (if not, check it) and click the Install/Config button. In the Config Grub for DOS window, click on the “Save to disk” button, the program will display a window that the boot record has been successfully written to the drive.
We return again to the Bootice utility window, where we click the “Process PBR” button and do everything the same, without changing anything in the last window, click OK.
That's it, now all we have to do is write the image to a flash drive, this is done in the main program window, which we saw immediately upon launch. You need to check the required box - if you are going to install Windows XP, then this is the first checkbox, but if Vista or Seven - the second. Next, click on the “…” button on the other side of the checkbox and set the path where our unpacked image is stored on the hard drive, or simply mounted in a virtual drive using DaemonTools or Alcohol. Click on the “GO” button and wait until the process finishes.
Upon completion, the program will display the message “Job Done!” That's it, dear friends, you can reboot and start installing the operating system.
Also, I advise you to read the article regarding
operating system optimization.
we-it.net
Transferring Windows 7 to a USB flash drive
Burning a disc with Windows OS for further use is no longer effective. The disk can be scratched, it is not as compact as a flash drive and its service life is much shorter than that of a removable drive. Therefore, let’s look at a way to transfer Windows 7 from a computer to a USB flash drive.
There are many ways to do this. Let's look at the example of using the Novicorp WinToFlash program. It doesn't need to be installed. It is downloaded as an archive. We launch the software and accept the terms of the license agreement.
Click “Next”.
Choose a free copying method. It will differ in the speed of the program.
Next will be a series of “Next” repetitions. Afterwards, a program window will appear in which the user will be notified that the “Setup Wizard” will prepare a flash drive for copying the Windows OS to it. Click on the “Languages” button at the bottom, and then on the checkbox.
Put o and click “Next”.
Insert the flash drive and install o. Click “Next”.
Select the drive where the operating system is installed and the media to which the files will be copied. Click “Next”.
After the files are transferred, click done and remove the flash drive.
SoftikBox.com
How to burn windows 7 to a flash drive
Many users have at least once encountered the need to install or reinstall an operating system. The OS can be installed on a computer using a disk or a flash drive. The second method is being used more and more often due to its clear speed advantage (the installation process is 2-3 times faster than using an optical disk). That's why we want to talk about how to burn Windows 7 to a USB flash drive.
There are a fairly large number of ways to write an operating system to a flash drive. We want to pay attention only to those ways in which you can write Windows 7 to a flash drive quickly, simply, and most importantly, safely for your computer. In some cases you will have to use additional programs, but they are completely free and available for free download (in some cases we will use a free trial period).
How to burn Windows 7 to a USB flash drive using UltraISO
This method is very popular among users. To use it you will need:
- UltraISO program
- Windows 7 disk image in .iso format
- Flash drive with a minimum memory capacity of 4 GB
- Perseverance and a little patience
Please note that the full version of the UltraISO program is paid. However, you can safely take advantage of the trial period, which lasts 30 days. During this time you can use all functions of the program absolutely free. After downloading, install the program on your computer; this process will not raise any questions for you.
Insert the USB flash drive into the computer and launch the UltraISO program. After launch, a welcome window should appear in which we need to select the “Trial period...” mode.
Next, click “File” -> “Open”.
Select the already prepared Windows 7 ISO image and click “Open”.
After that, go to the “Boot” section and select “Burn Hard Disk Image...”.
In the “Recording method” field, you must select “USB-HDD”. Select our flash drive and click the “Format” button (note that this will delete all data from the drive).
After launching the formatting utility, a window will appear in which you need to select options for formatting the flash drive. In the “File system” item, select “NTFS” and click “Start”.
In the warning that appears, click “OK”.
After successful formatting, a corresponding window will appear.
We close the formatting window using the “Close” button and move on to directly solving the problem of how to write Windows 7 to a flash drive. To start recording, click the “Record” button.
The process of writing the operating system to the USB drive will begin. You will be able to track the recording speed, time remaining until the end of recording, and the total percentage of files already recorded.
After Windows 7 is finished recording to the USB flash drive, the message “Recording complete!” will appear. You can safely close the program and use a ready-made bootable flash drive to install the operating system on your computer.
How to burn windows 7 to a flash drive using windows 7 USB/DVD Download Tool
This program is narrowly functional and is intended only for writing an ISO image of the operating system to a USB drive or optical disk. This product does not have any other capabilities, but in this situation we don’t need them.
To burn Windows 7 to a USB flash drive you will need:
- Installed Windows 7 USB/DVD Download Tool
- Windows 7 OS disk image in .iso format
- Flash drive with a minimum memory capacity of 4 GB
The program we will use is absolutely free. You can download it from this link. Installing this software product is no different from installing other programs and should not cause you any difficulties.
Insert the flash drive into your computer and run the pre-installed Windows 7 USB/DVD Download Tool. In the window that appears, click “Browse” to select the operating system distribution.
Select the desired Windows 7 image and click “Open”.
After you have selected the prepared operating system image, click “Next”.
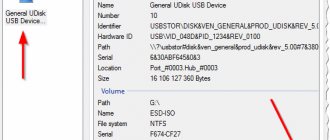
At this step of recording Windows 7 to a flash drive, the program provides the user with a choice of media (“USB device” - recording will be made to a flash drive, “DVD” - to an optical disk). Select the “USB device” option.
In a special window, select the flash drive on which you want to burn Windows 7 OS and click the “Begin copying” button to start the process.
In the window that appears, confirm the need to erase the flash drive and click “Erase USB Device”.
After this, the recording procedure will begin. The percentage indicator will show the recording status.
After Windows 7 is finished recording to the USB flash drive, the message “Status: Backup completed” will appear under the percentage scale. Close the program and use the resulting bootable USB flash drive for your own purposes.
How to burn Windows 7 to a USB flash drive using WinSetupFromUSB
Here is a very effective software solution that will help you create a bootable USB flash drive for Windows 7. In terms of complexity, this method is somewhat more complicated than the previous two, but, nevertheless, some users choose it.
You will need:
- WinSetupFromUSB program
- Disk mounting program DaemonTools or Alcohol
- Windows 7 disk image in .iso format
- Flash drive with a minimum memory capacity of 4 GB
The program we will use is absolutely free. You can download WinSetupFromUSB from this link. Installing this software product is no different from installing other programs and should not cause you any difficulties.
Run the program (preferably as an administrator), with the flash drive already connected to the computer. In the “USB disk selection and format” field, you must select your flash drive. After that, press the “RMPrepUSB” button.
In the window that appears, in the “Boot sector” section, set the selector opposite the “WinPEv2/WinPEv3/Vista/Win7 bootable [BOOTMGR] (CC4)” item. In the “File system and Options” section, set the selector next to the “NTFS” item and check the box next to the “Boot as HDD (C: 2PTNS)” item. After that, click the “Prepare disk” button.
In all warnings that appear, click “OK”. After this, a Dos window should appear, which does not need to be closed, it will close automatically.
After closing the Dos window, click the “Exit” button. Using the checkbox, you need to check the item “Vista / 7 / Server 2008 - Setup / PE / RecoveryISO” and then click on the rectangle to the right of it.
In a special window, specify the pre-downloaded ISO image of Windows 7 OS and click “OK”.
Click the “GO” button to begin the process of writing Windows 7 to the USB flash drive. When finished, the message “Job done” will appear.
conclusions
We examined in detail three effective ways to burn Windows 7 to a USB flash drive. Using the proposed methods, you can write to removable flash media and other operating systems. The first two methods of creating a working bootable flash drive are simple and convenient, the third method is more labor-intensive, so for inexperienced users we recommend using the UltraISO and Windows 7 USB/DVD Download Tool programs.
computer-info.ru