Why do you need email archiving?
There are several reasons to compress your own mail archives. The first point is safety . The archive is encrypted and sent “to the cloud”, where it is no longer threatened by intruders. The second situation is the need to rationalize the archive space. This is especially relevant when the organization is large and it is simply impossible to keep all the letters unpacked. This is not so relevant for small organizations, but for large businesses and centralized government agencies the advice will definitely be valuable.
The absolute advantage of archiving in Outlook is the centralization of accounts and the ability to implement a flexible mail permissions policy.
How to archive letters
Archiving in Outlook is a feature that moves some emails into a separate compressed archive to reduce the amount of space they occupy on your hard drive. Unlike traditional backup, which creates a copy of Outlook items, archived items are moved to a separate Outlook data file (.pst file). Archived items can be accessed at any time by opening this file.
Automatic archiving
By default, the function is activated and performs its duties after 2, 3 or 6 months, depending on the type of letters. See the table below for more details.
Table: Retention period for various data in Outlook
| Folder | Obsolescence period |
| Inbox and Drafts | 6 months |
| "Sent" and "Deleted" | 2 months |
| "Outbox" | 3 months |
| "Calendar" | 6 months |
| "Tasks" | 6 months |
| "Notes" | 6 months |
| "Diary" | 6 months |
After the first automatic archiving session, the program creates a file and a separate folder for it. In the future, you will be able to independently add letters to the archive or remove them from it. An archive created using Outlook is located by default in the Primary_drive:UserAccount_NameDocumentsOutlook Filesarchive.pst section.
To customize automatic archiving settings for yourself, follow these steps:
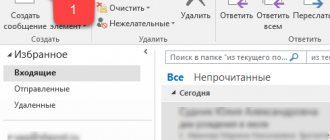
- While in the “File” tab, go to the “Options” sub-item.
Go to the sub-item “Parameters” - Go to additional program settings by clicking on the “Advanced” item.
Open additional options
- Click on the “Setting up auto-archiving” button.
Click the button “Setting up auto-archiving”
- Specify how often to check for obsolete items and what to do with them: archive or delete them. Here you can also change the path to the folder in which the created archive will be stored.
Configuring autoarchive settings
- If you want to disable autoarchiving, then uncheck the box next to the autoarchive interval settings.
Uncheck the box to activate auto-archiving
Manual archiving
During manual archiving, the “Archive” folder will be created automatically if it was not previously created during automatic archiving.
- While in the “File” tab, go to the “Information” sub-item.
Select the “Information” section
- Expand the Cleanup Tools button and select the Archive option if you are using Outlook 2013.
Select the “Archiving” function
- Or the Remove Old Items feature if you're using Outlook 2020.
Select “Delete old items”
- Select one of the archiving types: according to the automatic archiving parameters or manual configuration. Set all archiving parameters, select which folders should be archived, and click on the “OK” button to complete the process.
Specifying manual archiving parameters
Video: Archiving in Outlook
How to find out the mailbox size
Before you archive mail in Outlook, you need to check your mailbox size.
There are two main ways:
- using the capabilities of the web interface ;
- through the interface of the program itself.
To find out the mail size via the web interface, you need to do the following:
- Log in to your mailbox through a browser.
- Click settings icon (usually this is a standard gear icon), look there options.
- The account settings will usually reflect the occupancy of the mailbox itself.
In Outlook, the procedure looks slightly different:
- You need to click on the “ File ” item.
- The size of the box is indicated in the “ Details ” tab in the form of a visual graphical progress bar.
1. Information about the mailbox server storage.
The standard server quota for your mailbox is as follows:
- when the size reaches 141 MB, a warning “Your mailbox is almost full” is sent.
— when the size reaches 146 MB, receiving letters is still possible, sending letters becomes unavailable;
— when the size reaches 150 MB, both receiving and sending letters become unavailable.
How to view the current size of your mailbox: to do this in Outlook, you need to right-click on “Mailbox-full name”:
Next, go to “Properties” and click the “Folder Size” button:
The sizes of each folder in your mailbox will be shown (in kilobytes), and on the “Local data” tab - the sizes of the local copy, on the 2nd tab “data on the server” - respectively, the server mailbox. If the size of the local copy differs by more than 2 MB from the server data and the reason for this is the existing letters in the server mailbox in the “Outbox” folder, leave a request to clean this folder.
In exactly the same way, you can determine the size of the local data file (Archive folders).
In Outlook 2010, mailbox size information is also displayed on the File tab in the Mailbox Cleanup section:
Automatic archiving
Mailbox reservation is usually carried out on the Outlook client. You can configure archiving automatically or manually. For autoarchiving you will need:
- open your own Outlook account using the “ File ” menu tab of the same name;
- you need to select Cleaning Tools , and already there - “Clean up mailbox” ;
- automatic archiving button in the interface ;
- If necessary, you can configure auto-archiving of a specific folder. To do this, call the Outlook context menu Properties / Archiving / AutoArchive ;
- in the Default archive settings you can set all the necessary settings.
Exit from gmail, Yandex, mail ru mailbox
How to properly archive emails in Outlook mail
Using the Archive button will not reduce the size of your mailbox. But if this is necessary for archiving, then you should use server-based archive in Microsoft 365 for enterprise or perform archiving manually.
Of course, there is always a space limit on corporate email and the user receives his own memory limit for storing letters. If you actively use this service, sooner or later you will have to free up space in order to be able to receive new letters.
And here you can either delete them all or move them somewhere for storage (local disk). And for such storage they will have to be archived. In addition, to clear your mailbox, you will have to spend a lot of time deleting each letter individually. And to clear everything in one quick motion, you first need to create an archive. But at the same time, important data can also often fall into disarray. When creating an archive, you can set parameters based on which emails will be archived.
Archiving manually
If there is no need to automatically package all correspondence, you can create an archive manually. To do this, go to the menu File / Cleanup Tools / Archive.
In the Archiving , set the necessary parameters and click Ok .
As a result of both described methods of archiving Outlook data, the mail client will create a file with a data archive , which can be imported back if necessary, and you can also transfer the archive to any other computer.
Setting up email archiving in Outlook
The more often you receive and send emails, the more correspondence is stored on your computer. And, of course, this leads to the disk running out of space. Also, this may cause Outlook to simply stop accepting emails. In such cases, you should monitor the size of your mailbox and, if necessary, delete unnecessary letters.
However, you don't have to delete all emails to free up space. The most important ones can simply be archived. We will explain how to do this in this instruction.
In total, Outlook provides two ways to archive mail. The first is automatic and the second is manual.
Automatic archiving of letters
Let's start with the most convenient method - automatic mail archiving.
The advantages of this method are that Outlook will archive the messages itself without your participation.
The disadvantages include the fact that all letters, both necessary and unnecessary, will be archived.
In order to set up automatic archiving, you need to click on the “Options” button in the “File” menu.
Next, go to the “Advanced” tab and in the “AutoArchive” group click the “AutoArchive Settings” button.
Now all that remains is to set the necessary settings. To do this, check the “Auto-archive every ... days” checkbox and here we set the archiving period in days.
Next, configure the parameters at your discretion. If you want Outlook to request confirmation before starting archiving, then check the “Request before auto-archiving” checkbox; if this is not required, then uncheck the box and the program will do everything on its own.
Below you can configure automatic deletion of old letters, where you can also set the maximum “age” of the letter. And also determine what to do with old letters - move them to a separate folder or simply delete them.
Once you have made the necessary settings, you can click on the “Apply settings to all folders” button.
If you want to select the folders that you want to archive yourself, then in this case you will have to go to the properties of each folder and configure auto-archiving there.
Finally, click the “OK” button to confirm the settings made.
In order to cancel auto-archiving, it will be enough to uncheck the “Auto-archiving every ... days” checkbox.
Manual archiving of letters
Now let's look at the manual archiving method.
This method is quite simple and does not require any additional settings from users.
In order to send a letter to the archive, you need to select it in the list of letters and click on the “Archive” button. To archive a group of letters, you just need to select the required letters and then click the same button.
This method also has its pros and cons.
The advantage is that you choose which emails require archiving. Well, the downside is manual archiving.
Thus, the Outlook email client provides its users with several options for creating an archive of letters. For more reliability, you can use both. That is, first, set up auto-archiving and then, as needed, send letters to the archive yourself, and delete unnecessary ones.
We are glad that we were able to help you solve the problem. Add the Lumpics.ru website to your bookmarks and we will be useful to you. Thank the author and share the article on social networks.
Describe what didn't work for you. Our specialists will try to answer as quickly as possible.
Did this article help you?
NO
Moving to a network archive
A network archive is a pre-organized storage facility on a local network or the Internet. Typically, unnecessary email messages are moved there. Moving to a network archive is organized in different ways. time interval can be set for packing documents, but I can also use the overflow principle . That is, after a certain period of time, the documentation is placed in storage. Either the disk is filled to a set volume - and the packaging and movement of materials also occurs.
Using the web interface, you can send correspondence to the network archive as follows:
- open Outlook through a browser ;
- in the “ Inbox ” folder, select the letters that need to be moved ;
- click “ move ” in the web interface;
- letters will start moving . A large archive is sent in tens of minutes.
It should be noted that most web access interfaces are organized in such a way that they resemble the mailers of “big” companies like Google. And the navigation menu is usually organized similar to standard Windows Explorer. Therefore, there are usually no difficulties in mastering the procedure.
On a computer in Outlook, you can archive letters as follows: go to any folder containing letters , select the correspondence you are looking for, then in the context menu click Move - desired folder. Using the Ctrl and Shift keys the process is slightly automated: with the Shift button held down, all letters are selected (select a letter, hold down Shift and click on the last element of the desired selection), with Ctrl - each subsequent letter is added to the selection. However, these are standard hotkeys for many programs.
How to use Outlook and what it is
Set up outlook archiving in a minute
Good afternoon, dear readers and guests of the blog, we continue our study of email programs. In my practice, I have seen a huge number of them, and I can say for sure that the best thick client (this is the one installed locally on your computer) is Microsoft Outlook, and yes, that is it, since apart from it, with a large number of letters, no one is stable can't work, so don't write to me thunderbird. Last time we solved the problem with the search not working, today we’ll figure out how to set up archiving in Outlook , let’s go.
How to connect an archive on another computer
Subsequently, you can connect the archive in any version of Outlook, including 2010, 2013, 2020:
- We copy the archive file with the pst extension to another medium via Explorer or other file managers.
- Open Outlook on the “machine” where you want to restore.
- Select “ Open and Export ”.
- In the file opening menu that appears, look for the directory for the copy of the archived document and select the file you are looking for.
Admin Notes
Hello everyone, earlier I mentioned in my article how to restore an Outlook 2010 archive folder in the program interface. Today there will be instructions on how to connect an archive file with the pst extension; this data file stores information about incoming or outgoing letters, depending on what was saved to this file. Over a long period of time, the mailbox on the computer increased to a critical size, and a situation also developed that the archive of letters also exceeded the permissible size, as a result of which it was decided to create a new archive file with the pst extension but with a different name. But how can I make sure that two archives (data files with the pst extension) are in the program and that I can read archived letters from several archives?
So, if we click on the file menu item, in my case the mailbox is full and archiving is required.
Click the Archive button, only in the Archive File line:
We write a new file name - arbitrarily, for me it is archive22.pst, I also set the archiving of elements until a certain date - Monday February 29, 2020 - all letters that were created before this date will be archived.
Now, to connect two archive files in Outlook, go to File – Open and Export tab – Open Outlook data file (.pst)
When you select this item, a dialog box appears with the choice of the included file, let’s say the newly created archive file is called archive22.pst, and the old backup.pst - which means we need to select backup.pst
so that the letters stored in this data file are loaded into the program. After selecting a file, the Outlook email program takes some time to download all the files from the archive. As a result, we get two archive folders on the left in the navigation panel: These are Archive folders - the newly created archive (Archive22.pst), Archives (backup.pst)
If mail has been accumulating for a long time, then you can similarly archive incoming and outgoing correspondence by year (for example, 2014,2015,2016) and create 2014.pst files, etc. Connect archives to the program using the above method and rename the names by right-clicking on the folder name - then data file properties
In the “Folder Options” information window, click the additional button:
In the General tab, change the name to the required one, for example, to the year of stored archived letters, for example 2014
By splitting the archives into several files, we managed to reduce the main database of letters, and also split the archive into several files. We created a catalog by year of storage of letters. And we got rid of the long loading time of the program when it starts.
In any unclear situation with the Windows operating system, the easiest way is to reinstall the operating system. However, if you have little experience or have never reinstalled such programs, then it is better to turn to professionals. This will reduce the time it takes to restore your computer to working order and save your nerves and finances; in every city there are service centers that have been providing these services for years, for example, installing Windows in Zhitomir is carried out in the shortest possible time, quickly, efficiently, and most importantly reliably and professionally.
How to Archive Outlook Mail
One of the latest innovations of computer developers is the creation of such a service as mail archiving. This service allows you to save incoming and outgoing letters in a separate folder. How to archive Outlook mail
Instructions
1. Save incoming and outgoing emails on your computer if you use the standard option in your Microsoft Outlook operating system. This may be necessary when all incoming and outgoing emails are transferred to another medium or when each system crashes. In the program window, go to the “File” menu and select “Open” from the proposed list of folders. In the dialog box, specify the Export to File options, select Outlook Data File. Be sure to indicate the file names of your letters and indicate the date of creation of these letters. 2. To archive a letter, select it, click on the empty square and then click on “Archive”. Select one of the suggested options: “Archive the folder according to the autoarchive settings” or “Archive the folder and all its subfolders.” In the special field, enter the archiving date. Several archived letters from the same recipient will form a chain, and you will be able to manage them with one click of the mouse. Manage all archived emails yourself, as they are all stored in the Every Mail section. Archived emails are stored permanently, while deleted emails are stored every thirty days. 3. If you want to place the archived emails in another file, click “Browse”. For example, select several letters in a chain or one letter to move and click “Place to inbox.” Click “Ok” at the end. 4. If you do not use programs that access mail servers, use the most common universal mail service today, Gmail. It allows you to archive incoming and outgoing mail and stores it on its server. This will allow you to save additional disk space. The server can also combine several mailboxes at once.
When the need arises to clear space in your mailbox, you don’t have to strictly delete existing letters . The thing is, there is another method: you can easily archive them.
Instructions
1. All stages of this procedure can be analyzed using Gmail as an example. First, log in to the system (enter your username and password). After that, go to your inbox. Next to the message you want to move, check the box next to it. Above the list of all emails you will see a toolbar. Click on the “Archive” button. By the way, if you want to archive a message that is currently open, you do not need to go to the general list: easily click on the button located above the letter itself. Please note that archiving only means moving it to the Every Mail folder, not deleting it. 2. To view archived messages, follow the “Every Mail” link (located on the left side of the page). You can easily find such a letter later due to the search function or the label assigned to it. 3. Don’t be surprised if after some time the message you archived appears in your inbox again. The reason may be that it received a result, and therefore the chain began to be displayed again. 4. As already mentioned, similar messages are transferred to the “All letters” folder. However, its volume is also limited, as is the volume of the electronic box. Therefore, it is allowed to keep letters there, although they are long, but not all of them. If it is overloaded, then something will still have to be erased. To do this, open the desired message, check the box next to it, and then click “Delete”. This way you will get rid of each chain of letters at once. 5. In addition, you can delete an individual message. In order to complete this procedure, you must open a chain of letters and select what is necessary there. You'll see a down arrow icon next to the Reply button. IT is located in the upper right corner of a special panel. To conclude, click on the “Delete this message” column.
Recovering items from a data file
Restoring items by dragging and dropping from a pst :
- Select Open command File , and then select the Outlook Data File .
- Click on the required pst file and click OK.
- The folder name associated with the data file appears in the folder list. To view a list of folders, select List of Folders Go menu . The default name is "Personal Folders".
- Move or copy files from the open folder to the folder where you want to restore the items.
- To close a data file folder, right-click it and select Close "folder name" from the context menu.
Recovering items by importing a pst file:
- In Microsoft Outlook, select Import and Export from the File menu .
- Select Import from another program or file and click Next.
- Select Personal Folders File (.pst) and click Next.
- In the "Import from file" field, specify the path to the .pst file to import and its name.
- Select one of the values:
- "Replace duplicates when exporting." If there are duplicates of the data in the pst file in the folder into which the data is being imported, the data will be overwritten by the data in the pst file;
- "Allow creation of duplicates." Data existing in the folder where you import will not be overwritten by the data in the pst file. They will be saved;
- "Do not import duplicates." Data existing in the folder where the import is performed will be preserved and duplicates from the pst file will not be copied to that folder.
- Next, follow the instructions of the Import and Export Wizard. Items from the pst file will be copied to the specified folder.