Description
Available as an open source networking tool, it offers you various standard services such as serial terminal communication, Telnet, Rlogin, as well as secure file transfer via SCP and SFTP. Download PuTTY Russian version allows you to select the name of the Internet host server with which you want to establish a connection. This application provides five protocols to choose from, i.e. Telnet, Rlogin, Serial and Raw. The first three are used for entry. On the other hand, Raw can be used as debug and serial to connect to a local serial line.
Once the Configuration window appears, you need to enter the hostname (or IP address) for the server you want to connect to. After this, you can select the correct port number in the Port field. In the Saved field, you can specify a name for the session by entering a title and clicking Save. The session name appears in the list.
Download PuTTY for Windows 10 is one of the best remote access programs that offers you a submenu of special commands depending on the one you are using. These commands are intended to provide security. In addition, the SSH client can connect to multiple resources and even supports via a proxy server.
Once you've configured everything, the program saves the host servers and their corresponding settings in order to give you fast and accurate communication between your systems. Additionally, the latest version supports a variety of encryption algorithms such as Blowfish, AES, DES, and Arcfour, among others.
Especially designed for programmers and system administrators, the application has a simple and intuitive interface. The remote monitoring software has the ability to connect via the Internet, and its rich feature set is large enough to meet the needs of professional users. It is easily customizable and includes a number of options, security features and even window appearance.
Network tool for PC describes its comprehensive configuration panel to help you set up and manage sessions and connections along with the terminal and the window that wraps it. You can easily select your connection type and set logging options for the selected session.
There is a section that deals with several general settings along with line discipline options and remote print control. You can also set keyboard actions, alarms, and advanced terminal, translation, behavior, selection, or window color features. What's more included in the full version is that its scope configures low-level TCP connections, login details, Internet protocol version, environment variables, proxy type, and other specific settings.
In addition, the logging feature saves every keystroke and terminal response in real time, allowing you to save or send a log file for further analysis. This is software that is designed to manage multiple servers. Download PuTTY for Windows 7 now and establish a PC-to-PC connection over the network.
How to use PuTTY
Program interface
Immediately after launching the program from the start menu, you will see a graphical interface for its configuration. After connecting, you will only see the terminal, but you can configure the program through a convenient interface.
Let's look at what these or those program tabs are responsible for, so that you can know what and where to look. We have four tabs:
- Session - is responsible for connecting to a remote server, here we enter connection parameters, port, address, and we can also save all putty settings so as not to configure it again each time.
- Terminal - allows you to enable or disable terminal capabilities;
- Window — setting the appearance of the window, color, font, encoding;
- Connection - configure connection parameters, encryption algorithm, compression, authentication keys, X11 and other parameters.
Each tab has several subsections, but we will not touch them now, but will go straight to practice and see how to connect putty to a remote node.
Connecting to a remote computer PuTTY
To connect to a remote computer via SSH, go to the “Session” , here, in the “Host Name” , you need to enter the ip address or host name of the computer you want to connect to, in the port field - you need to specify the port on which SSH is running server, port 22 is used by default:
Next, click the "Open" . After this, a request will appear to add the server key to the list of trusted keys, click “Yes” :
Then you will need to enter your username and password. It is important to note that you will not be able to copy your login or password; you only need to enter it manually:
Now the authorization has been successful, and you can perform the necessary actions on the server:
Saving a PuTTY session
In order not to enter the ip and port every time, you can save this data as a session, to do this, enter a new name in the “Saved Sessions” , and then click the “Save” :
You will now be able to load your saved session by clicking the "Load" .
After the putty setup is completed and all parameters are set correctly, you can save the settings and not enter them several times.
Default username
You don’t have to enter the username every time; to do this, go to the “Connection” , then “Data” and in the “Auto-login Username” enter the user name, for example, root:
Now the putty connection will be performed on behalf of this user.
Authorization using ssh key in PuTTY
In order not to enter a password every time, you can set up authorization using a key. In Linux, this feature is used very widely because it is convenient. The first step is to create a key. To do this, run the PuTTYgen utility and set the switch to the “SSH-2 RSA” and click “Generate” :
The key must be SSH-2 RSA; if it is not in the main window, select “Key” . Move your mouse to create enough entropy:
The key is ready, then use the “Save Public Key” and “Save Private Key” to save both keys.
Next, open PuTTY, go to the “Connection” , then “SSH” , then “Auth” :
Here you need to click the “Browse” and add the recently saved private key:
Next, return to the “Session” , select our save and click “Save” to save the settings. All that remains is to send our public key to the server. To do this, log in to it using a password and paste the public key at the end of the /root/.ssh/authorized_keys file.
The key can be taken directly from the PuTTYgen “Public key for pasting” or from the public key file:
That's it, now you can log out and log in again. This time the connection via ssh putty will be performed using our key. Don't forget to save your session settings so you don't have to select a key every time. Now you know how to use putty, let's look at transferring files.
Transferring files via scp in PuTTY
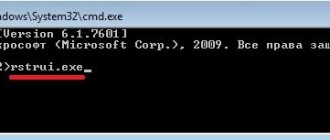
Not everyone knows, but PuTTY allows you to transfer files via ssh just like Linux does using the scp utility. Press Win+R, then type cmd to launch the command prompt.
The pcsp utility syntax is as follows:
pscp options filepath username@host:/path/to/file/on/remote/host
For example, we can send a file from the current folder to the user's /root/ folder:
pscp test.txt [email protected] :/root/
You can use the -P option to set the remote port:
pscp -P 2250 test.txt [email protected] :/root/
And the load option allows you to load saved PuTTY session settings:
pscp -load losst-2 test.txt [email protected] :/root/
Now you know how to use putty to transfer files.
Main characteristics
- Stores every terminal response and keystroke in real time
- Free SSH implementation for Unix and Win32 platforms
- Provides full control over SSH version and encryption key
- Supports various network protocols
- Supports simultaneous connection to multiple servers
- Will be able to save or send log files for further analysis
- Can act as an SSH tunnel for X11 traffic
- SSH provides a connection between the user's computer and the remote computer
- Allows you to transfer files from one system to another using the SCP and SFTP protocols
- Can be used as an XTerm terminal emulator
- Customizable
- Hosts can be saved for later use
WinSCP
This will be the last SSH client we reviewed. You can download it from the link:
https://www.bestfree.ru/soft/inet/ssh-manager.php
Its peculiarity is that it provides an encrypted connection only to FTP servers.
Launch the program. The start window looks like this.
The interface is similar to Putty.
To connect to a remote server, enter the following parameters:
- Protocol used
- Login and password
- Connection port
- Server address for connection
When you enter all the data, click the “Login” button. The session will be activated.
Video for the article:
Bottom line
Download PuTTY for Windows 10 is one of the most useful tools that allows you to connect clients to a host or terminal system. This is a client program for SSH and Rlogin. Everything can be used to run a PC over a network. Additionally, SSH is used to securely connect your system to another. It is most often used with Unix, so you can work from your own machine just as if you were sitting right in front of that PC.
Every setting you make can be saved, making it easy to connect to many servers. PuTTY is a robust tool that comes with source code and is maintained by a group of volunteers. The application is compatible with almost all Windows, including XP, 7, Vista, 8, 8.1 and 10.
With a complete list of supported protocols and their execution speed, the access software allows you to send commands from one computer to another without any glitches. Overall, download PuTTY in Russian, which has proven its worth as a vital tool for system administrators who are looking for a powerful one.
PuTTY Settings and Commands
Almost all of the program's functionality boils down to its ability to interact with one or another remote access protocol. PuTTY currently fully supports the following communication protocols:
- SSH-1 and SSH-2. Authentication on servers with RSA and DSA public keys is supported. It is possible to import and export SSH-2 private keys in OpenSSH and ssh.com format. To perform this task, a separate utility “ Puttygen ” is used, which is installed on the computer along with the main program.
- Telnet. The protocol most commonly used to connect to the command line interface of various operating systems, including Windows. All the nuances of using Telnet are taken into account in PuTTY.
- A network protocol used for connecting to computers and network equipment running UNIX systems. PuTTY is one of the best (if not the best) programs that provide interoperability between Windows PCs and UNIX systems.
- Serial. Serial port (or COM port, RS-232). One of the purposes of the PuTTY utility is to connect and manage local equipment connected to the computer via COM ports. Such equipment includes, for example, UPS (uninterruptible power supplies), cash registers, various security system devices (for example, stationary metal detectors) and much more. In addition, the PuTTY program is capable of emulating computer terminals (TTYs) - specialized physical devices for connecting to a local/remote computer or computer equipment via RS-232.
- Raw. T.N. “raw sockets” are a special type of sockets used, for example, when testing network equipment or applications being developed.
- SCP (Secure Copy). A network protocol used to copy files from/to a remote computer using the secure SSH protocol. To start an SCP communication session, a separate program “ PSCP ” is used, which is installed with PuTTY.
- SFTP (SSH File Transfer Protocol). A protocol for copying and performing other operations (creating, deleting, renaming, etc.) on files stored on remote FTP servers. As in the previous case, a separate utility “ PSFTP ” is used to work with SFTP.
The PuTTY client is designed in such a way that each of the listed (and not mentioned) protocols can be finely tuned by the user depending on the specific situation. The very ability to make these settings speaks to the versatility of using the PuTTY utility.
Connecting via SSH using PuTTY
Launch PuTTY and specify the necessary details for connecting to the server in the settings window:
Host Name - enter the IP address or server name (listed in the account control panel);
port - 22 (default).
You can save the parameters of this session to simplify future connections by entering any convenient name in the Saved Sessions field and clicking Save.
Then click on the Open .
the first time, you will see an additional window to confirm the connection - click Yes .
Next, a console will open where you will need to enter your username and password:
login as — enter your login from the account control panel;
password — enter (or copy, see below) the password from the account control panel (be careful when typing, as the password characters will not be reflected on the screen).
Then press Enter . If all data is entered correctly, the connection will be established.
Then you can enter the necessary commands in the console window. More information about basic commands is available in the article Basic SSH Commands.
Copy and paste
It is impossible to use the usual combinations Ctrl+C and Ctrl+V in the Putty console window.
- To paste copied text (such as a password or command) into the Putty console, simply right-click. You don't need to press anything additional.
- To copy text from the Putty window, select it with the left mouse button. The very fact of selection will copy it to the clipboard.
Additional information and instructions for working with PuTTY to make its use as convenient and efficient as possible can be found in the official documentation, as well as in numerous open sources on the Internet.
Top
Linux and Windows: help for administrators and users
I already talked about the PuTTY Connection Manager program in one of the articles. One of the most important features of PuTTY CM is the display of multiple sessions in tabs. In this article, I'll share 5 more great features that PuTTY Connection Manager allows you to do.
Feature 1: Display multiple PuTTY sessions in tabs
If PuTTY Connection Manager opens the original PuTTY window in a separate window, instead of opening the session in a tab, go to Tools -> Options -> Check the box “Enable additional timing for PuTTY capture (ms)” -> set the value to 500 ms.
[cut]
Feature 2: Dockable windows in PuTTY sessions
In addition to displaying multiple sessions in different tabs, PuTTY CM can also display different sessions in one panel.
In the example below, I move the qa-box session to the bottom pane of the window. To do this, you need to left-click on the qa-box tab and hold the mouse until the pointer changes to a cross (or you can call it a plus) in the middle of the screen. Click on the bottom of this cross with a pointer and the qa-box session will be transferred to the bottom panel.
As a result, we have the following picture:
Using a similar technique you can move all PuTTY sessions into one panel.
Function 3: Encrypt the PuTTY configuration database
By default, information about PuTTY sessions is stored in the Windows registry in clear form. If you want to encrypt this information (ip addresses, session names, etc...), you must use the encryption function available in PuTTY CM
- Download the AES encryption library (pcmcrypt.dll) from the PuTTY CM website.
- Place this file in the C:\Program Files\PuTTY Connection Manager folder (default)
- Restart PuTTY CM
- Go to the menu Tools -> Options -> Database -> in the Encryption section the “AES Rinjdael Managed” algorithm should be available, indicating that the library has been successfully installed.
Click File -> New -> Database and enter the relevant information as shown below to create a secure PuTTY database:
- Database name: putty-secure-sessions
- ABOUT
- Select “AES Rinjdael Managed 256 bits”
- Enter a strong password for the database.
- Click 'Create database'.
- Click File -> save database to save the database to a file.
- Now the 'putty-secure-sessions' database will appear in the right window.
- Next, right-click on 'putty-secure-sessions' -> Click New -> Click Connection to create a new secure connection.
Feature 4: Automatically start a PuTTY session
After you have created a secure database using the method described above, you can establish an automatic connection to the required servers. In the right pane, select the desired connection, right-click on it and select Configuration, check the 'Enable Macro' checkbox.
In the same configuration window, click 'Login Macro' and enter your username and password.
Now, double-clicking on the desired connection will automatically connect.
Function 5: Commands executed after connection
You can also specify commands that will be automatically executed after connecting to the server. This setting is performed in the same 'Login macro' window in the 'Post-login command' section. Check 'Enable post-login commands' and enter the required commands.
Guard
Beauty studio - hair extensions with a guarantee, eyelashes and nails. Only experienced and professional craftsmen. The salon is conveniently located in the center of Moscow (Tretyakovskaya metro station), and a specialist can come to your home or office.
Stop using shitty hosting sites and become the master of your website. Place your server in the Dinet data center. You simply won't find a better price/quality ratio.