" Peripherals
Anton Nazarenko 05.29.2019
Let's look at the most effective methods on how to completely remove a virus from a flash drive and not lose important files.
Using USB drives is a simple and convenient way to quickly move any files between devices.
In addition to all the advantages, there is also a negative side - rapid infection with the virus.
It is enough to connect the drive to an already infected computer so that the virus is added to the flash drive without any visible signs.
The malware's goal is to spread infected code to other computers. This code can have a variety of purposes - from stealing your data to using your computer for mining.
Types of shortcut viruses
Today, there are two most common types of viruses that create shortcuts: the first create shortcuts instead of files and folders on a flash drive or memory card, others create shortcuts to removable drives instead of the flash drives themselves, external USB drives and memory cards.
Names of the most common viruses:
- Bundpil.Shortcu;
- Mal/Bundpil-LNK;
- Ramnit.CPL;
- Serviks.Shortcut;
- Troj/Agent-NXIMal/FakeAV-BW;
- Trojan.Generic.7206697 (B);
- Trojan.VBS.TTE(B);
- Trojan.VBS.TTE;
- VBS.Agent-35;
- VBS.Serviks;
- VBS/Autorun.EY worm;
- VBS/Autorun.worm.k virus;
- VBS/Canteix.AK;
- VBS/Worm.BH;
- W32.Exploit.CVE-2010_2568-1;
- W32.Trojan.Starter-2;
- W32/Sality.AB.2;
- Win32/Ramnit.A virus;
- Worm:VBS/Cantix.A;
Antiviruses for phones
There are quite a lot of good antivirus programs that work on smartphones and tablets.
A prominent representative is Kaspersky Internet Security, which can be downloaded from Google Play and the Apple Store. We will consider its operation using the example of a device running Android OS.
Step-by-step instructions for using this antivirus program are as follows:
- First, Kaspersky Internet Security needs to be downloaded and installed. To do this, go to the Google Play page and complete all the operations described above. There's nothing fancy here, and the app installs just like any other.
- Then click on the icon to reveal additional functions. Initially, it is a circle with an upward arrow. After clicking, a down arrow appears. These additional functions will appear. From the entire list we will need “Verification”. So just click on the magnifying glass picogram with this inscription.
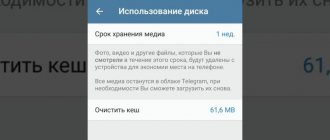
- In the next window, you just need to click on “Check folder”. This will give us the opportunity to check the memory card and all the folders on it.
- Now, in fact, a window will be displayed with options for checking a folder in the device’s memory or on the built-in card. We need a second option. Therefore, at this stage you should click on the magnifying glass next to the words “Built-in memory card”.
That's all. If any viruses are detected on the memory card, you will be asked to delete them or quarantine infected files.
Everything happens exactly the same as when working with the version in Kaspersky Internet Security for personal computers.
Clue:
If no viruses were found on the memory card, perform a full scan of the entire device. This means that the problem is not with the built-in card.
Recovering data deleted by a virus
To reliably recover data deleted by this type of virus, use Hetman Partition Recovery. Since the program uses low-level disk functions, it will bypass virus blocking and read all your files.
Download and install the program, then analyze the infected flash drive or memory card. Perform data recovery before cleaning the media from the virus. The most reliable treatment option is to clean the flash drive using the DiskPart command; this will delete all information on it.
Vaccination of flash drives
A flash drive vaccine is a kind of software protection in the form of a special file (Autorun.inf). It prevents the virus from “settling” on the flash drive: it blocks its functions. Used exclusively as a prophylactic and warning agent on “healthy” USB drives. It is created manually and using special programs. We will get to know some of them better.
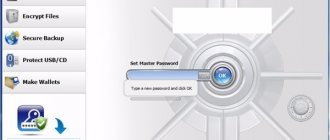
Panda USB Vaccine
A utility from the famous antivirus company Panda. Has a volume of less than 1MB. However, very useful. Available free of charge on the official website. After launching USB Vaccine for the first time, in the panel, check the boxes next to “Hide tray icon...” and “Enable NTFS...”. And then click “Next”. Connect the USB flash drive and click the “Vaccinate USB” button in the application window.
Autostop
Does not require installation. Runs in the MS-DOS console. At the request of the user, he can not only “vaccinate” the flash drive, but also disable autorun by changing the registry settings, and prohibit writing data on the media.
USB Defender
An efficient GUI tool. Activates USB storage protection in one click (and disables it in the same way). Carefully hides the presence of the “grafting” AUTORUN.INF on the flash drive.
Let your USB drives avoid viruses!
distributed using Autorun.
). It is transferred to a flash drive from your computer as soon as the media is inserted and hides your folders and files. Turns them into shortcuts and thereby blocks access.
It is problematic for the average user to deal with it, especially if deletion is required without data loss.
Typically, such viruses are harmless in themselves. They simply hide files and spread to other media.
You can remove a virus from a flash drive using almost any antivirus program, and infection most likely occurs due to its absence. This also applies to the memory card.
Here are a number of signs that your device is infected:
- Labels instead of folders.
- Missing information.
- It is impossible to open the flash drive ( but most likely another reason
). - Unknown files with .exe extension.
- File autorun.
- Hidden RECYCLER folder.
Remember that these problems can occur not only if the virus is on a flash drive, but also on a computer or other device. Other unpleasant things can also happen. In this instruction I will show 2 ways to remove this virus, but of course the fastest and easiest way is this. Only suitable if you do not have valuable information on it.
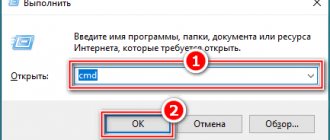
Removing a virus from a flash drive using the command line
This method does not guarantee to clean the flash drive from all types of viruses, but it can remove a virus that creates shortcuts instead of files. You will not need to download and install third-party utilities; removal is done using the tool built into any version of Windows.
- Click right click on the Start menu
and
run command prompt as administrator
. - Enter the command f:
and press
Enter
(where f is the letter of the flash drive infected with the virus). - Enter the command: attrib f:*.* /d /s -h -r –s
and press
Enter
:- –h: shows all hidden files on the flash drive;
–r: removes the read-only option;
- –s: removes the system parameter from all files.
Removing the virus
When the scanning is completed, the following window will appear in front of you:
Obviously, you should click the “Disarm” button. Then restart the system and try to open the contents of the flash drive again.
There is another method to recover data after manually removing the virus. This path is suitable for users who have at least some knowledge of basic Windows settings.
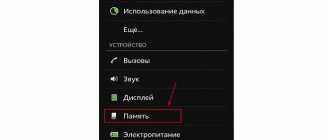
- Open the “Control Panel” and go to the “Folder Options” section.
- Go to the “View” tab, scroll through its contents and put o at the bottom. This will allow you to see the elements that the malware is hiding.
- Now open the “damaged” external drive in Explorer and call the context menu on any shortcut folder. Select the “Properties” item:
- In the “Target” field we see a long path, from which it becomes clear that one of the viruses has settled in the exe file of the folder
- Delete the above directory from the external drive. I recommend checking another path to see if this folder appears: C:\users\your_user_name\appdata\roaming.
After these steps, part of the problem will be resolved. But we have yet to recover the data that has become hidden.
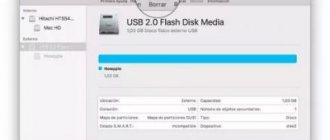
Method #2: formatting
(removal of all data - virus and user files)
Note. This option is appropriate to use when there is no valuable information on the media or when it is not possible to remove the virus from the flash drive using other methods.
1. Make sure that AutoPlay is disabled on your computer. And then connect the infected media.
2. Press the “Win” and “E” keys simultaneously.
3. Hover over the USB shortcut. Click the right button. In the system menu, select “Format...”.
4. In “Formatting...” set the following values in the settings:
- "File system" - NTFS;
- “Cluster size” - “Standard size...”;
- “Volume Label”—the name of the flash drive (optional; you don’t have to change it);
- “Format methods”: in the “Quick” box, check the box to perform superficial (quick) cleaning.
5. Click the "Start" button.
6. In the additional window, confirm the action: click “OK”.
7. When the procedure is complete, in the “Formatting...” window, click “OK” again.
8. In the settings window, click “Close”.
Now the flash drive is clean and ready for full use.
Protecting a flash drive from viruses: useful tips
What this and the previous programs have in common is that they protect not a flash drive, but a separate computer. In general, we strongly recommend combining methods of protection against autorun viruses: firstly, vaccinate the flash drive, secondly, install an antivirus on your computer and, without fail, one of the above-mentioned programs.
Finally, some tips on the topic. By following them, you will certainly protect your computer from autorun viruses.
- If possible, do not give your flash keychain to anyone for personal use. This way you will protect yourself from autorun viruses. And if you really want to share, don’t forget to copy all the important data from the flash drive to your computer.
- If viruses have blocked access to files or writing to a flash drive has become impossible, see the guide on how to remove protection from a flash drive
- Check the drive for viruses immediately after inserting it into the USB socket by selecting the scan command from the context menu.
- If possible, do not open removable media by double-clicking or through the “Open...” window. Use the Total Commander file manager or other file managers when working.
- Nowadays this is rare, but on some flash devices manufacturers include a file write protection button. If you copy information from a flash drive to a computer (and not vice versa), it would be a good idea to switch to this mode.
- If you hold down Shift for 10 seconds when connecting a removable drive, autorun will not work, even if this function is activated on the computer.
Malwarebytes
Another very effective antivirus that can find any malicious object on your computer (in particular a USB drive). Let's look at how to check a flash drive for viruses using it:
- In the left side menu, select the check item. In the central part of the window, click on custom scanning and press the button to configure it. Check the boxes as shown in the screenshot and select the drive that will be scanned.
- After this, we wait for the analysis to complete and, if necessary, remove the threats found.
As in previous cases, you can check our flash drive using the context menu in Windows Explorer.
How to manually remove a virus that creates shortcuts from a flash drive?
Now a few words about what you can do if you don’t have a single suitable tool at hand. How to remove a virus from a flash drive in this case? This will require manual intervention. Some users find this a very difficult and tedious procedure. But actually it is not. First of all, through the RMB menu, check the properties of a folder that is shown as a shortcut. Here on the shortcut tab, pay attention to the “Object” field - there may be a long path in which the name of the previously mentioned RECYCLER directory (or some other) can be entered with the addition of the name of the EXE file. Try to delete the specified folder yourself. If this turns out to be impossible, use the Unlocker utility. After that, just in case, go to the AppData directory of the user directory on your hard drive, then check the Roaming folder, since the virus can migrate there, and after removing it from the removable media, copy it spontaneously to the flash drive again.