MS-DOS (Microsoft Disk Operating System) is a disk operating system for computers based on an x86 processor. In the period from the early eighties to the nineties of the twentieth century, MS-DOS became the most popular operating system for personal computers, capable of working with various types of disks, performing data input and output, performing memory operations and controlling processes.
In 1981, Microsoft acquired the copyright to the 86-DOS operating system from Seattle Computer Products and began modifying and adapting it to IBM's requirements. A short time later, IBM released an operating system called PC DOS 1.0 as the only available option for use on your own computers, licensed by the brand owner. MS-DOS from Microsoft and IBM were practically no different from each other, however, in recent years of cooperation, developments have acquired fundamental differences in compatibility with various peripheral devices, command syntax and capabilities provided to the end user.
As an independent product, MS-DOS went through a number of updates and revisions over two decades, after which work on it was stopped. Each new version expanded the capabilities, ensuring the functionality of new storage media and larger files.
For Microsoft Corporation, operating system development has become the main activity, which brings stable profits and provides resources for further improvement and development. Windows 95 and 98 were developed and implemented on the basis of MS-DOS, and the system itself was positioned as flexible and taking up relatively little disk space.
A Brief History of MS-DOS
In the summer of 1980, an operating system written by Tim Patterson of Seattle Computer Products and called 86-DOS was released. It had three fundamental differences from CP/M - the prototype OS from Garry Kildall and Digital Research:
- Ability to work with sixteen-bit processors (Intel x86) instead of eight-bit ones (Intel 8080 and Zilog Z80);
- Innovative (improved) disk sector buffering logic;
- New FAT12 file system.
IBM Corporation could not cope with the development of software for the computer planned for mass production, so it was forced to enter into a contract with Microsoft. According to the contract concluded in the fall of 1980, Microsoft was obliged to complete the creation of software for the first production PC based on the Intel 8086.
Microsoft hired 86-DOS creator Tim Patterson in May 1981 to complete the project. And just two months later he bought the copyright to Patterson’s promising development.
Since August 1981, users of personal computers have been able to fully experience all the capabilities of the new product. Boot diskettes were included with each machine. Initially, MS-DOS did not have a graphical interface. The work was reduced to entering user commands manually. After loading the OS, a white cursor on a dark background blinked on the screen. By improving the system, the developer is able to achieve high results.
After several intermediate software versions, version 2.0 is released. It was timed to coincide with the launch of the IBM PC/XT machine with HDD into mass production. The system has significantly expanded its functionality: subdirectories and directories have appeared, interaction and exchange between I/O devices, and addressing requests to peripheral equipment by name.
The modular operating system was equipped with a minimum of drivers. Everything necessary for stable operation of the software, peripherals of other models and brands, became available after loading MS-DOS on the PC. Microsoft supplied various developers with a basic kit, based on which each made their own changes in accordance with the capabilities of the hardware.
The development of IBM computer technology has led to the fact that the need to adapt the operating system to the hardware has disappeared. All devices produced by IBM were equipped with PC DOS. Basic MS-DOS was available to other personal computer developers. The end of the contract between IBM and Microsoft led to fundamental differences between the systems starting in 1991.
What is the DOS operating system
The abbreviation DOS stands for Disk Operating System and denotes an operating system designed to work with disk drives, such as floppy disks or hard drives.
Logo of Free DOS - the most popular DOS operating system at the moment.
The DOS operating system typically supports multiple file systems and allows the user to read and write data to files on storage devices connected to the computer. In addition, the DOS operating system provides other computer functions. In particular, it controls the display of information on the screen, ports, memory operations and running programs.
The appearance of the term DOS is due to the fact that the first versions of computers were not equipped with hard drives and ran on diskless operating systems. Such computers required loading data using magnetic tapes, punched cards, jumpers, or a keyboard, which meant that only experienced professionals could operate them.
The first disk operating systems appeared in the early 60s and were actively used until the end of the 80s. During this time, many different operating systems have appeared that fall under the definition of the term DOS. The most famous of them are:
- MS-DOS is an operating system from Microsoft that is based on 86-DOS from Seattle Computer Products. It first appeared in 1981 and was used until the mid-90s, when it was supplanted by the first versions of Windows.
- PC DOS is an operating system from IBM. Appeared in 1981 as a revised version of MS-DOS 1.0.
- Free DOS is a free and open source operating system developed by programmer Jim Hall. The first official version of FreeDOS appeared in 2006.
In modern conditions, operating systems of the DOS family are hopelessly outdated and completely supplanted by such graphical operating systems as Windows, Linux, MacOS and others.
Basic Concepts
A disk operating system is a set of software tools for ensuring the operation of a personal computer.
Drivers are programs integrated with the OS and designed to control peripheral devices.
A file is a named area of interrelated data with a set of specific properties, which is stored on various media and can be processed using PC tools. The file name consists of two parts separated by a dot: the name and the extension.
File directory (directory) - files grouped according to one or more characteristics (sometimes without characteristics). Kinds:
- Root. Contains all other directories and files of the system. On the command line, when writing the path to a file in the root directory, use the “\” sign.
- Current, denoted by “.” on the command line. The directory that DOS is currently working with.
- Parent, denoted by “..” on the command line. The directory in which the current directory is located.
The "\" character is used to terminate the directory name. In order to go to a particular file, you must enter the full address:
D:\users\1\123_1.txt, where:
- D: — disk name, root directory;
- \users\ - parent directory;
- \1\ - current directory;
- 123_1.txt is the name of the file that the user accessed.
Another way
Well, the last method, for some reason the most common on Russian-language sites. Apparently, one instruction was distributed to everyone. One way or another, this method for creating a bootable MS-DOS flash drive does not seem optimal to me.
In this case, you will need to download this archive: https://files.fobosworld.ru/index.php?f=usb_and_dos.zip, which contains a folder with the DOS operating system itself and a program for preparing a flash drive.
- Run the USB Storage Tool program (HPUSBFW.exe file), specify that formatting should be done in FAT32, and also check the box that we intend to create a bootable USB flash drive specifically MS-DOS.
- In the appropriate field, specify the path to the DOS OS files (dos folder in the archive). Start the process.
Main system components
BIOS is a set of microprograms that describe how the computer hardware platform (PC components) interact with each other and allow the PC to interact with peripheral hardware devices connected to it. After turning on the computer, the microprocessor conducts a full diagnosis of the equipment, including controllers, and then runs the built-in code from the read-only memory. The code is rewritten into RAM. During the diagnostic process, when a failure is detected, the code displays the reasons in the form of a text notification on the machine’s operating screen. If there is a built-in speaker, the text notification duplicates the sound signal.
BootRecord is a system file loader. Reads system modules into RAM, also known as kernel files, IO.SYS and MSDOS.SYS.
- IO.SYS - command control module for peripheral devices;
- MSDOS.SYS - interrupt handler.
The command processor is a tool for processing user commands, which are divided into internal and external.
- Internal commands are executed directly by the command processor;
- External commands are programs of the same name written to the disk memory. When you enter the appropriate command, the processor loads the found file into memory and transfers control to the running program. Upon reaching the result of entering such a command, it is automatically deleted from memory, and information is displayed on the user’s screen that the command processor is ready to continue working and implement the following programs. The command line program code is located in the COMMAND.COM module.
Drivers and utility programs - perform standard procedures (formatting the HDD, launching an antivirus, diagnosing errors, amount of free space, etc.).
- The ANSI.SYS driver is responsible for managing I/O devices (keyboard and monitor).
- The COUNTRY.SYS file contains localization tables for various countries, namely, the date and time format used in the country, the currency icon and the code page (encoding).
- DISPLAY.SYS. Provides font loading and support. Is the display driver.
- DBLSPACE.EXE is a disk compressor, both hard and floppy. Used in versions MS-DOS 6.0 - 6.2.
- DRVSPACE.EXE. Compressor for hard and floppy disks (versions MS-DOS 6.22 and higher).
- DEFRAG.EXE. Disk defragmentation program.
- DOSSHELL.EXE. File manager. It was released along with the operating system in versions MS-DOS 4.0 - 6.0. This shell was discontinued after version 6.0, but was supported as part of the "Supplemental Disk" until MS-DOS 6.22.
- HIMEM.SYS. Additional memory driver. Coordinates the operation of additional memory, including its initial section.
- HELP.COM. User manual available online.
- EMM386.EXE. Extended memory driver. Provides access to upper memory (UMA - Upper Memory Area, English), emulates additional memory using extended memory.
- INTERLNK.EXE, INTERSVR.EXE. Drivers for organizing data exchange between computers via asynchronous adapter ports or parallel ports.
- KEYB.COM. Language-specific keyboard layout configuration (to configure languages other than US English).
- Module KEYBOARD.SYS - provides the user with a set of valid language layouts.
- Files with the CPI extension contain information about code pages.
- MEMMAKER.EXE - increases the amount of RAM. Can be used if the computer has extended memory and 80386, 80486, and also Pentium processors.
- The MODE.COM module contains settings for the operating screen parameters, serial and parallel ports.
- MSAV.EXE and MWAV.EXE are basic antiviruses, MSAV for MS-DOS, MWAV for Windows.
- MSD.EXE. Allows you to display the current system and PC configuration.
- MSBACKUP.EXE, MWBACKUP.EXE. Programs for backup storage and data recovery. MSBACKUP for MS-DOS, MWBACKUP for Windows.
- MWUNDEL.EXE. A program for recovering files accidentally deleted by the user.
- POWER.EXE manages the consumption of network energy resources.
- RAMDRIVE.SYS is a driver for creating a logical electronic disk in extended memory.
- SCANDISK.EXE. A program for diagnosing and restoring disks.
- SMARTDRV.EXE. Performs disk caching.
- VSAFE.COM. Module for continuous monitoring for the presence of viruses in the system. When a virus is detected, it displays a message about it.
- UNDELETE.EXE. Recovering deleted files and data.
CONFIG.SYS and AUTOEXEC.BAT modules or configuration files. They launch the system configuration with saved user settings to implement certain tasks and automatically launch programs (drivers).
Old operating systems.
On the disk you will find the following old operating systems.
*** Download with possible installation of various versions of MS-DOS on the HDD ***
- MS-DOS 6.22 (Original)
- MS-DOS 7.00 RU (Win95) Step by Step
- MS-DOS 7.10 RU (Win98SE) Step by Step
*** Installation on HDD Windows 3.11, 95, 98 ***
- Windows 3.11 RU
- Windows 95 OSR2 RU
- Windows 98 SE
Step by Step (MS-DOS 7.00, MS-DOS 7.10) means that at boot time you will be asked which drivers and programs will load and which will not. At the beginning of the installation, you can decide which file manager to use - VC or DN. The simtema will boot into the virtual disk. Before you start working using one of the two file managers, the system will prompt you to launch the necessary system files to install the operating system. The offers are presented with a blue MS-DOS-style window that pops up when the download is complete.
MS-DOS 6.22, as well as Windows 98, 95, 3.11 are installed in standard mode, like most modern operating systems.
Bootable ms-dos disk with operating systems and utilities for old hardware.
In the OS\MSDOS7\ folder you will find the MS-DOS 7.10 installation files. To start the installation, you need to boot using Volkov Commander or DOS Navigator, go to the directory and start the installation via autoexec.bat or setup.bat. Then follow the installer's instructions. The installation process is described in detail in the series of articles “MS-DOS 7. Classic installation” on our website.
Versions
Microsoft released versions of its disk operating system with different names for different machines between 1981 and 2000. The operating system appeared under the names: 86-, COMPAQ-, Z-DOS.
| Name | Release date between 1980 and 2000 | File system | detailed information |
| QDOS version 0.10 | Mid-July 80 | FAT12 | Pilot launch of Tim Patterson's product, implemented by Seattle Computer Products. |
| 86-DOS | August '80 | A copy of DigitalResearch CP/M adapted for 8080/Z80 microprocessors. Changes: data buffering, FAT12 file system. | |
| 86-DOS version 0.3 | December '80 | Version from Microsoft under license from the developer Seattle Computer Products. | |
| 86-DOS version 1.0 | April '81 | Product release. The basis for IBM production machines. | |
| 86-DOS version 1.10 | July '81 | Microsoft buys the copyright to the product from Seattle Computer Products and renames the OS to MS-DOS. The version is similar to PC-DOS 1.0. Basic functions: - Supports exclusively single-sided eight-sector 5.25-inch floppy disk drives with a capacity of 160 KB; — Fixing the date of the last saved version of the file. | |
| MS-DOS versions 1.10..1.14 | Summer-autumn '81 | Microsoft releases three products for IBM PC DOS 1.0. The OS becomes a universal solution for all 8086-based PCs, adapting to various hardware platforms. Developer solutions: - Pre-installed drivers for peripherals; — Basic input/output modules; - Core adaptable to peripheral equipment. | |
| MS-DOS version 1.24 | March '82 | Changes: Works with double-sided 5.25-inch floppy disks up to 320 Kilobytes. Record the date and time the file was modified. | |
| MS-DOS version 1.25 | Summer '82 | Version for PCs not related to IBM. | |
| MS-DOS version 2.0 | Spring '83 | Changes: — Ensuring HDD operation up to 15 MiB; — Support for single-sided and double-sided 5.25-inch floppy disk drives of 180 and 360 KB, respectively; — Support for a tree structure of file directories (before this version, all files were located at the root of the disk, directories did not exist); — Support for external hardware drivers; — Organization of background printing using the PRINT command; — Powering the CGA, the first video card to support color images, released by IBM in 1981. | |
| MS-DOS version 2.01 | Autumn '83 | Displaying the current date and time settings and currency sign using the COUNTRY command | |
| MS-DOS version 2.10 | Autumn '83 | The version for the PC PCjr from IBM was called PC DOS 2.10. | |
| MS-DOS version 2.11 | March '84 | Adaptation for PC ACT-86C (Altos MS-DOS 2.11), TeleVideo (TeleVideo PC DOS 2.11) and T1000 (Toshiba MS-DOS 2.11, included on CD). Translation into 10 languages. | |
| MS-DOS version 3.00 | Late summer '84 | FAT16 | Version for PC IBM PC/AT with HDD 20 MiB. Works with hard drives up to 32 MiB inclusive. It becomes possible to specify a route for launching programs that are not in the current directory. Ensuring operation of 5.25″ floppy disks with a capacity of up to 1.2 Megabytes. |
| MS-DOS version 3.10 | Late autumn '84 | Supports the ability to work in Microsoft networks. | |
| MS-DOS version 3.20 | January '86 | Added support for drives for 3.5-inch floppy disk drives with a capacity of 720 kilobytes. | |
| MS-DOS version 3.30 | Summer '87 | It is now possible to split the HDD into logical disks with a capacity of up to 32 megabytes. Added support for 3.5-inch 1.44 megabyte floppy disk drives. | |
| MS-DOS version 3.31 | Autumn '87 | Version 3.30, enhanced by Compaq Computer Corporation. | |
| MS-DOS version 4.0 | Summer '88 | The size of the logical disk has been increased. Added expanded support for national languages. Fully supported EGA and VGA. Has many errors. | |
| MS-DOS version 4.01 | End of '88 | Bugs from the previous version have been fixed. Includes a file manager, one might say, a graphical shell, DOS Shell. The version is Russified. | |
| MS-DOS version 5.0 | June '91 | Ensuring the operation of 8 HDDs simultaneously. Supports 3.5-inch EHD 2.88 Megabyte floppy drives. Added: text editor Edit, QBASIC, online help Help. The Russian version of the OS was released. | |
| AST Premium Exec DOS 5.0 (OEM) | 1991 | Version for laptops AST Premium Exec, containing a package of extensions. | |
| MS-DOS version 5.0 | 1991 | The DOS versions from IBM and Microsoft are becoming fundamentally different. | |
| MS-DOS version 5.50 | 1991 | Part of the 32-bit Windows NT operating system, NTVDM is the NT Virtual DOS Machine (DOS virtual machine for the NT system). | |
| MS-DOS version 6.0 | March '91 | Ensuring the operation of CD-ROM. File compression and defragmentation. Checking the HDD with an antivirus program. | |
| MS-DOS version 6.2 | November 1993 | Added ScanDisk hard drive testing utility. The MS-DOS Shell program has been excluded from delivery. | |
| MS-DOS version 6.21 | February 1994 | The DoubleSpace disk compression program has been removed from the system. Components that support data compression, namely ScanDisk and Microsoft Backup, have undergone changes. | |
| MS-DOS version 6.22 | Summer '94 | Added DriveSpace, which uses a data storage format incompatible with DoubleSpace. Files can be converted to the new format. Microsoft Backup uses the new compression technology found in DriveSpace. The non-localized version supports working with Cyrillic characters, including in file names, as well as date and time representation focused on Russia, Ukraine and Belarus. | |
| MS-DOS version 7.0 | Late summer '95 | Becomes part of Windows 95 OS. Added CD-ROM driver. | |
| MS-DOS version 7.1 | Late summer '96 | FAT32 | Becomes part of the Windows 95 and Windows 98 operating systems. The maximum HDD capacity is 2 TiB. |
| MS-DOS version 8.0 | Autumn 2000 | Becomes part of Windows ME. Found on the boot floppy disk created by Windows XP and later versions. |
Creating a bootable flash drive with DOS Diary Maxim Bogolepov
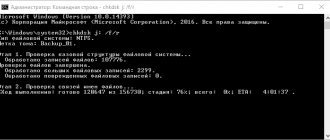
| The other day I encountered some problem updating the BIOS of this server. The update program, together with the latest firmware, takes up 1,156,258 bytes. And the BIOS itself does not have the ability to self-update. On the motherboard developer's website it is written that to update the BIOS you need to boot from a Windows 95 or Windows 98 ... Jokers... |
To make everything completely clear, three DOS files (COMMAND.COM, IO.SYS, MSDOS.SYS) occupy 316,400 bytes of space on a floppy disk with a capacity of 1,457,664 bytes. It turns out that all this equipment simply cannot fit on one floppy disk! Of course, it was possible to make a DOS floppy disk with support for a CD drive... But, as it turned out, the BIOS firmware program for this motherboard does not work if the additional (extended memory) and HMA memory driver for the MS-DOS operating system is used, which provides support for additional memory ( extended or expanded). The so-called HIMEM.SYS . This driver is required to load CD drive drivers. I just needed more space on the boot device than a 1.44 floppy disk! Having scoured the Internet, I found a wonderful utility from Hewlett-Packard for creating bootable flash drives - HP Windows Format Utility for USB Drive Key or DiskOnKey .
This was my salvation! Download the USB_boot_Flash.zip and unzip it to any location on your disk. Go to the unzipped USB_boot_Flash and run the installation file for the utility to create bootable flash drives hp_usb_tool.exe .
Click Next > .
Accept the terms of the license agreement and click Next > .
In the next window, click Next > .
Accept another license agreement by clicking Yes .
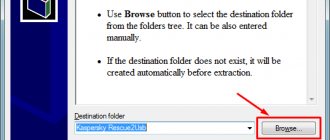
At this stage, you can change the destination folder for the program to be installed by clicking the Browse... or continue installation to the default folder c:\DriveKey by clicking Next > .
In the last window, complete the installation of the utility by clicking the Finish .
On your desktop you will find a shortcut to the installed HP USB Disk Storage Format Tool .
Warning: In the process of creating a bootable USB flash drive, all information from it will be deleted!!!
Launch HP Windows Format Utility for USB Drive Key or DiskOnKey using this shortcut.
At the top, in the Device , indicate the device on which your flash drive is located. Check the box next to Create a DOS startup Disk , check using DOS system files located at and indicate the path to the DOS folder in the folder where you unpacked the USB_boot_Flash.zip (in my case this is the folder C:\USB_boot_Flash\dos ). In the File System we indicate FAT32 , in the Volume label you can specify the label of the future bootable flash drive. We start the process of creating it by clicking Start .
In the warning window that appears that all information located on the flash drive will be destroyed, click Yes .
In the next window you will see the status of the process of creating a bootable USB flash drive.
At the end of the creation process, you will see an information window about the status of your flash drive. Finish the process with the OK .
Returning to the previous window, close it by clicking Close .
All we have to do is copy the entire contents of the C:\USB_boot_Flash\USB to our flash drive. You can also copy the programs needed to run from DOS there; in my case, I copied the program for updating the BIOS and the new firmware itself (there is now more than enough space!)
All that remains is to go into the BIOS and in the boot method settings, select boot from our newly created USB flash drive as the first item. When you boot from it, you will see a clean DOS with the Volkov Commander .
Finally, for those who may need a Windows 98 with the ability to access a CD drive, I offer a utility that creates such a floppy disk. Unpack the contents of the boot98se.zip to your disk and run the boot98se.exe , which will do all the dirty work for you. During the boot process from it, you can select boot items either with or without CD drive support drivers.
That's it, good luck!
MS-DOS file managers
Shell programs for MS-DOS made the user's work more convenient and simplified the visual display of information.
Norton Commander
The most common shell program in the Russian Federation. Visually it is a screen divided into two panels. Initially, all operations with the directory tree and files were performed using the F1...F10 keys. A later version added a mouse and menu bar.
The Norton Commander shell program forms the basis of most graphical interfaces - shells for many different operating systems and software. The shell was developed by a group of programmers consisting of John Soch, Linda Didiak, Peter Braden, Kate Ermel, Brian Yoder. The file manager was released by the Peter Norton Computing brand. Later the brand became part of the Symantec concern.
Work on the shell was carried out from 1984 to 1986. After its release and release, Norton Commander instantly gained a leading position among PC users. Version 3.0 of the shell made it possible to finally oust competitors from the market and take a leading position in the industry.
In our country (Russia), the most common versions are 2.0, 3.0 and 4.0. For a long time, the popularity of the program was associated with the computer science textbook for school and higher educational institutions “IBM PC for the User” (author E.V. Figurnov), in which the bulk of the information contained detailed principles of working with the Norton Commander shell.
Starting from the third version, extensions, patches, improvements, and viewers began to be released for the software. Unauthorized modifications made it possible to expand the range of operations with directories, playback of audio and video files, and other useful updates.
Before it was released, version 4.0 failed. The increased amount of RAM and numerous errors became the decisive factor, and Norton Commander began to lose its position in the market. The company that bought the development struggled for almost 7 years for the market: one after another, versions 5.0..5.51 were released, version 2.01 adapted for Windows. However, during the period when almost identical copies of the shell dominated the market: Volkov Commander, PIE Commander and DOS Navigator, the file manager was unable to cope with the damage caused and lost its last users.
Norton Commander shell functionality
Conventionally, the program desktop can be divided into two main blocks vertically. In blocks - a tree of directories and files that are located on the computer’s drives. Above the blocks is a menu for setting up and managing basic operations. Below the blocks is a menu of basic operations. Control Norton Commander from the keyboard:
- The F1 key brings up the help menu;
- F2 key - menu settings;
- F3 key - open and view a file in text mode or as binary code;
- Key F4 - text editing;
- Key F5 - quick copying of elements;
- F6 key - allows you to rename or move the current file or directory to another directory;
- F7 key - creates a new subdirectory;
- F8 key - deletes the selected file(s) or directory(s);
- F9 key—go to the menu above the blocks;
- Key F10 - exit the program.
Control is carried out using the arrows on the keyboard, function keys F1..F10, hot key combinations, the Enter key, and mouse operation is supported. The main goal of Norton Commander is to make it easier for the user to work in MS-DOS and save time on entering standard commands. In this case, even when working under the Norton Commander shell, the user can enter the desired command in the appropriate line.
Volkov Commander
The shell program is an almost identical copy of Norton Commander. The main difference is the ability to specify a file or directory name longer than 8 standard characters.
One of the advantages of the file manager is its compact weight. The distribution includes the program itself, which implements a minimum set of functions. Expansion of functionality is carried out through the integration of third-party applications, drivers and programs. The program was written by Vsevolod Volkov, a native of Ukraine. Volkov Commander is a shareware software.
The Volkov Commander 4.0 shell was released in 1994 and immediately won a lot of sympathy due to a number of advantages:
- The unpacked weight of the utility is 64 Kilobytes. A complete analogue of Norton Commander with slightly reduced functionality;
- Can perform full copying of directories;
- Transfers directories with all contents within the disk without copying;
- Implemented 5 basic operations with files: editor (built-in and external), viewing service (built-in and external), launch by file extension;
- The built-in editor is capable of loading large files (up to 640 KB, in comparison with it, a similar version of Norton Commander opens files up to 64 KB);
- When running under DOS without disk caching, it is characterized by a fast response to user requests;
- Built-in hex editor;
- The Alt+F5 key combination allows you to open the menu for managing resident programs;
- In version 4.99, a text editor is built into the shell, with which you can quickly edit files.
Among the shortcomings were noted: limited functionality, small memory, lack of updates since 2000 (the latest version is 4.99.08 alpha).
DOS Navigator
Another shell program that has become an improved copy of Norton Commander. Users have the opportunity to work in a menu with wide functionality, an increased number of panels, and a multitasking interface for plugins. Easy integration of third party software.
DOS Navigator version 0.90 was developed and released in the early 90s by a group of programmers consisting of Stefan Tanurkov, Andrey Zabolotny, Sergey Melnikov. A later version was rewritten using Turbo Vision by Tanurkov and D. Dotsenko. In 1993, the development team was replenished with S. Filimonov, and the shell acquired new components, graphics and was optimized for user needs. In 1995, version 1.35 was released, after which several years of improvements, bug fixes and version updates to 1.39 were carried out. Ilya Bagdasaryan and Maxim Masyutin managed to participate in the team.
Since 1998, the team switched to developing the email client The Bat!. The final version of DOS Navigator 1.50 was released in 1999, after which the software source codes became available to everyone.
In 2020, the successor to the original Dos Navigator shell, Dos Navigator III, was released, written in the multi-paradigm JavaScript programming language.
Dos Navigator was one of the most advanced file managers in terms of functionality and efficiency, which worked under OS/2 and DOS. The project was developed and implemented by Ritlabs from Moldova.
The visual design differs little from Norton Commander. Two blocks with directories and files, top and bottom menus with functions and frequently used commands. Advantages: capacious memory, driver for moving files to the “recycle bin”. You can remove and add panels, create a menu according to your own preferences, play a large number of text video modes, create direct links to objects in the catalog tree, archive information and carry out other commands. Built-in programs and applications:
- Table designer;
- Drive editor;
- Text editor;
- Calculator;
- Formatting disk space;
- Encoders and decoders;
- Disc player;
- Contact book;
- Gaming applications and much more.
Among the most striking advantages is the ability to freely operate any integrated software and utilities when working with the root directory and files, operations with which are carried out in the background. For a long time, DOS Navigator occupied a leading position in its segment, providing the first solution to PC multitasking issues.
How advisable is it to use DOS programs in the latest versions of Windows?
In general, many users mistakenly believe that there is no point in using programs and utilities designed exclusively for use in a DOS system environment. This, of course, can be argued. Any fan of early versions of Windows or outdated retro games will find a lot of arguments in favor. In addition, some MS-DOS programs very often turn out to be more effective in comparison with updated environments when it comes to managing outdated computer hardware, which is not only not supported by the latest operating systems, but is often not even recognized, not to mention ensuring the installation of a full feature driver or performing other actions.
Template operations
To group packages by name or extension, use the following symbols:
- (*) any number of any characters in the file name before the extension, belonging to the same group. Example: *.txt – finds all named text editor data areas with a given extension in the current directory. 1.* - finds all files with name 1 of any extension in the current directory
- (?) any character, but one Example: fox?.exe - finds the entire list of files in the directory with any character after fox and the exe extension in the current directory: foxp.exe, foxh.exe and so on. Similar operations can be performed with a search by file extension.
MSDOS bootable flash drive. Let's start the installation.
First, let's prepare the environment necessary for MS-DOS. HP Flash Utility will handle this with a bang. In order not to see this window:
run the utility with administrator rights. We will be greeted by the settings window. Display it like in my photo:
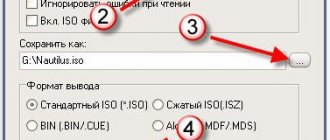
Yes, MS-DOS only understands the FAT or FAT32 file system, which appeared in those days when a volume of more than 2 GB was simply cosmic and therefore unrealistic. That's why you have to succumb to this vicious circle: MS-DOS understands FAT, FAT sees only 2 GB. Anyway.
The rest of the settings are clear: I placed the MS-DOS system files in a folder called New Folder, threw it on the desktop and indicated this path to the utility. The process after which a bootable MSDOS flash drive will appear will take very little time. After the end and subsequent reboot, you will be greeted by a full-fledged, good old console, capable of doing things from days gone by. We just have to stock up on managers a la Norton Commander, but that’s for another article.
Good luck to all of us.
Basic commands for operations with files, directories and drives
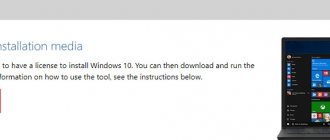
Before you begin operations with files, when working in a Microsoft Windows 10 environment, you must launch the command line. Open: Windows key + R, then type cmd and press OK or Enter.
You can also press the Ctrl + Alt + Del keys simultaneously, then select “Task Manager”. In the top “File” tab, select “Run new task” > “cmd” > “OK” or “Enter”
- The ATTRIB command changes the properties of a file or group. Command syntax: ATTRIB [+R | -R] [+A | -A ] [+S | -S] [+H | -H] [drive:] [route] [file name] [/S] [/D] + - set the selected property - - remove selected properties R - read without making changes to the data area A - put in archive S - make system H - hide The icon after the slash indicates which groups will be worked on: /S - with the specified named data areas in the current directory /D - with both files and folders
- The COPY command is needed to copy selected files. Syntax: COPY [/D] [/V] [/N] [/Y | /-Y] [/Z] [/A | /B] source [/A | /B] [+ source [/A | /B] [[+ ...]] [result [/A | /B]] /D - indicates the possibility of creating an encrypted file /V - checks that files are copied correctly /N - use short names if possible when copying files whose names do not meet the 8.3 standard /Y - suppresses the confirmation request to overwrite an existing destination file /-Y - mandatory confirmation request to overwrite an existing target file /Z - copy network files with resume /A - file is an ASCII text file /B - file is a binary file source - names of one or more files to be copied result - directory and/or name for target files To combine files, you must specify one target and several source files, using wildcards or the format “file1 + file2 + file3 + ...”.
- The DEL and ERASE commands delete selected files. Syntax: [command][drive:][path][file name]/P /P - ask for confirmation before deleting each file Example: DEL C:\main\123.txt/P If you specify a directory instead of a file name, then all the files from it will be deleted, but the directory itself will remain, but will be empty.
- The REN and RENAME operators allow you to change file and directory names. Syntax: [command][path]\[filename 1] [filename 2] [Filename 1] is the name of the named data area to be renamed [Filename 2] is the new name of the named data area to be assigned Examples: REN C:\main\123.txt 1234.txt - changed the file name 123.txt to 1234.txt REN C:\main second - changed the directory name main to second
Operations with disks and directories
- The CD or CHDIR commands move to the specified directory. Syntax: CHDIR [drive:][path] CD [drive:][path] Example: CHDIR C:\1\123 - by typing this command, the user will navigate to directory 123, which is located in directory 1 on local drive C.
- The DIR command shows all files and directories located in the specified directory. Syntax: DIR [drive:][path][filename] [/P] [/W] [/A[[:]attributes]] [/O[[:]sorting]] [/S] [/B] [ /L] [/C] [drive:][path][file name] - drive, directories, file to display, which may not be specified. If you do not specify a file name, then all files located in the specified directory will be shown. /P - information is not displayed after the screen is full. To continue, you must press Enter. /W - output information in a compact form /A - files are displayed with the specified attributes Attributes: H - hidden files; -H - files that are not hidden; S - system files; -S - files that are not system files; D - catalogs; -D - files only (not directories); A - files ready for archiving; -A - files not changed since the last backup; R - read-only files; -R - files are not read-only. /O — display information in the specified order: N — alphabetically (by name); -N - in reverse alphabetical order (Z - A); E - by extension, in alphabetical order; -E - by extension in reverse alphabetical order; D — by date and time (starting with the earliest); -D - by date and time, starting with the latest; S - ascending size; -S - descending size; C - by compression ratio, starting with the lowest; -C - according to the compression ratio, starting from the highest; G - show directories first; -G - show files first. /S - display a list of files in the specified directory and all directories that it contains /B - display files and directories without any information except extensions /L - display all names in lowercase letters only
- The MD and MKDIR commands allow you to create a new directory. Syntax: MD [drive:]\[path]\directory name (directory) MKDIR [drive:]\[path]\directory name (directory) Example: MD C:\123\1\2 - directory 2 will be created. If the required directories are not in the path, they will also be created.
- The RD and RMDIR commands delete directories. Syntax: RD [drive:]\[directory name][/character] RMDIR [drive:]\[directory name][/character], where characters can be: S — deletes a directory tree; Q - deletes directories without user confirmation; ? - displays a certificate.
All commands can be written in both lowercase and capital letters, and you can also combine letters. For example, when entering TIME, time or TiMe in the commands, the result will be the same.
For the command to work, after entering it and all parameters, press the “Enter” key. To delete a command, press the Esc key before pressing Enter.
MSDOS bootable flash drive. What will you need?
- The flash drive itself. We choose from unnecessary and “small-sized” ones - volumes larger than 2 GB are not accepted by the used file system
- HP Flash Utility ( it and the second one are in the archive):
http://www.sevenforums.com/attachments/tutorials/42022d1260810265-ms-dos-bootable-flash-drive-create-hpflash1.zip
- MS-DOS system files (also available as an archive):
https://www.sevenforums.com/attachments/tutorials/42023d1260810265-ms-dos-bootable-flash-drive-create-win98boot.zip
Before work, download both archives and unpack them into folders of the same name. The first archive contains an executable file that will have to be launched from the context menu with administrator rights. The second one contains files of the MS-DOS operating system, which will subsequently be located on the bootable flash drive.
List of commands relevant for MS-DOS, which is part of Windows 10
- CLS - screen clearing.
- COLOR - Set the default foreground and background colors.
- DATE — display or set the current date.
- DEL - delete one or more files.
- DIR - displays a list of files and subfolders from the specified folder.
- ECHO - display messages and switch the mode of displaying commands on the screen.
- ENDLOCAL - Ends localization of environment changes in the batch file.
- ERASE - deleting one or more files.
- EXIT - shutdown of the command line interpreter CMD.EXE.
- FC - Compares two files or two sets of files and displays the differences between them.
- FIND - searches for a text string in one or more files.
- FINDSTR - search for strings in files.
- FORMAT - formats the disk for working with Windows.
- HELP - displays an integrated reference book.
- LABEL - creates, changes and deletes volume labels for disks.
- MD - folder creation.
- MKDIR - creating a folder.
- MKLINK - creating symbolic links.
- MODE — configuration of system devices.
- MORE - sequential data output in parts the size of one screen.
- MOVE - moving one or more files, renaming files and folders.
- PATH - Displays or sets the search path for executable files.
- PAUSE - pauses the execution of a batch file and displays the message: “To continue, press any key...”.
- POPD - Goes to the directory saved by the PUSHD command.
- PRINT - prints the contents of a text file.
- PUSHD - Saves the current directory for use by the POPD command and then changes to the specified directory.
- RD - deletes a folder.
- RECOVER - Recovers readable data from a bad or damaged drive.
- REM - Places comments in the batch data file and CONFIG.SYS file.
- REN - Renames one or more files.
- RENAME - Renames one or more files.
- REPLACE - replaces files.
- RMDIR - delete a folder.
- ROBOCOPY - A tool for copying files and directory trees.
- SETLOCAL - Begins localizing environment changes in a batch file.
- SHUTDOWN - ending a user session, shutting down or restarting the computer.
- SORT - sort input.
- START—execute a program or command in a separate window.
- SUBST - Maps the drive name to the specified path.
- TIME - display and set the system time.
- TREE - graphical display of the directory structure of a disk or folder.
- TYPE — displays the contents of text files.
- VOL - displays the volume label and serial number for the disk.
- XCOPY - copying files and directory trees.
To obtain information on a command, after typing it, you must enter the combination /?. For example: cls/?.
15.09.2019
Text editor EDIT
This is a simple and very convenient text editor. You may need it to view text files that have DOS character encoding. (In Windows, you can open such files using Notepad, but instead of normal text you will see a set of “hieroglyphs”). To launch this editor, type EDIT at the command line and press ENTER. This editor can also be launched from the Windows command line.
NOTE Here the names of all commands are printed in capital letters, however, this does not matter - you can write in small letters.
And in conclusion, let’s mention two commands for working with the disk:
FORMAT - disk formatting
FORMAT A: - formatting disk A. Before formatting the disk, think carefully: is it worth it?
FDISK - dividing the hard drive into logical disks. In this case, ALL information on the disk is lost. If you don't know what you're doing, it's better not to use this command. In general, this command requires more detailed consideration. I'll come back to it someday.
Multitasking options
System administrators prefer to create bootable DOS flash drives, which eliminate conflicts on many platforms (Windows and Linux). Utilities, file manager, anti-virus programs, and other applications are copied to the connected external media.
Before making a bootable DOS flash drive, the set of software necessary for installation and a wide range of tasks is determined.
A universal bootable USB flash drive running MS DOS can work wonders when working with FAT32, NTFS, UEFI.
A flash drive running MS DOS is a must for every PC owner
Step-by-step instruction
To create an image of a bootable flash drive in DOS format, it is recommended to download the Easy2Boot (E2B) archive.
- Unzip to any directory on your PC.
- Run the file called _ISO\docs\Make_E2B_USB_Drive.cmd.
- To burn a Live-CD image, specify the path by selecting the disk from the list.
- Answer the question about the options for the proposed media formatting.
When transferring MS DOS to a flash drive, several problems arise:
- FAT32 works well with UEFI and supports files no larger than 4 GB;
- NTFS without UEFI has no restrictions;
- for images up to 4 GB, you can safely create a bootable USB flash drive in FAT32.
In order for NTFS to be able to interact with UEFI under MS DOS, creating a bootable flash drive is similar to the previous description. But in the BIOS you need to select a UEFI image so that Easy2Boot changes the entry of the first boot sector on the MBR disk (this is true provided that the bootia32.efi, bootx64.efi configuration files are available).
Recommendations on how to make a bootable one for legacy Windows
The described method is suitable when you need to install MS DOS on a flash drive to work with Windows version no older than version 7. Otherwise, the risk of irretrievable data loss is inevitable.
It will not be possible to create a bootable card or USB drive using standard Windows tools unless you additionally download usb_and_dos.zip.
Insert the drive into the connector, then unpack the archive and click hp_usb_tool.exe.
After starting the program, specify FAT. Before creating an MS DOS bootable USB flash drive, use the corresponding checkbox to indicate the path to extract the files.
After installation is complete, restart your computer. Enter the “BOOT” section of the BIOS, change the disk priority by moving the USB-HDD to the top line.
Advice for owners of popular versions
To restore Windows 7, 8, 10, you need modern programs launched by a privileged user as root.
There are several ways to create an MS DOS bootable USB flash drive for popular operating systems. One of them is the reliable software Boot_USB_Sergei_Strelec_2015_v.8.0_x86.
The assembly includes Acronis Disk Director for disk partitioning and Acronis True Image for recording a finished image and backing up the system. All utilities have an intuitive interface. Any user can understand them.
To start a Live CD, you need to change the “boot loader” priorities.
Installing MS-DOS 6.22.
We will implement our goals and objectives according to the following plan:
- Minimum installation of MS-DOS 6.22.
- Memory settings (HYMEM.SYS, EMM386.EXE).
- Russification of the operating system (MS-DOS 6.22 rus).
- Selection and installation of the necessary drivers and programs.
- Fine-tuning the system boot (adjusting the AUTOEXEC.BAT and CONFIG.SYS files).
- Testing the system (let's run several games).
You know the configuration of our four machines based on old hardware. If necessary, information can be viewed by clicking on the “OLD IRON” button in the main menu of our website. We will be dealing with a computer based on an Intel Pentium III with at least 128 MB of RAM, a Creative SB Live! (SB 0100 - EMU10k1), 40 GB HDD, installed CD-ROM and floppy disks.
We will install MS-DOS 6.22 on the hard drive. The size of the hard drive is not significant (from 800 MB to 80 GB, our test computers have 20 GB and 40 GB HDDs installed). Installing MS-DOS 6.22 on a flash drive will be similar. You will find information on how to create a bootable USB flash drive in the relevant articles on our website.
Pay attention to the sound. Creative SB Live! (SB 0100 - EMU10k1) is one of the latest sound cards that provides very high-quality sound and works perfectly in MS-DOS 6.22 with the correct driver installation. DOS games will run without sound, but playing with sound is, of course, more enjoyable!