Method 1: Format the drive
A software failure, virus attack, or damaged file system layout can usually be resolved by simple formatting. This action allows you to recreate the markup, remove malware, or hide damaged memory blocks. The card format is done in one of the following ways:
- Inside a mobile device.
- Using standard Windows tools.
- Through specialized applications.
Android OS has a drive formatting feature. This is the simplest procedure with minimal chances of recovery. In this case, you do not need a computer or other equipment. Read detailed instructions on how to format an SD card on your phone.
If your phone or tablet does not see the card or refuses to clear it, then you should use formatting using standard Windows tools. In this case, you will need a computer and an SD/MicroSD card reader. See detailed instructions for formatting an SD card on a computer.
Problematic and write-protected cards are formatted only by third-party programs. Such utilities allow you to perform low-level formatting, as well as analyze the flash drive and restore it in hidden mode. See the list of current programs for formatting flash drives and memory cards.
DiskDigger is a professional program for recovering memory cards for Windows and Mac OS
The desktop version of DiskDigger supports most external storage devices, including USB flash drives and SD memory cards. A characteristic feature of the program is the presence of two file recovery modes: Dig Deep and Dig Deeper.
Dig Deep scanning mode is suitable for most file deletion scenarios: formatting, corruption, deletion. DiskDigger easily recognizes SD card file systems - FAT, exFAT and NTFS.
Dig Deeper scanning mode is designed to recover specific file types. For example, you can limit your search to photos in jpg format or documents in doc format.
A complete list of deleted file formats is available on the official website.
Preview in the results window is available for all media file types.
Another useful feature is that you can create a virtual clone of an SD card in VDI format and then safely restore the SD card without the risk of overwriting its contents.
The current price for the full version of DiskDigger for Windows is $14.99, which is not that much for a professional tool.
In any case, DiskDigger allows you to scan an SD card, flash drive or other media, perform a preview and then think about purchasing a personal license. The Linux version of DiskDigger is free.
Method 2: use a flash drive recovery program
If the memory card is damaged - the firmware has been lost from the controller or the memory has worn out, then specialized recovery programs will help. For example, EzRecover or D-Soft Flash Doctor, as well as other programs for flash drive recovery.
Interface of the D-Soft Flash Doctor program.
Photorec - free resuscitator of memory cards and flash drives for Windows and Linux
Photorec is a universal, free and multi-platform application. Recovers data including from SD cards and digital cameras. Photorec can detect deleted files in cases where the file table is damaged or the disk is formatted. Since the program works in read-only mode, there is no need to worry that the data on the SD card will be overwritten.
Photorec supports Canon, Fujifilm, Nikon, Olympus, Sony and other digital camera models. When scanning there are no restrictions on the file format (as, for example, in CardRecovery). Everything that Photorec finds among file system clusters will be suitable for preview and recovery. The program will help you recover everything it finds inside the file table, as well as metadata: size, name, date and file location (path) on the memory card.
There are no restrictions in Photorec, in addition you get the console utility TestDisk - a resuscitator of deleted partitions and sectors, which also restores lost information on hard drives.
Thus, if you need a free program, Photorec is the best program for recovering microsd memory cards.
Method 3: recovery using service utilities
Some drive manufacturers develop proprietary utilities for analysis and recovery. Such programs are downloaded for free on the official website.
The recovery principle is based on formatting the media. In this process, the memory is analyzed, damaged cells are hidden, and the operation of the controller is restored.
JetDriveToolbox only works with Transcend flash drives. The program will not see other drives.
How to prepare a smartphone for firmware
Before proceeding with the software installation, be sure to prepare the device for the update, otherwise during boot the device will crash and will not start again. This is due to the interruption of the firmware download. To avoid such problems, you need to:
- charge the gadget. Reinstalling the firmware will require a lot of energy, so it is better to charge the device to 100%;
- download from Google Play the ROM Manager, TWRP or CWM Recovery, Root Checker and any rooting program, for example, Kingoo Android Root.
The first utility is needed to replace the standard CRM boot menu and allows for advanced device management, but requires root rights - superuser (administrator) rights. Other applications allow you to download third-party firmware, check your smartphone for administrator rights, and grant superuser rights.
You should definitely check the device for administrator rights, since without them you won’t be able to install custom firmware.
To do this you need:
- Launch Root Checker on your device.
- In the application, click on the “Check Root” function.
- When the test for superuser rights is completed, a message indicating the presence or absence of superuser rights will appear in the upper field where the above-mentioned function is located.
If you do not have root rights, you need to get them, otherwise you will not be able to flash your Android smartphone via a memory card. The process consists of two stages: allowing the installation of third-party applications and working with Kingo Android Root.
Access to unofficial utilities is needed to update custom firmware. To allow installation of third-party applications, you must:
- Go to "Settings".
- Select the "Security" menu.
- Click on “Unknown sources” and allow installations from them by moving the slider to the right.
The next stage is working with the Root Kingo Android root access program. To start unlocking your device, follow these steps:
- Run the Kingo Android Root.apk file. You can download it on the official website of the application: https://www.kingoapp.com/.
- Agree with the warning. After this, the installation of the program will begin.
- Open the installed utility.
- Click on the “No root” button, after which the process of obtaining rights will begin.
There is a possibility that the program on the device will not work, but there is a way out - use a computer. Once you have received administrator rights through your PC, you can flash Android from the SD card.
To unlock root using an external device, you need to enable USB debugging and connect the device to the computer. Step-by-step instruction:
- Go to the "Settings" menu.
- Click on the “For Developers” section. If it is blocked, you need to return to the menu and select “About device”. Then click on “Build Number” several times. After this, the section will become available.
- Select the “USB Debugging” mode.
- Connect your tablet or smartphone to your PC via a USB cable.
- Launch the Root Kingo Android utility. The necessary drivers will begin automatically downloading.
- Press the “ROOT” button.
- After rooting is completed (obtaining rights), the “Finish” button will be highlighted.
Conclusion
The methods described above will tell you how to restore a micro SD flash drive. Use media formatting as this method is effective in most cases. If there is no result, use flash drive recovery programs or proprietary utilities. Also try to reflash the controller if other methods did not help solve the problem.
What methods of recovering flash drives do you know? Share your experience in the comments below the article.
Post Views: 677
www.MobiMS.ru
SDtool is a program and instructions for flashing Android devices from an SD card.
the instructions are something like this:
- 1)Double click "SDtool" on your computer.
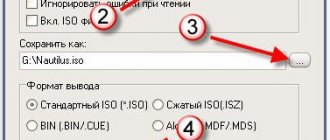
- 2) Click the Browse button and locate the update file. (The file extension must be OSK, the file name can be anything)
- 3) Click the Detect button. Do not insert the SD card before pressing the Detect button. If you already have an SD memory card inserted, remove it from your computer and then click the Detect button.
- 4)After clicking the Detect button, you will see a forward progress status bar. Insert the SD card before the line starts moving.
- 5) When the line ends with movement, the SD card is ready to connect to the “Make target Card”.
- 6)Click the "Make target Card" button and then the SD card process starts. Wait a short period of time until the Success window appears. Click OK to finish.
- 7)Insert SD card into Android. If already enabled, unplug it and then plug it back in to reboot. The update will then start automatically.
- 8) The update takes about 5 minutes. After flashing the firmware, you need to press reset.
Using Vista:
SDtool v1.1A. run exe in XP SP2 compatibility mode as administrator (otherwise it does not see or detect the card)
UPGRADE BY burning sd CARD Back up the data in your SD card. When you use this SD card to upgrade your Android TV, all the information in this card will be erased. Double click “SDtool” on your computer. The following window appears.
Click Browse and find the update file. (The file extension should be .osk. The name of the file can be any name as given by the dealer.) Click Detect . Don't insert SD card before you Click Detect. If you already insert an SD card, remove it from your computer first, and then click Detect. After you click Detect, you will see the status bar moving forward. Insert your SD card before the status bar finishes moving. When the status bar finishes moving, the Detect button will be turned into “SD card connect” And the “Make target Card” will become usable. Click “Make target card” and then the SD card burning begins. Wait a short period of time until a window pops out indicating “Success”. Click OK to complete. Insert the SD card into your Android TV. If your Android TV is already powered on, unplug your Android TV and then plug it back to restart your Android TV. Then the upgrading will start automatically. If your Android TV is off, just power it on, then the upgrading will start automatically. The upgrading takes about 5 minutes. During the upgrading process, the green LED indicator on your Android TV stays on. When the upgrading is complete, the green light flashes. If the upgrading fails, the light turns off. Remove the SD card from your Android TV. Unplug your Android TV and then plug it back to restart your Android TV. Important! You can insert the same SD card to other units of Android TV for upgrading. It is suitable for mass production. If SD card cannot be detected, format your SD card and then try again. If there is still detection problem, try using SDtool on other computer with Windows XP system. Remove the SD card from your Android TV after upgrading is complete. Otherwise your Android TV will upgrade again when you restart it. If you want to use your burned SD card for file storage, you need to format the SD card.
Download links SDtool v1.1A:
0
0
104
