A webcam is an essential attribute of any modern laptop. With its help you can communicate on Skype, create video conferences and take photos. The built-in cameras are turned on by default, and you can check its readiness for work in several ways.
How to turn on a video camera on a laptop
How to understand that the webcam is turned on
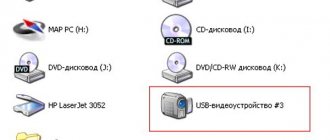
After a person has connected the webcam, he must check whether it really works. You can do this using the device manager. If the webcam is in the list called “image processing devices,” then it has been identified correctly.
Indirect sign: after connecting the device to a computer or laptop, a message about initializing the new device will appear on the screen. Typically the message is in the lower right corner.
On laptops like emachines, Packard, pavilion, Samsung, satellite, Toshiba, vaio and others, you can tell that the camera is on by the glowing indicator.
Setting up a webcam for Skype
Skype is the most popular program in the world for video communication over the Internet. Most users do not know how to install a webcam on their computer for Skype correctly. In fact, this program does not require any special webcam setup. The entire setup consists of correctly connecting the camera to the computer and correctly installing the drivers. Therefore, if the user has completed all the previous steps correctly, then Skype will inevitably broadcast the image from the device.
To check whether the image is being transmitted, you first need to launch the program and log in to your account. Next, you need to select the “Tools” tab at the top of the window, and click “Settings” in the menu that opens. After this, select the “Video Settings” item. If an image from the camera appears, then everything is in order and you can make video calls. If a text message is displayed on the screen, then there is a problem. Most often it occurs because the camera is being used by another application. Therefore, in order to make calls on Skype, you need to close other similar programs.
Thus, installing a webcam is not difficult. Everything is very simple: connecting cables, installing the necessary drivers, installing a program for video communication. Leave your comments and ask questions that you couldn’t find answers to in the article. Feedback from readers is very important to us. It will improve the project and the quality of articles on it.
How to enable a USB camera on a laptop or PC on Windows, Linux and Mac
Regardless of what kind of laptop you have - hp, lenovo, msi, asus, acer, sony, toshiba, usb, aspire, bell, compaq or any other - the process of connecting an external usb camera is the same for them. The same algorithm is used to work with a computer running Windows or other systems.
To do this you need to do the following:
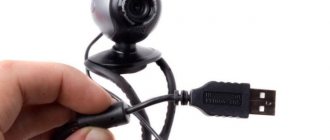
- Unpack the device and find the flat plug on it.
- Insert it into the USB port on the front or rear panel.
- Carefully attach the webcam to the screen.
The camera will be detected automatically in the OS - you don’t even have to select anything in the manager.
After connecting, it is better to follow the system recommendations and update the drivers.
Features of turning on the webcam on a laptop with Windows 7 or 8
Owners of devices with “seven” often experience difficulties turning on and checking the functionality of the webcam. Indeed, unlike the previous Windows Vista OS, there is no corresponding “WindowsMovieMaker” application by default, which helps you quickly and easily turn on the camera.
WindowsMovieMaker interface
So users of laptops with Windows 7 need to use third-party software. For example, the Live Webcam application, which has a clear and simple interface. Some difficulties may arise only during its installation. Therefore, it is better to carry out the Live Webcam installation process as follows:
- Download the installation file from the Internet and unpack it.
- We start the installation of the program.
- At some point, a window will appear in which the system will ask whether you can allow this utility to change settings on the computer. We answer “yes”.
- Then you will need to click “accept” in the window with the license agreement.
- All that remains is to select the components to install and where to save the program. Then click “next”.
The popular Skype messenger will also help you turn on and check the operation of your webcam. All that is needed:
- Download and install it;
- Then go to the application;
- Select the “Calls” section and right-click on the “Video” icon;
- In the window that opens, click on the “Video Settings” line.
After which the camera will automatically turn on. Moreover, in the window that appears, you will see an image of yourself or what the lens is pointed at. By the way, through Skype you can adjust many webcam parameters, including brightness, contrast, saturation, etc.
Windows 8 also does not have standard programs for turning on the webcam. Therefore, on this RAM you can check its operation using the same applications as on the “seven”. You can also turn on the webcam on a laptop with Windows 8 through the “Device Manager” (you can find it - computer settings / control panel / hardware and sound).
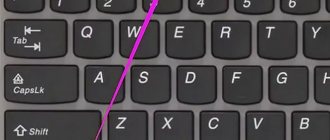
How to turn on the camera using the buttons on the keyboard
You can activate the webcam from the keyboard only on a laptop - all laptop computers have this function. Among the keys, you need to find the one marked with a camera icon (most often it’s “m”), and hold it down simultaneously with Fn.
To use this feature on your computer, you need to purchase a special keyboard with additional buttons. Among them may be the one responsible for the webcam.
On a netbook, the mechanism works in the same way, only the keys can be swapped.
Procedure for turning on the video camera
To connect a webcam to a computer, you must use one of two popular methods. With their help, you can get the job done as quickly as possible and not spend a lot of time on it. The easiest way to connect and configure a camera on a Windows laptop is to perform the necessary operations through the Device Manager.
Algorithm of actions:
- Using the supplied cable, the camcorder is connected to the USB port of the computer.
- Press the power button (if there is one on the device body).
- In the lower left corner of the computer screen, click on the “Start” button.
- Move the mouse cursor over the “All programs” section.
- Look for the “Control Panel” item in it.
- After that, click on the inscription “System and Security”.
- In the window that opens, select “Device Manager”.
- Depending on the type of equipment used, click “Video Devices” or “Image Processing Devices”.
- In the list that appears, find the name of the connected equipment.
- Click on it with the right mouse button.
- In the drop-down menu, click on the “Engage” button.
- Confirm the changes made by clicking on the “Yes” button.
- Reboot the computer.
There are situations when the name of the connected video camera is not in the “Device Manager”. In this case, you need to perform a few additional steps to help update the device configuration.
Correct sequence of operations:
- Go to “Device Manager”.
- In its top menu find the “Action” tab.
- After clicking on it, a list of available commands will appear.
- From these, select “Update hardware configuration”.
- Wait a few seconds until the system completes the operation. At this time, you will see a window on the screen in which all found devices will be displayed.
- Of these, choose the one you want to activate.
- Click the “Activate” button and confirm the completed actions.
The second method to launch the camera is only suitable for a built-in device. In most cases, they are found on laptops and are activated by pressing special key combinations.
Possible options:
- Fn+V;
- Fn+"Video camera";
- Fn+F11.
How to choose a built-in front camera on a laptop
To use the front-facing camera on laptops like Asus, Lenovo, Acer, Sony, Dell, Dexp, DNS or others, just disconnect the device connecting via USB. In this case, the front camera is activated automatically.
You can also do the following:
- Go to “Start - Control Panel - Device Manager”.
- Find "Image Processing Device" there.
- Using the context menu, select the built-in webcam as the main one.
How to run a webcam on Windows 10 and 8
Versions of Windows 8 and 10 are also not much different in terms of webcam settings. Therefore, we will consider them in one instruction. You can also check the connected camera here via the control panel. However, getting to the control panel here is a little more difficult. Therefore, we will look at another option on how to run a webcam on Windows 10.
- Go to “My Computer”.
- Right-click on an empty space in the window.
- In the menu that appears, select “Properties”.
- In the left panel, select the “Device Manager” tab.
- Find your camera in the list of devices.
- Double click on it.
- Check the status of your camera and turn it on if it is turned off.
This option, by the way, may be suitable for older versions of the OS.
How to activate a webcam on Skype
To use the device in the most popular instant messenger, you must first select a webcam. To do this, go to the sound and video settings and select your device in the list. Both front and external cameras are available there.
After that, call a person and click on the crossed out webcam icon at the very bottom of the screen. It will be painted black. Located third, counting from left to right.
How to enable the camera in the browser
If you accidentally blocked access to video capture or set strict security settings, the webcam in your browser may not work. In this section we will look at the basic settings where this can be corrected.
Google Chrome
1. Open the menu (three dots) and go to Settings.
2. Click on the “Privacy and Security” section and select “Site Settings”.
3. In permissions, click on the “Camera” item.
4. Make sure the radio button is set to “Ask permission to access.”
If you accidentally denied access, you can always delete it in the site settings.
On a note. To check the operation of the device, go to webcamtests.com, allow access and check for the presence of an image.
Mozilla Firefox
1. Enter the menu (three dotted lines) and open “Settings”.
2. Select the “Privacy and Security” section. Scroll down the settings panel a little, and in permissions, click on the “Options” button next to the camera icon.
3. The next window will show which sites have requested access.
You can change or delete permission settings by clicking on a specific site.
Yandex browser
By default, when going to a site where access to a webcam is required, Yandex Browser asks the user for permission.
If you accidentally blocked access to the desired site, you can enable the webcam by clicking on the “Protect” icon. And in the window, activate the “Use camera” switch.
After refreshing the page, the image will appear on the site.
Edge browser and other Microsoft apps
1. From the Start menu, open Settings.
2. Select "Privacy".
3. Go to the "Camera" section. On the right, turn on the On switch and select the apps you want to grant access to.
How to take a photo with the turned on web camera on a laptop and PC
Regardless of what kind of laptop you have - Acker Bell, Vayo, Dell, MSI, Packard, Samsung - or computer, you can take a photo using programs for Windows. Install a utility called LiveWebCam.
Open the program and click on the big “Take Photo” button. Pictures are saved along the path “My Documents - Images - Current Date”. This setting can be easily changed.
For Linux lovers there is GuvcView. For Mac OS - iGlasses. You can also try MyCam or AlterCam.
Install webcam software
Before you can start using your webcam, you will need to install drivers on your computer. Depending on your webcam, you will either receive a CD with drivers or instructions on how to search for them online. Since many computers today don't have a disk drive, this may be moot and you'll need to skip to the No Disk section in this guide.
Using CD
Unless otherwise noted, insert the disk that came with your webcam before connecting it.
Windows will recognize that you are trying to install software and a wizard should appear to walk you through the driver installation process.
If this doesn't happen, simply go to "My Computer" or "This PC" in Windows 10 using desktop search or the Start menu and click on the CD drive (usually E:) to launch the files on the drive .
No disk? No problem! Plug and shoot
Increasingly, hardware (including some webcams) comes without a driver installation disk at all. There can be a variety of reasons for this, but the biggest one is that Windows has (usually) excellent capabilities for recognizing and installing hardware without the need for software.
If your webcam doesn't come with a software disk, just plug it in and see what happens. Most often, Windows will recognize it as new hardware and will either be able to use it or walk you through the process of finding drivers (online or on your computer) to use it.
You can also use Windows Update to manually search for drivers. Type Device Manager into the search box on your desktop in Windows 10. The app you are looking for will be the first result.
When the window opens, you will see a complete list of devices on your computer. Find your webcam under Cameras or Imaging Devices. Right-click and select Update Driver from the menu that opens. Go through the wizard to see if Windows can find the drivers.
Of course, nothing may happen when you connect to the network, and Windows will not find the drivers. In this case, you should probably read the instruction manual or visit the manufacturer's website to find driver software for your webcam. This is also what you should do if you lose or throw away the disc that came with your webcam. In recent years, as disk drives have become less common, webcam manufacturers have become much more likely to offer the latest drivers over the Internet.
How to turn on the microphone on a webcam
If your camera has a built-in microphone, you do not need to connect it to the additional jack. It works smoothly using USB. Plus, you don't need to activate it.
All that is needed is to connect the camera according to the instructions given a little higher. After that, go to the calling program, go to settings and from the list select a device whose name is similar to the name of your webcam or its model.
How to enable the webcam on a Windows 10 laptop
The developers of this version of the OS have introduced a special service that is responsible for the operation of video communication tools. Therefore, no additional software is required to enable the webcam. You need to do the following:
- Open the Start menu.
- Click on the “All applications” item.
- Next, look for and select the “Camera” service.
- After which the camera should turn on and the corresponding image will appear on the screen.
If for some reason you cannot turn on the webcam on a laptop with Windows 10, then:
- Go to the start menu.
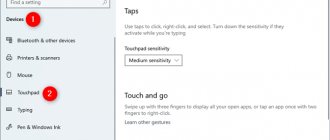
- Next, go to the “Settings” section, and from there to the “Privacy” subsection.
- On the left, click on the “Camera” line.
- At the top right of the window you will see a “slider button”. With its help, you need to allow applications to use the camera.
What program should I download to turn on the camera remotely?
The easiest option is to use a system utility called Ivideon Server. Set up a broadcast to carry out the configuration process. Determine which area needs to be monitored.
Be sure to configure motion detectors and their sensitivity. Using this program, you can either activate the camera remotely manually or force it to be triggered by any movement in the area. Additional features will only be available if you have detectors in your camera.
Webcam Applications
Below I will present you a list of camera programs. After all, not only Skype is limited to working with this device. If anyone is interested, you can experiment.
- WebcamMax. With this program you can add images, videos and various effects to your camera and broadcast to others.
- LiveWebCam. This program allows you to receive snapshots from your webcam.
- ManyCam. With it you can edit the image and sound during a live broadcast on YouTube, Facebook, or when communicating on Skype.
- Movavi Video Suite. It will not only record video from a webcam, but will also help you edit it.
- IP Camera Viewer. The function of this program is to create surveillance via IP and USB devices.
How to launch a web browser on a laptop and PC
To open a web browser and look through news online, just find its icon on your desktop. If we are talking about a clean system, just find the small letter “E” and click on it twice.
You can also often find the Opera browser, whose icon is made in the form of a large red letter “O,” and Google Chrome, a multi-colored circle. In order to get these browsers, you need to download them.
Connecting a webcam without software
It is possible that the webcam is supplied without drivers and software. Usually in this option you can purchase a camera from a Chinese manufacturer.
When you connect the webcam, the message “Found new hardware” will appear.
"New hardware found" message
A message may appear indicating that the webcam is ready for use. In this case, there is no need to take further steps to connect it.
Message about the webcam being ready for use
A message may also appear stating that it is impossible to install a webcam if the operating system does not find the necessary drivers for it.
Message about the impossibility of installing a webcam
In this case, you need to find the video camera drivers using a special wizard.
Installing the driver using the wizard
- Press the “Ctrl” key on your keyboard, and while holding it, press the “R” key. In the Run window that appears, type devmgmt.msc and click OK.
Enter devmgmt.msc and click “OK”
- The “Device Manager” will launch, in which “Unknown device” will be located under the question mark. Right-click on it and select “Update Drivers” from the menu.
Click on “Unknown device” and select “Update drivers” from the menu
- In the window that opens, click on “Automatically search for updated drivers.” After the system finds and installs the required driver, the unknown device will disappear in the manager. You may need to restart your PC.
Click on “Automatically search for updated drivers”
Installation via device ID
If the system fails to detect the driver, you must find the driver on the Internet manually using the ID of the installed equipment.
Step 1: In Device Manager, right-click on “Unknown Device” and select “Properties”.
Right-click on “Unknown Device” and select “Properties”
Step 2. In the next window, go to the “Information” tab and select “Equipment ID” from the list. The ID code of the installed equipment will appear at the bottom in the “Value” field.
Select the ID code of the installed equipment
Step 3. Select the top line with the code with the mouse and press the “Ctrl+C” combination on the keyboard, copying it.
Step 4. Follow the link: https://devid.drp.su/?l=ru and paste the copied information into the search line using the “Ctrl+V” key combination. Select the type of operating system and its bit depth by checking the x64 or x86 checkbox. Click "Find drivers".
Step-by-step instructions on how to find drivers
Step 5. A suitable driver will appear for download. Click the “Download” button.
Click the “Download” button
Step 6. After downloading the file, launch it with the mouse button. The DriverPack Solution installation window will appear. Click “Install manually”.
Click “Install manually”
Step 7. The “Device Driver Installation Wizard” will launch. Click "Next".
Step 8. After installing the video camera driver, click “Close” (“Finish”).
After installing the video camera driver, click “Close”
The installed webcam will appear in Device Manager.
Installed webcam in Device Manager