Watching a DVD on a laptop or computer
There are many special players for reading DVDs.
Among them: PowerDVD , Windows Media Player , Media Player Classic .
To view the contents of the disc you will need one of these programs.
The easiest way is to use a player that is used by many Windows users, Media Player Classic .
- Paste disk into drive mirror side down. Wait for him to counted. Its location will be added. If the computer doesn't does not react DVD, it may be dirty or damaged.
- Launch Media Player via "All programs».
- Click on the link "File" From the list, select " Open file" Select the disk location in the window that appears and indicate the entry you are interested in.
It is worth remembering that the standard player sometimes does not recognize digital signatures and codecs, so you have to use other players.
Why doesn’t the disk drive on my laptop open and what to do in this case?
The disk drive was found. We press the button, but nothing in response. The disk drive does not want to open. Even the software methods listed above do not help. This problem is quite common. Although there are only two reasons for its appearance:
- mechanical failure;
- software level malfunction.
You can determine why the drive does not open on your own. For example, you can pull out the tray programmatically, but not through a button. This means that most likely the key has failed.
If you have tried all sorts of options, but the disk drive on your laptop still does not open, then we recommend following the following procedure:
- The first thing you need to do is turn off or restart your laptop. Thus, you can reset all software and hardware control commands, due to which the device sometimes does not open.
- Did not work out? We check whether the optical drive is used by some program. Some software may simply block work with the device. Call the Task Manager by pressing the Ctrl, Alt and Del keys. You can also use the Unlocker program. In any case, you need to find applications running from the disk and disable them. Then we try to open the drive. If nothing works, then move on to the next point.
- In some cases, malicious software blocks the drive. Therefore, we update the antivirus and check the system. To no avail? Then there is another option.
- Sometimes windows loses connection to the disk drive. Most likely due to various system errors. Even rebooting doesn't help. You need to unplug the laptop and remove the battery for a couple of minutes. Then we return the battery to its place and turn on the device. Already when loading the OS we try to open the drive.
If all these steps do not help, then you can reinstall or update Windows. But, most likely, the reason why the laptop drive does not open is more serious.
It also happens that the optical drive does not work. However, you need to remove the disk with important information from the device. What to do in this case? All that remains is to resort to mechanical opening, which can also help if the tray suddenly gets jammed or skewed. However, do not forget that this is quite risky. One awkward move and the disk reader will have to be changed.
You can pry off the drive cover using a sharp object. Then you need to try to pull out the tray. But if the drive is tightly seated, then you cannot pull it out by force! Most likely, the cause of the malfunction is a hardware failure associated with damage to cables, cables, contacts, etc. This is no longer possible without professional repairs.
The easiest way is to open the disk drive on a Lenovo laptop. This manufacturer equips many models of optical drives with a special escape hole. In this case, the user needs to do the following:
- Take a thin wire or paper clip.
- Carefully insert its end into the holes. Just don't confuse it with the LED on the disk drive, which is often located nearby.
- Press lightly. The latch should work.
- After which the cover will open slightly and the drive tray can be pulled out.
By the way, before trying mechanical opening methods, restart your laptop. Then, while loading the operating system, repeatedly press the open drive button. Sometimes such simple steps help to remove the disc without resorting to manipulating a paper clip, knife, or other objects.
11. How to watch a DVD on a computer. Video tutorial
27.04.2016 13:07
In this video tutorial you will learn how to watch a DVD on your computer if it does not start automatically.
Quite often, many people encounter this problem - they cannot watch a DVD. What is the reason? After all, on a regular DVD player everything can be read absolutely freely. In fact, there can be many reasons. This is a malfunction of the DVD drive itself, a break in the contact cable, or a malfunction of any microcircuits. But more often than not, everything is much simpler. The computer may not have DVD reading software, a set of codecs, or all of these together. In our practice, there have been cases when a customer received a recorded disc, previously checked in front of him in our studio, came home, turned on the computer and was unable to view the video, after which he tried to make a claim to us, as if we “somehow didn’t So they recorded a DVD for him.” And then, upon closer examination of his problem, it turned out that the person simply did not know how to play the recording on his device. There were cases that were quite funny. When, for example, someone tried to watch a DVD by inserting it into the drive tray “inside out,” that is, with the readable side facing up. Naturally, after such an action, the device displayed the message “Disc error”, and the unlucky film lover began to lament that “there is something wrong with the disc, it was damaged or recorded incorrectly.” But, fortunately, such cases in our practice occurred extremely rarely. And even if this suddenly happened, then, as a rule, we quickly enough helped to find the answer and the right solution.
In this video tutorial we tell you how you can do without installing all of the above software and view the disc using a standard set of software and some sequential steps. This lesson is intended for beginners and inexperienced users who have not yet mastered all the intricacies of the computer world. We will be happy to help you bridge the knowledge gap on this issue.
Very often the computer does not have enough memory to store all the accumulated information. As your hard drive becomes full, it becomes necessary to transfer data to other media. Flash drives are expensive, but disks, in comparison, cost pennies.
But even here problems may arise; discs may suddenly become unreadable by your drive. This article will tell you about the possible causes of the breakdown and help you solve the problem.
There can be many reasons for this, ranging from problems with the disk to complete failure of the disk drive. However, all the reasons can be divided into two categories, hardware and software problems.
Hardware problems are caused by problems with the hardware. The following problems fall into this category:
- The cause may be the disk itself; its wear can be so severe that no disk drive can read it.
- The drive may no longer accept discs due to contamination. Over the entire period of operation, a large amount of dust accumulates inside the computer, which can get into the drive and settle on the read head.
- Loose connecting wires will also affect the performance of the device.
These are the most common hardware problems; determining which of these led to the failure can only be done “surgically”, that is, you need to get into the system unit.
Diagnosing software problems is much easier. If problems appear after installing some software, then we can talk about software incompatibility.
Is your drive not reading discs? Don’t rush to throw it away and run to buy a new one. First, check the condition of the disk inserted into the drive; if it is in poor condition, then the reason may lie in the damaged disk, and not the drive. Remove the disc from the drive and inspect it for scratches and abrasions.
If everything is fine with the disk, then we move on. It is worth testing the drive on other disks of different types: CDs, DVDs and small miniCDs. It is recommended to use the newest disks for the test.
Do not forget about other hardware problems; open the cover of the system unit and carefully check the connection between the drive and the motherboard with connecting cables. If there is no obvious damage, still try to connect the drive using other available cables. And for prevention, clean the drive from dust and dirt. This can be done using special disks.
There is another way to clean the read head, but this option is for more experienced and confident users. This method involves disassembling the drive and cleaning the laser with water or high-quality gasoline. Never use cologne or other alcohol-containing liquids, or acetone to clean the laser. Their use will lead to disastrous results.
Have you cleaned the drive, checked its functionality on other drives, and tried to make it work using other cables, but it still refuses to read the drives? Don't be upset. You can move on to solving possible software problems, and consider all the above actions to be preparatory.
If you discover that the problem is not due to hardware reasons, remember what you did with your computer earlier, what you installed, changed and deleted. Because you might have accidentally deleted or changed files that are necessary for the drive to function.
To fix it, you will need to reinstall the device drivers required for the normal and correct operation of the device on the system. Driver mismatches or errors in them can cause the drive to refuse to read discs.
In addition, you can disconnect the drive using the operating system and then reconnect it. For Windows this is done in the system properties.
My Computer window
In the window that appears, click on Device Manager.
System Properties window
The manager finds your drive and then removes it.
After removing the device, you must restart the computer so that the system can detect the drive again and automatically install the appropriate software, that is, drivers, for it.
Often the cause of disk drive malfunction is third-party software installed to emulate virtual drives. Such programs include: DAEMON-Tools, Alcohol 120%, etc. All these programs can cause your drive to malfunction. If you have these programs on your computer, remove them one by one, and test the drive after each removal.
To uninstall, you can use the CCleaner program; it not only removes programs from the computer, but also cleans the system of unnecessary files and system entries remaining after removing the software. The process of cleaning system entries is called cleaning the registry.
You can download CCleaner here.
In practice, there were cases in which the solution to the problem was to flash the device. But this action can lead to complete failure of the drive. So, before taking these measures, it is highly recommended that you read the following point.
Launch using PowerDVD
Unlike Media Player Classic, this program is paid . It can read media of any format, from MPEG and MP3 to ASF and WMA.
- Install the licensed version and restart your computer.
- Place DVD into drive. After it is considered, PowerDVD will open a menu where you can choose the desired video or audio file.
Launch using Windows Media Player
This program is available on every Windows computer, which makes it very convenient for reading disks. The playback manipulations are exactly the same as for Media Player Classic, however, this player has a number of its own features .
The player does not play files because:
- The DVD was recorded in a different region . Mircosoft products have algorithms that prevent pirated recordings from running.
- The standard player conflicts with other players. In such cases, you must stop using third-party software.
- The computer's optical drive is damaged .
- The file format is not compatible with the player.
How to open a disk and flash drive on a computer
We can connect almost any equipment to a modern computer and open almost any device. You can connect a camera, video camera, mobile phone to your computer, you can listen to music CDs and watch movies on DVD.
In this lesson we will learn how to open a disk and flash drive on a computer.
If you have a laptop, click here
In order to open a disk or flash drive on a computer, you must first insert it.
Let's start with CDs and DVDs:
Look at the system unit:
For disks on a computer there is a special thing that slides out, called a disk drive.
In order for us to insert a disk into it, the drive needs to “move out” of the computer. To do this, click the small button below it. When the drive comes out, place your disc on it. This could be a disc with music or a movie. Place it shiny side down.
By the way, there are discs that have shiny sides on both sides. These are double sided DVDs. That is, there is a recording on both sides.
To make the drive slide back in, press the small button underneath it again.
After you have inserted the disc, wait 15 seconds: it may open on its own on the computer (this happens with discs on which movies and music are recorded). If this does not happen, then open the “My Computer” icon. It is either located on the Desktop, that is, on the screen, or it can be opened from the Start button:
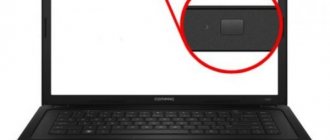
How to open a disk, floppy disk, flash drive on a laptop - COMPUTER HELP + ELECTRICIAN HELP
A laptop is a portable computer.
A laptop is a computer just like a personal computer. And it has the same parts, just smaller. That's why laptops are more expensive.
A laptop can be compared to a mobile phone, and a regular personal computer can be compared to a regular home phone.
In order to open a disk, floppy disk or flash drive on a laptop, you must first insert it.
Let's start with the floppy disk:
Look at the laptop:
If the laptop has a special floppy drive, that is, a device for floppy disks, then you can open the floppy disk. But most laptops do not have this drive, since floppy disks are considered obsolete and unreliable.
You can learn more about floppy disks by reading the article “Floppy disks”.
To insert a floppy disk, there should be a hole like this:
If your computer does not have such a hole, then you can skip the next paragraph.
Insert the floppy disk along the arrow that is drawn on it until it stops (until it clicks). After you have inserted the floppy disk, go to “My Computer”. It is either located on the Desktop, that is, on the screen, or it can be opened from the Start button:
Then double-click with the left mouse button on the icon
"Disk 3.5" (A):
You will see what is written on the floppy disk (files and folders). To remove a floppy disk from your computer, you must first close all files and folders that you opened from the floppy disk. Then press the small button under the hole into which the floppy disk was inserted. The floppy disk should pop out of the laptop on its own. Now about how to open a CD or DVD disc:
Either on the side or front of the laptop there is a storage device for disks. It's called a CD or DVD drive.
To open it, you need to press the small rectangular button.
When you press this button, a click will be heard and the drive will slide out slightly from the laptop. Gently “help” him move out all the way. Then you need to literally “put” the disk on it, shiny side down, and “push” it into the laptop until it clicks. After you have inserted the disc, wait 15 seconds: the disc may open on its own (this happens with discs on which movies and music are recorded). If this does not happen, open the My Computer icon. It is either located on the Desktop, that is, on the screen, or it can be opened from the Start button:
Then double-click the left mouse button on the “CD drive” icon (can also be called CD-RW, DVD, DVD-RW drive).
What is recorded on the disk will open.
Now let’s learn how to open flash drives on a laptop. The flash drive looks like this:
In order to open a flash drive on a laptop, you need to insert it into a special hole:
You will find several of these holes either on the side or at the back.
After you insert the flash drive into one of the holes, open “My Computer” (let me remind you, it is either in “Start” or on the Desktop).
A new icon should appear there. For example, like this:
This icon is usually called "Removable Disk". Double-click on it with the left mouse button. You will see what is written on the flash drive (files and folders).
Before removing the flash drive from the laptop, click on the special icon at the bottom right (next to the clock) once with the left mouse button.
The message “Safely Remove USB Mass Storage Device” appears. Click on it once with the left mouse button. The message “Hardware may be removed” will appear. Now you can remove the flash drive from your computer.
sites.google.com
How to find out the number of hard drives on a computer
In the last lesson we talked about how to take a screenshot of the screen. Today I will tell you how to find out the number of hard drives installed on our computer. This information will be useful to us when we talk about things like data backup.
As you know, there are often several volumes on a computer. For example, C and D. But in most cases, these are two logical drives on which the only physical drive installed on the computer is allocated.
But it also happens that there are several physical drives installed on the computer, each of which can be labeled with one letter or, in turn, can be divided into several local drives.
It would seem that it makes no difference whether it is a logical disk or a physical one. For the system, everything is the same.
For the system, of course, yes, but not for you and your hardware.
For example, you have a computer that has two disks - C and D (there may be much more of them, this is not significant). If you have one physical disk installed, partitioned into two logical volumes, then if the physical drive fails, all the logical volumes into which your disk is divided will become unavailable to you.
If volumes C and D are separate physical disks, then the failure of one volume does not damage the other.
So how can you determine the number of hard drives on your computer?
Everything is very simple. Click "Start" and right-click on "Computer". In the context menu that appears, select “Management”.
Launch "Management"
The following window will open:
Select "Disk Management"
Here you need to select the “Disk Management” section. The display will show information about the physical drives and the logical volumes to which they are allocated. The following illustration shows an example of one hard drive divided into two logical drives. There are also two hidden sections intended for system needs.
Determining the hard drive model on a laptop
A laptop can have either a hard drive (HDD) or a solid-state drive (SSD). These are two devices with fundamentally different approaches to storing information, so if you, for example, decide to upgrade a laptop, then you need to find out what type of disk is currently in use. For convenience, we will simply call both types of media disks.
Physical examination
If the hard drive has failed and you want to remove it or are simply not afraid to disassemble the laptop, then you can find out the type of media as a result of a physical inspection. But first you need to get to the disk:
- Disconnect the laptop from the electrical outlet and turn it upside down on a flat surface. Remove the battery.
- Unscrew the lid covering the bottom of the laptop. Some models have separate small covers, under which there are compartments with RAM or hard drive. If you are lucky and have just such a laptop, then all you need to do is remove this small cover.
The hard drive is mounted inside the laptop on a special slide. Unscrew them and carefully remove the device from the case. Now you can find out the model, volume, speed and other important parameters.
Using Monitoring Utilities
There are two serious disadvantages to physically examining a hard drive:
- You have to disassemble the laptop just to find out which drive is installed and see its model.
- The disk casing may not contain the necessary information.
To resolve these shortcomings, use the software method of viewing hard drive information. It consists of using Windows tools or special utilities to monitor your computer. For example, to find out the size of your hard drive, just go to “My Computer” and add together the volumes of partitions C and D. You can also find out the full size using the “Disk Management” utility.
- Right-click on the "Computer" shortcut. Launch the Manage tool.
- Go to the Disk Management tab. Find the connected drives and see their capacity.
If you want to find out the exact model of the drive, then in the same “Management” window, go to the “Device Manager” tab. Open the “Disk devices” section and you will see the names of the connected media.
If you want to find out all the technical parameters of the disk, including the number of heads, file system and firmware version, then use computer monitoring utilities - Speccy or AIDA64.
In Speccy (a free program), the necessary information is located on the “Data Storage” tab. Among other things, it shows the current temperature of the disk and its general condition.
A comparable amount of disk data can be found in the Data Storage section of AIDA64. By selecting the subsection with the name of the interface that is used to connect the media, you will receive a complete specification of the disk.
What types of discs are there?
When you find information about the disk, you will have to interpret it somehow, because for an unprepared person all these meanings and terms do not make any sense. Therefore, let's first figure out what types of drives for laptops there are:
- SSD (solid state drive) is a new type of storage device that uses memory chips, which makes it look like a regular flash drive. Does not make noise, does not heat up, does not vibrate, consumes little energy, and demonstrates high read and write speeds.
- HDD (hard disk, hard disk) is an outdated type of media that uses an electronic-mechanical operating principle. It is equipped with a head that reads data from magnetic disks, so the read and write speed is significantly lower than that of an SSD.
HDD is noisy, hot, vibrates and consumes more power than SSD. The only advantage is the low cost compared to a solid-state drive. But SSD is gradually pushing HDD out of the market, so soon no one will remember about hard drives.
In addition to types and capacity, you need to know a few more important information about disks. For example, operating mode:
- SATA 150 - practically not used in modern laptops, bandwidth does not exceed 1.5 Gb/s.
- SATA 300 – operating mode with a bandwidth of 300 Gb/s.
- SATA 600 – operating mode with a bandwidth of 600 Gb/s.
It is preferable to buy drives that support SATA III mode (SATA 600). The difference in performance between SATA II and SATA III can reach 1.5-2 times, this is noticeable to the naked eye when loading the system and performing other tasks.
But if the laptop motherboard only supports the SATA II interface, then there is no point in installing an SSD with SATA III, because it will not be more than 300 Gb/s anyway. It's important to keep hardware compatibility in mind, otherwise you could end up wasting money on a device that has limited functionality.
LookForNotebook.ru
How to find out which hard drive is installed in a computer SSD or HDD
Modern hard drives come in two main types: HDD and SSD, and there are also hybrid ones. Let's first look at these two types. If you talk about them in simple and understandable language, you will get the following. An HDD is a familiar box containing round magnetized plates. They store information and read heads that read this information. The spindles in this device spin the disks up to several thousand revolutions per minute. The most common speeds are 5400 and 7200 rpm.
An SSD or solid-state drive is, simply put, a large flash drive, but with incredibly high read and write speeds, and the larger the file size, the more significant the difference between an SSD and a regular hard drive becomes. Any program installed on an SSD drive starts several times faster, as almost everyone already knows. But how can an ordinary user find out which disk is installed in his computer?
Three ways to find out which hard drive is installed
There are three common ways to find out which disk is installed in your computer (ssd or hdd): using Windows tools, software, or disassembling the computer.
First - Using Windows Tools
The easiest and most up-to-date way to determine the type of hard drive is using Windows tools. You need to hold down the Win + R keys. In the window that appears, enter the combination “mmc devmgmt.msc”. The combination is written without quotes, after writing the combination, you need to press the OK button.
Next, you will have an open device manager; this combination works on all Windows operating systems. In the Device Manager that appears, find the disk devices button. Open and look at the name of your disk.
As a result, you will get the full name of your disk. You will need to enter this information in any search engine. Most often, this panel contains only one disk device, but if you have two, you need to enter each name separately. Any search engine by name will give you the characteristics of the disk and other information about your device.
This method is the simplest and most accessible for every user. But there is also a second way that will help you find out what kind of drive you have using special applications and programs.
The second is to determine the hard drive type using AIDA64
The most common program that will help you find out which hard drive is installed is AIDA64. The program can be downloaded absolutely free from the Internet. It is convenient, provides a huge amount of useful information for almost your entire system and has a very simple and user-friendly interface. In addition, the program not only provides information about your hard drive, but also provides complete characteristics of your entire machine. Working with it is very easy and simple; in order to find out what kind of disk you have, you need to:
Launch the AIDA64 application.
Go to the data storage tab, and then select the ATA tab. It is this tab that will be responsible for all the information about your hard drive, its values, properties, device type and much more.
How to open Disk Management in Windows from the Run window (3rd method)
Now we will look at how to enter disk management using a universal method that works in different versions of the Windows operating system. To gain access to disk management, we can use the command from the Run dialog box.
Follow these steps:
- Press “Win” + “R” on the keyboard.
- In the “Run” window, in the “Open:” field, enter the command “diskmgmt.msc” (without quotes), and then click on the “OK” button.
What kind of discs are there?
First you need to decide what kind of disk you have.
- Music and programs are most often distributed on CDs, which can hold up to 700 MB of data.
- Movies and operating systems are recorded on DVDs, which average 4.7 GB in capacity, although smaller or larger capacity options are also available. Typically, drives that can read CDs can also read DVDs.
- But to read Blu-ray discs on which films are recorded in high definition, you need a special drive - a regular CD/DVD drive will not work with them.
There are, however, universal drives that can read both Blu-ray and CD/DVD, but if you don’t have the latest computer or laptop, it’s not a fact that it has just such a drive installed. So before you buy a Blu-ray disc, make sure you have something to watch it on.
To view the disc on a laptop that does not have a built-in drive, you can buy an external drive. And for your computer, you can also purchase a built-in disk drive, just don’t forget to get help installing it if you don’t know how to do it yourself.
Let's display video files located in different folders in one window
Before describing the method I resorted to, it’s worth delving a little deeper into the theory.
Video files, like any other file, have an extension (a sequence of characters that indicates the file type). By default, the Windows operating system is configured in such a way that file extensions are not displayed. You can enable the display of file extensions.
What's all this for? The answer is simple - we will use a search by file extension and display all video files in one window. What’s especially pleasing is the fact that the entire procedure is carried out with lightning speed and exclusively using the standard tools of the Windows operating system, regardless of the version - it can be Windows 7, 8, and the latest to date, Windows 10.
Let's quickly move on to the instructions:
- Open a drive or folder in the Windows file manager that has subfolders with video files located there.
- In the upper right corner of this window there is a file search form. Not everyone knows, but Windows Search supports advanced search commands.
By entering this command into the line:
*.avi OR *.mp4 OR *.wmv OR *.mpg OR *.mpeg
a search will be carried out across several file types at once, which in this case are popular video formats.
Naturally, you can add or remove extensions that are not relevant in your case.
- As a result, all video files will be displayed in the search window.
You can change the view - display them as a list, table, tile, etc. Very convenient and really clear.
That's all. Now you know more, and you will not have problems when you need to display all video files in one window, which, in turn, are in fact located in different folders.
Disc viewing programs
To view a disc, you need not only a disc drive, but also software. If you have a CD with music, there will be no difficulties - you can play it through the built-in Windows Media Player by selecting the “VCD or audio CD” option from the “File” menu. You can use any other music player.
You can view the contents of a disk with programs or photos through Explorer. But to play discs with films you will need special programs. By default, Windows cannot play video DVDs - the system does not have the necessary codecs. To view such discs, you need to install an additional component of Windows Media Center, and it is not free. But you can also save money by using one of the free video players with the function of playing video discs - for example, VLC Player or SMPlayer.