Today, optical discs have almost completely lost their relevance. External hard drives and USB drives are being replaced hour by hour. In this regard, many people want to replace an outdated item with a more current one. After all, you can install an additional hard drive in a desktop computer, but this number will not work with a laptop, so we will use a disk drive.
Hard drive instead of a floppy drive in a laptop
Preparing for installation
The following items are required for this operation:
- The hard drive itself for installation.
Laptop hard drive - Adapter (on modern laptops you usually find a thin one - 9.5 mm, but first you should disassemble the laptop and make sure which adapter is suitable for you). You can purchase an adapter in many online stores. For example, Yulmart or Yandex Market.
Hard drive adapter - The necessary tools are screwdrivers (usually included with the adapter).
Important! If your device is under warranty, then after removing the drive you can forget about warranties. Therefore, before deciding to take such a step, you should think it over carefully.
Advice: if you buy an SSD, it is better to put it in place of the hard drive, and install the HDD itself instead of the drive. This is due to different port speeds. It is also necessary to choose the right adapter. If your laptop model is outdated, then most likely you will need an adapter from IDE to SATA during installation (in fact, they differ only in thickness, but there will be fewer problems with the original size).
Choosing the right adapter
Find out useful information from our article - “How to split a hard drive into two.”
What is the best place to put it?
It's up to you to decide. You will have unhindered access to the device installed instead of the DVD drive, that is, it is better to install a media device there - a hard drive (movies, music, photos, etc. will be stored on it). In this case, you can always quickly take out the HDD and, using a special device (pocket), connect it to a DVD to watch movies or connect it to another PC as a bulk flash drive.
On the other hand, the heat dissipation of the drive is worse, and there will be more vibrations here, and it is also difficult to say about the protection from mechanical damage of this place. And an SSD is much smaller than a hard drive and is afraid of vibrations, high temperatures, etc. That is, as far as performance properties are concerned, it will be better here than a hard drive.
In any case, it’s up to you, depending on how you plan to use these devices and depending on the configuration of your laptop model.
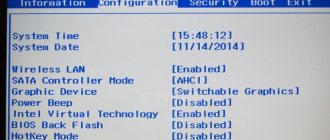
BIOS setup
You must enable recognition of the second drive.
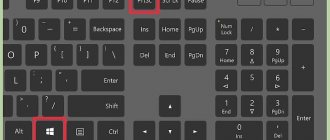
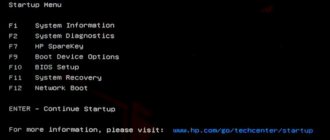
- Go to Bios (press F12 or F10 when booting the computer).
- In the “Main” tab we find “Configure SATA” and instead of “IDE” we install “AHCI”.
In the “Main” tab we find “Configure SATA” and instead of “IDE” set “AHCI”Save the changes and reboot.
We upgrade the laptop: add RAM, an SSD drive for the system, and put the HDD second instead of the DVD
To the competition ! Hi all! Often you read, hear and see reviews from cool journalists like this: hurray, finally in 2020 there are no more DVDs in this laptop! Well, these are them who buy a laptop for $1000. We could too, but we won’t, we’ll take a normal option within our means, and later we’ll upgrade it “inexpensively”. This is how I thought of everything when I bought my laptop last year. I took it specifically from the DVD so that I could later replace it with a second screw. And before the purchase, I found out that the laptop has a second slot for RAM for future upgrades.
And now the time has come. And it came for two reasons: firstly, I was given two gift certificates for this store, and secondly, the store itself sent me an offer by e-mail with a promotional code for purchasing this SSD, it turned out to be very profitable, although initially I chose a different option .
The review describes how to upgrade an HP laptop in a 250 G3 case using this: 1) SSD drive Kingston SSDNow KC400 128GB https://hard.rozetka.com.ua/kingston_skc400s37_128g/p6812319/ 2) RAM Kingston SODIMM DDR3L-1600 4096MB PC3L- 12800 https://hard.rozetka.com.ua/kingston_kvr16ls11_4/p707524/ 3) Adapter for connecting Grand-X HDD 2.5" to the laptop drive bay SATA/mSATA https://rozetka.com.ua/grandx_adapter_hdd_2_5_sata_msata_hdc_24/p4402620/
Everything is detailed and in pictures. The total came out to about $100. Sent by Mist Express, it arrived in 3 days, the courier brought it straight to my office. I paid in cash, including some with certificates (plastic cards).
The package included: 1) RAM 4GB Kingston SODIMM DDR3L-1600 4096MB PC3L-12800
This is the type of memory that suits me according to Aida. But to be sure, I disassembled the laptop in advance to see with my own eyes the presence of a second empty memory slot, because... I saw videos in which there was a similar laptop without it.
2) boxes for a SATA drive, inserted instead of a DVD.
They come in two types, differing in thickness, my 9.5mm is thinner. And this is the second reason why I disassembled the laptop in advance. The kit includes a small screwdriver and a front panel. The store also gave this product as a gift: a Green selfie stick, with a button and a plug into the headphone jack. Thank you, let it be
The third reason why I disassembled the laptop in advance... You didn’t guess, it wasn’t because of the hard drive. I already understood that it was possible to install it. And because something inside him was initially rattling, then it stopped. These turned out to be pieces of plastic, which during assembly at the factory broke due to screwing in a couple of screws and another surprise - a screw! As I expected, it stuck to the speaker magnet. An examination did not show where it could have fallen; apparently, it was simply forgotten inside. Hello to the assemblers at the factory!
3) the last and most expensive item in the package is the SSD hard drive itself.
Initially I wanted to take Kingston Fury on 120Gb https://hard.rozetka.com.ua/kingston_shfs37a_120g/p1104899/
But then the store sent me a letter with a promotional code for the KC400 at a very good price. I read about it, it's a cooler business class screw, fresh model this year, new 8-channel Phison PS3110-S10 controller and quad-core processor, advanced error handling during power failures, more speed, especially incompressible data, 5 year warranty, 1 million hours between failures. In short, it’s much better than Fury with the old SandForce controller, but it’s more expensive with a promo code of only $10.
Guarantees and an invoice were also included in the package.
Ok, let's start pumping. Our experimental HP 250 G3, on board Core i3-4005U, 4Gb DDR3L, HDD 500Gb, Windows 10 64bit
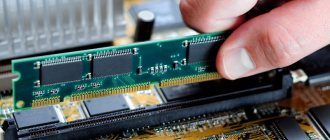
The problem with this model is that in order to get to the hard drive, and especially to the RAM, it needs to be completely disassembled. Well, we have no other choice. But first, let's transfer our OS to a new screw and check how it will work without disassembling it. Let's remove the DVD and install the box with the SSD in its place. Fortunately, at least the DVD can be easily removed, just unscrew one screw. Here's a DVD and SATA adapter for comparison.
So that you can later secure it in the case with the same screw, you need to remove the loop from the end of the DVD.
Screw it onto the SSD box and insert our SSD into it.
Next, let's boot our Windows 10 from our old HDD. Let's go to disk management, the system will tell us that it has found a new uninitialized disk and will offer to initialize it. Because I have a modern laptop, I will do this not in MBR, but in its successor GPT.
Everything is ok, the system sees the SSD with a clean capacity of 119.24Gb. There are many programs for transferring the system, for a change I use the free MiniTool Partition Wizard Free Edition: https://www.partitionwizard.com/free-partition-manager.html If you have a dirty/infected system or an old one like Windows 7, it is better to install Win 10 from scratch.
So, go to the Wizard->Migrate OS to SSD/HD Wizard program menu.
We are warned that all data on the target disk will be destroyed, ok, it is already empty.
The trick to transferring a system is to transfer only the system partition, drive C: and not transfer the data drive D:, leave it on the old capacious hard drive. As you know, in the latest versions of Widows, not only one partition is important for the system, but also the boot partition, recovery partition, etc., in general, everything that it created during installation. And it can create several of them, this is especially true for laptops. So in my case, there are as many as 3 hidden partitions in front of the system partition: a recovery partition of 300 MB, then another one of 100 MB, and another 128 MB, and also after that one of 495 MB, all this needs to be transferred. Partition Wizard understood everything correctly, but I do not agree with him on the size of the partitions, he suggested this:
No, you don’t need to do that, you need to make my section C: make it as much as possible, and the one after it is about the same as it was. I do it manually myself.
Next we are reminded that to boot from a new screw, we must remember to switch to it in the BIOS, ok.
All that remains is to click the Apply button on the taskbar to apply everything.
The process will begin.
It will transfer all other partitions except C:, and about C: it will write that it is currently in use and should be done after a reboot.
OK, let's restart. When loading, the process of transferring the C drive itself will begin:
Then you can go into the BIOS, for HP it’s F10, and configure it to boot from the new SSD.
We load the OS from the new screw, make sure that everything is ok. In principle, you could leave it in this box and not disassemble the laptop. But what if the internal SATA port is faster? Many people put the SSD inside and the HDD in the box. But in my case, I still need to deliver the RAM, so I still have to disassemble it. When disassembling, look on the internet for a video of your model being disassembled, because... each has its own nuances.
In mine, you have to remove the top part of the case completely to get to the hard drive.
And to get to the memory, you need to remove the motherboard altogether.
Reassemble in reverse order. Interestingly, the front panel from the DVD fits perfectly into the new box with the HDD. It needs to be carefully removed, there are several thin flimsy latches that fit completely into the holes, I didn’t expect it, respect! Now everything is as it was.
I won’t bore you with tests and benchmarks, you yourself understand perfectly well that replacing an HDD with any SSD is a noticeable increase in performance when performing disk operations, and not even so much in read/write speed, which is several times higher for SSDs, as in random access time to memory cells, which is thousands of times lower for SDDs. Comparison of CrystalDiskMark test results:
Booting Windows 10 to the desktop takes 11 seconds, with the old HDD 40 seconds. The biggest difference is when accessing a bunch of small files, for example, Windows updates, have you noticed how the screw rattles at this time? Or, let’s say, find out the size of a 30Gb windows folder: SSD in 5 seconds, HDD in 1 minute 15 seconds. Users folder size 5Gb: SSD in 2 seconds, HDD in 1 minute. And the RAM size of 8Gb allows you to run several virtual machines at the same time, and not, as before, only one, and then only if you unload Chrome
Bottom line: everything is ok, and I wish the same for you. And it works faster and looks good, no new freeways have been added for dust. On the old HDD, the old C: drive is hidden for now. I’ll work like this for a while, if everything is ok, I’ll delete all unnecessary partitions from it and expand the D: drive to cover the entire volume of the HDD. In addition, I have two more bonuses: * a mini screwdriver from the HDD case, which ended up in a set with friends:
* DVD, which can be connected via USB, sometimes it is needed, older comrades ask them to record porn and various films for their household DVD players. Just tell me, has anyone seen where to buy such a cord cheaper, not to be confused with regular SATA, mSATA is smaller in size.
Thank you all for your attention!
upd: to extend the life of the SSD, I made some settings: * disabled defragmentation for drive C: It is not relevant for SSDs, because the access time to all cells is the same, unlike HDD SSDs, you do not need to move the head to get to the next fragment of the file * disabled the paging file, because 8Gb of RAM allows * disabled system protection, fewer write cycles on C:
upd2: Firstly, I deleted all unnecessary partitions on the old HDD disk, leaving only the D: drive, which expanded the entire available 500Gb space. I did everything with the MiniTool Partition Wizard Free program mentioned above, all without data loss, but before that I backed up the most important thing to an external USB HDD, always do this if you value information.
Secondly, my laptop-DVD -> USB adapter cord arrived. Got it here for $2.59: https://www.aliexpress.com/item/USB-2-0-to-7-6-13Pin-SATA-Laptop-CD-DVD-Blu-ray-Optical-Drive-Adapter/32636362025 .html
hidden text↓
This one with two USBs:
It has two LEDs, the blue one is constantly on, the red one blinks during operation.
I didn’t take any boxes for the DVD, I still don’t understand why they are needed, it’s already quite sealed.
The front panel is completely identical to the purchased HDD caddy, the thickness of the DVD is only 10mm.
For comparison, my DVD and the other one in the box are longer and twice as thick.