What is Quick Start?
Windows PCs typically have multiple power states. The ACPI specification identifies the following basic states of the “system as a whole.”
- G0 (S0) - normal operation.
- G1 - the machine is turned off, but the current system context is saved, work can be continued without rebooting
4 sleep states:
- S1 is a state in which all processor caches are flushed and the processors have stopped executing instructions. However, power to the processors and RAM is supported;
- S2 is a deeper sleep state than S1 when the CPU is turned off.
- S3 - In this state, random access memory (RAM) continues to receive power and remains virtually the only component consuming power. Since the state of the operating system and all applications, open documents, etc. is stored in RAM, the user can resume work exactly where he left it.
- S4 - “Hibernation” - in this state, the entire contents of RAM are saved to the hard drive: the state of the operating system, all applications, open documents, etc. This means that after returning from S4, the user can resume work from where it was terminated, similar to S3 mode. Some power is usually still supplied to the peripherals so that you can, say, touch the keyboard and boot up the computer.
- G2 (S5) - soft (software) shutdown; The system is completely stopped, power is on, ready to turn on at any time, there is no hibernation file and there is no saved user session.
- G3 - mechanical shutdown of the system; power supply is disconnected.
With Fast Startup enabled, the process of shutting down your PC may look like you're shutting down your computer completely, but in reality your PC is going into a combination of shutdown and hibernation. The hibernation file is actually used, although it is smaller than usual. For what? The improved boot speed comes from storing the Windows kernel on the hard drive and restoring it at boot.
Automatic clean installation of Windows 10
Previously, the site had already published instructions on how to return the system to its original state - Automatic reinstallation or reset of Windows 10. In some cases (when the OS was installed manually), what was described in it is equivalent to a clean installation of Windows 10 on a computer or laptop.
But: if you reset Windows 10 on a device where the system was preinstalled by the manufacturer, as a result of such a reinstallation you will receive the system in the state in which it was when purchased - with all additional programs, third-party antiviruses and other software from the manufacturer. In new versions of Windows 10, starting from 1703, a new system reset option has appeared (“New Start”, “Start Over” or “Start Fresh”), when used, a clean installation of the system (and the latest current version) is automatically performed - after reinstallation Only those programs and applications that are included in the original OS will remain, as well as device drivers, and all unnecessary, and possibly some necessary, manufacturer’s programs will be deleted (as well as the programs you installed). Learn how to clean install Windows 10 using the new method later in this guide.
Please note: for computers with HDD, such a reinstallation of Windows 10 can take a very long time, so if manual installation of the system and drivers is not a problem for you, I recommend doing just that. See also: Installing Windows 10 from a USB flash drive, All methods for restoring Windows 10.
Is your computer actually shutting down?
Although Quick Startup is a fairly safe tool that can significantly improve startup speed, especially for PCs that use hard disk drives (HDD), some users still prefer to actually shut down their PC when they click the Shut down button.
Keep in mind that Windows updates sometimes reset your computer's power settings. Therefore, if you want Fast Startup to be permanently disabled, you may need to check your configuration periodically. In my experience, Fast Startup was re-enabled after the Windows 10 May 2020 Update (version 1903) .
If you are one of those users who disable Fast Startup on Windows 10 PC, you should double-check your settings to make sure that Fast Startup is still disabled.
First steps after a clean installation of Windows 10
This is a non-binding list of changes and recommendations that may be useful to Windows 10 users and administrators. Power users are likely already aware of them.
The steps given are not mandatory, but rather precautionary measures. They include backing up the system, installing updates, checking that drivers are installed correctly so that all PC components are correctly recognized and working at full capacity, etc.
Why disable fast startup?
Enabling Fast Startup will not harm your computer in any way - but there are several reasons why you might want to disable this feature.
In most cases, a quick startup does not cause any problems. But there are a few situations where you can disable it. The first is enterprises where Wake-on-LAN (WOL; translated from English - “waking on [a signal from] a local network”) is used to service computers. Wake-on-LAN does not work if Fast Startup is enabled. The second reason for disabling Fast Startup is that some Group Policy settings are not applied when the user turns off and turns on the PC. The settings are only applied during reboot.
Because the feature prevents the computer from shutting down regularly, it may cause compatibility issues with devices that do not support sleep or hibernation mode. Which will likely lead to problems, such as the computer waking up from sleep mode on its own.
Others would like to save hard drive space that would normally be occupied by the hibernation file, and those running a second Linux system will likely struggle with dual booting and virtualization. Additionally, some users have reported that the fans on their PC keep spinning. These problems are not widespread, but they can be frustrating. Lastly, even Windows 10 updates may not install correctly if Fast Startup is enabled.
Your reason for disabling fast startup could be as simple as knowing that your device is truly powered down , especially if you have a fast solid state drive (SSD) installed, or clear the CPU cache and have trouble-free operation after boot.
If you want to check how your computer works without Fast Startup, you can disable it in just a few steps:
Initial setup of Windows 10 after a clean installation
Installing updates
The first thing you need to do is install all the necessary updates and security patches. Some users prefer to create a system backup first. Indeed, this is also a good strategy that allows you to restore the system if the update fails.
Note : This manual is intended for casual, casual users. Some people prefer to have complete control over the Windows 10 update process, which is great. You can also use third-party tools to selectively install updates.
Check for updates and install all available packages.
Four ways to disable Quick Launch.
Using the Settings app.
Step 1: Open the Settings by clicking the gear icon in the Start Windows logo key and I Win I
Step 2: Go to the “System” → “Power and Sleep” , on the right in the “Related settings” click the “Advanced power settings” link.
Step 3: In the Control Panel that opens, open the item “What the power buttons do.”
Step 4: In the System Settings , click the Change settings that are currently unavailable link.
Step 5: Under Shutdown Options, uncheck "Enable Fast Startup (Recommended)"
Step 6: Click the Save Changes .
If in the future you want to enable Fast Startup again, simply repeat these steps and check the box next to Enable Fast Startup.
Enable or disable Fast Launch using Registry Editor.
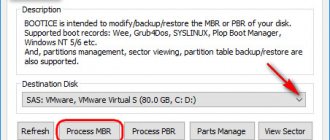
Step 1: Open Registry Editor (see how) .
Step 2: Go to the next section:
HKEY_LOCAL_MACHINE\SYSTEM\CurrentControlSet\Control\Session Manager\Power
Step 3: Open the setting named HiberbootEnabled and change the value to 0
- 0 = disable fast startup
- 1 = enable fast startup
Step 4: Reboot your device.
Enable or disable Fast Startup using Local Group Policy.
Step 1: Open the Local Group Policy Editor (see how)
Step 2: Navigate to the following path in the left pane of the Local Group Policy Editor. (see screenshot below)
Computer Configuration\Administrative Templates\System\Shutdown
Step 3: In the right Shut Down , double-click/tap Require Fast Startup . (see screenshot above)
Step 4: Select Not Configured or Disabled . This will allow you to disable Fast Startup.
Step 5: Click OK and close the Local Group Policy Editor.
Disadvantages of the New Start feature
A significant drawback will be the loss of all software and drivers installed during operation. As well as all keys and licenses. Therefore, before using this function, make sure that you have all the keys, licenses or registration data.
For example, most new Dell PCs include the Dropbox app with a free 20GB of storage space.
The same goes for other applications. In iTunes, you will have to deauthorize the device from your computer before resetting. Then, after reinstalling, re-authorize. If you have a Microsoft Office product key, you need to make sure you have it before you can reinstall it. The same applies to any other applications that require a key or authorization.
Although the OS promises to preserve personal files during reinstallation, it is recommended to have a backup copy of all important data in case of failure.
You can see how to restore data after resetting Windows 10 to its original state in the video of our YouTube channel
Additional solution to speed up Windows boot time
Fast loading of Windows 10 is not the only way to speed up the work and start of the operating system. Below we will present a number of methods that will help you configure your PC so that logging into it is faster.
Disabling autoloading of services and programs
As has already become known, startup significantly reduces the speed of turning on the PC and complicates it. To exclude some applications from the list you must:
- Right-click on the virtual “Start” button and select “Task Manager”.
- Go to the “Autostart” tab.
- View the list and disable unnecessary programs by right-clicking on them and selecting “Disable”.
Important! Services can be deactivated in the System Configuration utility, which is not difficult to access. Just press the Win + R key combination and enter “msconfig”. In the window that opens, go to the “Services” tab and disable unnecessary ones.
Video card driver update
If the laptop has two video cards at once, a so-called “black screen” may appear after starting the PC. He doesn't disappear for a long time. Fortunately, there are a number of ways to solve this problem.
If a person uses a card from NVIDIA, then it is recommended to update the driver to the latest version. To do this, go to the official website and download the special GeForce Experience utility.
Owners of AMD cards should act similarly, but with one caveat: this manufacturer’s hardware technologies are based on ULPS technology, which activates the second card and causes the PC to crash. To disable ULPS:
- Go to the Run window (Win + R).
- Run the regedit command.
- Search for the “EnableULPS” parameter and change its value to “0”.
Working with "Startup"
Installing the latest Windows 10 updates
If the methods described above do not help, you can try updating the system itself. To do this, go to the “Update Center” and check if new updates are available for installation. Very often, the manufacturer corrects old errors only after some time.
Disabling Windows 10 services
Sometimes disabling a number of system services helps. For this:
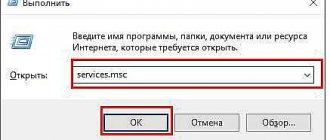
- Go to “Run”.
- Type services.msc and press Enter.
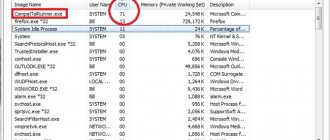
- Find the names Background Intelligent Transfer Service (BITS), Connected User Experiences and Telemetry, and Windows Search.
- Disable them using the right mouse button.
Disable automatic maintenance in Windows 10
Automatic OS maintenance often slows down booting, so you should turn it off:
- Go to “Run”.
- Enter the regedit command.
- Go to the path HKEY_LOCAL_MACHINE\SOFTWARE\Microsoft\Windows NT\CurrentVersion\Schedule\Maintenance.
- Find the “MaintenanceDisabled” parameter and set its value to “1”.
Disable OneDrive sync
If a person does not use this technology, then you can safely turn it off. To do this, use the icon in the “Notification Panel” to go to the application settings and remove the checkbox next to the inscription “Automatically launch...”.
Disabling some services will allow your PC to start faster
Using Power Options
Disabling the quick shutdown and startup of Windows 10 also helps. It is designed to increase startup speed, but sometimes everything works exactly the opposite. How to do this was described in detail in the sections above.
Disk Cleanup and Junk Removal
A cluttered hard drive can slow down its performance. To prevent this, you need to get rid of unnecessary games and programs, and also clean the media using the utility of the same name.
Move swap file to SSD
As you know, there is never enough RAM, so Windows creates a special paging file that works together with the RAM. To improve performance, you can simply move it to a faster SSD drive by specifying the file location in the appropriate settings.
Hibernation mode will allow you to not turn off your PC and get back to work faster
Thus, it was explained how to enable or disable fast boot in Windows 10, as well as exactly what factors affect the OS loading speed and how to remove them. If you follow the step-by-step instructions presented above, your PC will turn off or on much faster. It does not matter which tool is used for configuration: command line, PowerShell, Registry Editor or Control Panel.
Why might I need to disable Quick Start mode?
But why, then, in some cases may it be necessary to disable Windows 10 fast startup, if this mode has seemingly such undeniable advantages?
The point here is that when exiting hibernation, some drivers (most often the control software for graphics adapters) may not work correctly and cause conflicts at the system level, which is why the entire system freezes completely. Sometimes this happens immediately after exiting, sometimes after a short period of time. It would seem that you can simply reinstall or update the driver package, and the problem will disappear. However, as practice shows, Windows 10 is such that such actions do not always help. In addition, when accelerated start is deactivated, the difference in the time required to “bring the system to life” increases quite insignificantly, and the user practically does not feel it.
For that matter, it is better not to use standard driver update tools, but to install automated programs like Driver Booster. Perhaps this will give the desired result (absolutely all system drivers that require such procedures will be updated or reinstalled, without much user participation in the installation or update process).
How to speed up Windows 10 system boot - step-by-step instructions with screenshots
If loading Windows is slow and takes more than a minute, you should think about the fact that the system needs to be comprehensively optimized and also checked for viruses.
Optimization consists of many ways to fix errors, clean up junk, disable unnecessary services, and much more. Moreover, professionals recommend cleaning your PC at least once a month. It is during this period that enough garbage accumulates in Windows for system performance to begin to decline.
The author tries to clean the system of garbage and unnecessary files every two weeks, defragment the disk once every three weeks, update drivers efficiently and disable services immediately after installing the OS. At the same time, Windows is reinstalled for itself no more than once a year.
If your computer takes a long time to boot or there is a general slowdown in performance, the first thing you need to do is check Windows for viruses. It is best to do this with two or three antivirus programs from different manufacturers.
Disk Cleanup and Junk Removal
Garbage refers to some application cache files, program logs, various kinds of reports, temporary browser and system data, the contents of the recycle bin, and much more. When Windows boots, it reads these files, determines their need, and this takes resources and time. That is why it is recommended to regularly clean the system.
- In the search, enter “Control Panel” and select the best result.In the search, enter “Control Panel” and select the best result
- Open the “System and Security” category. Among the categories, select “System and Security”
- In the “Administration” applet, click on the “Free up disk space” link. In the “Administration” column, click on the “Free up disk space” link
- Next, select drive C, click OK, and wait for the wizard to generate a list of files to delete.1
- In the dialog box, check the boxes next to the data groups that need to be deleted and click OK. In the program window, check the boxes next to the data groups that need to be deleted and click OK
- We wait until the program finishes working and restart the computer.
Deleting files can take a long time. In the author's memory, there was a case when the disk was cleared for two and a half hours, due to incorrect installation of Windows over another version. You should definitely wait until all files are deleted. Forcibly interrupting the process is fraught with disk errors, and they are much more difficult to cure than a little garbage.
Setting up startup or removing unnecessary programs from it
“Startup” is the process of starting programs when the operating system starts without user intervention. If there are too many programs in the automatic launch environment that are of no practical use and can be launched manually, it is advisable to clear it.
- Right-click (RMB) on an empty space on the taskbar and select “Task Manager.” Right-click on an empty space on the taskbar and select “Task Manager”
- In the window that opens, go to the “Startup” tab. Right-click on the process and select “Disable.” In the “Startup” tab, right-click on the process and select “Disable”
On subsequent Windows startups, the disabled processes will not start automatically.
System Quick Start Feature
Windows 10 also has a fast startup setting that allows you to create less backup information at startup, thereby reducing the load on the system kernel.
- Open the “Control Panel”, as shown above, go to the “Hardware and Sound” applet. Open the “Control Panel”, go to the “Hardware and Sound” applet
- Next, in the “Power Options” group, click on “Customize the functions of the power buttons.” In the “Power Options” group, click on “Customize the functions of the power buttons”
- Next, click on “Change settings that are currently unavailable.” Next, click on “Change settings that are currently unavailable”
- And check the box next to “Enable Fast Launch” and click “Save Changes.” Check the box next to “Enable Fast Launch” and click “Save Changes”
If you have the Hibernation service disabled, the Quick Startup feature will not be available.
If you have the Hibernation service disabled, the Quick Startup feature will not be available.
Disk Defragmenter
Fragmentation is a recording process that Windows uses when saving information. In this case, the file can be split into parts for a more compact location on the hard drive. However, when trying to read it, the operating system must first “glue” the data together, and only then use it. This takes time, which means you need to use the reverse process - defragmentation.
- Open the “Start” menu, in the list of programs click on “Windows Administrative Tools” and select “Disk Optimization”. Open the “Start” menu, in the list of programs click on “Windows Administrative Tools” and select “Disk Optimization”
- In the wizard that opens, click “Optimize” and wait until the program finishes its work. Click “Optimize” and wait until the program finishes its work
Driver Update
Drivers are important components of the operating system. These software products ensure stable operation of the “internals” of the computer, communication between the system and devices. This is why it is important that drivers are up to date and not basic. Especially for the operation and loading of the system, AHCI controller drivers are needed, which are responsible for the speed of data exchange between the hard drive and the rest of the computer.
- In the search, enter “Device Manager” and select the best match. In the search, enter “Device Manager” and select the best match
- Open the “IDE Controllers” tab, right-click on the device that has AHCI in its name and select “Update Driver.” Right-click on the device and select “Update Driver”
- Next, click on “Automatic search” and wait until the program installs the best software.Click on “Automatic search” and wait until the program installs the best software
- Reboot the computer.
Video: how to update drivers
Disabling unnecessary services
Services are background processes that keep the operating system running. If drivers allow devices to work, services set the vector for this work. However, Windows has a lot of services and not all of them are “useful.” For example, the “Fax” or “Remote Registry” service, they are simply not needed by ordinary users.
- Open the “Start” menu, in the list of programs, the “Windows Administrative Tools” folder, select “Services”. Open the “Start” menu, in the list of programs, the “Windows Administrative Tools” folder, select “Services”
- In the window that opens, double-click on the service to open its properties. Next, change the “Startup type” filter to “Disabled” and save the setting with the OK button. In the service properties, change the “Startup type” filter to “Disabled” and save the setting with the OK button
- We repeat the procedure for all unnecessary Windows services.
List of services that can be safely disabled for the operating system:
- "Fax machine";
- NVIDIA Stereoscopic 3D Driver Service (for NVidia graphics cards if you are not using 3D stereo imaging);
- “Net.Tcp Port Sharing Service”;
- "Working folders";
- "AllJoyn Router Service";
- "Application Identity";
- "BitLocker Drive Encryption Service";
- "Bluetooth Help" (if you don't use Bluetooth);
- “Client License Service” (ClipSVC, after disabling, Windows 10 Store applications may not work properly);
- "Computer Browser";
- Dmwappushservice;
- Geographic Location Service;
- "Data Exchange Service (Hyper-V)";
- "Guest Shutdown Service (Hyper-V)";
- "Pulse Service (Hyper-V)";
- "Hyper-V Virtual Machine Session Service";
- "Hyper-V Time Synchronization Service";
- "Data Exchange Service (Hyper-V)";
- “Hyper-V Remote Desktop Virtualization Service”;
- "Sensor Monitoring Service";
- "Sensor Data Service";
- "Sensor Service";
- “Functionality for connected users and telemetry” (this is one of the options to disable Windows 10 “tracking” of the user);
- “Internet Sharing (ICS)” (provided that you do not use Internet sharing functions, for example, to distribute Wi-Fi from a laptop);
- "Xbox Live Network Service";
- Superfetch (assuming you are using an SSD);
- "Print Manager" (if you don't use printing features, including Windows 10's built-in printing to PDF files);
- "Windows Biometric Service";
- "Remote registry";
- "Telephony";
- "Telephone communications";
- “Secondary login” (assuming you are not using it).
Video: how to disable unnecessary services
Special programs for system optimization and acceleration
If you think about optimization, you can understand that this is a very labor-intensive process that takes the user a decent amount of time. Hence the demand for programs that will do everything for a person. Now the market is replete with programs that help optimize your PC in a couple of clicks.
"Computer Accelerator"
"Computer Accelerator" is an extremely effective program for cleaning and optimizing Windows. The application has a number of advantages over its competitors: a user-friendly interface, the most comprehensive range of built-in utilities to speed up PC operation, a built-in scheduler and much more.
"Computer Accelerator" is an extremely effective program for cleaning and optimizing Windows
Features of the Computer Accelerator program:
- incredibly effective acceleration of your computer's performance compared to its analogues;
- special functionality for eliminating freezes and system failures;
- presence of a useful built-in task scheduler;
- the ability to completely clean the system of all kinds of computer debris;
- the function of correcting various errors found when checking the Windows registry, as well as its high-quality cleaning;
- provides the ability to manage startup;
- effective optimization of the registry and important software systems;
- operational monitoring and cleaning of the hard drive from damaged, unnecessary and temporary files.