What is this function?
Backup is a function of the operating system that, using archiving tools, can create a backup copy of user information and the OS as a whole. There are a lot of benefits from it, since with its help you can make an OS image, thanks to which you can then restore a damaged operating system. This will be a real lifeline if a restore point has not been created and a rollback is impossible. Of course, it is also advisable to make a restore point in case the operating system is damaged, but there are different situations in which a good old rollback will not help. For example, when the system does not start, and the disk on which Windows 7 is recorded is not at hand.
Preparing to create a Windows backup
So, we have a stable and fully configured operating system with the required package of installed software. Before you start creating a backup copy, you need to take care of the future location of its storage. A local computer disk or an external hard drive is suitable, the amount of free space of which should correspond to the size of the backup being created.
Typically, the size of a Windows 7, 8 or 10 backup, with a full list of installed programs, can be in the range of 10 GB and above. Its value directly depends on the number of programs and their purpose. For example, programs for working with 3D graphics take up significantly more disk space, unlike any video player.
Please note : if there is no suitable external storage medium, and the PC hard drive is not partitioned (other logical drives) and has only the system volume “C”, then in such cases you will have to resort to creating at least one additional logical drive on which we will subsequently record the created system image. Otherwise, archiving will not be possible.
Why not a rollback?
Unlike a rollback (restore function in another way), which simply returns the system to a previously saved state, a backup saves user settings and the image of Windows 7 as a whole. The benefits of this are enormous. For example, by reinstalling Windows 7, you get the opportunity to restore all user data that was erased during the reinstallation process.
And if the operating system fails, it can always be returned to normal using a backup copy; in addition, drivers, programs and personal data (saves and profiles in games, etc.) will also be restored.
How to restore Windows 7 system
Now let's assume that the operating system crashes and Windows 7 won't boot. We insert our disk into the drive and set the BIOS to boot the computer from the CD. The computer should then start booting directly from the CD.
After downloading the files, a window will appear with the option to select the location of our file with a copy of Windows 7. After specifying the location of our copy, click the “Restore the computer using a previously created system image” button, after which the recovery process will begin.
If everything goes well, then after rebooting the computer, we will have a fully working Windows operating system. Unfortunately, the Windows 7 backup utility does not have many options and therefore the backup takes on average 14-18 GB.
External USB SSD disk 64/128/256 GB
Aluminum body, dimensions: 80 * 25 * 120 mm, recording speed…
More details
Another method for backing up Windows 7 is using the Acronis program, which is much better than Windows system tools. First of all, the copy is created much faster and we have the choice of creating an image of the entire C: / partition or just Windows. In addition, restoring Windows from a previously created backup is much faster, and we can do without using a CD.
How to backup Windows 7?
Creating a copy of the OS is carried out by a fairly large number of utilities. In addition, Windows 7 has sufficient functionality for this. Before you create a backup of Windows 7, you need to do the following steps.
We go to the “Start” menu, where in “All Programs” we look for the “Maintenance” folder. In it we find and click on the item “Backup and Restore”. There are also a couple of alternative ways to open this function:
- open “Start”, enter “Backup and Restore” in the search line and go when it appears;
- We go to the control panel, where the “Backup and Restore” section immediately catches your eye.
It doesn’t matter which opening method is chosen, the main thing is that the window with this service is open. There you can use three functions:
- configure backup;
- create an OS image;
- create a disk designed to return the system to normal.
Let's start with how to create a backup copy of Windows 7, then we'll look at the other two functions.
Procedure for creating an archive
If the user is wondering how to properly make and record a backup copy of the Windows 7 operating system, then you will need to perform the following several sequential steps:
- Through “Start”, enter the “Control Panel” window;
- Next, it is recommended to click on “Small icons” and in the list that appears, find and click on the line “Backup and Restore”;
- Then in the window that appears, click “Set up backup”;
4. Specify the location where you plan to create a copy of the OS and click “Next”;
- After this, it is recommended to check the “Give Windows selection” section and click “Next” again;
- In the next window that appears, you can, at your discretion, set a “Schedule” according to which changes will be recorded in the archive at a frequency specified by the user;
- You can leave the default by clicking “Save parameters and start archiving” or adjust the recording schedule,
- Wait until the process completes.
Backup
To do this, in the “Backup and Restore” window, click on the “Set up backup” hyperlink highlighted in blue. The archiving settings window appears. At this stage you will have to wait a little. Patience will be rewarded by the appearance of a window called “Archiving Settings”, where you will be offered a choice of where to save the copy. Of course, a reserve can be created on drive D, for example. But if all the data on the hard drive is deleted or damaged, then the backup copy will be of no use. Therefore, it is best to store the backup on an external hard drive. In addition, if you connect an external hard drive, the system will offer nothing more than to backup the Windows 7 system to it. When the choice is made, move on using the “Next” button.
In the next window you need to choose whether to leave the selection of files for Windows archiving or choose what data will be archived (individual files, folders, disks). By the way, this feature can help you on how to backup Windows 7 drivers.
If there is no trust in the operating system, and the decision was made to distribute the data manually, in the window that appears, you must click “Include disk system image: (C)” so that you can restore the faulty system using a backup, and also check the boxes for the necessary data. As usual, click on “Next”. Before making a backup copy of Windows 7, we check that all settings are correct. After that - “Save and run”.
Backing up the Windows operating system
First, we'll show you how to make a copy of Windows using system tools. To do this, go to the following menu: “Start” - “Control Panel” - “Backup and Restore”. On the left side of the panel we have the option “Create a system image”.
When you select this option, a window will appear asking you to select the location where the backup will be saved. We can select one of the partitions of our disk, or use an external disk or flash drive of the appropriate size for this purpose.
USB flash drive 8/16/32/64/128 GB
High-speed USB flash drive, metal casing…
More details
After selecting the storage location, click “Next”. Then click the “Start Backup” button. The copying process will begin, which may take up to several tens of minutes, depending on the size of the operating system along with programs and the speed of your computer.
The next step we can take is to create a recovery disk. Once the backup process is complete, you will see a window asking you to create a recovery disk. Press the confirm button and insert a blank DVD into the drive. After burning a recovery disk, we have a ready-made set that will be useful to us in case of a computer failure.
Creating an OS image
This time we click on “Create an image” instead of such a fad as making a backup copy of the Windows 7 disk. In this case, an image is created that includes the disks necessary for normal operation of the OS. We are in the window for choosing where to save the future image. It is best to prefer a portable (that is, external) hard drive, since the image can weigh several tens or even hundreds of gigabytes. Next, you select the disks from which the image will be created. In the next window, we check again the disks that will be in the image, and then click “Archive”.
Creating a copy of Windows 7 using Acronis
Launch the program, and then select “Create an image” or “Create a copy” depending on the version of the program. As a rule, at each stage the program tells us what needs to be done. So you just carefully read the instructions displayed on the screen.
The program will ask you to select what should be included in the image (copy). Select "My Computer" and click next. Select the C:\ drive and click next. On the file exclusions tab, do not mark anything and click next.
A window should appear with the option to select the location where our copy of Windows 7 will be saved. First, on the left side, select a location, for example Drive D:\. Then below we enter the name of the file of our copy and click next.
Select “Create a new image” and click next. The program will ask whether to use the default parameters - oh. Then a window will appear with the ability to enter comments about the copies (no need to write anything), click next, and the creation of a Windows backup will begin.
Creating a recovery disk
This is done in the same place, instead of such an item as making a backup copy of Windows 7, only it is located next to the image creation button. True, this step is not necessary for those who have Windows 7 on disk and who can use it to return the system to normal. For those who do not have such a disk, it is useful to go through this procedure, since in case of serious damage to the OS there will be something to restore it from.
To do this, you will need a blank DVD or CD, since the recovery files will weigh approximately 150 MB. In the “Backup and Restore” window, click the “Create system disk” option. Insert the disc into the drive, select it from the list and click on the “Create disc” button. We wait until the disk creation process comes to an end, after which we remove the disk.
Now this disk can be used if the operating system dies for a long time, and it will be impossible to enter it even from safe mode.
Creating a system repair disc
For those users who have pre-installed operating systems on their computer, creating a bootable system recovery disk is a must. Computer manufacturers now often do not include a Windows installation disc with them. In this case, an emergency system recovery disk will help boot the computer to restore it if it is not possible to boot in any other way.
In the “Backup and Restore” window, you must click on the “Create system repair disk” item to create an emergency system recovery disk. In this case, you will have an emergency CD for system recovery in case of serious problems with the operating system.
After clicking on the “Create a system repair disk” item, the “Create a recovery disk” window opens. To create a system recovery disc, you need to insert a blank CD or DVD into your optical disc reader, and then click the “Create Disc” button.
Next comes the process of creating a system recovery disk. After completing the creation of the emergency recovery disk, you need to click on the “OK” button. The Windows 7 emergency recovery disk takes up about 150 MB.
You will now be able to access system recovery options using a bootable recovery disc if you are unable to boot your computer using other methods.
To boot your computer from a rescue or installation disk, you will need to select in the BIOS the boot priority from a CD/DVD reader, and in the case of using a bootable flash drive, from the USB drive to which such a bootable flash drive is connected.
If, when creating a recovery disk, you are prompted to insert an installation disk with the Windows 7 operating system, this means that the necessary files to create a system recovery disk were not found. In this case, you will need to insert the Windows 7 installation DVD into your computer's optical drive.
Using the Windows 7 installation disk or recovery disk, you will be able to boot into your computer and have access to all of the operating system's recovery options.
Configuring regular backup options
By default, backup is not configured. Click the Configure backup in the main Control Panel item window to set your backup options.
Options for placing a backup copy of files are given in the table.
| Accommodation | Comments |
| Internal hard drive | You can place archived files on:
The second option is recommended, because if the system disk fails, you will lose both the operating system and backup copies. |
| External hard drive | If scheduled backup is configured, the external hard drive must be connected at the time the backup is created. Note : Windows 7 does not support creating system images on flash drives. |
| The local network | Backup is supported only to computers on a network running Windows 7. Of course, you will need credentials to access the computer where the backup is located. |
You can place archived files on partitions formatted in both the NTFS and FAT32 file systems. When archiving to a hard drive, files are placed at the root of the partition. You cannot specify a subfolder for the archive, but nothing prevents you from placing other files and folders on this drive.
The rest of the article discusses saving a backup copy to a partition of the internal hard drive. Having decided on the location of the archive, you must set the archiving parameters. You can leave this decision to the operating system, or you can select the folders yourself.
If you choose yourself, you can create backups:
- user files, including libraries
- local disk folders
- full system image
At the end, Windows 7 displays a summary of your backup options.
Click the Change schedule to set up a scheduled backup at a time that suits you.
The schedule parameters you specify are saved in the task scheduler, which is responsible for starting archiving in a timely manner.
Once you've finished configuring your backup settings, you return to the main Control Panel item window.
Backup Recommendations
Everyone knows that they need to back up regularly, but not everyone does it. Given the extensive backup capabilities in Windows 7, you will only regret losing important data if you do not set up regular backups.
A separate hard drive is ideal for storing backups - internal or external, connected via USB or FireWire. If you have a network drive at your disposal, you can also use it. Storing backups on a different partition on the same drive where the OS is installed is not a good idea. If a drive fails, you will lose both the system and your backups.
Since backups take up a lot of space, I can only give general recommendations that you will need to adjust depending on the free disk space you have.
System partition images
- First image . Install Windows 7, then all updates and drivers. After making sure that the OS and devices are working normally, create the first backup image. If you "kill" the system during further configuration and software installation, you can return to its original state faster than if you reinstalled it.
- Second image . Install all applications and configure the system as you wish. Since fine-tuning the OS is usually done as you use it, work in Windows 7 for a couple of weeks. After making sure that the OS is working normally, create a second backup image. If you delete the first image before doing this, you will have a complete image of a fully updated and customized system with your favorite set of applications.
- Subsequent images . Depending on your available disk space, create subsequent images monthly/quarterly. If a problem arises that requires you to restore from an image, you can return to a relatively recent state of the system.
Archives of user files
How often you archive your files is determined by how valuable they are to you and how often you add or create new files. In general, I recommend archiving data weekly or twice a month. Combined with monthly manual system imaging, you will have an excellent backup set that will allow you to not only return your system to a recent working state, but also restore all your hard-earned data and files. You can always free up disk space by deleting old archives if disk space is needed for other needs.
It is not possible to set different schedules for image creation and data archiving in the GUI. Therefore, if you want to automatically image and archive files at different times, use the wbadmin command line utility and the task scheduler.
How to create a Windows backup using the system method
To get started, type the word “backup” in the search bar and select from the suggested commands:
If you have a dozen, do not pay attention to the Windows 7 inscription, because... this utility was transferred from this system. Follow the link provided to us. Our window opens.
In the left column, click “Create a system image.”
We are starting to wait for archiving devices. Then, we are asked to choose where exactly we want to make a copy of the system - on a hard drive (removable or just separate, external ones are recommended), or just a DVD disc (I recommend taking RW).
A network folder means a folder connected to a given computer via a network. In this case, you need to have access to a computer connected via a network to yours.
The most convenient thing is to create an image on a DVD disc. If necessary, it can be inserted and restore the system. The DVD from which you installed the system should have a system recovery partition.
Before making a Windows backup, it is recommended to remove all unnecessary programs, because... they will also be included in the archive and may take up too much space. In addition, I recommend cleaning the registry and simply clearing the disk of system junk!
A window appears that the selected disk is stored on the same hard drive, part of which we are now archiving. This means that at the moment I have only one physical hard drive inserted into the system unit, divided into several partitions, and if this disk fails, the created archives will also be lost.
But I still select drive E. My system is located on drive C. Click next. The next window appears with confirmation of the archiving parameters. Also, you see how much space the archive will take up.
Archiving takes time, from 20 minutes or more, depending on the system load. Before archiving, make sure you have enough space on the disk where you are going to back up your system. There should be at least ten percent free space on this disk.
So, click Archiving and wait... After the process is completed, the system will notify you that archiving has been completed.
After archiving is completed, the system will prompt you to create a disk for backing up the system. If you do not have such a Windows system image disk, it is recommended that you create one.
You click yes and create a backup copy of your Windows on disk.
I advise you to read my article - How to completely recover data from a disk?
Archiving options in Windows 7
Windows 7 has built-in backup capabilities for the operating system itself.
Thus, you don’t have to use any third-party software, but use these built-in capabilities of Windows 7, create a backup copy of the OS, and then, in the event of some kind of disaster, you can recover quite simply.
You can boot from any installation media and choose an option such as restoring from an image that is previously created by the built-in capabilities of Windows.
Therefore, it is useful to create such a backup image and the system will be restored in its entirety at the moment when it was possible to create the backup image, with all programs and settings on the system disk, etc.
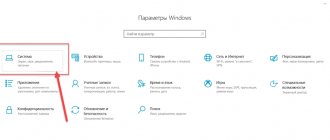
To create a backup copy of Windows 7, go to the Control Panel and in the All Control Panel Items mode, select Backup and Restore.
A window opens and at the bottom left there is a link to Create a system image, click on it and the image creation wizard will start.
If Windows 7 has never been backed up, the window that opens will display information that data archiving has not been configured and there will be a link - Set up backup.
Before doing this, you need to check that the archiving service is enabled. To do this, go to Computer Management, then open Services.
Here we find the Block-level Archiving Module Service, in Properties we set the startup type to Manual and click Start Service.