AOMEI Backupper is designed to backup and restore data. After the archiving process is completed, backup copies of the data you want to save will be saved in the storage location.
As you know, unfortunately, equipment breaks down from time to time. Your computer's hard drive can fail at the most inopportune moment. In this case, the user will lose all data that was placed on this disk.
If you, at one time, saved backup copies, or started the backup process on your computer, then you will not lose your data that was located on the failed hard drive.
If everything is fine with the hard drive, crashes and problems may occur in the Windows operating system and in the operation of applications. It is not always possible to get rid of such problems using standard system recovery. Your computer may not have restore points created when everything was working fine.
In this case, you will also be able to restore the system, disk or partition if you have backed up the relevant data in advance.
To organize backups, special programs are used to organize the archiving and recovery process.
AOMEI Backupper for backup
With AOMEI Backupper, you can back up the entire contents of partitions, disks, important files and folders on a regular basis, or periodically by creating a complete archive for this.
Using the AOMEI Backupper program, you can perform the following basic operations:
- Backup the system, partitions, disks, files and folders.
- Restore the system, partitions, disks, files and folders.
- Backup (full, incremental and differential).
- Checking the integrity of the backup copy.
- Backup management.
- Cloning disks and partitions.
- Mounting the backup image.
- Support for VSS (Volume Shadow Copy) technology.
AOMEI Backupper has a free version, AOMEI Backupper Standard, which is suitable for most users. The program has an interface in English. On the Internet you can find unofficial Russification for this program.
AOMEI Backupper download
This article will discuss creating a backup copy of the system partition of the hard drive and restoring it using the AOMEI Backupper Standard program.
Typically, backup copies of the system and installed programs are created shortly after installing Windows on a computer, in order to quickly restore the system in case of problems, without reinstalling the operating system.
In my case, such a backup was not made at one time, so I will now create a full backup of the system and all data located in the system partition (Logical drive “C”) of my computer’s hard drive.
First, you need to install AOMEI Backupper on your computer. I will not describe the installation process (the article is already long) of the program, which will not cause any difficulties. You will need to successively click on the “Next” button, and when the program is installed, click on the “Install” and “Finish” buttons.
Once launched, the main window of AOMEI Backupper will open. The main window of AOMEI Backupper Standard is open in the “Home” section.
On the left side of the program window there are buttons for moving to specific sections of the program:
- “Home” - Home.
- “Backup” - Archiving.
- "Restore" - Rollback.
- "Clone" - Clone.
- "Utilities" - Utilities.
EaseUS Todo Backup Free
Platforms: Windows.
Price: Free or $29 for the premium version.
A fairly popular backup application, the only frustrating thing about it is the lack of Russian localization. EaseUS Todo Backup Free can create backups of folders, drives and the entire system. Scheduled copying is supported, as well as encryption and compression of copies.
The free version does not have the ability to transfer the system from one disk to another and make a backup of the Outlook mail database. It also does not send copy notifications by email.
EaseUS Todo Backup Free →
Backup to AOMEI Backupper
To start creating a system backup, you will need to go to the “Backup” section. There are several options available here:
- File Backup - Backs up files and folders.
- System Backup - Backup your system with one click.
- “Disk Backup” - backs up hard drives to an image file.
- Partition Backup - Backs up partitions and dynamic volumes.
After clicking the "File Backup" button, you can start backing up files and folders on your computer.
If you need to create a backup copy of the disk or partition on which the Windows operating system is installed, then you will need to click on the “System Backup” button. You can create a backup copy of the system and files that are located on the disk or disk partition on which the operating system is installed.
Physically, there may be one hard drive on your computer, but it can be divided into separate sections - logical drives. For example, on my computer these are the partitions - logical drives “C” and “D”.
If you need to archive the entire hard drive, then in this case, you will need to click on the “Disk Backup” button (Backup the hard drive to an image file).
To back up individual partitions, you can use the “Partition Backup” button.
Since I am going to save a backup copy of the logical drive “C” of my computer, on which I have the Windows operating system, programs and other data installed, in this case, I will need to click on the “System Backup” section.
AOMEI Backupper will not back up the entire hard drive of my computer, but only the partition of the hard drive where Windows is located. Your computer may only have one partition on its hard drive (“C”). Anyway, you will need to click on the “System Backup” button in order to backup the system.
At the top of the window, you will see the name of the archive being created. Next in the backup section you will need to take two steps.
In the first step, you will need to select the partitions and volumes to create a backup. AOMEI Backupper itself detected the partition with the installed operating system.
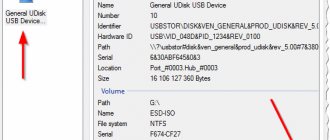
In the second step, you will need to select the destination path for the backup. The program offered me a disk on which I could create a backup copy. In my case, this is an external hard drive on which I store the backup copies of my operating system installed on my computer.
You can click on the "Step2" button to open the selected drive. As you can see in this image, there is already a backup copy of the system partition created by the standard utility included with Windows 7.
You can enter the backup settings after clicking on the “Backup Options” button.
In the default settings, the compression level is normal and the copy method is intelligent backup. Only a copy of the used sectors of the file system will be made. VSS technology will be used, which allows the program to make a copy without interrupting the operation of applications.
I was happy with the program's default settings.
To start archiving, highlight the drive and then click the “Start Backup” button.
Next, the process of archiving the system partition begins. The duration of this operation will depend on the size of the disk you will be backing up.
You can monitor the backup in this program window. The lower part of the window displays the archiving status, backup speed, and approximately the remaining time until the process is completed.
After completing the archiving process, click on the “Finish” button.
Then the main tab in AOMEI Backupper will open. In the window you will see the created backup copy of the system partition, with the date and time of its creation. There are also buttons “Restore”, “Backup”, “Advanced” (Options), which are used to perform various actions in the program.
Next, you will need to create a bootable recovery disk.
Get Backup Pro 3
Platforms: macOS.
Price: $19.99.
Another special tool for macOS. It's easy to use. Create a task by clicking on +. Specify how often to make backups and where to save them. Then drag the files and folders that should be backed up into the application window.
In addition to files and folders you specifically add, Get Backup Pro 3 can backup contacts, photos, iTunes library, documents and email. It can clone disks and synchronize folders, making their contents identical. You can try the application for free for 30 days.
Get Backup Pro 3 →
Creating a boot disk in AOMEI Backupper
Such a disk may be needed to boot a computer to restore the system if, for some reason, the Windows operating system on this computer does not boot.
You may also be interested in:
- Acronis True Image WD Edition (free)
- Ashampoo Backup Pro 11 for backup
To create a boot disk, you will need to click on the “Utilities” section. Next, you will need to click on the “Create Bootable Media” button. You can create bootable disks such as CD/DVD or USB media.
In the Create Bootable Disc window, under Bootable Disc Type, you will be presented with two options for creating a bootable disk:
- “Linux – Create bootable disc based on kernel” - create a bootable disk based on the Linux kernel.
- “Windows PE – Create bootable disc based on Windows PE” - create a bootable disk based on Windows PE.
You can make a bootable Linux disk without installing additional tools. Windows PE boot disk is suitable for everyone, and it provides more flexible and convenient operations than Linux boot disk.
By default, the Linux-based option is selected. I agreed with the choice of program. After that, click on the “Next” button.
In the next window you will need to select the appropriate bootable media: CD/DVD disk, USB drive, or ISO image.
I chose a CD/DVD disk, having previously inserted a CD into the drive of my computer (its capacity will be sufficient). After this, click on the “Next” button.
Next, the process of burning a boot disk will begin.
When recording is complete, click on the “Finish” button. Then remove the disc from the drive and keep it in a safe place.
Restore to AOMEI Backupper
The system partition can be restored from the AOMEI Backupper program window, or using the created boot disk.
A boot disk will have to be used if a serious failure occurs in the operating system and Windows stops loading. In this case, you will need to insert a boot disk into the optical drive, or connect a bootable USB flash drive to the computer.
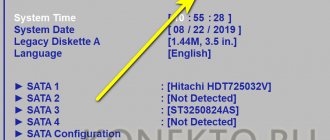
Next, you will need to set the boot priority from a CD/DVD or USB drive in the BIOS. After that, after downloading, the AOMEI Backupper program window will open. In the program window, you will need to select the required action - “Restore” (Rollback), and then select the disk with the backup copy of the system image.
If, despite the problems that have arisen, Windows boots and programs start, the system recovery process can be started from the AOMEI Backupper program window.
First, a window will open indicating that AOMEI Backupper has detected a backup that is a system image. You are prompted to perform a system restore.
There are two options for starting a restore from a backup.
In the first case, you can click on the “Restore” button in the “Home” section.
When using the second option, go to the “Restore” section, select a system backup if you have several backups. Then check the box next to “System Recovery”, and then click on the “Next” button.
After selecting the full copy, click on the “Next” button.
The next window will indicate the operations that will be performed:
- "Source Partition" - source partition.
- “Destination Partition” - destination section.
Click on the “Start Restore” button in this window to start the system recovery process.
After this, the system recovery process will start, after it is completed, the computer will restart. Next, the restored Windows operating system will load.
Déjà Dup
Platforms: Linux.
Price: free.
Unlike TimeShift, Déjà Dup aims to create backup copies of user data: documents, images, music, videos and other files. This application is included by default in many Linux distributions, and in those that do not have it, it is easy to install. Déjà Dup can work on a schedule, copy data to local and external media, as well as to network servers via FTP or SSH protocols.
On the popular Ubuntu distribution, the application is easy to find in the main menu. There it is called “Backups”.
If Déjà Dup is not installed, you can download it directly from the repositories. To do this, enter one of the following commands into the terminal, appropriate for your distribution:
- Ubuntu, Debian, Mint: sudo apt-get install deja-dup
- Fedora, CentOS: dnf install deja-dup
- openSUSE: zypper install deja-dup
- Arch, Manjaro: sudo pacman -S deja-dup
Those users who do not want to install anything, much less pay for third-party software, can use the built-in backup applications that are available in every modern OS. These are Backup on Windows and Time Machine on macOS. You can view our detailed instructions for them in the corresponding article.