What is the SysWOW64 folder and where is it located?
SysWOW64 is a system resource used to process 32-bit programs on a 64-bit version of Windows. This is a folder located on the Windows OS system and supports devices that can be damaged when memory problems occur.
SysWOW64 folder location
The SysWOW64 folder is not a virus. This is a resource folder filled with system files and allows you to use 32-bit programs in the 64-bit version of Windows 10. This process goes along with the Windows system directory and is responsible for managing 64-bit files. The main reason why users call SysWOW64 a virus is that sometimes the folder takes up a lot of system memory (40 GB or so).
However, we do not recommend deleting this folder from the system because it is thanks to it that you can run 32-bit applications on the 64-bit version of Windows. If you have serious doubts about this folder, make sure you double check your system with reliable anti-spyware software. There is a possibility that malware developers decided to misuse the name SysWOW64 to hide their malware, such as cryptominers.
Characteristics of SysWOW64:
- Type – library directory.
- Associated files and folders – System32, cmd.exe, odbcad32.exe, Svchost.exe.
- Problems – sometimes it takes up a lot of system resources.
- May be found in Windows Vista, Windows 7, 8, 8.1 and Windows 10.
In short, the main purpose of SysWOW64 subsystem is to create a 32-bit environment that helps 32-bit applications to run on 64-bit Windows without any modification, contains .dll and .exe documents. Windows uses a file system redirector for this procedure. WOW64 uses several DLLs to implement various functions:
- dll is the main interface that translates between 32-bit and 64-bit calls;
- dll – provides entry points for applications;
- dll – helps switch the process from 32-bit to 64-bit mode.
However, as we already mentioned, people tend to complain about the size of the SysWOW64 folder. Although in most cases it only takes up a few gigabytes of computer memory, some users have complained that C:\Windows\SysWOW64 reaches up to 40GB. As a result, your computer may start to run slowly or sometimes even freeze.
Is it possible to remove it?
You can delete the Syswow64 folder using various utilities or manually when cleaning your hard drive. But it is not recommended to do this, the directory is a system one and there is a high probability that after deletion the functionality of the entire system will be disrupted . The most harmless thing that can happen after erasing data from this directory is the disruption of the launch of several applications.
Recent actions on the computer - how to find out who is using my PC
May contain viruses
There is a possibility that malware developers misused the name of a component of this system to help their malware go undetected. However, a full system scan using reliable anti-spyware or anti-virus programs will help you determine the real intentions of this component. You should NOT uninstall SysWOW64 if a full system scan says it is free of malware.
Running an AdwCleaner scan
Because executable documents and DLLs run in the background, users may find malware such as cryptominer on their computer. To prevent this from happening, cybercriminals have begun using legitimate file names to help their viruses camouflage themselves and avoid destruction.
The developers note that not every process running in Task Manager is safe, and you should take care to ensure that the file takes up a lot of space or takes up a visible portion of your computer's CPU. It is highly recommended to scan your system with an updated anti-spyware program to check the file's reliability.
Most often, these documents sneak into systems undetected after attackers trick the victim into clicking on a malicious link or ad. Additionally, the system can be infected through spam attachments, which are usually in the form of business reports or important notifications from financial/government authorities. Once downloaded, these documents run specific code that is responsible for installing the threat on the system. Update your anti-malware tools regularly and try to scan every downloaded file before opening it to prevent unexpected infections!
If you have problems with your PC, you need to fully scan your device with Reimage, or Plumbytes Anti-Malware, and see what's hiding there. If you have any malware on your computer, it is likely using an almost identical name for this folder because it is trying to hide it and prevent it from being deleted. In this case, remove any components reported after the scan, but leave the original SysWOW64 folder alone. Otherwise, you may encounter serious problems affecting the performance of your entire computer.
If you are still thinking about uninstalling SysWOW64, you can try performing a clean boot via System Configuration.
32-bit and 64-bit computers and Windows
Since the mid-90s, almost all computers sold were 32-bit, and mostly ran a 32-bit version of Windows. But after the release of Windows 7, sales of 64-bit computers with 64-bit Windows installed increased significantly. In the coming years, more and more people will have a 64-bit computer running 64-bit Windows in their home or office. One reason for this is that prices for 64-bit computers have come down so much that they are almost as cheap as 32-bit ones. And people will prefer 64-bit over 32-bit because they can handle a lot more (RAM) memory, and are generally faster because they use more modern technology.
A 32-bit computer running 32-bit Windows OS can use a maximum of 3-4 GB of RAM memory. Mostly around 3 GB because most of the address space is used by video cards and other devices like network cards, sound cards, etc. Even if you install 4 GB in the computer, in most cases only about 3 GB of RAM will be used. Things are different with 64-bit computers and 64-bit Windows. A 64-bit computer running 64-bit Windows can handle up to 192GB of RAM!
On 64-bit Windows, you can run both 32-bit and 64-bit programs. When a 32-bit program is run on 64-bit Windows, the 32-bit emulator is launched to process the 32-bit program.
The emulator will make the 32-bit application think that it is running on 32-bit Windows, and the same functionality that is available on 32-bit Windows will also be available to the program on 64-bit Windows. Typically it will be difficult for a program to know whether it is running on a 32-bit or 64-bit system, but if a program really needs to know the difference, there are API functions available that the program can call as needed. Exceptions are antivirus programs, etc.
Exceptions
Low-level 32-bit programs, such as antivirus software, will not always work on 64-bit Windows. then the 64-bit version of the program must be used. During installation, it is important to install documents in the correct folders.
As mentioned above, the 32-bit emulator handles situations where 32-bit programs are running on 64-bit Windows, and it usually works fine. There are special folders on your hard drive that are dedicated only to 32-bit binary files, and it is very important that Setup installs 32-bit binary documents in these folders. Some folders on your hard drive are only for 32-bit binaries, while others are only for 64-bit binaries. If you place a binary file of a certain bitness (32/64 bit) in a folder intended for a different bitness, the program will probably not be able to work properly. in many cases the program will not even start.
Examples of binary files mentioned in this article are EXE files (program files), DLL files, and OCX documents (ActiveX components). Data files can usually be placed in the same folders and used by both 32-bit and 64-bit applications.
SysWOW64 is a special folder that exists only on 64-bit Windows and is designed to store 32-bit binaries. WOW64 is short for “Windows on 64-bit Windows” (can be read as “32-bit Windows on 64-bit”). It is an emulator that allows 32-bit Windows applications to run smoothly on 64-bit Windows. The compatibility layer is used as an interface between a 32-bit program and a 64-bit operating system.
Can there be viruses in SysWOW64
ProgramData - what is the Windows 10 folder, where is it located?
Many malicious virus programs can infect and damage most folders, and system folders are no exception. You shouldn’t be 100% sure that there won’t be a virus in the Windows SysWOW64 folder. It can disguise itself as system processes and negatively affect the operation of the device. Or make yourself known in some other way.
Malware
Note! That is why professionals recommend from time to time conducting a comprehensive scan of the system, including drive C. If such malware is detected, it is urgent to treat the device with an antivirus.
Although cases of viruses being found in it are extremely rare. Most inexperienced users may mistake a completely normal and necessary process for a malicious program. Having opened the task manager, seeing there the names of processes that are completely incomprehensible to the user, he begins to suspect the actions of the virus. It tries to disable the process, get rid of it, after which problems with the functioning of the system suddenly begin. You should not delete or disable all unfamiliar processes occurring in the OS.
Is it possible to remove SysWOW64
Accessing and deleting SysWOW64 can be dangerous to the normal functioning of the system as it is a special folder used by the Windows operating system. If the scan finds a list of viruses, take care of them first, restart your computer and check its status again. If you can still find this folder after the antivirus has taken care of hiding the malware on your computer, you can be sure that it is safe.
The SysWOW64 virus is a type of infection that is initially located in C:\Windows\SysWOW64\…exe. Computer users usually notice the existence of the SysWOW64 virus through installed antivirus applications such as AVG Internet Security, Norton, Microsoft Security Essentials, and MalwareBytes. However, according to the hidden properties of the virus, they may not completely remove the SysWOW64 virus. Although the SysWOW64 virus has been removed once, it can come back again and again after rebooting the PC, once installed on the PC, the SysWOW64 virus can create a SysWOW64 folder on the vulnerable system, which contains malicious codes and requirements.
At the same time, computer users are prohibited from entering the file location when receiving unknown system errors or warnings. In some cases, the SysWOW64 virus along with the C:\Windows\SysWOW64\…exe field may automatically appear upon startup. Some victims may also encounter the “Windows recovered from unexpected shutdown” issue and the computer keeps crashing and rebooting. Moreover, this type of virus is usually associated with additional threats that can cause additional damage to the infected machine. This could include a browser hijacking virus, trojans, worms, keyloggers or fake antivirus applications. After this, SysWOW64 (C:\Windows\SysWOW64\…exe) should be removed from the computer after receiving information about its existence.
How to remove SysWOW64 virus
Before performing manual SysWOW64 virus removal, restart your computer in “Safe Mode with Networking” by continuously pressing the F8 key before starting Windows.
If you are a Windows 8 user:
- Start the infected computer and log in until you see the desktop.
- Press the key combination Ctrl+Alt+Del, the user switching interface will appear.
- Always hold down the Shift key on your keyboard and at the same time click the Power off button once in the bottom right corner of the page.
- There you will get three options: Sleep, Shutdown and Reboot. Click on the reboot option.
- The next window will display the message “Choose an option” and then click “Troubleshoot.”
- On the troubleshooting page, click Advanced Options. In the next window, select "Launch Settings".
- Select "reboot" and wait a minute. Windows will automatically display Safe Mode options. Finally, press the F5/5 key to highlight the Safe Mode with Networking option, press the Enter key. After this, the Windows 8 operating system will boot into safe mode with a network connection.
Then you can clean the system and start removing SysWOW64 virus step by step:
- Open the task manager and end all malicious processes created by the SysWOW64 virus. (Ways to open Task Manager: Press CTRL+ALT+DEL/CTRL+SHIFT+ESC. Or, click the Start button, select the Run option, type taskmgr, and click OK.)
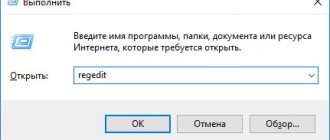
- Go to Regitry Editor and remove malicious registry entries associated with SysWOW64 virus:
Registry Editor Tab
- HKEY_LOCAL_MACHINE\Software\Microsoft\Active Setup\Installed components\random
- HKEY_LOCAL_MACHINE\Software\Microsoft\Windows\CurrentVersion\Policy\Explorer\run\SysWOW64
- Search and remove malicious SysWOW64 virus files:
- %WINDOWS%\system32\consrv.dll
- Counter-Strike Source.exe
- exe
- exe
- exe
- exe
- exe
- exe
- exe
- exe
- exe
- exe
- exe
Since some documents may be hidden or modified, you should understand that manually removing the SysWOW64 virus is a cumbersome procedure and does not guarantee complete removal of the malware. In addition, manual intervention of this kind may damage the system.
Purpose of the System32 folder
First of all, the System32 folder is responsible for storing operating system files. It contains executable files of utility programs, system utilities, dynamic libraries “DLL”, files for working with the registry and drivers that users install for various equipment. In addition, the System32 folder contains a large number of small applications that are part of the Windows operating system. They either play a key role in it or complement it as tools that help in configuring Windows. These include applications that provide access to the Internet, programs that allow you to read email, play video and music, and edit graphic images. And even though the System32 folder contains mainly system files, newly installed applications also install their dynamic DLLs into it.
The very essence is that the System32 folder is somehow connected with all installed applications and their directories.
What happens if you delete the System32 folder?
The first and most important thing we must warn you about is that never, under any circumstances, try to delete the system folder. Fortunately, it is sufficiently secured by the Windows OS developer, and yet it’s definitely not worth the risk.
To check whether the importance of the System32 folder is really so high, we decided to conduct a small experiment, which consists of deleting it. We strongly do not recommend that you repeat it, since the consequences are unpredictable.
First experiment.
We tried to delete the folder using the usual and well-known method - using the Delete key. I admit honestly, I almost had a heart attack while I was looking at the filling line for analyzing the folder size, waiting for what might happen. Fortunately, Microsoft has protected system files so much that even administrator rights do not give complete freedom of action. A kind of security system.
Second experiment.
Now we tried to gain absolute access to the folder through the folder access settings in order to be able to do whatever we wanted with it. And even in this case, failure awaited us. It turned out that it is not so easy to delete the System32 folder. Apparently there is something really important in it.
Therefore, if you suddenly find an article on the Internet where, when offering any services, they give the example of the words “I accidentally deleted the System32 folder and now I have such and such problems,” be sure that this is a “scam.” This folder cannot be deleted accidentally.
Third experiment.
As they say, “He who seeks always finds.” This happened to us too.
In the final experiment, we decided to use the command line, since this utility is most closely related to the operating system; it directly works with its code. Using the del command, we took and mercilessly deleted all possible files in the System32 folder. To our surprise, even the command line did not help to completely remove everything - some files still remained.
Summarizing.
The result of the experiment was an almost complete failure of the Windows operating system. Outwardly it may seem that it works, but if you decide to click on one of its elements, nothing will happen. We tried to open the Start menu and other system utilities, but Windows did not respond to our actions. Attempts to interact with programs only resulted in a copious amount of “system curses” - a large number of pop-up errors appeared.
Usually, in case of failures, the system offers to perform an automatic recovery or at least start in safe mode. We decided to take advantage of this. Having restarted the computer and selected the necessary parameters for correct recovery, we achieved nothing other than another automatic reboot. This is due to the fact that Windows simply lost any ability to start.
How to recover
On Windows 10, open the Start menu or Cortana search (WINDOWS KEY+S), type "backup" and select "Backup and Restore." In Windows 8, open Search Options using WINDOWS KEY+W, type "windows 7" and click "Windows 7 File Recovery". In Windows 7, open the Start menu (press the WINDOWS key on your keyboard) and type “backup.” Click Backup and Restore.
To recover your personal documents or folders, click "Recover my files" in the "Recovery" section. If you need to restore other users' documents, use the "Recover all user documents" button. To restore documents from a different backup (for example, after a clean installation of Windows), click Select another backup to restore files from.
Don't forget that for Windows 7 users, the Previous Versions feature works automatically, which can be an easier way to recover overwritten or deleted files.
Windows 8, 8.1 and 10 users have a similar feature called File History, which must first be configured manually.
Selecting a backup by date and files and folders to restore
By default, all documents or folders that need to be restored are selected from the most recent backup. If you want to restore something from an older backup, click "Select a different date."
- In the Recover Files window, select the time period to display old backups in the Show backups from field. By default, the last week is selected.
- Then select the backup date you want to use and click OK.
- Please note that the Browse or Search Backed Up Files and Folders to Recover window now displays the selected date and time.
Selecting files and folders to recover
If you don't remember exactly where the documents or folders you want to recover were, click "Search":
- Enter full or partial keyword(s) in the search field and click the Search button.
- If the search results contain the item(s) you want to restore, click to select them, or use the Select All button to select all items in the list. Then click OK to add the item(s) to the list of files and folders that need to be recovered.
- In the Browse Backup Files window, find and click the item(s) you want to restore and click the Add Files button.
Alternatively, if you click the Browse Folder button, the Browse Folder or Drive Backup window will open, where you can add the selected folders to the list of items to be restored by clicking the Add Folder button. As you can see, you can also recover the entire contents of a hard drive if it is not a Windows drive. Use System Image Restore to restore your entire installation of Windows 7, 8, or 10.
The root folder of the latest backup is opened first. Double-click the hard drive where the recovery folder is located.
User documents, videos, photos, music and other items are located in the Users folder on drive C. Find the folder you want to restore, single-click it, and then click the Add Folder button.
Note that you can remove individual items from the list by clicking on them and then clicking the Remove button. To clear the entire list, use the “Delete All” button. If the list of all files and folders to be restored is complete, click “Next”.
Restore files and folders to their original location
Next question: where do you want to restore your documents? If you deleted folders or files and want to restore them to the folder where they were previously located, leave them in their original location. If files or folders with the same name still exist, you will be asked if you want to overwrite the files or folders.
Windows 7 system recovery window
- Click "Restore".
- The recovery process will begin. If files with the same name already exist, the Copy File window will open.
- If you want to overwrite an existing file with the backup file, click Copy and Replace.
- If you want to keep the existing document, click Don't Copy. If you want to compare an existing file with a backup file, click Copy, but keep both files. The recovered file will have "(2)" in its name. If you know you want to use the same answer for all upcoming questions, check the "Do this for all conflicts" checkbox before clicking the button. Be careful with this option!
- After restoring files and folders, click “Finish”.
Recovering files and folders to another location
If you want to compare the files and folders in the backup with existing files, it is recommended to restore them to a different folder.
- To do this, select "Elsewhere" in the "Where you want to restore your files" section.
- If you want to recreate the entire folder tree in an alternative location, check the "Restore files to their original subfolders" checkbox.
For example, you select C:\Restored as the alternate location. If you now restore a file named Test.txt from the Documents folder, this will create an entire tree of folders, for example: C:\Restored\C\Users\<your name>\Documents\Test.txt. If you do not check the box, the file will be restored to C:\Restored\Test.txt.
- Click Browse... to select an alternative folder.
- In the Browse for Folder window, select an empty folder. You can also click the "Create New Folder" button to create one. Type a name for the new folder and press Enter on your keyboard to accept the new name.
- Then click OK to select a folder for the alternate recovery location.
- Now click "Recover" to start restoring the selected files and folders.
Once the items are restored, click "View Recovered Files" to open an alternative recovery folder.
Recovery using third-party software
Let's look at the SysWOW64 recovery process using the example of a third-party tool, Veeam Agent. It is a data protection and disaster recovery solution for physical and virtual machines. Veeam can be used to protect different types of computers and devices: desktops, laptops and tablets.
- Launch the recovery wizard.
To run the File Recovery Wizard, do one of the following:
- Right-click the Veeam Agent icon in the taskbar and select Recover/Individual Files.
- Double-click the Veeam Agent icon in the taskbar or right-click the icon and select Control Panel. In Control Panel, click the desired backup session panel. Click "Recover Files" at the bottom of the window. The Veeam Agent will automatically publish the contents of the backup to your computer's file system and open the Veeam Backup Browser.
- Double-click the Veeam Agent icon in the taskbar or right-click the icon and click Control Panel. From the main menu, hover your mouse over the name of the job that created the backup you want to restore data from and select Restore File.
- From the Microsoft Windows Start menu, select All Programs/Veeam/File Recovery.
- Specify the location of the backup file.
At the Backup Location step of the wizard, specify the location of the backup file that you plan to use for recovery.
By default, Veeam Agent automatically finds the latest backup on your computer drive or network share and takes you straight to the restore step. If Veeam cannot find the backup for any reason, or you want to use a different backup for recovery, specify where the backup file is located:
- Local storage - Select this option if the backup file is located on a computer drive, external drive, or removable storage device that is currently connected to your computer. Click the Browse button and select the backup metadata (VBM) file.
- Network storage - Select this option if the backup file is located on a network share, Microsoft OneDrive cloud storage, backup storage managed by a Veeam backup server, or cloud storage provided to you by a Veeam Cloud Connect service provider. In this case, the Veeam Recovery Media Wizard will include additional steps to specify the backup file location settings.
- Select the type of remote storage.
The “Remote storage” step of the wizard is available if you decide to restore data from a backup file that is located in a remote location - in a shared network folder, in backup storage or cloud storage.
- Specify remote storage settings.
Specify the parameters for the remote storage containing the backup file from which you plan to restore data:
- Select Backup.
From the list of backups, select the one from which you want to restore data. To quickly find the backup you need, use the search field at the bottom of the window. If you are restoring data from a backup stored in a backup vault, Veeam Agent displays only those backups that are available to the user whose credentials are specified in the Backup Server step.
- Select Backup.
If you are restoring data from an encrypted backup created on another Veeam computer, you will need to provide a password to unlock the encrypted file.
- Select a restore point
By default, Veeam Agent uses the latest restore point. However, you can select any valid recovery point to restore folders to a specific point in time.
- Complete the recovery process
Click Finish. Veeam will extract the contents of the backup, publish it directly to your computer's file system, and display it in the Veeam Backup browser.
- Save the recovered documents.
Once the restore process is complete, the Veeam Agent opens the Veeam Backup Browser, displaying the contents of the backup file.
You can perform the following operations on recovered files and folders:
- Save to their original location.
- Save in a new location.
- Open in
When you are finished working with files and folders, close the Veeam Backup browser.
As you can see, the SysWOW64 folder is critical for the stable operation of the entire Windows system. If you are not confident in your abilities, it is better to seek help from professionals. If you have already encountered a similar problem, share your comments under this article.