Restoring Windows 10 from Control Panel
The latest version of the operating system has many bugs and sometimes after updating it may not start for some users. A solution to this problem has been provided by Microsoft and a Windows 10 recovery disk can be created from the Control Panel.
If the creation of a Windows 10 recovery disk does not take place on your own computer, then you must definitely find out the bitness of the broken and temporarily used Windows, they must be the same.
Instructions on the question: how to create a Windows 10 recovery disk :
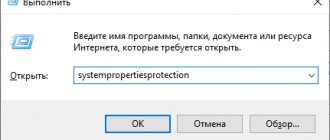
- First go to Control Panel. To do this, go to system settings and enter “control panel” in the search. Or press the Win + R key combination and write control in the input line
- Find the “ Recovery ” icon or item.
- After opening this section, the user is offered 3 options for system recovery; open the “ Create a recovery disk ” item.
- In a new window, the user is prompted to save system files to a recovery disk. If you select this item, you will need a flash drive of at least 8 GB, since a recovery image is additionally written to the media. This will allow you to quickly reset the operating system to its original state, even if the built-in recovery program does not work. Click " Next " to continue.
- Select the media on which the reset files will be written.
- Next, the creation of the recovery disk begins. Wait for the process to complete.
After the program finishes, the flash drive can be used to restore Windows 10 and install it. Sometimes creating media using this method fails, in these cases you need to create a rescue disk using other methods.
Some users may need to create a Windows 8 recovery disc. This can be done in the same way as described above.
How to burn a Windows 7 recovery disc to a flash drive?
Windows 7 has a wonderful feature for creating a system repair disk, which we already wrote about in an article about why Windows won’t boot.
This disk can be used to solve system boot problems, for example, when you accidentally erased the boot record when uninstalling Ubuntu and its Grub boot loader.
Creating a system repair disc in Windows 7 is very simple.
Type in the search bar in the Start
create a system repair disk
and press Enter .
A window will open asking you to select a drive to burn the recovery disc. If you don't have a floppy drive or disk on hand, you can emulate a disk and floppy drive. We wrote how to do this in the previous article.
So, the disk has been created. Now you need to create a bootable flash drive.
Insert the flash drive into the USB port.
Launch a command prompt with Administrator rights. To do this, type in the Start
and press the key combination Ctrl+Shift+Enter .
At the command line, type
and press Enter .
and press Enter - it will take a few seconds until the system detects your disks. From the list you need to select the item pointing to your flash drive. The easiest way to navigate here is by size. The size of the flash drive will be indicated in megabytes, while the size of hard drives is in gigabytes. Select your flash drive from the list and remember its number (for me it’s Disk 6 ).
The following commands must be executed sequentially one after another and press Enter .
Standard features of the Windows 7 operating system make it easy to create a bootable emergency repair disk (Emergency Repair Disk ERD), which can be used to resuscitate the OS in case of serious damage that does not allow booting, or to perform other actions outside the Windows installation environment.
To create a rescue disk using standard Windows 7 tools:
— Go to Control Panel — Select “Backup and Recovery” — “Create a system repair disk.”
Then you need to insert a blank CD into the DVD drive and click the “Create disc” button
The created system recovery disk is a stripped-down version of Windows, designed to be loaded from removable media into the computer's RAM without installation on the hard drive - Windows PE (Preinstall Environment). Starting from WinPE 2.0, the standard boot manager BOOTMGR
with the corresponding
BCD
(Boot Configuration Data) configuration.
Windows PE is often used by laptop OEMs to restore the system to factory settings using proprietary tools, such as
Lenovo's One Key Recovery Moreover, to download recovery tools, not only external media can be used, but also a hidden partition of the hard drive.
The Windows PE boot process can be divided into the following stages:
The BIOS subroutine reads the first sector from the boot device - the MBR (Master Boot Record) and transfers control to its program code.
Searches the MBR table for a partition for which the “Acive” flag is set, searches for and reads its PBR (Partition Boot Record) and transfers control to its program code.
The PBR boot record code reads the boot manager's bootmgr file and transfers control to it.
The bootmgr manager proceeds to boot the system according to the BCD storage boot configuration settings.
All the above boot steps using bootmgr
are always present, regardless of whether you are booting from an installed Windows 7, or Windows PE, or Windows RE (System Recovery Disk).
The chain of boot stages MBR - PBR - BOOTMGR
is the minimum necessary condition for the operating system to start loading.
Its further progress is determined by the boot manager BOOTMGR
, which reads the boot configuration data (Boot Configuration Data) from the BOOTBCD file of the active partition and performs the boot in accordance with its contents.
More information about how bootmgr
and the data structure of the boot configuration store can be found in this article.
bootmgr boot manager
allows you to boot from a regular system disk, as well as from boot images, virtual disks, and boot using boot loaders of other operating systems.
The specific option is determined by the configuration specified in the BCD store, which is a registry hive structure file located in the BOOT
of the boot partition.
A system emergency recovery disk created using Windows 7 tools contains the bootmgr
, configured to boot the system from an image in the Windows Imaging format (file with the
.wim
), and using a virtual disk created in the computer’s RAM from an image in the
System Deployment Image
(file with the extension
.sdi
)
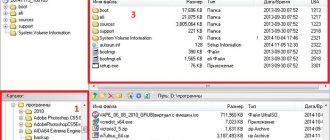
Contents of the rescue disk:
— Root partition file bootmgr
is a download manager file.
— BOOT
- contains the
bcd
- boot configuration data, the
boot.sdi
needed to create the virtual ramdisk in RAM, referenced in the BCD configuration, and the font file used by the boot manager
bootfix.bin
- SOURCES
, containing the bootable system image file
boot.wim
.
Since the BCD boot configuration for the created Windows 7 recovery disk is already configured for the bootmgr
to load from the
boot.wim
, then to create a bootable flash drive you just need to copy all the listed files and folders, write the MBR and PBR boot sectors, and install a sign that the section is active.
All this can be done using standard Windows 7 tools - using the command line utilities bootsect.exe
and
diskpart.exe
.
bootsect utility
usually available on the installation disk, can be downloaded from the Microsoft website, or from the link at the end of the article.
Thus, to create a bootable system recovery flash drive, you need:
1. Create MBR and PBR boot records.
Using the command line, run:
bootsect /nt60 E: /mbr /force
— for a flash drive assigned the letter
E:
2. Make the partition active.
Because the bootsect
only writes the program code of boot sectors necessary for booting the
bootmgr
, but does not change the sign (flag) of the active partition; you need to install it using the standard utility for working with disks and partitions
DISKPART
.
Reinstalling Windows 10 with the official application
The Microsoft website suggests using a separate application to create a bootable USB flash drive.
- Download the program and run it.
- Next, you need to select “ Create installation media for another computer .”
- After this, the user is asked to select settings for the image that will be installed on the flash drive. Under Architecture , select the Both .
- In the next window, select the media type to be used (USB or DVD).
- The last step is to select from the list the desired media on which the image will be installed.
After these steps, you can use the USB flash drive to install or reset the system.
Restoring Windows 7 from an installation disk
Restoring Windows 7 from the installation disk is the best option for restoring the system. The advantage is that from the installation disk or flash drive, in addition to recovery, you can install the operating system on your computer.
To run the Windows 7 recovery tool, you need to boot your computer from a bootable USB flash drive or DVD with the operating system.
After downloading, Windows 7 installation starts.
In the “Windows Installation” window, agree to select the Russian language, click on the “Next” button.
In the next window, in the lower left corner, click on “System Restore”.
Next, the system recovery environment will start (see above in the article), in which you need to select the appropriate tools to restore your computer.
Windows installation flash drive from system image
To restore Windows 10 from a system image, you must first create this file. This can be done through the built-in application. To open it, go to “ Control Panel ” → “ All Control Panel Items ” → “ File History ” → “ System Image Backup ”.
In the next window you need to select the “ Create a system image ” section.
In the window that appears, you need to select the media on which the image will be saved.
It is advisable to create a separate disk partition to store this data, as it will be needed to restore Windows 10 from an image. If you don’t have a flash drive at hand, you can reset the system settings from the created file on your hard drive.
After data archiving is completed, the user will be prompted to create a system recovery disk. Thanks to this, in the event of an unexpected error in the system, you can restore all the data that was on the archived disk.
System recovery process using a bootable USB flash drive
After we have chosen which media will boot from and rebooted the computer, before starting the system we insert a bootable USB flash drive. The process of loading system files may take some time, as a result of which you will see a window with installation parameters.
Here, in principle, you don’t need to change anything, just click the Next button. In the next window, select “System Restore”.
Well, continue as usual. Select the disk and the next step is to select a recovery point. Try to choose the earliest restore point, since you cannot fully understand at what point the changes made to your computer affected its correct operation.
It happens that there are no saved points and to avoid this, you need to ,
otherwise, without it, restoring Windows 7 from a flash drive will be very problematic.
The last step is to start the process, after which the computer will ask you to reboot for all changes to take effect. Don't forget to remove the bootable USB flash drive from your computer and return all changes to their previous form in the Bios settings.
In fact, this process is completely simple and there is nothing to be afraid of. But if you are not sure about something, write your questions in the comments, where you will definitely receive detailed answers.
What do we need?
1. CD/DVD disk (blank) 2. Flash drive 3. Two programs: UltraIso, and Daemon Tools.
Why do you need a recovery disk?
- Restore the system from an ISO system image.
- Restore Windows initial boot.
- Roll back the system to the last working configuration.
1. Go to the Start menu->My Programs->Maintenance->Backup and Restore.
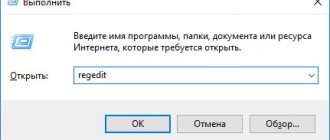
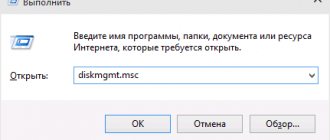
Or create a new task “recdisc” in the “Create a new task” application. To do this, open the task manager, select “New task (Run)” from the “File” menu, and in the new window enter the name of the application “recdisc”.
The Create Recovery Disk application will load on the screen.
We insert an empty disc into the drive and press the button to create a disc.
After creating a Windows 7 recovery disc, you will receive a notification like this.
If a flash drive is not needed, you can finish here, since the files for system recovery are already on the CD/DVD disc.
Installation flash drive for Windows via UltraISO
First, you need to download the ISO file of the desired OS version from the Internet. Also, to create a Windows 7 system recovery disk, just like other versions, the user will need the UltraISO or its analogues ( Rufus , Wintobootik , etc.) capable of writing system images to a USB drive.
- Launch UltraISO, then open the image file you downloaded earlier. Through the section “ File ” → “ Open ” or through the button on the quick access panel.
- After this, all files inside the ISO archive will appear in the side window of the program.
- The next step is to go to the “ Boot ” tab and select “ Burn Hard Disk Image... ”.
- In the window that appears, you need to select the USB drive on which to install. The recording method should be USB-HDD+ .
- The flash drive must be at least 8 GB and pre-formatted for the FAT32 file system. This can be done directly in UltraISO.
- After cleaning the disk, you need to click “ Burn ” and copying files to the USB drive will begin.
To restore Windows 7 via an ISO image, you need to do exactly the same steps, but at the stage of selecting an image file to burn, you need to use an image of the seven or other versions of the OS. The same method is suitable if you are wondering how to restore Windows XP or another version of this OS.
Creating an installation disk
If for some reason a laptop or PC does not want to accept a bootable USB flash drive, for example, on very old devices or if the USB ports are malfunctioning, then in these cases you can use a DVD-R or DVD-RW disc.
Due to the fact that disk media capacity is limited, you need to find an image up to 4.7 GB (capacity for DVD-R and DVD-RW). Such files contain only the base assembly without additional data and applications. Official images of all Windows OS occupy a volume of 2–3 GB. But amateur versions have a basic set of popular programs and improvements, so they can take several times more.
How to make an installation disk
To do this you will need a floppy drive, DVD and UltraISO. The program can be replaced with another one that can write information to disk.
- The first step is to open UltraISO and select the desired operating system file.
- Next, press F7 or go to the “ Tools ” → “ Burn CD image... ” section.
- After this, a new window will open in which you need to click “ Record ”.
Now you need to wait for the transfer of information to the optical disk to complete.
Multiboot flash drive
Such a multifunctional device is necessary for computer technicians. It is much more convenient to restore Windows XP, Vista, 7, 8, 10 and other versions from one universal flash drive. This solution is called a multiboot device. To create it you will need the WinSetupFromUSB . It uses the minimalistic Grub4dos bootloader, which allows the boot disk to be used with several system images at once.
Initially, you need to download WinSetupFromUSB and ISO images of the desired systems. After starting the program, a window with settings appears in front of the user.
It needs:
- Select the drive to install on.
- A. This allows you to format the media to the desired format before starting installation.
- Select FAT32 format. Please note that this file system does not recognize images larger than 4 GB in size. When installing NTFS, some computers will not be able to see the flash drive and it will not work.
- Select the type of operating system that will be installed.
- In Explorer, assign a system image file.
- Click the “ GO ” button and confirm the actions in the new warning windows.
After this, the process of installing files on the specified media will begin. Installation details can be viewed on.
After completing the installation of one system image, you can immediately begin mounting the next OS. Now you can restore Windows XP and other versions of the operating system using a single flash drive or a separate hard drive.
When recording a second OS distribution, you need to uncheck the “ Auto format it with FBinst ” checkbox. Otherwise, the previously recorded system will be deleted from the drive.
In addition to the installation version of Windows, you can load Linux distributions and many useful programs like Acronis, antivirus and backup bootloaders onto the drive using this method. To do this, you need to first download the necessary ISO files and when installing on the drive in the WinSetupForUSB program, select the “ Linux ISO/Other Grub4dos compatible ISO ”
After installation is complete, immediately check the functionality of the programs on the flash drive.
For the drive to be recognized by the computer, it must be inserted into a USB 2.0 port connected directly to the motherboard.
When starting in the BIOS, the user will see a minimalistic GRUB4DOS window, in which you need to use the keys to select the OS to be launched or the installed program.
To create a multiboot flash drive, they also use the MultiBoot . It includes Grub4Dos installer, formatter and WinSetupUSB. The only difference from the previous creation method is a more beautiful graphical menu when starting the media and already built-in programs for recovery, Acronis, etc.
How to run an installation flash drive or disk
After creating a Windows 7 recovery disc on your laptop or PC, you need to run it. To do this, insert the storage medium into the device. After this, turn off your computer.
To restore the system, you must first configure the device's BIOS so that it can start the flash drive or disk. To do this, you need to press a certain key in the first 2 seconds after turning on the computer. It differs for different manufacturers. You can read more about this in the instructions for the device. Approximate use of keys to enter the BIOS on different branded devices:
- Acer, Lenovo, Asus, Sony - F2 or Ctrl + Alt + Esc
- HP - F10
- Samsung - Del
- Dell devices - F1 or Del
To ensure that the BIOS boots on the first try, press the desired key 3-5 times. After this, a blue menu with items in English will appear on the screen. On personal computers, the BIOS may look more attractive.
To boot from the installation disk, you need to go to the “ Boot” and change the boot priority (“ Boot Device Prority” ). In the same section, you need to find a previously made flash drive or disk with recovery files and move the media to the first boot position using the F5 and F6 keys.
After this, you need to find the “ UEFI Boot Support ” or “ Boot Mode” and set Enabled or UEFI Boot there.
After these settings, you need to go to the “ Exit ” section and select “ Exit & Save Changes ”.
The installation version of Windows will begin to load from the disk. Depending on the OS version, the boot menu may differ in appearance.
Using a recovery disk, you can perform not only a complete reinstallation, but also partial repair of damaged files via the command line, or restore damaged download files.
Select the desired recovery method from the program menu and wait until the utility finishes. The main thing is that the device does not turn off during recovery; it is better to connect it to the network. If this is not done, the recovery process may fail and result in a hard drive error. A similar problem will have to be solved by physically repairing the device.
How to create a Windows 7 recovery disk on a flash drive
It is not possible to create a Windows 7 recovery disk on a flash drive using a standard tool, because it does not initially provide support for a USB drive. But owners of laptops that do not have a disk drive can bypass this limitation.
Please note that there are articles on the Internet describing the creation of a Windows 7 recovery disk on a flash drive, in which the image is first created on a physical optical disk and then transferred to a flash drive. But I have one question: “How can a user first burn a recovery disk to a CD or DVD if the computer does not have a disk drive?” It turns out that such articles are divorced from practice.
We will need an emulator program to create virtual record drives. This is a must. I was interested in the possibility of creating a Windows 7 recovery disk on a flash drive, so in the process of writing this article, I spent several hours testing similar programs until I found a working application for this method.
The Phantom Drive program (you can find a program with a crack on the Internet) successfully completed the task.
To create a Windows 7 recovery disk on a flash drive, you must follow these steps:
- A system recovery disk is created in the burner drive emulator.
- A bootable USB flash drive is then created for the recovery drive.
- The contents of the recovery disk are copied from the optical disk emulator to the bootable USB flash drive.
First step: First you need to burn the recovery disk to the virtual Phantom Drive:
- Launch the Phantom Drive program.
- In the start window of the program, select the task: “Create. Create a new blank disk."
- In the “Phantom Drive – Create” window, in the “Create as” setting, select the disc type (I chose DVD-RW), click on the “Create” button.
- After that, in the Explorer window, the inserted virtual optical disk will be displayed in the virtual drive.
- Follow the path: Start menu => Maintenance => Create a system repair disk.
- In the “Create a system recovery disk” window, select the virtual drive and click the “Create disk” button.
- Next is the process of creating a recovery disk; upon completion, close the system tool windows.
Second stage: creating a bootable USB flash drive using the command line.
- Insert the flash drive into the USB connector of the computer.
- Go to the “Start” menu => “Accessories” “Command Prompt”.
- Launch the command prompt as an administrator, enter the following commands sequentially (after entering the command, you must press the “Enter” key to execute the command):
- The command line interpreter window will display all drives connected to the computer. Identify the USB flash drive among the computer disks, based on the size of the USB flash drive. From this image it is clear that the flash drive is named “Disk 1” (you may have a different drive number, depending on the number of connected drives).
- Select the drive, in this case "Disk 1".
- Next, you need to enter the following commands, which will result in clearing the flash drive of data, creating partitions, selecting a partition, marking the partition, formatting the partition in FAT32, assigning a drive letter, and shutting down the DiskPart utility.
- In the command line interpreter, run the following commands in sequence:
- After DiskPart is finished, close the Command Prompt. The bootable USB flash drive has been created.
Resetting the system on laptops
To restore the system on laptops, there is a built-in reset of OS settings. To restore Windows 7 without a disk, you need to run a standard recovery tool on your laptop.
To do this, after starting the device, hold the power button or a specific key combination for 5-10 seconds. Next, to restore the system using the built-in program, select the desired item in the menu that appears and wait until the program finishes.
The laptop will restore Windows XP if it was originally installed on it. The same will happen with all other OS versions. If at the time of purchase there was an old version of the operating system, then it will be restored.
There are many different ways to restore a system after a breakdown or infection. The simplest method is to completely reinstall the OS using an installation disk, which is created in 10 minutes and can then be used on any device to repair them.
Creating a system repair disc
In our article we will tell you how to create a Windows operating system Recovery Disk and then show you how to use it. But first, a short piece of advice for our reader.
- The simplest solution for you, Denis, is to use any Live CD, boot from it and copy your archive with the Windows 7 image from the flash drive to the hard drive of your computer from which you cannot boot. Next, boot your computer from the System Recovery Disk and your backup will definitely be found. I hope you know that the recovery will be complete and all your information from the disks that you included in the backup will be deleted.
Well, now create a system recovery disk
, which needs to be used to boot the computer, it will contain Windows 7 recovery tools, with the help of which you can repair operating system boot problems or restore it from an archived copy, which is what we will do.
- Note: You must first have created a backup of Windows 7, it is very simple. How to do it? You can read here -> How to restore a Windows 7 system, this is an article about how to restore Windows 7 using various recovery tools built into the operating system itself, if you have a problem with starting or operating Windows, read it first, maybe everything will work out and no recovery disk.
You also need to know that the system architecture is important for the recovery disk; you can use a 32-bit recovery disk for any 32-bit Windows 7, and a 64-bit recovery disk for any 64-bit Windows 7.
Create a system recovery disk
, go to
Start
->
Control Panel
->
Back up computer data
,
select Create a system repair disk
.
Insert the DVD into the drive and click the Create Disc
There is a short process of creating a system recovery disk. Now let's talk about how to use it. Let’s say your computer has a serious crash and you can’t load Windows 7 at all. Press F-8
on the keyboard, immediately after starting the computer, with the intention of getting into the
Computer Troubleshooting
, but nothing except a black screen.
To restore the functionality of Windows 7 from the Recovery Disk
, you need to change the boot priority on the drive in the BIOS, then insert the recovery disc into it and restore your Windows 7 using a backup. How to change the boot priority in the BIOS, read our articles and.
We inserted the Recovery Disk
into the drive, then rebooted, the
System Recovery Options
.
Press Enter
or the prompt to boot from the disk will disappear.
I need good advice on how to restore the Windows 7 bootloader if restoring the startup using the Windows 7 installation disk did not help. I’ll briefly explain what’s going on: Windows 7 was first installed on the computer, then the second system needed Windows XP, after installation it naturally started alone, to boot two operating systems I used the EasyBCD program. Later, XP was no longer needed and I formatted the partition on which it was located from Windows 7. Now, when loading, there is nothing except a black screen. What can be done in this case? More details if possible. Sergey.