Making Android from Windows Phone
First, take care to create a backup copy of your device.
This can be done by a function on your phone or a special program (for example, Titanium Bekap). If something goes wrong or you want to return everything back, then such a copy will help you do it without any problems. Also, a backup copy will help you install all your important documents, photos, images, videos and other files on a ready-made flashed smartphone. In order to check whether there are backups in the phone’s memory, you need to go to the phone’s settings, to the “Backups” tab. There are a lot of phone models running Windows OS, but the firmware principle is the same. Firmware can be installed in two ways: installing Android on a memory card and launching it directly from the Windows system, and installing Android into the phone's memory.
The main files that are present in the firmware program:
- Initrd.gz – file system. Used to run Android from a flash drive.
- Haret.exe is a system file that loads the entire Android platform.
- Zimage is the kernel for Android.
- Default.txt – boot script.
- androidinstall.tar – file system.
- androidupdate.tar – file for updating the Android system.
How to Install Android Apps on Windows Phone
Microsoft has recently been making great efforts to popularize its mobile platform, but, unfortunately, it cannot boast of any particular success. All the efforts of marketers and programmers are frustrated by the vicious circle in which Windows Phone finds itself: “users don’t come because of the meager selection of applications, and developers ignore them because of the small number of users.”
However, with the release of Windows 10, which, as we know, will be a universal system for all platforms, everything may change. Microsoft has come up with a radical way out of the trap in which their mobile devices find themselves. The Astoria project is a special tool for developers that is designed to make it as easy as possible to port and run Android programs on mobile devices running Windows.
The presentation of this project was scheduled for the fall of 2020 along with the final release of Windows 10 Mobile. However, something went wrong, and yesterday Project Astoria documentation and files leaked online. And this is some interesting information that has become public knowledge:
- Project Astoria will allow Windows 10 Mobile users to seamlessly install Android applications if they do not use Google Play services in their work. Otherwise, developers will still need to perform a small modification.
- Along with Windows, Project Astoria SDK will also be available for Mac, but at a later date.
- To install the application's apk file, you will need Java JDK (1.7 or older), Android Studio, and the ability to work with Android Debug Bridge (adb).
- Currently, a limited list of devices is supported, but this will be expanded in the future. Here is the list: Nokia Lumia 920, Nokia Lumia 925, Nokia Lumia 929 (icon), Nokia Lumia 830, Nokia Lumia 930, Nokia Lumia 1020, Nokia Lumia 1520, Nokia Lumia 635, Nokia Lumia 730, Nokia Lumia 820, Nokia Lumia 435 , Nokia Lumia 928.
Some curious users have already tried out the tools posted online and installed Android applications on devices running Windows 10 Mobile. It turned out that this process is very simple and accessible to almost any advanced user. You can see a detailed step-by-step guide in the following video. Links to the necessary files are provided in the comments to this video on YouTube.
This news cannot but please all owners of mobile gadgets running an operating system from Microsoft. Finally, they will be able to install any programs they need and stop envying the wealth of choice their competitors have. However, can this save the Windows Mobile platform? We invite you to express your opinion in the comments.
Launch of a new system with Windows Phone CP
With this method, all Android system folders are registered in one of the root folders of the Windows Phone memory card. The folder can be anything. Example of a system path: Memory card /OCA. Particular attention should be paid to the default.txt file and its contents. It contains all the information for the normal launch of the new operating system.
When the Haret.exe file is launched, the smartphone loads the operating system again, thanks to the parameters of the default.txt file. this means that even though the OS is copied to a removable drive, using native Windows is only possible after a backup (restoring the state of the phone to a certain point - when the save was created). Possible problems with this installation format are restarts and crashes.
Preparation and process of firmware
The technology for installing Android on Windows devices is identical for most modifications and involves the following steps:
- We get root rights (unlimited access) to the smartphone. For this, specialized applications are used (iRoot, FramaRoot and others).
- Download and install the service program used to install the firmware. Each manufacturer's devices have their own software. For example, firmware on HTC smartphones is done using the Custom utility.
- We format the SD card for the FAT32 file system. It is recommended to use Class 10 memory cards to reduce the likelihood of problems and failures in the future.
- On the formatted card, create the “Andboot” directory, into which we copy two files from the firmware set: androidupdate.tar and androidinstall.tar. After this, be sure to remove the external drive from the smartphone!
- We connect the mobile device (without a card!) to the personal computer via a USB cable and transfer the installation program (the aforementioned Custom) and the system file with the .NBH extension to the hard drive.
- Launch Custom on your PC and simply follow the instructions that appear on the screen. The last step is to click the “Update” button (in the English interface – “Update”), after which the smartphone will complete the installation process and automatically reboot.
- However, the device will not be able to complete the restart process and will freeze. At this moment, insert the memory card removed in the previous steps, after which we simultaneously press the buttons to turn on the smartphone and lower the volume.
- The message “Hold down Volume Up or DPad center to launch installer” should appear on the screen. We fulfill the requirement: press the volume rocker or the center button of the joystick (if available).
- The installation mode for a new operating system is activated. In the menu that opens, select “Sys on NAND/Data on NAND” and run “Install System”. If your firmware package included an update file, then after completing the installation process of the system itself, click on “Install Update”.
- When all installation processes are completed, click on “Fix Permissions”, after which we send the smartphone to a soft reboot. The first launch takes from 5 to 20 minutes, after which the loading time will return to normal.
Starting a new system from Windows Phone memory
The file that is installed in the smartphone’s memory is .nbh. For our case, it should be called polaimg-panel1-320-17-06-10.nbh, where each part has its own meaning. The first word is the type of smartphone (manufacturer), the second is the model, the first digit is the screen resolution, the last three digits are the release date of this file. We select the firmware version ourselves depending on personal preferences.
- Using special programs, we obtain root rights to the smartphone. This can be done using programs such as: Framaroot, Root Genius, iRoot, RomasterSy and others.
- Download the utility necessary for flashing the firmware. It is different for each phone and tablet model. If we take the most common ones, then for HTC these are Custom programs.
- We format the memory card using a program designed for this - Fat 32. It is better to take the memory card class 10, so that there are no problems in the future. We create a folder on it, which we call andboot. From the firmware, select the file androidinstall.tar and, if available, androidupdate.tar and place them in the folder created on the flash drive.
- Connect the device to the computer using a USB cable without a memory card! On the computer, create a folder with any name and transfer the Custom program and the .nbh file into it.
- We launch the program from the Custom RUU folder and follow the instructions that appear on the screen. The last thing you need to do is click the button labeled Update and wait for the progress to finish. Then it restarts and hangs.
- We insert the previously prepared memory card into the device and simultaneously press the volume “-” button and the power off button (turn it on in soft reboot mode). We wait until the message “Hold down Volume Up or DPad center to launch installer” appears on the smartphone screen. As soon as we see it on the screen, press the center of the joystick button (or the “+” button on the volume). The device will go to the installation menu for the new operating system.
- In the menu that appears, you need to select Sys on NAND/Data on NAND. Below you need to select Install System and wait until the system is installed. If the androidupdate.tar file was moved to the memory card, then select Install Update and wait to return to the main menu. Next you need to click on Fix Permissions and wait.
- Next, we reboot the device again in soft reboot mode. After this, the device can boot for quite a long time (from 5 to 20 minutes), everything is ready!
Firmware process
The firmware process itself consists of the following steps:
- Obtaining Root rights to your device. This is done using special applications (Root Genius, iRoot, Framaroot, etc.).
- Download software for firmware installation. Each brand of phone or tablet has its own program. For example, for HTC phones such a utility is Custom.
- Format the SD card to FAT32 file system. It is preferable to use a class 10 memory card. On the flash drive, create an “andboot” partition, and then place the “androidinstall.tar” and “androidupdate.tar” files from the firmware there.
- Connect your device to your PC. Attention! The memory card must be removed beforehand. Move the Custom program and the .nbh file to any folder on your PC.
- Enable the Custom RUU utility, and then follow the on-screen instructions. The last action is to click on the button labeled “Update” or Update and wait for the process to complete. Your phone will automatically restart, but will not be able to turn on on its own. At this point, insert the pre-prepared SD card into the device slot.
- Press the volume down button and turn off the device at the same time. A notification should appear on the screen: “Hold down Volume Up or DPad center to launch installer.” Hold down the center key of the joystick or the volume up button.
- You are in installation mode for a new OS. Select "Sys on NAND/Data on NAND". Then click on “Install system”. We are waiting for the installation to complete. If the build included an update file, then also select “Install Update”, and then simply return to the main menu. Click "Fix Permissions".
- Reboot your device in soft mode. The first startup may take quite a long time (from 5 to 20 minutes).
At this point, the flashing process is considered complete. If the phone gives an error or any services do not work (Bluetooth, Wi-Fi, communication), you can always return to the original version thanks to a previously created backup file.
The main disadvantage of using devices with the Windows Phone operating system is the rather limited set of mobile applications. While the variety of games and utilities available for Android smartphones have long won the recognition of users, the range offered to owners of devices with a tiled OS still raises many complaints.
In connection with this situation, many people have a question about how to install Android on Windows Phone devices in order to gain access to more advanced features. currently two ways to achieve this goal:
- flashing the device to initially boot the Android OS;
- using special tools that allow you to install and run Android applications directly in the Windows environment.
How to install an Android application on a Windows phone
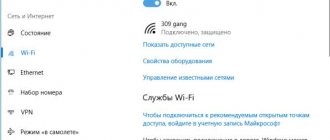
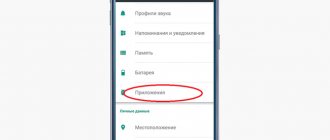
You need to start the installation by setting up your phone. To do this, go to the settings menu, update and security, for developers. In the window that appears, check the Developer mode checkbox and enable device detection. Now you can connect your smartphone to your computer. If you use Windows 10 OS, the system itself will make the necessary settings and synchronize between devices.
If not, then download and install the Project Astoria emulator. After downloading, a folder with application files will appear. Now, through the command line, go to the windows search menu and enter: “cmd”, run as administrator.
Next, a window will appear, in it we write: cd c\\ user\\user name\\ downloads\\Tools. Press the “enter” key and type: wconnect.exe.usb and “enter” again. Now the device will synchronize with your personal computer. The program will ask you for your phone pin; you must enter it. Then copy the path to the folder with the Project Astoria application, and paste it into the previous window after “cd” and press “enter” .
In the next line we add: adp install and the full name of the android application. Now press the “enter” key and watch the installation of the application. You can use everything for your pleasure. As you can see, the installation is not that complicated and will not take much time.
Flashing Windows Phone is easy and simple
So, to perform this procedure you will need a smartphone, a USB cable to connect to a computer and the Windows Phone Recovery Tool
, which can be downloaded from the official Microsoft website. The sequence of actions for flashing Windows Background is as follows:
Step 1
.
Run the “ Windows Phone Recovery Tool
”
Step 2
. Connect your smartphone to your computer and wait until the application recognizes it
Step 3
. Select the connected phone and view the available firmware versions for it.
Step 4
. Depending on the availability of the latest firmware version, the program will download it or offer to reinstall the existing OS on the smartphone
Step 5
.
Having confirmed his intentions by clicking the “ Continue
” button, the user will start the process of flashing the device. This will take some time, and during this operation it is forbidden to disconnect the device from the computer and press any buttons on it.
It is important to know:
Reinstalling the operating system will delete all user settings and files from the smartphone. Therefore, before flashing the device, it is advisable to make a backup copy of important data.
Step 6
. Once the flashing is complete, the gadget will turn on and the user will be able to set all the necessary settings.