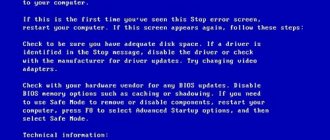
When launching any game, the user may encounter a black screen with the message “Input Not Supported” displayed. Typically, this message appears in a situation where a video signal is supplied from the computer to the monitor that is not supported by the hardware of the monitor. After some problems starting the game and the message “Input Not Supported” being displayed, I had to figure out the reasons for this dysfunction and how to fix it.
Message about dysfunction
When starting the game “Input Not Supported” - the essence and causes of the problem
Translated from English, the text of this message Input Not Supported literally reads “Input (input signal) is not supported.” This means that the computer is sending a signal to the monitor with a resolution or refresh rate that is not supported by the hardware characteristics of this monitor.
This is usually caused by incorrect game settings (the user-selected resolution or refresh rate is higher than the monitor's capabilities allow). Other causes of dysfunction may be a malfunction in the game settings, as well as unstable operation of the adapter used to connect the monitor to the PC.
Statistically, this problem is often observed among players who use the Steam game client to purchase and launch the game.
Quite often this error occurs in the Steam game client.
To solve the “input not supported” problem, you will need to perform several options. Let's look at them in order.
Method number 1. Use transitive switching to windowed mode
If “Input Not Supported” crashes when you launch the game via Steam, do the following:
- Launch your Steam;
- Move the cursor over the name of the desired game on the left, right-click, and select “Properties” in the list of settings that appears;
- Click on the “Set launch options” button;
- In the line that appears, enter –window, then click on “Ok” - “Close”;
- From above, launch the game by clicking on “Play”. The game should launch normally in windowed mode;
- Go to the game settings, select the video settings there, in the “Resolution” option, specify one of the resolutions supported by your monitor (look for data on the technical characteristics of your monitor on the Internet);
- In the Display Mode option, select Full Screen (full screen). The game will launch in full screen, which will fix the “Input not supported” error on your PC.
Resolution and hertz settings
Depending on the version of Windows you are using on your PC, the process will vary.
Important! Selecting a high screen refresh rate may lead to incompatibility between the video adapter and the monitor, so the out of range message .
In Windows7
Regardless of the model of the installed video adapter, you must first try the parameters proposed by Microsoft developers:
- You should right-click (RMB) on the desktop to go to the “ Screen resolution ” settings.
- Next, in the expanded “Resolution” line, you need to set the appropriate parameters .
- If the required resolution is not there, then open “ Advanced options ”.
- The “ Adapter ” settings will open, where they select “ List of all modes ”.
- A list of modes compatible with the installed video card will appear. From this list, select the appropriate mode and click “ OK ”.
On Windows 10
In Windows 10, settings are carried out as follows:
- Press the Win + I and open the “ System/Screen ” section. You can also click on the desktop and open “ Display Settings ”.
- A new window will appear where you select “ More display options ”.
- Select the optimal resolution and apply the settings.
- After which a small window will pop up where you need to confirm or cancel the settings (you need to “Save” or “Cancel changes”), 15 seconds are given for this. If the system does not receive confirmation during this time, the new settings will not be applied.
Error - Windows cannot be installed on this drive
To change the refresh rate you need:
- Advanced screen settings window appears .
- In it you need to select “ Graphics adapter properties ”.
- In the next window, select “ Monitor ” and change the display frequency, as in the bottom picture. In this case, you need about.
- After completing the operation, you need to click “ Ok ”.
Changing parameters using video card software
Let's look at the applications of the most popular video adapter manufacturers.
Intel
For video adapters from Intel you need:
- Right-click on the desktop and in the new window select the “ Graphics characteristics ” option.
- Then, in the “ Display ” subsection, open “ User Permissions ”.
- Then a window will pop up warning you about the possible unpleasant consequences of changing the screen refresh rate. Where you need to confirm the action by clicking “Yes”.
- Then select resolution and refresh rate settings
- If you want to save an individual configuration, select the “ Add ” tab.
- After completing the operation, click “ OK ”.
NVIDIA
For NVidia the steps are similar:
- Click on the desktop with the mouse and select the “ NVIDIA Control Panel ” tab.
- Next, click “ Change resolution ”.
- Select “ Settings ”.
- Then select the “ Create custom permission ” tab.
- In the next window, indicate the required values. To get other parameters, click the “ Synchronization ” tab, then select “ Auto ” from the expanded menu, then “ Manual ” so that you can change configurations.
- Then you need to test the selected settings by clicking the “Test” tab.
- The user settings have been saved, so you should click “ OK ” to apply them.
- Finally , click on the “Yes” tab and confirm changing the settings.
After this, the new user configuration will appear in the main window of the NVIDIA Control Panel.
ATI
These video adapters cannot create custom settings, but you can enable more resolutions and frequencies available in the adapter application.
This is done in the following sequence:
- Click on the desktop and open the “ Catalyst Control Center ” tab.
- Next, select “ My VGA Screens ” or “ My Flat Digital Panels ” according to the port used.
- Then open “ VGA Screen Properties ” in the expanded list.
- Use EDID (extended display identification data) or driver default settings checkbox .
- Then in the line “ Maximum screen resolution ” set the optimal one.
- Next, expand the “ Maximum refresh rate ” list and set the desired frequency.
- Then apply the settings using the “ Apply ” button.
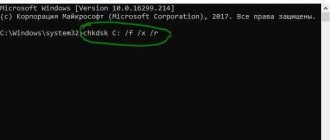
How to fix error 0x000000d1 in Windows 7 and 10
Method number 3. Change the game settings in the config file
Another effective solution to the “Input Not Supported” problem is to change the screen resolution settings in the game configuration file. Do the following:
- Go to:
and look there for the game configuration file that has a characteristic name (for example, variables.txt, options.txt, preferences.xml, etc.);
- Open this text file with any text editor (the handy Notepad will also work);
- Find there the indicators height=XXXX and width=XXXX (this is the height and width of the screen, resolution numbers should be indicated instead of XXXX);
- Instead of the specified resolution numbers, enter the resolution numbers supported by your monitor (for example, height = 720 and widht = 1280). If the numbers are missing, enter the correct values anyway.
- Save the result and try to launch the game.
Method number 6. Switch scaling to PC screen
If your PC is connected to another computer and uses it for streaming and various relevant tasks, it is recommended to go to the settings of your video card and set the “perform scaling” option to the graphics card (gpu) in the case of “ Nvidia”, and “enable gpu scaling” in the case of cards from Amd.
Enable the correct zoom option
Removing the video driver
Before you begin removing the video card driver, you need to look at your monitor settings . Perhaps pressing the Auto button (available on almost all modern monitors) will allow you to set the necessary video output parameters, which are selected by the monitor itself.
If the error does not disappear, then you should open the “ Device Manager ” (you can get through the “Control Panel” or the “Run” window, where you enter the command devmgmt.msc ) and find the installed video adapter in it. Next, you need to open its parameters by selecting “ properties ” and remove the video driver .
Uninstalling related programs
After removing the video driver, you need to uninstall the software installed with it, if it was not removed during the process. This applies to removable and built-in video adapters.
The easiest way is to use the system's software removal capabilities. To do this, in the “ Control Panel ” you need to find “ Programs and Features ”, where all installed software is displayed.
For a more correct removal, it is better to use functional utilities such as iObit Uninstaller, which can uninstall it efficiently (clean up the registry, delete remaining folders and files).
After completing this procedure, you need to restart the PC so that during boot the system itself installs a standard VGA video driver . If the problem persists, you can resort to the help of utilities that will automatically find missing and outdated drivers on your PC (DriverPack or Driver Booster can do this). They themselves will download them from equipment manufacturers, but this requires access to the Internet.