How to find out the current version
First, users need to find out which version of the Windows XP operating system is currently installed. This can be done using the computer properties panel:
- Right-click on the “My Computer” shortcut on your desktop or Start menu.
- In the drop-down menu that opens, select “Properties”. An alternative way to open this panel is to use the key combination “Win” + “Pause”.
- Read what is written in the “System” section. If it says “Service Pack 3” or “SP3”, you don’t need to install anything.
If sp2 or sp1 is installed, follow the further instructions.
So what's the catch?
2. A Microsoft spokesperson said: “We recently became aware of a method that is supposed to allow Windows XP users to receive security updates. These security updates are designed for Windows Embedded and Windows Server 2003 and do not fully protect Windows XP users. Windows XP users expose their machines to significant risk by installing these updates because they have not been tested for Windows XP. The best way for Windows XP users to protect their systems is to upgrade to a newer version, such as Windows 7 or Windows 8.1 or wWindows 10."
Support for Windows XP ended in April 2014, however, many users still actively use this version of the operating system. It may be needed for test runs of applications and games, or simply due to human habit. In order for such a relatively old system to run all modern games and applications, you need to update it promptly. In this article, you will learn what you need to do to update Windows XP, support for which has long been discontinued.
Windows XP Update
The easiest way is automatic updating. The computer will automatically download all the necessary packages and install them in the background without interfering with your work. If auto-update were active, Windows XP would have already installed sp3. If this does not happen, you need to enable this function (at least temporarily):
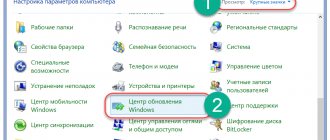
- Open Control Panel from the Start menu.
- Open the section called "Automatic Updates".
- Check the box next to “Automatic (recommended).”
- Click "Apply" and "Ok" to close the window and save the configurations.
Now you just have to wait until all the necessary packages are downloaded from the Microsoft server and installed on your PC. In case you encounter any problems and nothing works, try the alternative option described below.
How to upgrade Windows XP to Windows 7
Microsoft it provides users with the opportunity to update and switch to them while saving data and settings, and we are only talking about early-generation OS, no later than the previous release. If other editions are available, Microsoft recommends performing a clean installation of the OS, first saving all personal data. Immediately after a clean installation of a new operating system, the user has to reinstall many programs and deal with their additional configuration, but when installing an operating system over a previous version, this problem does not arise. With a clean installation, the new operating system will work better, more stable and faster, but many users do not want to waste time on this and, if possible, install the new OS on top of the old one. But what if there is no such opportunity? That's why Microsoft created a special tool Windows Easy Transfer , which greatly simplifies the transition from XP/Vista to Windows 7 .
Let's figure out how to correctly switch from an old operating system to a new one.
The transition process will be divided into two stages: data backup and restoration on the new operating system. Note that this is the most correct, recommended by Microsoft , path to switch to a new OS.
Preserving settings and data from the old operating system
First of all, you need to install the Windows Easy Transfer , download the installation package, find the software product in the archive that matches your operating system and perform the installation. After successful installation, the application must be launched; after launch, we will be greeted by a data transfer wizard that will help you save and, in the future, automatically restore your data.
Next, the transfer wizard will offer us several ways to save data.
Backup can be performed in any way, the end result will not change, for example, a removable disk or a computer located on a shared local network will do. But we would recommend an external removable device. After choosing a saving method, the application will begin searching and collecting data.
After scanning, the wizard will tell you how much free space is required to transfer the data.
Here you can perform a full backup or manually select the data to save. The Transfer Wizard application will then prompt you to protect your data with a password; we recommend doing so.
Congratulations, your backup is complete.
Restoring settings and data in a new operating system
After installing the new operating system, run the Windows Easy Transfer utility again. In Windows 7, the application is included in a set of standard components, so this can be easily done through the start menu.
Here the user can choose which data and settings should be restored to the new OS. Additionally, if desired, you can rename the old account.
Congratulations, the recovery process is now complete. Here you can view the recovery wizard report with information about the transferred data and previously installed programs that can be installed on the new operating system.
Download the update package from Microsoft
You can also download all the necessary files from Microsoft servers and install them manually. Despite the fact that support for Windows XP has already ended, all the necessary packages are freely available on the official website:
- Go to the download page at https://windows.microsoft.com/ru-ru/windows/service-packs-download#sptabs=win10.
- At the bottom of the page you need to select your operating system – Windows XP.
- Find the "Free downloads of the latest service packs" section.
- Click on the “Download package” hyperlink.
- After this, you will be redirected to the login page. If you already have a Microsoft account, sign in. Otherwise, go through the simple registration procedure. It's free and won't take much time.
- Now all that remains is to select the language of your OS and click on the red “Download” button.
- Select "Continue downloading".
- At this step, you will be asked to download additional updates that are not included in Windows XP SP3. Check the required boxes (or do not check anything) and click “Continue”.
After these steps, the sp3 package will be downloaded to your personal computer.
What to do?
First, check the “Don’t show this message again” box in the warning window that constantly appears.
You can clearly see that the Windows XP operating system works for us!
And the most interesting thing is that there are updates, they continue to come out! Everything turns out to be simple, there is a special version of Windows XP that was developed for terminals, ATMs, and cash registers, support for which ends only in 2019! (this is when you can think about changing the operating system; in most cases this means changing the entire hardware). Of course, these updates will not arrive on your computer. You need to follow certain steps so that Windows Update XP sees that you have the right to do this:
- Create a text file in Notepad
- You need to enter the following information into it:
Windows Registry Editor Version 5.00 “Installed”=dword:00000001
- You must save it with the .reg extension under any name
- Now let's run these files and agree and make changes to the registry
- Run the file and agree that information will be entered into the registry
- After the window appears that this information has been added, you must restart the computer
- Now you can safely receive updates
Installing the update
Once the download is complete, you need to start the installation process. Before you begin, save all the necessary data, turn off running programs, and temporarily disable your antivirus.
Open the downloaded file.
In the window that opens, click “Next” and follow further installation instructions. Once the procedure is complete, your computer will restart. Don't forget to turn your antivirus back on if it doesn't start automatically.