How to properly disable screen lock in Windows 7
Automatically turning off your monitor after a certain period of inactivity is one of the standard programmed features in most modern computers running the Windows operating system. The purpose of this shutdown is to reduce power consumption and increase the service life of the display. This option on your computer can be either simply disabled or configured.
Setting up the power supply
If you need to disable the locking feature on the Windows 7 operating system, to do this you need to take the following steps:
- Press the Win key on your keyboard or the mouse cursor on the “Start” button located in the lower left corner of the Desktop.
- After this, write the word “pitan” in the command line, the system will find files and functions with this word in the name. From the options that appear, find the component called “Screen Off Settings”. To open, click on it with the left mouse button.
- Next, a window will appear containing all the power settings for your screen that can be changed. Here you can change: the time after which the image will dim and turn off, the brightness of the image and how long after the computer goes into sleep mode. If you use Windows 7 on a laptop, you will see settings for several power modes at once. Opposite the phrase: “Turn off display” in the drop-down list, select the lowest answer option – “Never”. For laptops, you can separately configure for two cases: power from the network, power from the battery.
- The same thing needs to be done with the “Put the computer into sleep mode” function.
- To commit the new parameters you have set, click the Save Changes button.
Disabling the lock screen
If you have a password set in your operating system, then so that when you turn on the computer or after exiting sleep mode, Windows 7 does not constantly ask you for a password, you need to do the following:
- Go to Start again.
- Go to the “Control Panel” section, which is located in the right column.
- In the window that appears, find the name of the “System and Security” section and click on it.
- In the next window, select the “Power Options” category.
- In the window that appears, in the left column, select the section called “Request password on wakeup.” (You can get here in a simpler way: enter the phrase “password request” in the Control Panel search bar, press Enter, and then select the desired item from the list).
- Check the box next to the phrase: “Do not ask for a password,” and then click save changes.
Now you will not have Windows locked and a password prompt appearing on the screen when you exit sleep mode.
Video on the topic
Good publicity:
UstanovkaOS.ru
Changing the sleep time on Windows 7
If you do not use a computer or laptop for a while, the display turns off and you get the feeling that the machine is turned off. This situation indicates two situations: either the screen turned off, or the PC went into sleep mode. The specified frames are not always satisfactory, and it is often necessary to change the sleep time on Windows 7.
A small digression. All modes are divided into 3 categories:
- Sleep mode (sleep) is a state of the PC in which there is no shutdown, but reduced power is supplied. All open objects continue to be stored in RAM, allowing you to continue working instantly.
- Hibernation – designed more for laptops. The entire contents of the RAM are flushed to the hard drive, then the power is turned off. Resumption of operation takes much longer, but battery savings increase. This is what distinguishes hibernation from sleep.
- Hybrid mode – combines the characteristics of sleep and hibernation.
Methods to open the power option
To change the sleep mode transition time in Windows 7, there is an option called “power”, which can be found in 4 ways:
1. Click “start”, enter “power supply” in the search and select the item shown in the picture.
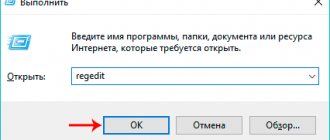
2. Hold down the Win + R keys and copy powercfg.cpl into the “Run” command input window. Click OK or Enter.
3. The longest path. Go to the start menu, select control panel. Make sure that there are large or small icons in the “view” field. In the list of Windows 7 options, find the “power options” option.
4. On a laptop, when you click on the button with the triangle icon in the tray, hidden icons will appear. Among them, find the icon in the shape of a battery and a power plug, click on it with the left button. In the pop-up window, click on any of the 2 links at the bottom.
After selecting one of the methods, a window for setting power consumption and sleep mode in Windows 7 with adjustable configurations will open. In the window, click the link to go to sleep mode, it is located on the left.
Here you will be prompted to change the settings of the installed power plan. In my case, this is the “energy saving” plan. It will always be possible to reset the settings to default, so don't be afraid to experiment.
On the laptop you will see 2 columns:
Each column is given individual parameters. On a regular PC, accordingly, there will be 1 column.
To reduce or increase the time it takes to enter sleep mode and turn off the display, click on the button located opposite the corresponding option. Set your time frame and click “save changes”.
If you always don't leave your PC idle for long periods of time, then select "never". This will disable sleep mode on your Windows 7.
To set your own transition time, click the change advanced settings link.
In the window We are interested in 2 sections:
Click on “sleep”, then “sleep after” and set your own time, down to the minute.
Click on “screen”, then on “turn off screen after” and also set the time period.
You can set other parameters, but after making changes, be sure to click the “apply” button and OK.
With these manipulations you can change the time it takes to go into sleep mode in Windows 7. Basically, sleep has practical benefits on laptops or other devices that use a battery. On a desktop computer, this option is practically useless.
nastrojcomp.ru
Disabling the lock screen in windows 7
Almost every user performs certain work at the computer and stores files that he wishes to hide from prying eyes. This is ideal for office workers and parents with small children. To limit unauthorized people's access to accounts, Windows 7 developers proposed using a lock screen - despite its simplicity, it acts as a fairly serious barrier against unauthorized access.
But what about people who are the only users of a particular computer, and the lock screen constantly turning on during minimal system downtime takes up a significant amount of time?
In addition, it appears every time you turn on the computer, even if there is no password set, which takes away precious time during which the user would have already booted up.
Disabling display of the lock screen in Windows 7
There are several ways to customize the display of the lock screen, depending on how it was activated on the system.
Method 1: Disable the screensaver in "Personalization"
If after a certain amount of time the system has been idle, the screen saver turns on on the computer, and when you exit it, you are asked to enter a password for further work - this is your case.
- On an empty space on your desktop, right-click and select “Personalization” from the drop-down menu.
- In the “Personalization” window that opens, at the very bottom right, click the “Screen Saver” button.
- In the “Screen Saver Options” window, we will be interested in one checkbox called “Start at the login screen”. If it is active, then after each time the screensaver is turned off we will see the user's lock screen. You need to remove it, commit the actions with the “Apply” button and finally confirm the changes by clicking “OK”.
- Now, when exiting the screensaver, the user will immediately be taken to the desktop. There is no need to restart your computer; the changes will be applied instantly. Please note that this setting will need to be repeated for each theme and user separately, if there are several of them with such parameters.
Method 2: Disable the screen saver when you turn on your computer
This is a global setting, it is valid for the entire system, so it can only be configured once.
- On your keyboard, press the “Win” and “R” buttons simultaneously. In the search bar of the window that appears, enter the command netplwiz and press “Enter”.
- In the window that opens, uncheck the “Require username and password” checkbox and click the “Apply” button.
- In the window that appears, we see a requirement to enter the password of the current user (or any other user who requires automatic login when the computer is turned on). Enter the password and click “OK”.
- In the second window that remains in the background, also click the “OK” button.
- Restart your computer. Now, when turned on, the system will automatically enter the password specified earlier, and the user will begin loading automatically
After the completed operations, the lock screen will appear only in two cases - when manually activated by a combination of the “Win” and “L” buttons or through the Start menu, as well as when switching from the interface of one user to another.
Disabling the lock screen is ideal for single computer users who want to save time when turning on the computer and exiting the screensaver.
We are glad that we were able to help you solve the problem.
Poll: did this article help you?
Not really
lumpics.ru
How to set up a computer so that the monitor does not turn off? |
Beginner computer users often notice that the monitor screen turns off after some time, which can be inconvenient when it is necessary to monitor the progress of a particular program, or when purchasing saas and setting it up. Setting the screen to turn off automatically and turning it off completely is quite simple. To do this, use a special section in the Computer Control Panel - Power Options.
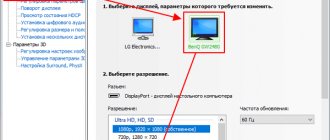
For owners of Windows XP, in the window that opens, go to the “Power Management Schemes” tab and for the current scheme you should set the time after which the monitor and hard drive will turn off. To ensure that the monitor never turns off again, select the “Never” option. Here you can also change the settings for the time after which the computer will go into Sleep or Standby mode.
You should also pay attention to how your screen saver is configured. If necessary, it can be easily disabled. To do this, go to the properties of the Desktop (by right-clicking on a free area of the screen). In the window that opens, on the “Screen Saver” tab, specify the interval for turning on the screen saver or disable the screen saver altogether by selecting “None” as the screen saver.
For Windows Seven owners, in the Power Options section in the left submenu, select the “Setting to turn off the display” section. Here we indicate the time after which the monitor will turn off and the time the computer will go into sleep mode. To ensure that the monitor is always on, select the “Never” time option. Then save the changes by clicking on the appropriate button.
You can also turn off the screen saver on your monitor. On the desktop, right-click on a free area of the screen and select the “Personalization” section. There will be several sections at the bottom, find the “Screensaver” section and click on it. Next, you should set the time for the screensaver to turn on or select “None” from the list of screensavers to turn it off completely. After all changes, click OK.
In the future, the computer screen will no longer turn off.
maxcomputer.ru
windows 7 automatic screen lock
If you leave the computer and do not want anyone to use it in your absence, then only a screen lock with a mandatory password request after waking up can guarantee this.
Train yourself to press the Win+L key combination or select the menu item “Start / Shutdown / Block” and you will know that neither your work colleagues nor your family will be able to use the computer without permission, and accidentally or intentionally do something change in your documents. But to be absolutely sure, set up an automatic screen lock as well.
Since Windows 95 and in all subsequent versions, including Windows XP, automatic blocking has been configured in the desktop properties, which in my opinion was very logical and convenient. However, when I set out to configure this in Windows 7, I was surprised to find that this setting was not in its usual place. Moreover, I was never able to find it on my own. I had to Google it. But even with the help of Google, I didn’t find it right away. And then things get weirder and weirder: it turns out that in some (more expensive) versions of Windows 7, the auto-lock setting is relatively easy to find - if you know where to look. And in cheaper versions of Windows 7 there is only one way to get to it! And maybe I’m too old for this operating system, but this method would never have occurred to me. So…
Setting up automatic screen lock in Windows 7
Open the control panel (“Start / Control Panel”) and enter the magic word “screensaver” in the search bar in the upper right corner. However, you can try to enter the word “password” or “blocking” there... But the word “blocking” will not find anything good for you.
Then select any of the links “Change the screen saver”, “Enable or disable the screen saver”, “Set a screen saver password”, “Lock an unattended computer” - in any case you will be taken to the same window. Where you can select the screensaver option; set a time interval - the screensaver will turn on if no one uses the computer during this time; and check the “Start at login screen” checkbox, which will enable the password prompt we require.
Of course, a password will only be requested if it has been previously set. Just in case, let me remind you...
How to set a password for a user in Windows 7
Open the control panel, find “Add and remove user accounts”, select the desired user and click the “Change password” link.
www.sovets.ru
How to change screen shutdown and sleep times in Windows 10
Hello. I don’t have any good ideas for articles, so I’ll write a little in the section for beginner users. So, the point is that in Windows 10, with each update, the old control panel interface is cut out, replacing it with an updated control center. And more and more settings are being transferred there; today we’ll just look at where the settings for the timers for turning off the screen and going into sleep mode go.
Click on the notification center in the lower right corner. And select “All parameters”. To speed things up, you can get used to pressing Win+I.
The “All Settings” utility of Windows 10 will open, here we click on the “System” button.
Let's go to the section called “Power and sleep mode”. It contains both switches that interest us. In the case of laptops, there will be twice as many parameters.
After changing the parameters, simply close the settings window. Now all changes are applied on the fly as they change.
Look like that's it. I hope you found this article useful, click one of the buttons below to tell your friends about it. Also subscribe to site updates by entering your e-mail in the field on the right or subscribing to the group on VKontakte and the YouTube channel.
Thank you for your attention
Material from the site geekteam.pro
geekteam.pro
Tip 1: How to disable screen lock
For Windows 7 and Vista, you need to click the “Block” button; by default it is in the list, which is called up from the “triangle” next to the “Shutdown” button. Also for all these OSes there is a key combination such as Win+L. But what if you often leave your computer and want to enable automatic locking after some time of inactivity, for example 5 minutes? This article will tell you how to do this.
In fact, I wouldn't be writing this note if this feature was activated in an obvious way. For example, I immediately looked for it in the power settings. But there you can only set a password requirement when exiting sleep mode. I’ll write how this is done, because this is also a rather important function.
How to make windows require a password when resuming from hibernation/standby mode
In Windows 7/Vista, this is done like this: Control Panel -> Power Options -> (Select the desired plan) -> Configure the power plan -> Change additional power settings -> (Plan name) -> Require a password on wakeup (set to “Yes” ").
In Windows XP, this is done on the “Advanced” power tab, you need to check the box next to “Request a password when exiting standby mode” (the checkbox will be available if you enable the use of hibernation mode on the “Hibernation” tab. Otherwise, this checkbox will simply not be there ; to be honest, I don’t know what the logic is here).
Automatically lock your computer after some time of inactivity
This option is activated in the screensaver settings. If your operating system is Windows 7 Home Premium edition and higher, you can access these settings through the “Personalization” menu item, and this menu is called up by right-clicking on an empty area of the desktop. If you have a cheaper edition, for example, Primary, then it doesn’t matter - go to the control panel, write “splash screen” in the upper right corner, and the “Change screen saver” item appears in front of us. By the way, you can read here how different versions of Windows 7 differ and what their prices are.
There you can check the “Start at login screen” checkbox. This will mean activating the automatic locking of the computer and requiring a password the moment someone tries to wake it up from the screen saver. Naturally, a password must be set for the account. By the way, it turns out that setting a screensaver is not necessary. You can select “(no)” in the list, but check the above-mentioned checkbox, and the computer will still be blocked after the specified time interval has expired.
In Windows XP, the corresponding actions are performed as follows: right-click on an empty area of the Desktop, and select “Properties”, then the “Screensaver” tab.
And check the “Password protection” checkbox.
SoftLakeCity.ru
Lock screen picture settings
Naturally, now we are not very interested in the user interface, that is, those four clicks that I mentioned in the introduction, which means that we will change the image itself using Group Policy functionality. The latest client and server operating systems from Microsoft have, of course, introduced new policy settings in administrative templates that are used only for the latest functionality, and one of these settings is the setting for applying a custom lock screen image. What should be done for this? Now to make this change we will perform the following steps:
- In Group Policy Management,
you need to create a new or select an existing GPO, associate it with the OU that contains your target computers, and then open the Group Policy Management Editor for it; -
-
in that appears, go to the Computer Configuration\Policies\Administrative Templates\Control Panel\Personalization node
and select the policy setting “
Force a specific lock screen image by default
” (
Force a specific default lock screen image
); - Now in the dialog box that appears, all you have to do is set the switch to the option "Enabled"
, and then in the corresponding text field you will need to indicate the local or UNC path to the required image. At this point, since each user will definitely not have the same required images in a specific folder, you can choose one of the following two options:- You can specify a UNC path for an image that resides on, say, a dedicated file server, and user computers will download it when Group Policy runs;
You can use Group Policy preferences to copy a specific image once to the image library of users who exclusively have the Windows 8 operating system installed, and then use the local path to the file in the corresponding text field.
Since the article will discuss many different nuances, we will focus on the first option with the UNC path. For example, as you can see in the following illustration, this would be the path \\SERVER02\Img\LockScrn\IM3.jpg:
Rice. 1. Lock screen image policy setting dialog box
In principle, this phase is coming to an end. That is, immediately after the user’s computer reboots, a new image will appear on his lock screen.
Auto-lock Windows 7 with password protection
Admin 01/15/2014 — 19:15 Workshop
It seems to me that the Windows 7 operating system was able to win its audience of users who are in no hurry to move to the already sensational Windows 8.1. Of course, I also know those who are still satisfied with the capabilities of Windows XP, and there are quite a lot of such people even among office workers.
So, we smoothly approached the topic of this material, which will tell you how you can configure automatic blocking of the Windows 7 operating system. A pressing question if you are the only user and would not want someone to accidentally or intentionally change settings or personal documents. But often, when leaving our computer place, we forget to press the Win + L key combination, which blocks access to the system until the password is entered, but automatic blocking is not installed.
How to enable automatic locking in windows 7?
Everything would be fine, but in the initial versions of Windows Seven operating systems, many visual design settings are not entirely open to the average user, since “Start”, “Home Basic” and “Home Advanced” do not have a “Personalization” tool.
This exception makes it difficult to access some system display settings.
Automatic computer lock
There is nothing complicated about the blocking techniques described in the previous section; the main difficulty is remembering the need to use them. For example, if you are late for a meeting or meeting, who will remember to lock the computer? In such situations, it usually happens that a person comes to the appointed place and only then remembers that he forgot to lock his PC, after which he begins to suffer from the thought that he left his computer unprotected.
To avoid such difficulties (not to mention possible penetration), it is better to configure the computer so that it is automatically locked after a certain period of inactivity on the part of the user. In previous versions of Windows, this behavior required the use of a screen saver, and Windows 7 is no exception. The required steps are given below.
- Right-click on the desktop and select Personalization from the context menu to open the Personalization window.
- Click the Screen Saver icon.
- If you want a screen saver to appear after the PC has been idle for some time, select it from the Screen Saver list.
- In the counter field, specify the idle interval (in minutes) after which Windows 7 should automatically lock the PC.
- Check the box next to Start at login screen.
- Click OK.