Content
- The Windows 7 installation does not see the USB mouse and keyboard (we solve the problem with the BIOS settings). Step 1 – disable (Intel) xHCI Mode.
- Step 2 – switch the USB Legacy Support mode.
- Step 3 – reset the BIOS (if the previous steps do not help).
- Manual installation of hard drive or SSD drivers.
- When installing Windows 7, the optical drive is not detected.
1.
Integration of drivers into the distribution
If switching devices and BIOS settings did not help, the last option remains - installing USB drivers. But since the input devices do not work, we will not be able to manually select a folder on the flash drive when the installation utility requires it. You will have to integrate the necessary software into the structure of the Windows 7 distribution.
The first step is to download a set of chipset drivers for your motherboard. It is best to look for suitable software on the manufacturer’s official website. Each such resource has a support section where you can specify a specific model and download utilities.
Now you need to install the NTLite program and specify the path to the root directory of the image. Then click on the “Download” button and select the mounted Windows 7 image from the list. Wait.
Now let's move on to the procedure for adding drivers. Through the “Add” menu, select the appropriate item. Use File Explorer to select all the drivers you want to integrate. Click on "Apply".
After integration, you need to save the ISO image. To complete the procedure, click on “Processing”. Wait for NTLite to complete the operation and notify you. Now all that remains is to burn a new Windows 7 image to a USB flash drive and test the installation with built-in drivers!
Windows 7 installation does not see USB mouse and keyboard (we solve the problem with BIOS settings)
If your Windows 7 installation does not see a mouse or other input device, the first thing to do is check the USB ports into which these peripheral devices are inserted.
Blue ports ( USB 3.0) may not be supported by the master, and therefore you should at least during installation move the equipment to gray ports ( USB 2.0 ).
In most cases the problem will be resolved.
steps in the BIOS in order (later in the article, these steps will be described step by step) :
- Disable ( Intel ) “xHCI Mode ” in the “ Advanced ” ;
- Try a different value for the “USB Legacy Support” ;
- Reset BIOS.
It is not necessary to do all three steps at once.
Check the functionality of your mouse and keyboard after each step, starting
from the first. First you need to go into the BIOS. more details on how to enter the BIOS on various devices (desktop computers or different brands of laptops) in this article: how to enter the BIOS. Restart your computer and on the motherboard logo, enter the “ Setup Menu ” by pressing the F 1 ( F 2, F 12, Delete - depending on the BIOS).
Now let's get started: 1.1.
Step 1 – disable (Intel) xHCI Mode
You can find this option in the
“ Advanced ” in the BIOS .
- Go to “ Advanced ” , navigating with the arrows on the keyboard;
- Change the mode to “ Disabled ” in the “ xHCI Mode ” ;
Figure 1. Set xHCI Mode to Disabled.
- We save the settings by going to the “ Exit ” and selecting “ Exit Saving Changes ”;
- We check the mouse and keyboard and try to install the OS again.
The first action helps in the vast majority of cases. Move on to the next heading if:
- " xHCI Mode " line is missing;
- Executing “
Action 1 ”
did not produce results.
1.2.
Step 2 – switch USB Legacy Support mode
Unlike described above, the
“ USB Legacy Support” is available for editing on the vast majority of systems. It is also located mainly in the “ Advanced” . We need to change the mode of this function to the opposite (“Enabled” to “ Disabled” or vice versa).
Figure 2. Changing the USB Legacy Support value. Do not forget to save the changes in the “ Exit ” by selecting the “ Exit Saving Changes ” option, the computer will reboot automatically.
We check our devices by running the Windows installation again. If the peripherals are still not working, you should try resetting the motherboard .
1.3.
Step 3 – reset the BIOS (if the previous steps do not help)
To return the BIOS to factory settings, you must:
- Go to the “ Exit ” (usually follows Boot );
- Select the item “ Load Setup (Optimal) Defaults ” → confirm the action by clicking “ Yes ”. The computer will restart.
These steps have a high chance of helping you solve your USB mouse and keyboard problem.
Otherwise, you should check the peripherals for hardware failures on another computer. Also try connecting other devices. ↑ Return
2.
Using third party programs
USB Ports Disabler
You can set a ban on USB ports in the simplest way - through programs. One of these is USB Ports Disabler. This is a free program that disables all ports on your PC. The utility has a very simple and minimalistic interface. The program is free. USB Ports Disabler detects and disables USBSTOR, which we saw in the registry. Thus, reading data from a USB drive will be impossible.
Download USB Ports Disabler - https://www.softportal.com/software-42029-usb-ports-disabler.html
USB Manager
Another utility worthy of attention. First of all, USB Manager is compatible with all versions of Windows. The program itself is lightweight, and installation will not raise any questions. The utility is completely multilingual, there will be no difficulties with the language. USB Manager disables/enables all USB ports on your PC in one click.
Download USB Manager - https://www.softportal.com/get-39722-usb-manager.html
It is worth remembering that the main malicious files enter the system through USB drives, so by disabling the read ports, you will thereby protect yourself from headaches. You can select a specific connector that you would like to disable, this could be a connector for a printer or scanner. The program itself works quickly, clearly and correctly. The software is updated very often; by the way, the latest version has an updated shutdown system for the user.
Solving a problem when using a PS/2 keyboard and mouse
Failures in these devices occur quite rarely and are mainly associated with BIOS and hardware failures.
Before performing the following steps, be sure to turn off the power to your computer. This precaution is due to the fact that it PS /2 while the system is running. If you are using standard PS /2 peripherals, you should:
- Check and clean the connector/port of the keyboard and mouse from various types of dirt;
- Try similar USB equipment;
- Swap the mouse and keyboard connectors;
- Update the motherboard BIOS to the latest version.
If all of the above does not help, try using another copy of Windows 7. The lack of support for PS / 2 devices may be due to the fact that a particular assembly does not contain, in fact, outdated drivers for these devices (they may be cut from the final image).
↑ Return
3.
Why the mouse and keyboard do not work
Most likely the version of Windows 7 that I installed is old and does not have standard drivers for a modern motherboard. When I installed Windows 8.1 or Windows 10 there were no such problems.
In general, when buying a motherboard, you should look to see if there are drivers for Windows 7; if not, then it is advisable not to install the seven because various problems may arise during installation.
In my case, the GIGABYTE GA-AB350M-DS3H V2 motherboard supports seven, so we are looking for a way out of the situation.
The computer does not see the bootable USB flash drive and/or other USB devices when installing Windows 7
The solution to this problem is quite simple in most cases. And before you start delving into this chapter, you need to do the following:
- Move the flash drive with the system from the USB 3.0
(blue color) to
USB 2.0
(gray color); - Check that the OS installation image is recorded correctly (just insert the USB flash drive/DVD into another PC);
- Make sure that other USB peripherals work (i.e. try connecting other devices to the USD ports, especially if you have a laptop);
- Reset BIOS settings to factory settings;
- Check the item “USB Functions”
in the
BIOS
, which is located in the tabs:
“Main”
or
“Advanced”
, depending on the model of your motherboard (the mode should be
“Enabled”
).
If the Windows does not see USB devices at all
, refer to the first chapter. It provides some general steps to resolve the most common problems.
↑ Return
4.
Power outages
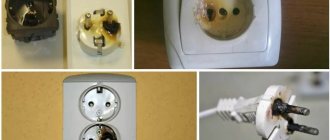
There are situations when there is simply not enough power for all devices. For example, connecting an external hard drive that uses two USB connectors at once may disable the printer or keyboard. In this case, the power of the power supply is not enough to provide energy to all consumers. In this case, the problem may not appear immediately, but after some time after turning on the computer. There are several ways out of the situation. If you have a low-power power supply installed, for example, 300 W, then it would be logical to change it to a more powerful one, 450-600 W. You can also use an active USB hub (with external power). It will allow you not only to increase the number of connected USB devices, but also to power them from a separate power supply.
Another reason that affects USB operation is a dead CMOS battery. But at the same time, every time you turn on the computer, you will observe a lost system time and date. After replacing the battery the problem goes away. But this does not occur often, so you should check other possible sources of malfunction.
Windows 7 Setup Wizard does not see the hard drive (SSD) or asks for drivers
Before you begin performing actions that affect the software, you need to make sure that the drives are working and the computer settings are correct.
Note. The following steps are also relevant for SSDs . the required “hard drive” (hard drive) is not present in the window for selecting a disk for installation
- Check HDD/SSD cables and fastenings;
- Disconnect unnecessary drives, leaving only the one on which the OS will be installed;
- Switch the “ SATA Mode ” from “ AHCI ” to “ IDE ” (any other available);
the third in more detail . To do this you need:
- Turn off computer;
- Enter the BIOS (or “ Setup Menu ” ) by pressing the F 1 (F2, F12, Delete) button immediately after turning on the computer at the stage when the logo of your motherboard manufacturer is displayed on the screen;
- Using the arrows, find the “ Configure SATA as ” or “ SATA Configuration / Mode ” (depending on your BIOS);
- Change the " AHCI " to " IDE " or " RAID " ;
Figure 3. Set the value IDE for the Configure SATA as line.
- Save the settings by selecting “ Exit Saving Changes ” in the “ Exit ” . The computer will restart with the changed configuration.
Now you can try the installation again. Continue to the next chapter if:
- The OS installation still does not see your HDD or SSD;
- The “ SATA Mode ” was already set to “ IDE ” .
↑ Return
4.1.
Manual installation of HDD or SSD drivers
It is recommended that you move on to this chapter after fully reading the previous one. This will help eliminate unnecessary actions. In most cases, the installation image already contains software for many drive controllers (SATA drivers). However, if the board model of your computer/laptop is quite recent (or, conversely, old), drivers may simply be missing.
Therefore, we need to “specify” them ourselves at the stage of selecting the system disk. The following instructions will describe this process in more detail. Let's get started. STEP 1 – search for the necessary software . Download drivers from the website of the manufacturer of your laptop or motherboard. First of all, we focus on files that include one or more examples of words: INF , SATA , RAID , RST .
STEP 2 – unpack and reset to media with the OS image. Unzip the downloaded file into a separate folder → copy it to any location on the installation flash drive. Please note that the drivers we need should not contain executable “. exe" files. Only unpacked ones (such drivers usually include folders: amd , x64 , as well as many . inf files) . STEP 3 – specify the required software in the disk selection window. We insert the flash drive into the computer → we reach the stage of selecting a disk for installation. Here you need to find the “Download” (or “Browse” ) button and click on it.
An explorer will open in which you need to specify the required driver.
Figure 4. Select the desired folder with the driver.
The hard drive (SSD) will be detected if the appropriate drivers are selected. Now you can continue the process by selecting the SSD disk that appears.
↑ Return
5.
Equipment setup
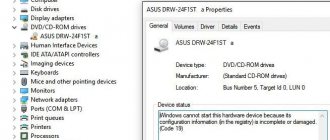
After installing the Windows 10 operating system on your computer or switching to it from previous versions, it may happen that peripheral devices connected via USB ports often turn off or even stop working correctly, displaying warning icons in the device manager in the form of a yellow triangle, as well as error code 43 in the description. What to do in this case? First you need to determine the culprit. Of course, if several devices fall off at once, then it is clear that they are most likely not to blame and the reason lies in the computer itself. If only one device is faulty, then for diagnosis you need to carry out the following manipulations:
— Try switching to a nearby USB connector. This advice is especially relevant if the system unit is located somewhere under a table in a dusty corner and is wiped only once a year. And then, before doing this, you need to see if it is clogged with dust or debris.
— Replace the connecting cable. This is generally a sore spot - cords are lying around anywhere, their connectors are bent, they are crushed by a chair or shoes, they are chewed by pets, etc. As an example, we can take iPhone smartphones, whose proprietary cables break near the plug after just a couple of months of active use.
— If an external hard drive fails, the error most likely appears because the second connector on the cable is not connected and it simply does not have enough power.
— If there is another computer or laptop, then connect the device to it and watch the work. Alternatively, you can go to friends or relatives. If the gadget functions there without problems, everything will immediately become clear.
So, we have come to the conclusion that the causes of the problem with USB ports are hidden in the computer. Let's look for them!
Outdated drivers and BIOS
Very often, outdated or incorrect drivers are to blame for bus failure. This is especially noticeable when updating the system, when everything worked fine on the old OS, but after updating to Windows 10 glitches began with error 43 and “Device not recognized” messages. To fix it, you need to go to the motherboard manufacturer’s website, look for a new version of the software and install it. An alternative option is to download the Drivers Solution Pack client online and use it to update drivers.
Usually after this the malfunctions are eliminated completely and irrevocably.
I also want to talk about a couple of cases where problems with USB ports on Windows 10 appeared due to an outdated BIOS version. Moreover, both times it was not on old decrepit hardware, but on new ASUS laptops after upgrading the pre-installed “Eight” to “Ten”. Everything was solved by downloading the latest version of the BIOS from the official website and flashing the motherboard using a special utility that came with the kit.
Reinstalling a port concentrator
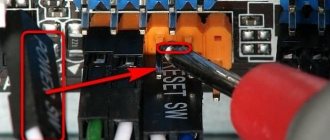
Sometimes this trick helps fix errors with USB: Right-click on the “This PC” icon and select “Manage”. The “Computer Management” system snap-in will open. In it you need to select the “Device Manager” section:
Here we find the “USB Controllers” section and open it. We need the “USB Root Hub” item. Right-click on it and select “Disable”. Close the window and restart the computer. We return to the dispatcher again and turn on the hub. After this, all USB ports should work without problems.
Power plan settings
This case is especially relevant for owners of laptops, netbooks and ultrabooks. The fact is that in order to save battery energy, they have activated the function of selectively turning off devices, and if at a certain point in time a lot of consuming gadgets are connected to the computer (phone charger, card reader, portable speaker, etc.), then Windows 10 can Selectively disable one or more devices at once.
To disable this option, go to Device Manager again and open the properties of the USB root hub. On the “Power Management” tab, uncheck “Allow the computer to turn off this device to save energy.” After that, close the manager and reboot.
My solution to this problem
Unfortunately, the above tips did not help me, but I had to do something. I just had a mouse with a PS/2 connector and with the help of it I was able to install Windows 7, but the problem did not end there after starting Windows, not a single USB socket was available it worked, but the computer did not have a DVD drive. I decided to start from a live disk (surprisingly, everything worked there), then I downloaded the drivers to the system partition, restarted the computer, installed the drivers and everything worked.
I hope some of the above helps you.
source
Ways to fix the error
The methods proposed below are designed for situations where the ports worked normally before the system was reinstalled - in other words, the reason for their inoperability should be the new Windows. Those malfunctions that are associated with the breakdown of the ports themselves will not be discussed in this article.
Incorrect operation of ports after installing a fresh Windows 7 can be caused by two main reasons:
- Lack of necessary drivers in the system
- Violation in system registry entries when migrating from older systems.
Let's highlight several ways to solve this problem.
USB Oblivion
The USB Oblivion utility is a simple tool that is designed to remove from the system registry all entries associated with previous attempts to connect USB devices through the corresponding ports. The program will help if you switched to Windows 7 from Vista or XP.
Instructions for using the program are as follows:
- Download and unpack the archive using any available archiver and run the EXE file corresponding to the bit level of your operating system.
- After the program window opens, disconnect all USB devices from the PC, close any other applications, activate the “Perform real cleaning” option, click on “Cleaning”.
- We are waiting for the cleaning procedure to complete - as a result, the PC will automatically reboot, after which it will be necessary to test the operation of the ports.
USB 3.0 laptop does not see mouse
Laptops running operating system 8.1 often encounter the “USB device is not recognized” error. To prevent this problem? It is necessary to change the power supply circuit of the laptop.
- Open Windows Control Panel.
- Select "Power Options" and click on the power plan.
- Now click on Change advanced power settings.
- Disable USB ports from being disabled.