May 5th, 2020 Rugi Deme
Annoying User Account Control pop-up messages often plague regular Windows users. UAC tries to improve security so that your computer is not in danger, but it turns out that with its constant alerts it only pushes you away. No matter how much the operating system wants to protect users' computers, sometimes excessive protection becomes very annoying, and it becomes necessary to disable it.
- 2 Why you shouldn’t completely turn off protection
- 3 Disable a service in Control Panel
- 4 How to turn off using a registry file
- 5 How to enable/disable a service using the command line
- 6 Is it possible to turn off UAC through the PowerShell console
- 7 Setting up UAC
- 8 Video: how to disable User Account Control in Windows 10
What is Windows UAC
Windows UAC is your account control. For the user, it serves as protection, monitors the compatibility of old programs, helps us protect ourselves from viruses, unwanted programs that may run on us, and various applications. Windows UAC works all the time. Every time you launch a program on your computer, the control will interrupt the launch and a window will pop up asking if the system is allowed to open the desired program. If you do not have administrator rights, the system will ask you to enter a password.
An example of what the popup message looks like:
Pop-up alert when you try to make changes to your computer
Configuring the UAC Tool
There are 4 main states in which a service can operate:
- Constant notifications are the most active mode; in this case, the notification window appears on top of all windows and reacts to both programs and processes. Without your reaction, it is impossible to continue work.
- Notifications about program actions - in this mode you will receive fewer notifications, since they will only come from programs. If you make changes yourself, there will be no notification.
- Warnings only about changes in critical files - this option is the “minimum program” for everyone, as it notifies about changes or an attempt to make changes to critical system files.
- No notifications – shutdown. This mode is not recommended, as you will no longer have control over the situation when making changes to the operation of your computer.
All this can be configured by clicking on “Setting up the issuance of such notifications” in the window that notifies you:
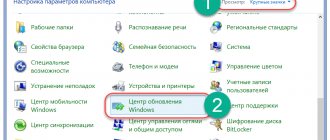
This can also be configured in “System Configuration” through the Control Panel, in the Service section:
Here you need to find the “User Account Control Settings” option; in the same section you can disable the service. Next, a visual interface will open in front of you, where you must move the slider:
Please note that this is not just setting up notifications, it is setting up the operation of the entire service - that is, if you turn off notifications, then the protection will also turn off. Therefore, don't disable notifications unless you want to be left without a reliable tool that blocks unwanted processes and prevents critical issues.
You can open this settings window by calling the UserAccountControlSettings.exe command through the Run interface. To do this, use the hotkey combination WIN+R, then enter UserAccountControlSettings.exe and press the Enter button. As a result, the same settings window will open.
Why you shouldn't completely turn off protection
Unfortunately, this technology only causes irritation for the user. Despite the fact that UAC increases the security of your PC, prevents malware from running and protects against viruses, users do not like annoying notifications that interfere with their work. The main reason why you need to disable control is the need to work with several programs at the same time. In this case, UAC will begin to irritate and interfere with your work. Microsoft does not recommend completely disabling the monitoring service because there is a risk of accidentally running spyware or downloading viruses that can quickly infect your computer and entire operating system. After all, enabling UAC in Windows was purely for security purposes.
What is UAC
Starting with Vista, Windows introduces a new security mechanism called UAC or User Account Control. Why is UAC needed and how does it work? Essentially, this is a function that allows you to prevent spontaneous execution of executable files on the system by asking the administrator for permission to perform operations that can make more or less significant changes to the operation of the system, programs or other user accounts. This protection mechanism is currently used in all latest versions of Windows.
Externally, the way User Account Control works in Windows 7/10 is that when the process starts, a window appears asking you to confirm an action that requires administrator rights.
This switches the desktop to protected mode, preventing the user from interacting with other applications. The only exception is for the built-in Administrator account, which is not restricted by UAC, but is disabled by default.
The benefit of UAC is obvious - if it were not there, any virus could run with higher rights when a user is working in an administrator account. Of course, UAC is not a panacea, but it is quite capable of stopping such unauthorized launch of an executable file. However, many users do not like UAC, and the main reason for this is its intrusiveness. Therefore, it is not surprising that ordinary users often have the question of how to disable User Account Control in Windows 7/10.
How to enable/disable a service using the command line
Disabling and enabling UAC is also possible through the console.
- First of all, hold down two Windows keys + X or select “Command Prompt (Administrator)” from the “Start” menu.
You need to select "Command Prompt" in Administrator mode to get to the console
- The console starts. Change the settings here. Instead of /t REG_DWORD /d 0 /f, enter /t REG_DWORD /d 1 /f. After you type the command, the protection will turn off.
Changing the values to disable UAC
- Secure the result by restarting the computer.
- If you need to re-enable UAC, just change the settings the other way around. From zero to one.
How to disable UAC Windows 10
There are several ways to disable UAC in Windows 10:
- via the control panel;
- via the command line;
- in the registry editor.
Let's take a closer look at how to disable each method.
Control Panel
- RMB on the Start menu → Control Panel → install View: small icons → User Accounts.
- Click “Change User Account Control Settings” → a window will open in which you can configure notifications about changes in computer settings by setting the slider to one of four suggested positions:
- Always notify;
Notify when applications try to change settings (default values);
- Notify without dimming the screen;
- Never notify.
Healthy! Alternative way to open Account Control Settings: Press Win+R and type: UserAccountControlSettings
Command line
- RMB on the Start menu → Command Prompt (Administrator).
- Enter: C:\Windows\System32\cmd.exe /k C:\Windows\System32\reg.exe ADD HKLM\SOFTWARE\Microsoft\Windows\CurrentVersion\Policies\System /v EnableLUA /t REG_DWORD /d 0 /f
- After this, a message will appear asking you to restart your computer.
This command makes the appropriate changes to the Windows Registry Editor.
Registry Editor
- Press Win+R → type regedit.
- In the Registry Editor window that opens, go to: HKEY_LOCAL_MACHINE\ SOFTWARE\ Microsoft\ Windows\ CurrentVersion\ Policies\ System.
- On the right side of the window, find the DWORD parameters:
- ConsentPromptBehaviorAdmin;
- EnableLUA;
- PromptOnSecureDesktop.
- RMB for each of them in turn → Edit.
To set a specific UAC value, use the table to select the appropriate DWORD parameters.
| ConsentPromptBehaviorAdmin | EnableLUA | PromptOnSecureDesktop | |
| Never notify | 0 | 1 | 0 |
| Notify without dimming the screen | 5 | 1 | 0 |
| Notify when applications try to change settings | 5 | 1 | 1 |
| Always notify | 2 | 1 | 1 |
Video: how to disable User Account Control in Windows 10
If you want to take a closer look at disabling and configuring UAC in Windows 10, you can watch the video that explains how it's done.
Correctly set User Account Control settings can ensure the desired level of PC security. The main thing to remember is that UAC is a way to protect your system and keep it safe. Control was activated to protect against viruses and malware; you can always turn it back on, and then you won’t have to worry about your system.
- Author: Rugi Deme
My name is Rugi. And today I am only 20 years old. I entered the specialty Economic Cybernetics. But I plan to work in a different field. Rate this article:
- 5
- 4
- 3
- 2
- 1
(10 votes, average: 2.8 out of 5)
Share with your friends!
Disable User Account Control (UAC) in Control Panel
The first way is to use the appropriate item in the Windows 10 Control Panel to change User Account Control settings. Right-click on the Start menu and select “Control Panel” from the context menu.
In the control panel at the top right, in the “View” field, put “Icons” (not Categories) and select “User Accounts”.
In the next window, click on “Change User Account Control Settings” (this action requires administrator rights). (You can also get to the desired window faster by pressing the Win + R keys and entering UserAccountControlSettings in the Run window, then pressing Enter).
Now you can manually configure the operation of User Account Control or disable Windows 10 UAC so that you do not receive any notifications from it in the future. Just select one of the UAC settings options, of which there are four.
Install the Windows 7 start menu in Windows 10
- Always notify when applications try to install software or when computer settings change is the safest option; you will be notified about any action you take that could change something, as well as actions from third-party programs. Regular users (not administrators) will be required to enter a password to confirm the action.
- Notify only when apps try to make changes to your PC—This setting is enabled by default in Windows 10. It means that only the actions of programs are controlled, but not the actions of the user.
- Notify only when applications try to make changes to the computer (do not dim the desktop). The difference from the previous point is that the desktop is not darkened or blocked, which in some cases (viruses, Trojans) can be a security risk.
- Don't notify me—UAC is disabled and does not notify you of any changes to computer settings initiated by you or programs.
If you decide to disable UAC, which is not a safe practice at all, you should be very careful in the future, since all programs will have the same access to the system as you, while User Account Control will not report if any of them they “take on too much.” In other words, if the reason you disable UAC is simply because it is “interfering,” I strongly recommend turning it back on.
How to Install Windows 10 on Mac