MBR types
Above we saw that the bootloader code is written to the MBR sector. What is this? The fact is that the MBR can contain both a “standard” bootloader and alternative bootloaders.
The following common MBR types are:
- Windows NT versions 5.x and 6.x, occupies 1 sector. Can boot the OS only from the primary active partition.
- GRUB4DOS versions 5.x and 6.x – occupies 16 sectors. This is a gbldr.mbr file. it can also be installed as PBR directly into the partition.
- GRUB 2.0 is a universal boot manager that occupies 63 sectors. Consists of the files boot.img and core.img. It can work with any file systems and boot the OS from both primary and logical partitions.
- PLoP – occupies 62 sectors and has an advanced interface. Allows you to organize booting from CD/Floppy/USB without support or access to the BIOS.
- UltraISO USB-HDD – occupies 1 sector and allows you to boot from external USB HDD drives.
Of course, given the diversity of OSes, there are many other MBRs, but they are not so popular.
Operating systems are only friendly with certain types of bootloaders, but this does not mean that they cannot be modified to support other operating systems. So, you can add information about the Linux partition to the Windows MBR, but this is not enough for Linux to boot. To do this, you will also need to edit the PBR. However, Linux LDLINUX.SYS requires its microcode to be in the MBR in order to access it during the boot process, that is, if you have a Windows NT MBR boot record and a GRUB bootloader, then this scheme will not work. Windows boot loaders can do without the presence of the corresponding microcode in the MBR, so they can also boot through GRUB MBR.
The main thing you need to understand is that the MBR contains microcode, instructions for the processor, not files. PBR points to the loader, which is a file.
What is a bootloader?
The operating system loader is a program located in the first sectors of the hard disk (hereinafter referred to simply as the bootloader), for example, in the MBR (master boot record) of the hard disk.
After the system test, at boot time, the BIOS (basic input/output system) transfers control to the MBR if the system is configured to boot from it. Then the program located in the MBR begins to execute. This program is called a bootloader, its task is to transfer control to the operating system kernel, which will continue loading. There are several boot loaders, including GRUB (universal boot loader), Boot manager, LILO (Linux OS boot loader), NTLDR (Windows NT boot loader), and others. I decided to describe GNU GRUB and how to use it.
Variety of PBRs
We found out that the MBR transfers control to the active partition with the PBR. PBR (Partition Boot Record), also called volume boot record (VBR), is microcode in the initial sector of a disk partition (often sector 63), which contains information about which bootloader to look for.
The following bootloaders are available:
MBR type - NT 5.x/6.x, 1 sector
- io.sys for MS-DOS, Windows 95/98/ME
- ntldr for Windows 2000/XP/2003
- bootmgr for Windows Vista/7/8/8.1/10
MBR type - Grub4DOS, 18 sectors
- grldr for Grub4DOS
MBR type - LILO/GRUB and other Linux ones (number of sectors depends on the version and number of files)
- ldlinux.sys – main base module
- syslinux.sys - for booting from FAT, FAT32, NTFS
- isolinux.bin - for booting from iso9660
- pxelinux - for PXE boot
- extlinux to boot from ext2/ext3/ext4 or btrfs
As I said above, the bootloader is not a boot area, but a binary file.
- Windows NTLDR or BOOTMGR files must be located at the root of the active system partition and they work differently. More on this below.
- The GRLDR file used by Grub4DOS must also be located in the root of the partition with which the boot is performed
- Syslinux is a universal bootloader that contains many modules and supports booting from ext2/¾, FAT, NTFS, CD/DVD disks, and over the network via PXE. Allows you to organize a text or graphical boot menu. Most often, this bootloader is used to launch Linux from FAT/NTFS file systems or to create multiboot USB flash drives that allow loading both Linux-compatible applications under DOS and Windows PE.
For example, a typical example of creating a multiboot flash drive is Multiboot USB 2k10, created by the respected conty9 & korsak7. Multiboot system administrator disk with the ability to boot from CD/DVD, flash drive, USB-HDD and regular HDD and consisting of several Windows PE assemblies, as well as DOS versions of Acronis products - for example Acronis True Image (run on the Linux kernel). It is because of this mixed zoo of systems that you have to use the Syslinux bootloader (although Grub4DOS is also possible).
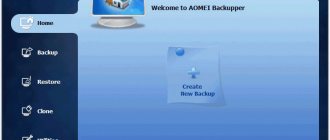
You must have the BootICE
. A unique utility for changing or backing up/restoring MBR (Master Boot Record) or PBR (Partition Boot Record). With BOOTICE, you can easily change MBR/PBR type. Supported boot entries: Grub4DOS, SysLinux, PLoP, MS NT52/60... For example, with this utility, you can install Grub4DOS to your MBR or PBR, install NTLDR or BOOTMGR to your PBR, install SYSLINUX to your PBR, and so on.
Editing and installing MBR
Editing and installing the bootloader
Installing MBR GRUB4DOS
In addition to working with MBR and PBR, BootICE allows you to edit disk partitions, perform manual partitioning and formatting, modify the partition type, save and restore the partition table from a backup.
Working with a partition table in BootICE
Briefly about the Syslinux bootloader
Note that the Syslinux boot code itself cannot be installed into the MBR, but the syslinux package provides two files from which you can install the Syslinux boot code into the 440-byte boot code area of the MBR: mbr.bin or gptmbr.bin. Of course, this only makes sense for Linux.
By the way, syslinux can be used with UEFI - the bootloader for it is called syslinux.efi, but it is still quite crude.
So, Syslinux consists of a bootloader file and a menu configuration file syslinux.cfg. The menu file can call a graphical menu by loading the vesamenu.c32 file.
Installing Syslinux under Windows on another drive is quite simple: use the file [bios/]"win32/syslinux.exe" for 32-bit systems and [bios/]"win64/syslinux64.exe" for 64-bit systems.
syslinux.exe --install a: - installation to floppy disk
syslinux.exe —mbr —active —directory /boot/syslinux/ —install z: — installation on disk z:, for example a flash drive, where
— the separators should be exactly /
, not
\
- the loader file “ldlinux.sys”
- and partition z: is marked as active
— to organize the menu, the file z:\boot\syslinux\syslinux.cfg must be created
Installing the Syslinux bootloader
Through BootICE, you can also install the Syslinux boot loader by specifying an alternative location for the ldlinux.sys files and the syslinux.cfg menu file in the options.
Windows boot loaders
Of course, we will focus on bootloaders for Windows.
NTLDR Loader
used before the advent of the Windows Vista operating system.
During the initial boot process, the partition boot sector (PBR) program code searched, read into memory, and transferred control to the ntldr file, which was located in the root partition of the boot disk. The ntldr boot loader was configured using a simple text file boot.ini
, the contents of which specified the list of operating systems to be loaded, their boot parameters, the location of system files, etc.
On Windows Vista/Server 2008 and later operating systems, the ntldr boot loader is not used, and is replaced by the BOOTMGR
. Accordingly, the program code of the partition's boot sector has also changed, ensuring the transfer of control to the bootmgr file. The new boot manager uses its own boot configuration data (Boot Configuration Data (BCD)) and can, with certain settings, boot any Windows operating system. The ntldr bootloader does not support the ability to boot Windows Vista and older.
Also, I want to note that all modern Windows PE of any version also use the bootmgr loader. The chain of boot stages MBR - PBR - BOOTMGR is the minimum necessary condition for the operating system to start loading. Its further progress is determined by the BOOTMGR boot manager, which reads the boot configuration data from the \BOOT\BCD file of the active partition and performs the boot in accordance with its contents.
For Windows 7 it runs the file \WINDOWS\system32\winload.exe
Loading WINDOWS\system32\winload.exe
bootmgr boot manager
allows you to boot from a regular system disk, as well as from boot images, virtual disks, and boot using boot loaders of other operating systems.
This allows you to use bootmgr
to boot Windows PE. According to the boot configuration, the BOOTMGR manager can boot the Windows or, for example, Linux kernel, exit from hibernation mode, load diagnostic programs, boot the kernel with changed parameters, etc.
Typically the bootmgr file has "hidden" and "system" attributes. By type of structure, the \Boot\BCD is a registry hive and is displayed in the Windows Registry Editor as a section
HKEY_LOCAL_MACHINE\BCD00000000.
Usually it is the BCD configuration that becomes the biggest stumbling block.
Configuring BOOTMGR and BCD
To work with the Windows bootloader you will need system utilities:
The BCDEDIT command is used in Windows Vista and older operating systems to edit the BCD. Detailed instructions for using this utility can be found here.
However, I highly recommend that you use the very convenient EasyBCD
for editing BCD. For example, using it you can easily add a Linux partition to the boot menu. Here is an article on how to add a Linux Ubuntu boot item to the Windows 7 BCD configuration.
When you launch EasyBCD, you can view the current BCD configuration in the View Settings window. The screenshot shows that there is currently one Windows 7 installed on the disk, the GUID of which is {9079c27c-fa49-11e5-8c8e-3417ebc2574d} and a manually added menu item to start Windows installation from a WIM file:
BCD menu for booting Windows and installing from a WIM file
And here is the BCD menu of the bootable flash drive, which contains Windows 7 x86 and x64 installers, as well as two MSDaRT x86 + x64 environments:
BCD menu of bootable flash drive, overview
BCD menu - installing Windows from a WIM file x86 and x64
Running the Windows RE recovery environment from a bootable flash drive
The BOOTSECT.EXE utility allows you to change the Windows boot loader code to switch between two boot manager options - BOOTMGR or NTLDR - or repair a damaged boot loader!
For example,
Command bootsect /nt60 E: /mbr /force
– creates MBR and PBR records on drive E: (for example, a flash drive) and installs the bootmgr boot loader.
Well, the third, extremely important utility is BootRec
is part of the Windows Recovery Environment and is used to restore the operating system boot. You can find it by booting from the Windows installation disk and choosing the “System Restore” option instead of installing. The MSDaRT window will appear, from where you can launch the command line and type BootRec.exe there. You can also make MSDaRT (it's a free Microsoft product) and make a bootable flash drive/disk with it.
Bootrec /FixMbr command
– Writes the master boot record (MBR) of the system partition, compatible with Windows. This does not overwrite the existing partition table.
Bootrec/FixBoot
– writes a new boot sector compatible with Windows to the system partition.
bootrec /RebuildBCD
– rebuild the boot configuration store on this computer. Convenient to use for changing the BCD configuration when adding a new disk with Windows installed, or for making changes to an existing boot configuration for new or previously unused OSs.
Loading the operating system
OS structure
To understand the operation of the OS, you must be able to identify the main parts of the system and their connections, i.e. describe the structure of the system. For different operating systems, their structural division can be very different. The most common types of structuring can be considered two. On the one hand, we can consider that the OS is divided into subsystems corresponding to the groups of functions listed above. This division is quite justified; OS software modules can indeed generally be attributed to one of these subsystems. Another important structural division is related to the concept of the core of the system.
The kernel, as the name suggests, is the main, “most systemic” part of the operating system. There are different definitions of kernel. According to one of them, the kernel is the resident part of the system, i.e. The kernel refers to the program code that is constantly located in memory throughout the entire operation of the system. The remaining OS modules are transitive, i.e. are loaded into memory from disk as needed for the duration of their operation. The transit parts of the system include:
- utilities – separate system programs that solve specific problems, such as formatting and checking a disk, searching for data in files, monitoring (tracking) system operation and much more;
- system libraries of routines that allow application programs to use various special features supported by the system (for example, libraries for graphic output, for working with multimedia, etc.);
- command interpreter – a program that inputs user commands, analyzes them, and calls other modules to execute commands;
- system bootloader is a program that, when the OS starts (for example, when the power is turned on), ensures that the system boots from disk, initializes, and starts;
- other types of programs, depending on the specific system.
Basic input/output system (BIOS) is a set of software that ensures the interaction of the OS and applications with hardware. Typically, BSVV represents a set of components - drivers. BSVV also includes a level of hardware abstractions, a minimum set of hardware-dependent input/output procedures necessary for the launch and operation of the OS.
Modern processors have at least two operating modes - privileged (supervisor mode) and user (user mode).
The difference between them is that in user mode, processor commands related to hardware management, RAM protection, and switching processor operating modes are not available. In privileged mode, the processor can execute all possible commands.
Applications running in user mode cannot directly access each other's address spaces - only through system calls.
All components of the operating system can be divided into two groups - those operating in privileged mode and those operating in user mode, and the composition of these groups varies from system to system.
The main component of the operating system is the kernel. Kernel functions may vary significantly between systems; but on all systems the kernel runs in privileged mode (often called kernel mode).
The term core is also used in different senses. For example, in Windows, the term kernel (NTOS kernel) refers to a combination of two components - the executive system (executive layer) and the kernel itself (kernel layer).
There are two main types of kernels - monolithic kernels and microkernels. The monolithic kernel implements all the main functions of the operating system, and it is, in fact, a single program, which is a collection of procedures. In the microkernel there remains only a minimum of functions that must be implemented in privileged mode: thread scheduling, interrupt handling, interprocess communication. The remaining functions of the operating system for managing applications, memory, security, etc. are implemented in the form of separate modules in user mode.
Kernels that occupy an intermediate position between monolithic and microkernels are called hybrid kernels.
Examples of different types of kernels:
- monolithic kernel – MS-DOS, Linux, FreeBSD;
- microkernel – Mach, Symbian, MINIX 3;
- hybrid kernel – NetWare, BeOS, Syllable.
Windows NT has a monolithic kernel, however, since Windows NT has several key components that run in user mode, Windows NT cannot be classified as a truly monolithic kernel, but rather a hybrid one.
In addition to the kernel, drivers—software modules that control devices—work in privileged mode (in most operating systems).
The operating system also includes:
- system libraries (systemDLL - Dynamic Link Library, dynamic link library) that convert application system calls into kernel system calls;
- user shells that provide the user with an interface - a convenient way to work with the operating system.
User shells implement one of two main types of user interface:
- text interface (Text UserInterface, TUI), other names – console interface (Console UserInterface, CUI), command line interface (CLI);
- graphical interface (GraphicUser Interface, GUI).
An example of implementing a text interface in Windows is the command line interpreter cmd.exe; An example of a graphical interface is Windows Explorer (explorer.exe).
Device drivers play a special role in the system structure. These programs, designed to serve specific peripheral devices, can undoubtedly be classified as the kernel of the system: they are almost always resident and run in kernel mode. But unlike the kernel itself, which changes only when a new version of the OS appears, the set of drivers used is very mobile and depends on the set of devices connected to a given computer. On some systems (for example, early versions of UNIX), the entire kernel had to be recompiled to enable a new driver. Most modern operating systems connect drivers to the kernel during system boot, and sometimes even allow drivers to be loaded and unloaded while the system is running.
Loading the operating system
Operating system files are stored in external, long-term memory (hard, floppy or laser disk). However, programs can only run if they are in RAM, so operating system files must be loaded into RAM.
The disk (hard, floppy or laser) on which the operating system files are located and from which it is loaded is called the system disk.
After turning on the computer, the operating system is loaded from the system disk into RAM. The download must be carried out in accordance with the download program. However, in order for a computer to execute a program, that program must already be in RAM. The resolution of this contradiction consists in sequential, step-by-step loading of the operating system.
Computer self-test. The computer includes a non-volatile read-only memory (ROM) containing programs for testing the computer and the first stage of loading the operating system - this is the BIOS (Basic Input/Output System).
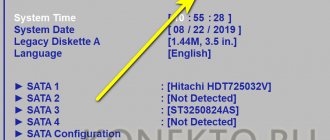
After turning on the computer power or pressing the Reset button on the computer system unit or simultaneously pressing the {Ctrl+Alt+Del} key combination on the keyboard, the processor begins executing the POST (Power-ON Self Test) computer self-test program. The performance of the processor, memory and other computer hardware is tested.
During testing, diagnostic messages may first be issued in the form of various sequences of short and long beeps (for example, 1 long and 3 short - the monitor is not connected, 5 short - processor error, and so on). After successful initialization of the video card, short diagnostic messages are displayed on the monitor screen.
To set the correct date and time, or to make changes to your computer's hardware configuration, you must press the {Del} key while performing the self-test. The BIOS Setup system utility will load, which has an interface in the form of a system of hierarchical menus. The user can set new computer configuration parameters and store them in a special memory chip, which, when the computer is turned off, is powered by a battery installed on the system board. If the battery fails, configuration parameters are lost and the computer stops booting normally.
Loading the operating system. After self-testing, a special program contained in the BIOS begins searching for the operating system loader. There is an alternate access to the disks available in the computer (floppy, hard, CD-ROM) and a search in a certain place (in the first, so-called boot sector of the disk) for the presence of a special Master Boot program (operating system loader program).
If the disk is the system one and the bootloader program is in place, then it is loaded into RAM and control of the computer’s operation is transferred to it. The program searches for operating system files on the system disk and loads them into RAM as program modules (Fig.).
| Rice. Operating system boot process |
If there are no system disks in the computer, the message Non system disk appears on the monitor screen and the computer freezes, that is, the operating system stops loading and the computer remains inoperable.
After the operating system has finished loading, control is transferred to the command processor. If you use the command line interface, the system prompts you to enter commands. The prompt is a sequence of characters indicating the current drive and directory. For example, if the operating system was loaded from the C: drive, and the operating system was installed in the WINDOWS directory, a prompt will appear:
C:\WINDOWS
If the operating system GUI is loaded, commands can be entered using the mouse.
Articles to read:
- Windows nt OS download. Windows NT features
- Concluding remarks to the section
What happens when the game is LOADING
Similar articles:
- Operating system features
Topic 1.2. Information technology hardware and software. Introduction. Information technology has already changed the world and continues to do so...
- Loading the operating system ms-doc.
Lesson plan No. 30 for the academic discipline “System programming” for specialty 2 – 40 01 01 “Information technology software”...
Bootloader GRUB4DOS
This is one of the most versatile boot loaders, capable of booting almost any operating system from any media. For Linux users, installing GRUB is obvious, but for Windows it is not so simple. It makes sense to use GRUB, for example, as one of the bootloaders of a multiboot flash drive, because it supports chainloader - transferring control to another bootloader along a chain. Thus, you can install GRUB MBR on a flash drive, which will access the grldr bootloader, which in turn, through the menu, allows you to redirect requests to bootmgr, for example, to install Windows.
The bootloader consists of the following files:
- default
- grldr
- menu.lst
The grldr.mbr file is needed to install GRUB as an MBR. So, GRUB can be installed manually under Windows or using various utilities.
Installing the GRUB bootloader under Windows
Let's imagine that you already have Windows with bootmgr boot loader. You will need to add entries for the new bootloader to the BCD so as not to lose the existing one. Procedure:
- The Grub4dos bootloader files - grldr.mbr
and
grldr
- are located in an accessible location, for example in the root of the
C:\
(can be FAT32, NTFS). You can download the files from the official repository. - Next, add the bootloader to the BCD either through the command line and the bcdedit command discussed above, or the BootICE/EasyBCD . Run the following commands at the command line: > bcdedit /create /d "Grub4Dos" /application bootsector - create a new entry named "Grub4Dos" in the boot configuration data store, remember the GUID of the new entry > bcdedit /set {id} device partition=C: - description of the properties of the new entry, {id} - GUID, which you remembered above > bcdedit /set {id} path \grldr.mbr - {id} is the identifier of the created entry, issued by the first command > bcdedit /displayorder {id} /addlast - (optional) shift the new entry to the end of the menu
- The Grub4dos bootloader menu is created - C:\menu.lst
That's all, it's not that difficult.
It's more difficult to edit the menu.lst menu. Here is a list of the main GRUB console commands (they can be executed either manually from the command line or from a menu file):
# comment - hash sign - instructing the bootloader not to process the boot line - transferring control to the kernel loaded with the kernel command or to the “next” bootloader using the chainloader command color light-gray/black yellow/green light-cyan/black light-green/black - sets menu colors chainloader /ntldr - transfers control to the bootloader, in the example /ntldr chainloader (hd0)+1 - transfers control to the boot sector of the device (hd0) chainloader +1 - transfers control to the boot sector of the root device configfile /cfg/next.lst - opens configuration file, go to the submenu default 0 - setting the default menu item to be executed after the timeout expires fallback 1 - setting the menu item to be executed if loading is not possible by default find --set-root /file - search for a file and set the partition on which it is located in as the root halt - shutdown the workstation gfxmenu /boot/message33.gz - install a background graphic image, also known as Russification of the quit menu - exit GRUB, in DOS map (hd0) (hd1) - “swap” partitions to make it possible to boot windows from second and subsequent disks map (hd1) (hd0) timeout 20 - set the time in seconds before the next command is executed title Boot Name - name of the menu item pause - wait for the key to be pressed rootnoverify (hd0,0) - cancel checking the file system type of the disk selected by the command
root
root (hd0,1) - select the root (current) disk reboot - reboot the workstation
Let me give an example of working pieces of code from the menu file:
| 1 2 3 4 5 6 7 8 | title Installing Windows XP with SP3 x86 RUS. root (hd0,0) map —mem /WINSETUP/XPpSP3.ISO (0xff) map (hd0) (hd1) map (hd1) (hd0) map —hook root (0xff) chainloader /I386/SETUPLDR.BIN |
title Installing Windows XP with SP3 x86 RUS. root (hd0,0) map —mem /WINSETUP/XPpSP3.ISO (0xff) map (hd0) (hd1) map (hd1) (hd0) map —hook root (0xff) chainloader /I386/SETUPLDR.BIN
| 1 2 3 4 | title Installing Windows 7 with SP1 x86-x64 + MSDaRT 7.0 RUS. find --set-root /bootmgr chainloader /bootmgr boot |
title Installing Windows 7 with SP1 x86-x64 + MSDaRT 7.0 RUS. find --set-root /bootmgr chainloader /bootmgr boot
| 1 2 3 4 5 6 7 | title Download WinPe RusLive Special Edition 2k10 RUS. find --set-root --ignore-floppies /2K10/WINPE/RLPE.BIN chainloader /2K10/WINPE/RLPE.BIN title Acronis DD 11 and True Image Home 2012 RUS. map /PROG/ATIH2012PP_6151_ADDH11_2343_ru-RU.iso (0xFF) || map —mem /PROG/ATIH2012PP_6151_ADDH11_2343_ru-RU.iso (0xFF) map —hook chainloader (0xFF) |
title Download WinPe RusLive Special Edition 2k10 RUS. find --set-root --ignore-floppies /2K10/WINPE/RLPE.BIN chainloader /2K10/WINPE/RLPE.BIN title Acronis DD 11 and True Image Home 2012 RUS. map /PROG/ATIH2012PP_6151_ADDH11_2343_ru-RU.iso (0xFF) || map —mem /PROG/ATIH2012PP_6151_ADDH11_2343_ru-RU.iso (0xFF) map —hook chainloader (0xFF)
| 1 2 3 4 5 6 7 8 | title Hiren's BootCD v.15.1 RUS. find --set-root /PROG/hiren.ima map /PROG/hiren.ima (fd0) map --hook chainloader (fd0)+1 rootnoverify (fd0) map --floppies=1 boot |
title Hiren's BootCD v.15.1 RUS. find --set-root /PROG/hiren.ima map /PROG/hiren.ima (fd0) map --hook chainloader (fd0)+1 rootnoverify (fd0) map --floppies=1 boot
| 1 2 3 4 5 6 7 | title Victoria v.3.52 RUS. find --set-root /PROG/vcr352r.iso map --mem /PROG/vcr352r.iso (0xff) map --hook root (0xff) chainloader (0xff) boot |
title Victoria v.3.52 RUS. find --set-root /PROG/vcr352r.iso map --mem /PROG/vcr352r.iso (0xff) map --hook root (0xff) chainloader (0xff) boot
| 1 2 3 | title Alkid Live CD root (hd0,0) chainloader (hd0,0)/minint/setuplns.bin |
title Alkid Live CD root (hd0,0) chainloader (hd0,0)/minint/setuplns.bin
If you don’t want to, there is a program called GRUB4DOS Installer, and even a convenient Russian installer for it, but this option will not allow you to make a combined bootloader . He will ask the question where to unpack the files and where to install the bootloader, after which he will do everything himself: format, install the MBR, copy the files. But I personally am against such “automation”.
Also, for those who like to configure the boot loader from Windows, there is a utility WinGRUB , which installs GRUB without formatting the flash drive.
If you still don’t have the nerves and strength to figure out how to write a menu, that is, there are programs that will make a boot menu and install the bootloader for you, you just need to select the ISO files of the distributions that need to be added:
- WinSetupFromUSB
- SARDU
- Easy2Boot
For those who want to create similar flash drives, I also recommend reading the specialized sites: greenflash.su, flashboot.ru and usbtor.ru.
Manual recovery procedure
To restore the bootloader, you will need either a Windows 10 distribution (bootable flash drive or disk) or a Windows 10 recovery disc. If you do not have them, you will have to use another computer to create them. You can read more about how to make a recovery disk in the article Recovering Windows 10.
The next step is to boot from the specified media by setting it to boot from it in the BIOS (UEFI), or using the Boot Menu. After downloading, if this is an installation flash drive or disk, on the language selection screen, press Shift + F10 (the command line will open). If this is a recovery drive, select Diagnostics - Advanced Options - Command Prompt from the menu.
At the command line, enter three commands in order (press Enter after each):
- diskpart
- list volume
- exit
As a result of executing the list volume command, you will see a list of mounted volumes. Remember the letter of the volume on which the Windows 10 files are located (during the recovery process, this may not be partition C, but a partition under some other letter).
No activation of Windows 10 / are there any restrictions
In most cases (the computer has only one Windows 10 OS, a hidden EFI or MBR partition is present), in order to restore the bootloader, it is enough to then run one command:
bcdboot c:\windows (where instead of C you may need to specify another letter, as mentioned above).
Note: if your computer has several operating systems, for example, Windows 10 and 8.1, you can run this command twice, in the first case specifying the path to the files of one OS, in the second - another (will not work for Linux and XP. For 7 it depends on configuration).
After running this command, you will see a message indicating that the download files have been successfully created. You can try to restart the computer in normal mode (by removing the bootable USB flash drive or disk) and check whether the system boots (after some failures, loading does not occur immediately after restoring the bootloader, but after checking the HDD or SSD and rebooting, error 0xc0000001 may also appear, which in this This case is also usually fixed by a simple reboot).
Activate Windows 10
conclusions
So, in order to be able to boot the OS, the correct MBR bootloader must be installed, which ends with a valid signature, there must be a partition table, and at least one partition must be marked as active. And in the partition itself, where the MBR will transfer control, there must be a valid boot record that will indicate which system file needs to be loaded into memory to start loading the OS itself. Additionally, there should be a boot menu that will point to the location of the OS boot files.
[Visits: 8,731, of which today: 8]
OSiBCD, boot, BootICE, bootmgr, EwsyBCD, GRUB, GRUB4DOS, MBR, ntldr, PBR, syslinux, boot, boot loaders
Did you like the post? Why not? Leave a comment below or subscribe to the feed and receive a list of new articles automatically through the feeder.