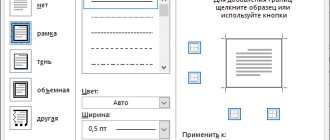
Some users are wondering how to enable a ruler in Word to take measurements. The Microsoft Word application has a Ruler tool, with which you can measure individual elements of a document for formatting, alignment, determining the desired boundaries, distances between paragraphs, margins, columns, indents, etc.
The Microsoft Word text editor is a popular program for working with documents, part of the Microsoft Office office suite. The Word program is used to create, view and edit text documents saved in the “.DOCX” and “.DOC” formats.
While working in MS Word, users need to bring the document to a certain appearance. Measuring rulers in Word are located at the top and left of the work area (text box). There is a horizontal ruler at the top and a vertical ruler at the left.
Please note that the vertical ruler appears in a Word document only in Page Layout mode. A horizontal ruler appears in most document views.
The ruler displays a scale in various units of measurement: centimeters, millimeters, inches, points and pica.
With default settings, after opening a document in Word, the ruler is not displayed in the program window, starting from Word 2007 (in Word 2003, the ruler is displayed by default).
Not all users work professionally with the MS Word text editor and know all the intricacies of its work. Therefore, users have to search the Internet for information, in our case, how to enable a ruler in Word. For other useful tips for working in Word, read this article on my website.
In this article we will look at how to enable a ruler in a Word document in different versions of the program: Word 2020, Word 2013, Word 2010, Word 2007.
How to enable ruler in Word 2020
In the Microsoft Word 2020 text editor, the measuring ruler is enabled from the application menu.
In Word 2020, make the following settings:
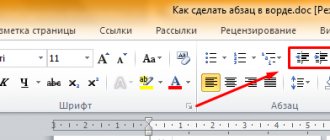
- Open a Word document, go to the “View” tab.
- In the “Show” group, check the box next to “Ruler”.
After this, both rulers (horizontal and vertical) will be displayed along the edges of the Word document.
If the vertical ruler is not displayed in the Word 2020 window, it means that it is disabled in the program settings.
To change the settings for displaying the vertical ruler in MS Word 2016, follow the settings:
- Go to the "File" menu, select "Options".
- In the Word Options window that opens, open the Advanced tab.
- In the “Display” settings section, check the box next to “Show vertical ruler in layout mode”, and then click on the “OK” button.
Accordingly, if, on the contrary, the user does not need to display a vertical ruler in an open Word document, uncheck the box next to this program settings item.
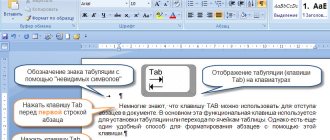
Setting the tab stop
Tab is the indentation that the cursor moves when you press the Tab
.
By default, when you open a new document, the ruler does not have tab stops. Therefore, each time you press the Tab
, the cursor moves forward by a preset standard indentation increment of 1.25 cm. But you can customize any custom tab stop interval. Setting tab stops will allow you to better control and arrange text, improve readability and document format.
Word comes with a number of preset tab options to make creating a document easier for you. If you look at the left edge of your document, just above the vertical ruler, you will see a button called "Item Picker"
.
By clicking this button, you can select any of the tab stops present in Word. Available tab stops:
- Align Left
: When this marker is set, the text will move to the right of the tab stop mark; - Center
: When you type, text is centered around the selected tab stop; - Align Right
: The text will move to the left of the tab stop mark. - By separator
: this position aligns numbers by their integer and fractional parts. The selected marker remains in one place regardless of the number of digits present. - With a bar
: The selected position does not create an actual tab stop. It allows you to insert a vertical line into the text, in the marked place, without changing the size and format of the text. - Indents
: Allows you to set indents for the selected text. Select the paragraph you want and place a tab stop marker on the white active ruler field to indent it. This position works similarly to the indent function described in the previous section.
A quick tip: If you're switching between tabs and don't remember what each symbol represents, move your cursor away from the button and then back to activate a tooltip describing that tab.
To insert a marker, simply use the Position Picker
to select the desired tab type.
Each time you press the button, you will change the type of tab. Now move the mouse cursor over the white part of the horizontal ruler (on its bottom line), and place the marker in the desired place. A symbol will appear indicating the type of tab you placed. A set tab marker shows where text will move when you press the Tab
on your keyboard.
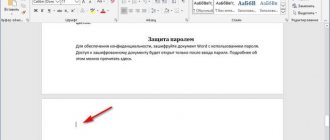
Let's look at an example. In this paragraph "General left indentation"
is located 1 centimeter from the left edge, and the
“First line indent”
is another 1 centimeter further.
I set the "Align Left"
to the three centimeter mark.
Place the cursor in front of the word "Microsoft"
.
After pressing the Tab
, the text moved to the manually configured tab stop.
If necessary, you can use multiple tab markers at once. Select the required markers and place them on the ruler in the desired location.
To remove a tab stop marker, simply drag it off the ruler body and release the mouse button. The tab stop marker will disappear.
If you prefer to manually adjust your tab stops (for a more precise location), double-click any marker to open the Tab stop
.
The Ruler is just one of the few Word tools that has much more functionality than is commonly believed. It provides a quick way to manage margins, set different paragraph indents, and help you format text using tabs. Why Word doesn't include a ruler by default is unclear. But at least now you know how to turn it on and use it.
This article describes how to work with a document in various document display modes. The issues of working in each of them are covered, as well as the issue of using the navigation area.
How to enable ruler in Word 2013
To start displaying the ruler in Microsoft Word 2013, you will need to enter the program menu.
In the Word 2013 window, do the following:
- In the Word 2013 program window, go to the "View" menu.
- Go to the “Display” group, check the box next to “Ruler”.
To enable the display of the vertical ruler in MS Word 2013 from the application settings, if this option is disabled in the settings, do the following:
- From the File menu, click on the Options option.
- In the Word Options window, go to the Advanced tab.
- Scroll the scroll wheel to the “Screen” section, check the “Show vertical ruler in layout mode” checkbox, and click the “OK” button.
If you don't need a vertical ruler, uncheck the box next to "Show vertical ruler in layout view" in the Word Options window.
Page settings
The main functions of page layout are items that define page parameters. These include: margins, orientation, size, columns, breaks, line numbers and hyphenation. In Word 2007 and 2010, these parameters are located in one place, also in the “Page Layout” tab.
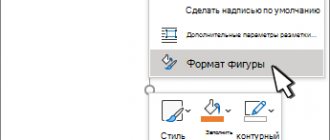
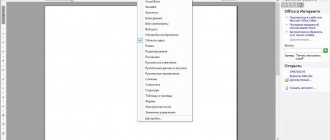
Let's look at how to work in Word 2003 with these parameters and where to look for them. For example, the main page parameters (margins, orientation, size, columns) can be found in the “File” tab if you click on the “Page Settings” item.
When you click on this item, the “Page Settings” window will appear, in the first tab (“Margins”) of which you can select margins and orientation. You can apply your changes to the entire document or to the end of the document.
The size can be changed in the same window. You just need to open the “Paper Size” tab.
“Columns” are located in the “Format” tab. There you can configure them.
“Break” is located in the “Insert” tab. This item allows you to insert page breaks into the document.
“Hyphenation” can be found by opening the “Service” tab. Next, in the “Language” item, you need to select the “Hyphenation” menu.
Also, in 2003 there is no way to set line numbers. Let's take a closer look at how to work in Word with some of these points.
How to enable ruler in Word 2010
Microsoft Word 2010 has two ways to enable the display of a measuring ruler in an open Word document.
1 way to enable ruler in MS Word 2010:
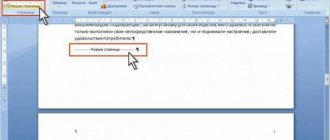
- After opening the Word document, go to the "View" menu.
- In the “View” menu, in the “Show” group, check the box next to “Ruler”.
2 way to enable display of the ruler in Word 2010:
In the window of an open Word document, on the right side of the program window, click on the “Ruler” button located above the vertical scroll bar.
If there is no vertical ruler in the Word 2010 window, go to the application settings:
- Go to the “File” menu, click on “Options”.
- In the Word Options window, go to the Advanced tab.
- In the “Display” section, activate the “Show vertical ruler in layout mode” option, and then click on the “OK” button.
To disable the vertical ruler, uncheck the “Show vertical ruler in markup mode” option.
How does the ruler work in Word 2020, 2013, 2010, 2007, 2003?
The ruler is an indispensable tool for working with any text. All of the things it can do can mostly be done using the Paragraph menu, but things like setting a tab stop or indentation are much easier to do by dragging the corresponding sliders on the ruler. The positions of all markers are shown in the figure below.
The ruler, located in the upper area of the page, is divided into two sectors: white - responsible for the document text area, and gray - responsible for the page margins.
Sometimes not all markers are displayed on the screen, so you need to be prepared for this. In this case, use the markers that are available.
The four main indent markers provide the ability to set paragraph indents. To set an indent, simply drag the marker to a specific position. To better understand what a marker does and what it does, experiment with dragging them and see the results.
The right indent marker sets the space between all paragraph text and the right margin.
The left indent marker determines the distance between the edge of a paragraph's text and the left margin.
If you set a red line indent for a paragraph, it will move in sync with the left indent marker, and the red line indent will remain in the same position relative to the paragraph text.
The red line indent marker sets the indentation parameter for the first line only. Using this marker you can identify the protrusion. To put this into practice, move the red line indent marker to the left of the left indent marker. After this, the beginning of each paragraph that is formatted this way will occur to the left of the body of the paragraph.
A similar action can be performed using the protrusion marker. To do this, drag the marker to the right of the red line indent.
If you place the overhang marker above the left indent marker, the red line overhang will be removed.
Also, using the ruler, you can configure tab stops. What it is? By pressing the “Tab” button, you will move the cursor to the appropriate position. The new cursor location will be marked with a tab marker. You can also manually drag this slider to determine a new location for the start of the paragraph.