Built-in diagnostics
Android smartphones have a hidden engineering menu that contains basic information about the phone, network and battery configuration. To get into it:
- Open the Phone .
- Tap on “Keyboard” or its icon.
- Enter the combination *#*#4636#*#*.
- “Check” window will automatically open .
Information about:
- Phone - IMEI, signal strength, network type for voice and data transmission.
- Batteries - type, charge level, voltage and temperature.
- Application statistics - time of last and total use.
- Wi-Fi networks - connection configurations, APIs and settings.
Note! The number of tabs and device information differs depending on the user interface installed on the phone (MIUI, OneUI, ColorOS).
Models from Samsung are equipped with an expanded engineering menu with system tests. It is activated by the combination *#0*# through the “Phone” application.
Diagnosis of mobile phone faults
What is diagnosing cell phone faults? This is a complete check of the functionality of all modules and functions with subsequent identification of faulty ones. Diagnostics can be divided into: primary (preliminary) and detailed. Primary diagnostics allows you to identify faults “on the fly”, i.e. without completely disassembling the phone. For example, malfunctions related to sound (speaker wheezes), image (display is broken), etc. Detailed diagnostics are carried out by disassembling the phone, thoroughly inspecting the board and all functional devices, as well as taking the necessary measurements and replacing faulty components.When diagnosing, the first thing (MANDATORY!) is to check with the owner of the phone about the possible cause of the malfunction. For example, the phone fell, or the phone was flooded, etc. Conscientious people can tell the full biography of their phone, which greatly helps the repairman. And the majority either simply hide the fact of their guilt, or generally mislead, trying to deny guilt or begin to shift responsibility to children, friends, etc.
Be that as it may, you always need to check the current state of the phone in full detail and immediately, without delay, notify the owners so that later problems do not arise, such as: “before your repair, everything worked there!!!” And then it turns out that the phone was flooded with water and was simply dried out (at best) or sprinkled with sugar/salt and even put on charge. And then they bring it to repair and with a surprised face they say: “What are you doing? - Can't be!" etc. In such cases, it is best to immediately show the condition and appearance of the phone from the inside. Most questions disappear on their own.
Actually, closer to diagnosis
To begin with, I would like to list a few points that you need to know when starting diagnostics:
- all modern phones have a nominal operating voltage of 3.6V - 3.7V. At the same time, the same voltage and sometimes battery capacity are also indicated on the battery. But, it should be remembered that a fully charged battery has a voltage of 4.2V - 4.3V. And at a nominal 3.6V, most phones will signal that the battery is low and ask you to charge the battery. Based on this, it becomes clear that a voltage of 3.6V or even a little less is sufficient to turn on and normal operation of the phone (some models work properly with a supply voltage of 3.3V - 3.4V but with a constant low-battery message). Many will switch off on their own. Therefore, for the normal diagnostic and repair process, you should connect a power source of at least 3.7V - 3.8V, and preferably 4.0V - 4.2V.
- Most phones can be turned on by powering them from the power supply. It is enough, observing the polarity, to connect the corresponding clamps of the supply wires to the contacts of the connector (connector/terminal block) of the battery and, as usual, start the phone with the power button. And then you can see the following:
a) the phone will turn on normally and function;
b) the phone will turn on and curse like “Invalid battery” or “Unknown battery”, etc.;
c) the phone will turn on, but will ask you to install a SIM card, even if it is installed (true for NOKIA phones);
d) the phone will either turn on for a short time and turn off again or not turn on at all.
In all points except a), the culprit is the missing “3rd” contact of the battery temperature sensor (see above for the description of the battery device). In cases a) and b) you can carry out a full diagnosis of the phone, except for charging, because For these purposes it is necessary to connect the battery accordingly. For point c) you can connect the middle contact of the battery connector to the negative one. After which the phone will start properly from the power button and will safely see the SIM card. For point d) you will have to connect only a charged battery or cheat with the middle contact by selecting a resistor whose resistance value corresponds to the resistance on the electronics board of the standard battery and connect it to the middle contact relative to the “-” terminal.
What is the difference between connecting a phone to a power supply or a standard battery? There is no fundamental difference for a telephone. But you can find out a few things.
Option 1 - turning on the phone from the standard battery:
If the phone turns on normally and shows a normal battery charge, but turns off very quickly, especially at the time of registration on the network, then this may be a sign of one of the malfunctions: The phone’s battery has lost its capacity and under load its voltage drops below the set level. Consequently, the phone cannot operate at a supply voltage below the permissible one. This battery is considered faulty and must be replaced. The phone has increased current consumption. This indicates a faulty phone board. This malfunction may occur as a result of exposure of the phone to moisture or shock.
The malfunction can be more accurately determined through detailed diagnostics.
Option 2 - turn on the phone from the power supply:
The most important advantage of a power supply unit (PSU) is its versatility, i.e. You can power any phone from it, and it is always ready to work, unlike a dead battery at the most inopportune moment. And if it is also equipped with an ammeter (with the lowest possible division of the measuring scale), then a lot can be said about the operation of the phone based on the readings of this device. The ammeter reading just shows the current consumption of the phone. What consumption is considered normal? — It is different for each phone, but it is within approximately the same limits. For clarity: when turned off (provided it is in full working order), the phone does not consume energy. Well, to be absolutely precise, it’s very little, which is comparable to the self-discharge of a battery. Energy is spent on powering the processor clock generator and/or power controller and a small part of RAM for the normal operation of the “clock/date/alarm clock” and some other phone service processes. When you turn it on and continue working, a lot of phone devices go into active mode and consumption increases. The following components consume the most energy in a phone:
— keyboard and display backlight ~ 70 – 300 mA (for different models) in active mode. On average up to 150 - 200 mA.
— power amplifier of the GSM module (PA – Power Amplifier). It varies for different phones + this parameter depends on the signal level of the cellular network coverage. The weaker the signal, the more energy is consumed. On average up to 200mA. Some older phones from previous generations typically consume up to 400 mA.
-Audio Power Amplifier. Depends on the output signal level. On average up to ~100 mA.
If the phone is turned on and in standby mode (i.e. none of the above modules is currently active), the consumption is very small and amounts to a few milliamps. Bursts periodically occur during the exchange of data between the phone and the base station. If the consumption in standby mode is constant and amounts to more than a milliampere, there is something wrong with the phone. The battery of such a phone will discharge prematurely. Most often this happens as a result of moisture or the phone has been hit or dropped as a result of which some elements have failed.
You should always pay attention to this parameter, otherwise the phone will definitely be returned to you after repair with the remaining increased consumption.
Further. Never succumb to provocations from phone owners who are in a panic and want to urgently flash their phone because it is BUGGY! I can’t stand this word, because it usually means ANYTHING and instead of clearly explaining a specific malfunction of the phone, they simply say IT’S GLUGGY! YOU GIVE IT TO ME! But in fact, it turns out that the phone was damaged, and through the fault of the user. For example, the battery quickly discharges, communication is lost, the keyboard does not work, and the like. They listen to each other and read a lot on the Internet, and then take them anywhere, just to flash them. What type of repair to carry out on the phone - to flash it or not to flash it - should be decided by YOU after a detailed diagnosis!
When starting diagnostics, in addition to the necessary equipment and materials, you must have a minimum (to begin with) set of spare parts - displays, cables, bells, speakers, microphones, etc. It's obvious. An equally important point is the presence of an electrical circuit diagram with the arrangement of elements on the printed circuit board, preferably together with disassembly/assembly instructions. After all, you can figure it out blindly only with experience and subject to frequent repairs of certain models. In such cases, the location of the elements on the board is stored in the head, which greatly speeds up the troubleshooting process. You can find diagrams of mobile phones on the Internet on thematic sites, forums, etc. There are situations when you cannot find a circuit diagram for your phone. Most often on very new phone models. In this case, you can almost always find a service manual (from English Service-manual) - service instructions. As a rule, it contains instructions for disassembling/assembling the phone and fragments of an electrical circuit diagram, and also indicates (not always) a troubleshooting algorithm for the main categories (does not turn on, speaker/microphone does not work, does not see the SIM card, etc. .)
Helpful information.
— More pages from the mobile phone repair training .
— Related training program for mobile phone salespeople.
— Tips for setting up mobile phones .
— Additional reference information on digital technology.
—
Radio online for a good mood.
Android phone diagnostic apps
All of the projects listed below are available in the official Google application store. To install them:
- Open "Play Market" .
- Enter the name of the software in the search bar.
- Select the application in the issue window.
- Click Install.
To avoid downloading software with a similar name, the official developer of the program will be indicated at the beginning of the description.
Repair System
A solution from Real Fans Booster, which in addition to diagnostics offers:
- speed up your smartphone;
- software removal function;
- optimize battery consumption;
- free internal and RAM memory from garbage.
To access device diagnostics:
- Open the application.
- Go to the tab “Tools” - “Device Testing” .
We recommend: How to transfer photos from iPhone to computer
A total of 6 tests are available:
- “Wi-Fi and Mobile Data Connection” - reports an active connection to a Wi-Fi network or mobile data transfer via 3G/4G.
- "RGB" - displays red, green and blue colors on the screen.
- “Speaker” - check the operation of the multimedia speaker.
- “Black Screen” - the display turns black to check for burnt-out pixels or matrix glare.
- “Touch Screen” - determines the accuracy and maximum number of simultaneous touches on the screen.
- “Haptic Feedback” - turns on vibration feedback.
The advantages and disadvantages of the software include
availability of tools for optimizing the device;
For tests, you do not need to give permission to access the smartphone system.
advertising after switching between tabs;
few diagnostic tools, half are useless.
The fifth program to check the Android system for errors - Fix Dead Pixels
The program will help you solve pixel problems on your screen and provide different background colors to identify dead, stuck or dead pixels and fix them.
Keep this application running until the corrected pixel is restored - this could even be several hours.
Also works for screen burn-in. There will be no more defective pixels on your device.
For those who have a color tint screen, this app will make a filter and with the Fix Dead Pixels tool you can try to fix everything. Good luck.
3 comments
Why didn’t they write about system repair? Why don't you come in here? / Ay-ay-ay! Please add it!
It’s already been written about system repair - I won’t repeat it.
Well, everything is clear. I'm bachiv. They just didn’t add yogo here. But it’s okay, as if it will be. Dyakuyu.
Let's take a closer look at how to check Android for errors in the operation of the operating system itself, as well as internal modules. The article is a logical continuation of How to check a used Android phone before buying.
p, blockquote 1,0,0,0,0 —>
This article is suitable for all brands that produce phones on Android 10/9/8/7: Samsung, HTC, Lenovo, LG, Sony, ZTE, Huawei, Meizu, Fly, Alcatel, Xiaomi, Nokia and others. We are not responsible for your actions.
p, blockquote 2,0,0,0,0 —>
Attention! You can ask your question to a specialist at the end of the article.
p, blockquote 3,0,0,0,0 —>
Phone Check
Development of inPocket Software to obtain detailed data about the phone. After launch, the user is taken to the main page, where he can open:
- “Tracking” is a tab that collects information about the load on the processor cores, the amount of used/free RAM and permanent memory, battery charge, and signal quality.
- “Test” - includes 11 sequential diagnostic tools, some of which can be disabled.
- “Report” - detailed information about the smartphone based on the diagnostics performed.
Advantages and disadvantages
test suite;
concise interface;
no advertising inserts.
machine translation of text.
Google Device Assist
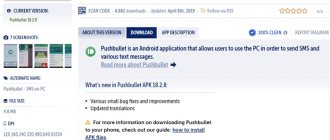
First, you need to download the Google Device Assist app from the Google Play Store. If you have a Nexus or Moto smartphone, you will have to download the APK file and install it manually. Google Device Assist does much more than just check your smartphone for possible problems. If you are a beginner, the application will give tips and tricks on how to best use your Android smartphone.
Phone Doctor Plus
An application from iDea Mobile Tech that collects detailed information about the operation of the device. Diagnostic tools are collected in a separate tab and divided into:
- “External” - checks the operation of the touchscreen, display, audio output, buttons and camera.
- “Sensors” - tests the device for the presence of an accelerometer, gyroscope, compass, proximity and light sensor.
- “Internal” - diagnoses the processor, vibration motor, device specifications, call functions, internal and RAM memory.
- “Wireless” - determines the operation of GPS, cellular communications, Wi-Fi and Bluetooth.
We recommend: Increasing speaker volume on Android
The collected data goes to the main page, where it shows the load on the processor, RAM, and marks untested or faulty system elements.
Pros and cons
no advertising;
maximum set of tests;
messages about malfunctioning elements of the smartphone;
Availability of tools for battery optimization and cache removal.
machine translation of text in the interface;
inaccurate display of processor operation data and battery charge information.