When working in Photoshop, quite often you have to cut out an object in order to later move it to a new location, overlay it on another background, etc. Moreover, the edges of the object after cutting are not always neat. Let's see how this can be fixed.
Note: we will not dwell in detail on how to separate an object from the background, since we discussed this in a separate article - “How to cut out an object in Photoshop.”
Simple smoothing
We will start, perhaps, with the simplest method. Open two images (where you will cut and where you will paste). In my case it will be the bride and the beach.
- Carefully select the object with any suitable selection tool, for example the same rectangular lasso, and transfer it to a layer with another image. We've already done this when we replaced the background in a picture in Photoshop. And as you can see, our cut out image will be slightly messy (though not always). There will be all sorts of angles that will make the photo look unnatural.
- Now, without removing the selection, call the menu “Selection” - “Modification” - “Smooth”. If you accidentally deselected it, don't worry. Just hold down the CTRL and left-click on the layer with the object. In this case, it will be highlighted again.
- In the menu that opens, select a radius such that it removes all the corners, but at the same time does not round them too much. For my case, I took the number 10 , but it may differ for you. After this, the edges can really be smoothed out, and all the irregularities will remain outside the dotted line. But that's not all. We need to clean up all these leftovers.
- Invert the selection ( SHIFT+CTRL+I ) so that not the object itself is selected, but the area around it. Now just press the DELETE , then all unnecessary corner details will be removed and the image will become smooth.
At the end, you can also do a little shading. To do this, again go to the “Selection” - “Modification” menu, but now select “Feather”. Here you need to set the dimensions of the shading itself. But don't bet too much. See for yourself how much is enough for you. For example, 6 was enough for me, but someone may need 15. Experiment. You can always go back.
How to do and what is smoothing edges in Photoshop
The smoothing operation in Photoshop makes the transition of the edges of the selected area smoother and smoother by removing/adding additional pixels or making them translucent.
As a result of this, the edges of such a selection will blend better and more naturally with other pixels that extend beyond the boundaries of the selection.
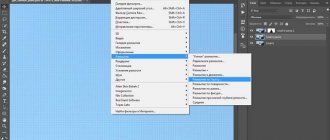
This setting is activated in the options bar of the following tools:
Why these particular tools?
This group of tools creates a selected area, that is, a kind of closed border, when editing which you often need to keep the edges smooth, that is, smoothed.
But questions arise: why are the Rectangular Marquee and Quick Selection tools not on this list - after all, they also create a selected area!?
I think the following. Regarding the Linear Selection, remember what the pixels look like - they are square. When creating a rectangular selection, the borders are always vertical and horizontal, the corners clearly follow the shape of the pixel, thus we do not have the defect when the edges of the rectangle can be sharp and torn - they are always straight and even. This means they don’t need smoothing at all.
As for Quick Selection, there is an alternative parameter - Brush Hardness, which regulates what the edges will be in the end. Moreover, this setting is more flexible, allowing you to adjust the effect on a 100% scale.
Wait a minute - what does the Magic Eraser have to do with it? This is quite far from the selected area! Right. Have you noticed that the Magic Eraser and the Magic Wand are almost the same thing? Simply, the eraser immediately removes pixels, and the wand adds them to the selection. And if this is the same principle of operation, then smoothing should be in both places.
Edge refinement
Well, now the method is a little more complicated, but more effective. We have already encountered this function when we selected hair in Photoshop. But today we will need it for simple smoothing.
- Select the object with any tool.
- Now go to the “Selection” menu - “Refine Edge”. A small work area with sliders should open in the hotel window. This is exactly what we were looking for.
- For convenience, you can select different viewing modes, such as “On Black”, “Mask” or “Marching Ants”. For example, I prefer it on black. But it still also depends on the image itself. If it is too dark, then there is no point in placing it on a black background.
- Well, now you will need to play with the sliders to achieve the desired result. You already understand what smoothing and shading are responsible for. Nudge Edge expands or contracts the selection area. In my case, I set this indicator to 10% . Watch how your picture changes and how the edges smooth out. Try not to let the background show through. Find the position that will be sufficient to eliminate defects.
- Next, pay attention to the “Output” item. He is responsible for where the final image will be displayed. You can immediately send it to a new layer, but I would recommend that you set the mode to “Selection”.
- Well, at the end, we invert the selection again and erase everything on the layer except our object by pressing the DELETE .
As a result, we get a very nice image, without any corners or gaps. Everything is smooth and neat. This is what we wanted. Well, of course, you can do further processing of the image, but more on that in another article. But the most important thing is that you now know how to smooth the edges in Photoshop after cutting.
Well, this is where I will end my article for today. But if you still want to improve your knowledge of Photoshop or learn it from scratch, then I recommend that you watch these cool video tutorials. Everything is told in a very accessible language and will be understandable to any level of user. The course is truly finger-licking good.
Well, I will say goodbye to you. I hope you liked my article today. So don’t forget to subscribe to my blog updates and share the materials with your friends on social networks. And I will try to post interesting articles for you more often. Good luck to you. Bye bye!
Best regards, Dmitry Kostin.
Professional work with layers for beginners
To correctly align the edges of the cut layer you will have to try. I can only show you the tools, but you will have to configure it yourself. If you want a really cool effect, it may take more than one hour at first. But let's get started.
Open the image.
Select the magnetic lasso. Its peculiarity is that the lasso line seems to stick to the boundaries of the object that needs to be cut out. If for some reason the line moves, just add an extra point by clicking in the place where the bevel occurs. This will secure the line. And it will move on, wherever you need it.
My line was moving in the white areas, and therefore I had to put dots in the face area before the magnetic lasso selected the area I didn’t need. Over time, you will get faster, and you will know where the lasso defines the object differently.
This is the result I got.
In the center of the selected object, click on the right mouse button. Next, select the “Refine Edge” option to make additional settings.
First of all, decide on the type to make adjustments more convenient. I prefer to work on black, white or layers.
Now you can adjust 4 main parameters: anti-aliasing, feathering, contrast and edge offset. Unfortunately, there is no single rule for what indicators should look like. Much depends on the background, and therefore, if possible, try to immediately work with the image inserted into the required photo.
After you have set the settings, save the changes and press Ctrl+C (copy) and paste (Ctrl+V) on your keyboard so that a new layer appears. Remove the “eye” icon in the background menu.
Again, you will have to experiment and remove halos and borders until you achieve the desired effect that completely satisfies you.
Ready. There are many ways to work with the background of a picture. Watch the video, there are many more interesting ways in it. The only thing I would like to note. The author of the video complicates the work with the size of the brush. Use parentheses (“{”,”}”) to increase or decrease the diameter.
Well, in order to roll back actions one step, it is better not to go into the top panel, but to use the Ctrl+Z keyboard shortcut or history. Learn the combinations and the work will go faster.
Now you know everything about the edges of an object and a picture. If you are interested in Photoshop, then . The program has a bunch of hidden functions and features. The more you open, the cooler your photos become.
To speed up the learning process, I can recommend Zinaida Lukyanova’s course - “ Photoshop from scratch in video format 3.0
" You'll learn a ton of tricks and learn all about the tools and features. This is what distinguishes a professional from a person who just likes to work in Photoshop.
If you are interested in website design, then a two-month web design school will soon open on Netology, where professionals from the largest corporations in Russia are preparing specialists who are fully ready to work - “Web Designer”
. At the end of your studies, you will even have to complete and defend your thesis, which will become part of your future portfolio.
And for starters, while the registration is ongoing, you can look at the courses and school of Alexey Zakharenko “School of Web Design”
. For the first three days you get full access to the service for free.
OK it's all over Now. If you liked this article, subscribe to the newsletter and receive more interesting publications about making money on the Internet directly to your email. Perhaps very soon you will start from your projects. It's so simple.
Good luck in your endeavors and see you again.
Blurring the edges of a photo is one of the most commonly used techniques by photographers and designers. A fairly simple basic effect that won’t take you much time to learn. Due to the fact that it is used often, it is worth knowing.
There are several ways to feather the edge of a photo. And the results of the work vary somewhat. Let's explore both.
First, let's prepare a photo. To do this, you should create a white workspace. And then drag the photo you like there. Like that:
The first is to blur the edge of the photo using the feathering tool.
Select the area close to the border of the photo.
Click on the selected area with the right mouse button. Select “shading” from the drop-down list.
Set the feathering radius. This is not necessarily the meaning. You can choose any other at your discretion.
Now to get a blurred edge we need to invert the photo.
What we got after inversion.
Now just press the del button.
The edges of the image, as you can see, have blurred. For a more pronounced effect, you can repeat it.
We combine the layers and save.
I'll show you another way to blur the edges of a photo, which is more interesting in my opinion. To do this, use the Gaussian Blur tool.
In my opinion, this effect is more interesting than the previous one due to the uneven blurring of the border.
Let's return to the original image. Repeat the selection. Let's invert.
Now we are looking for the “Gaussian blur” operation.
As you can see, this time we have a clear blur border.
The larger the blur radius you set, the sharper the border is drawn.
And a very simple way is the third one. But it is “for the little ones.” The easiest to understand and the most time consuming. It will not be possible to perform these steps carefully the first time.
Select “blur” from the toolbar. Right-click on the work area and select the blur radius.
Then, while holding shift, move the cursor along the edge of the photo.
For comparison "before"
And after"
This method, by the way, can be used not only for photos, but also for any other cut-out objects.
By combining commands you can achieve very beautiful effects. You should not rely on one method; there are situations where you will have to use all three. Let's say when creating a colorful collage for a banner. Therefore, I strongly advise you to remember all three.
Good day everyone. my dear friends and guests of my blog. Today I would like to tell you how to smooth edges in Photoshop after cutting, because if you don’t do this, then these imperfections are too obvious, especially after an oval selection or a rectangular lasso.
How to smooth edges after cutting out an object in Photoshop
Often, after cutting out an object, its edges may not be as smooth as we would like.
This problem can be solved in different ways, but Photoshop provides us with one very convenient tool that incorporates almost all the functions for adjusting selections. This miracle is called “Refine the Edge” . In this tutorial I will show you how to smooth the edges after cutting in Photoshop using it.
As part of this lesson, I will not show how to cut out objects, since such an article is already available on the site. You can read it by following this link.
So, suppose we have already separated the object from the background. In this case it is the same model. I specifically placed it on a black background in order to better understand what is happening.
As you can see, I managed to cut out the girl pretty well, but this will not stop us from learning smoothing techniques.
So, in order to work on the boundaries of an object, we need to select it, or to be precise, “load the selected area” .
Go to the layer with the object, hold down the CTRL and left-click on the thumbnail of the layer with the girl.
As you can see, a selection has appeared around the model, which we will work with.
Now, in order to call the “Refine Edge” function, we first need to activate one of the tools in the “Selection” .
Only in this case the button that calls the function will become available.
In the “View Mode” , select the most convenient view and get started.
We will need the functions "Smooth" , "Feather" and, possibly, "Shift Edge" . Let's go in order.
Antialiasing allows you to smooth out the corners of a selection. These can be sharp peaks or pixelated “ladders”. The higher the value, the larger the smoothing radius.
Feather creates a gradient border along the outline of an object. The gradient is created from transparent to opaque. The higher the value, the wider the border.
“Move Edge” moves the edge of the selection in one direction or another, depending on the settings. Allows you to remove areas of the background that may have gotten inside the selection during the cutting process.
For educational purposes, I will set the values higher to see the effects.
Well, let's go to the settings window and set the required values. I repeat once again that my values will be overestimated. You select them to match your image.
Select the output in the selection and click OK .
Next you need to cut off everything unnecessary. To do this, invert the selection using the key combination CTRL+SHIFT+I and press the DEL .
Remove the selection using the combination CTRL+D .
As we see, everything has “smoothed out” very much.
A few points about working with the tool.
The size of the shading when working with people should not be too large. Depending on the image size 1-5 pixels.
Refine Edges Dialog Box Tools
After I set the radius, you can see that there are strands of hair left that were not included in the edge detection area. I will manually include the remaining curls of hair using the tool, and the area of the body contours that I initially precisely selected using the Pen Tool (P)
I will remove it from the refinement area using the tool.
Refine Radius
tool is outlined in green
Erase Refinements
tool is outlined in blue .
You can quickly switch between these two tools while working by holding down the Alt
.
You can change the brush size using square brackets ([ or ])
.
1 . Zoom Tool
.
After activating this tool, hover your cursor over the image and it will take the form of a magnifying glass with a plus sign inside. Click on the image to enlarge. Alt
key while clicking (a minus sign will appear inside the magnifying glass).
2. Tool (H)
. Allows you to move the enlarged image to the desired direction.
3. There are two important tools in this group: Refine Radius (E)
and
Erase Clarifications (E)
. With these tools we do not add or subtract anything from the selected area, but simply adjust the boundaries, which are analyzed by the Photoshop program.
- Refine Radius
tool allows you to fine-tune the area of the border where edge refinement is performed. By moving the brush of this tool over the areas where it is necessary to refine the edges (hair, fur, etc.), we tell the program which pixels should be selected when detailing the selected area. When a tool is active, a plus sign is visible in the center of the cursor. - Erase Refinements
tool allows you to eliminate areas that do not need edge refinement. For example, precisely selected areas (in my example these are the shoulders) or an extra background included in the selected area. When the tool is active, a minus sign is visible in the center of the cursor.
A few words for those who want more
Well, if you want to quickly understand all the tools and find ways to solve this or that problem yourself, then you, like no one else, need to know as much as possible about all the available tools.
For example, did you know what is in this program? It is not so easy to get to it if you act on a whim. I can recommend you the course “ Photoshop from scratch in video format”
" Thanks to it, you will know much more and within a month you will start working in the program the way professionals do.
Don't believe me? Just try it. Think you might not need this? Meanwhile, thousands of people use these skills to earn extra income. Web design is just pictures that are created by specialists using this program and sent to customers for a lot of money.
Download the free course “ Profession of a web designer in 10 days”
» and find out all the details.
See you again and be sure to subscribe to the newsletter.