More recently, a new creation by Microsoft Corporation, Windows 10, was released. Initially, the public perceived the product quite critically, justifying their opinion by the excessive “closedness of the system.” However, today more than 100 million computers are running this operating system - whether this can be considered a success is still difficult to say, because problems arise that were not previously present in previous versions of the OS, and it is difficult for the user to solve them on their own. Today we will talk about a fairly common phenomenon - the message “Some settings are managed by your organization” appears in Windows 10, and we will try to find a solution.
What does the inscription mean?
First, let’s understand what “Some parameters are controlled by your organization” means. This means the following: some settings are locked and cannot be changed by the user. Yes, that’s right - once you install the operating system, you will not be able to fully manage it. Why did Microsoft take such a step? In a way, this is “foolproof,” which is akin to hiding system folders on a local drive. However, more experienced users should still be given the opportunity to fully customize the OS. Let’s look at why the message “Some settings are controlled by your organization” appears and how to disable this blocking.
What is the reason?
The reason for the problem lies in the name: it was created by your organization :) The Microsoft organization means either the domain administrator (if the computer is part of a public network) or the local user himself. Therefore, if you see the message “Some settings are controlled by your organization” in Windows 10, think about whether it makes sense to disable it in principle. If you work in an office, your boss is unlikely to like the fact that you are disrupting the general structure of the software and hardware. For a home computer, you can safely disable this “option”.
What is Group Policy
The main reason why the message “Some settings are controlled by your organization” appears is because group policies are set on system capabilities. With the advent of this option in the new Windows, corporations whose machines are connected by a local network began to increasingly resort to developing and installing their own group policy. Why are they doing that? The reason is simple - security and unification. When all computers are configured in the same way, it is easier for the system administrator to monitor their operation and fix them, and most importantly, prevent malfunctions. Another advantage is that the employee will not use options that he should not use. Combined with a not so obvious solution to the problem, this is a good level of overall organization even for confident and experienced PC users. But what about a home computer? We'll talk about this further.
Problem with home PC
When installing a new operating system, all registry values are set by default, and management of the OS is completely in the hands of the user. Only the local user can add a new value that will block some functions. How? Yes, whatever you want: from accidental to a banal error when changing the registry. Often, when a user wants to change the lock screen, “some settings are managed by your organization” prevents him from doing this. Then it turns out that somewhere the system has failed. Perhaps she independently suggested accepting the group policy, and the user agreed without looking, as often happens. One way or another, the problem needs to be solved, and now we will figure out how to do it.
How to clear the message about how your organization manages Windows 10 settings
If you have not done anything similar (from what is described above), in order to remove the message “Some settings are managed by your organization”, try the following:
- Go to Windows 10 settings (Start - Settings or Win + I keys).
- In the “Privacy” section, open the “Reviews and Diagnostics” item.
- In the Diagnostics and Usage Data section, under Send device data to Microsoft, set to Extended Information.
Then exit the settings and restart your computer. If changing the setting is not possible, then either the necessary Windows 10 services are disabled, or the setting was changed in the Registry Editor (or local Group Policy) or using special programs.
If you performed any of the described actions to configure the system, then you will have to return everything as it was. You may be able to do this by using Windows 10 restore points (if they were enabled), or manually by returning the settings that you changed to their default values.
As a last resort, if you are bothered by the fact that some parameters are controlled by some organization (although, as I already noted, if we are talking about your home computer, this is not the case), you can use Windows 10 reset with saving data through settings - update and security - recovery, more about this in the guide Restoring Windows 10.
And maybe this will be interesting:
Why not subscribe?
Distribution of new, sometimes interesting and useful, materials from the site remontka.pro. No advertising and free computer help for subscribers from the author. Other subscription methods (VK, Odnoklassniki, Telegram, Facebook, Twitter, Youtube, Yandex.Zen)
01/21/2016 at 22:08
Your site is being advertised. Expect an influx of new users youtube.com/watch?v=RgD0hw3RytI
01/22/2016 at 08:17
Oh cool! Thank you. I just noticed in the video that there is a problem with displaying the menu on a small screen width on my website. Although I didn’t have any during checks. I will fix it.
01/22/2016 at 12:00
Yes, this is, of course, good. Only, if before a person answered hundreds of questions, now he will answer thousands. He probably won't have time left for anything. But we still need to write articles.
01/23/2016 at 08:43
Well... there’s not such an influx there :) So far I have time to answer (although if you suddenly find yourself without the opportunity to answer for three days, then it’s very difficult to sort everything out).
01/31/2016 at 21:01
Is there no registration here? so you don't have to write your email all the time? I can’t tell you, I just installed Windows, there was a choice in “reviews and diagnostics”, but now there is no, now on a dark screen and it’s not clear how to fix it, what to do? I didn’t change anything
Solution 1: change the registry
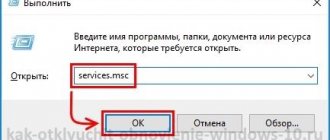
Let's start with an easier and safer method - cleaning the registry. First you need to call it with the command
regedit
which must be entered into the console (the call is made using the Win+R key combination).
Next, go to the personalization section, which is located at the following address (follow it in the system of subfolders on the left side of the registry):
HKEY_LOCAL_MACHINE\SOFTWARE\Policies\Microsoft\Windows\Personalization
Double-click to bring up the tab menu and delete the DWORD parameter. If the problem is with the lock screen, it will be called NoLockScreen.
As you can see, this method is quite simple, but it does not always save. Now we will get rid of group policy settings by changing them.
Using the registry
- Right-click the Start icon and select Run. Or just press Win + R.
- A window will appear - enter the command regedit, click OK.
In the registry, go to this path:
The Windows Defender folder will open - inside it, create a 32 bit DWORD parameter and name it DisableAntiSpyware:
A parameter has been created - click on it twice, write 1:
Clicked OK. Great. Now let's reboot. Let's check the configuration status:
- I press the Win + I buttons, bringing up the Settings window.
- I go to Update and Security.
- On the left I click Windows Security.
- I select Protection against viruses and threats.
- Next, click Manage settings (in Antivirus and other threat protection settings).
- I admire the inscription that Real-time protection is disabled))
True, after a couple of seconds a small mysticism happened - the inscription that this parameter is controlled by your administrator and everything else disappeared. Instead, all that's left is this:
Solution 2: change group policies
As mentioned earlier, this method is more dangerous in terms of the system’s crash resistance, but it works flawlessly. So let's get started.
- First, make a backup copy of all important files on your computer. In general, it is a good idea to always have a backup copy to avoid losing important documents.
- Call the Win+R system prompt, enter the gpedit.msc command into it, which will open the Local Group Policy management console.
- Follow the path Local Computer Policy -> Computer Configuration -> Administrative templates to the All Settings tab in the right drop-down menu of the console. A section will open that contains information about system policies available for configuration.
- Now sort the entire list by the State field until those policies that are in the Enabled or Disabled state are at the top of the list.
- Select those that interfere with your work and set them to the Not configured state, which means “Not configured”. If you want the “Some settings are managed by your organization” message in Windows 10 to disappear forever, turn everything off.
Carry out similar actions in the User Configuration drop-down menu (it is located under computer configurations).
System parameters are managed by the organization
First, let's define what kind of message this is. It does not mean at all that some “office” changed the system settings. This is just information that tells us that access to the settings is prohibited at the administrator level.
This happens for various reasons. For example, if you disabled the spy functions of the “tens” using special utilities or your system administrator rummaged through the options, protecting the PC from the “crooked hands” of inexperienced users. Next, we will look at ways to solve this problem in relation to Update and Windows Defender, since these are the components that are disabled by programs, but may be required for the normal operation of the computer. We will also provide troubleshooting options for the entire system as a whole.
Option 1: System Restore
This method will help if you disabled spying using programs designed for this or, during some experiments, accidentally changed the settings. Utilities (usually) create a restore point when launched, and we can use it for our purposes. If the manipulations were not performed immediately after installing the OS, then most likely there are other points. Please note that this operation will discard all changes.
Option 2: Update Center
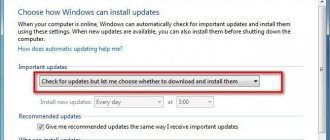
Most often we encounter this problem when trying to get updates for the system. If this function was disabled deliberately so that the “ten” did not download packages automatically, you can make several settings to be able to manually check and install updates.
An account with administrator rights is required for all operations.
- Launch the “Local Group Policy Editor” with the command in the “Run” line (Win + R).
If you are using the Home edition, then go to the registry settings - they have a similar effect.
Opening the branches one by one
Computer Configuration - Administrative Templates - Windows Components
Windows Update
On the right we find the policy called “Setting automatic updates” and double-click on it.
Select the value “Disabled” and click “Apply”.
- Let's reboot.
For Windows 10 Home users
Since this edition does not have the “Local Group Policy Editor”, you will have to configure the corresponding setting in the system registry.
- Click on the magnifying glass next to the “Start” button and enter
Click on the only item in the search results.
Let's go to the branch
Right-click anywhere in the right block and select “New – DWORD Value (32 bits)”.
Give the new key a name
Double-click on this parameter and in the “Value” field enter “1” without quotes. Click OK.
After the above steps are completed, we continue with the setup.
- Again, go to the system search (magnifying glass near the “Start” button) and enter
Click on the found “Services” application.
Find “Update Center” in the list and double-click on it.
Select the startup type “Manual” and click “Apply”.
With these actions, we removed the scary inscription, and also gave ourselves the opportunity to manually check, download and install updates.
Option 3: Windows Defender
You can remove the restriction on using and configuring Windows Defender settings using actions similar to what we did with Update Center. Please note that if a third-party antivirus is installed on your PC, this operation can lead (will definitely lead) to undesirable consequences in the form of an application conflict, so it is better not to perform it.
- We turn to the “Local Group Policy Editor” (see above) and follow the path
Computer Configuration - Administrative Templates - Windows Components - Windows Defender Antivirus
Double-click on the policy responsible for turning off Defender in the right block.
Set the switch to the “Disabled” position and apply the settings.
For Home Ten users
- Open the system registry editor (see above) and go to the branch
Find the parameter on the right
Double-click on it and give the value “0”.
After the reboot, you will be able to use Defender as usual, while other spying tools will remain disabled. If this is not the case, use other means of launching it.
Option 4: Reset local group policies
This method is a last resort remedy, since it generally resets all policy settings to default values. It should be used with great caution if any security or other sensitive options have been configured. Highly not recommended for inexperienced users.
- Launch Command Prompt as administrator.
More details: Opening the “Command Prompt” in Windows 10 We execute the following commands in turn (after entering each, press ENTER):
RD /S /Q "%WinDir%System32GroupPolicy" RD /S /Q "%WinDir%System32GroupPolicyUsers" gpupdate /force
The first two commands delete folders containing policies, and the third restarts the snap-in.
Conclusion
From everything written above, we can draw the following conclusion: disabling spyware in the “ten” must be done wisely, so that later you do not have to manipulate policies and the registry. If, however, you find yourself in a situation where the settings of the parameters of the necessary functions have become unavailable, then the information in this article will help you cope with the problem.
Method 2
The “Some settings are managed by your organization” problem, the solution to which is not so difficult, can be resolved by another method based on resetting group policies. So, let's go through the steps:
- Call the console with the cmd command, which should be entered in the “Run…” line (called Win+R).
- You must enter the following command into it:
secedit /configure /cfg %windir%\inf\defltbase.inf /db defltbase.sdb /verbose
After execution, you need to reboot the system.
How to remove this error
You need to choose a solution based on the reason. If you have not yet identified it, proceed sequentially: from method to method.
Changing the value in "Options"
You can use this method only if you have not previously turned off Microsoft tracking or changed anything in the registry. Otherwise it will not give results. Follow these steps:
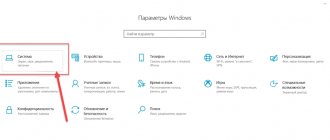
- Expand the Windows Settings menu. Just hold down I and Win on your keyboard. If the tile window does not appear, go to the Start menu, and then click on the gear sign.
In the Start menu, click on the gear to open the Windows Settings window.
- Switch to the “Privacy” section by clicking on the corresponding tile.
Open the Privacy tile in the Options window
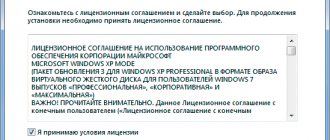
- In the left column with the list of blocks with parameters, open the third “Diagnostics and reviews”.
- In the first parameter, set the circle mark next to the “Full” value. Close all windows and immediately restart your computer for all changes to take effect.
In the “Diagnostics and Feedback” tab, check the box next to “Full”
- If it turns out that the values are not clickable (it is therefore impossible to change them), proceed to other methods of solving the problem (“Registry Editor” and “Local Group Policy Editor”).
Cleaning the registry
Editing the registry is a responsible process, so it must be approached with the utmost seriousness. Proceed strictly according to the instructions:
- Call up the “Run” window on the display by holding down the R and Win buttons. In the currently empty field, write the regedit command - you can simply copy and paste it. Now let the system execute the command by clicking OK.
Run the regedit command in the window to launch Registry Editor
- You can enter the same command in the Search panel. Click on the item in the results.
The regedit command is recognized in the “ten” and the “Search” panel
- In the gray-blue window, click “Yes” to give permission to the editor to change anything in the OS.
Click on “Yes” to allow the editor to make changes in the operating system
- Before you begin this task, create a copy of the registry. On the top panel, open the first menu “File” - select the second option “Export”.
Click "Export" in the "File" menu
- In the dialog box, specify a name for the file (a backup copy of the registry with which you can restore the database if problems occur during or after editing). Save the document in any place convenient for you - remember this location.
Save the resttra backup file in any location convenient for you
- Now start searching for the desired parameter. Open the second menu at the top “Edit” - click on “Find”. Or bring up a small search window using the Ctrl + F keys.
Click Find in the Edit menu
- Enter the name of the NoLockScreen parameter in the line. Leave checkboxes next to the items about searching for the entire string and parameter names. Uncheck all other boxes. Start your search.
Enter NoLockScreen in the line and search among the parameter names
- Wait while the editor tries to find the required registry entry.
You need to wait while the editor searches for the parameter
- If the search is unsuccessful, find the parameter manually. Expand the third section of HKLM, and there is already a fifth SOFTWARE directory in it.
Launch the SOFTWARE folder in the HKLM directory
- Now run the nested blocks one by one: Policies - Microsoft - Windows - Personalization.
In the Personalization folder we need the NoLockScreen parameter
- In the last folder with personalization settings there will be an entry NoLockScreen - right-click on it. From the context menu, select the delete option.
Click on “Delete” in the NoLockScreen context menu
- Confirm your action in the warning window.
Click “Yes” to permanently remove NoLockScreen
Changing Group Policy
If editing the registry does not help you, try resetting all system settings in the Local Group Policy Editor window:
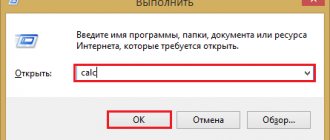
- “Local Group Policy Editor” can also be called up on the display through the “Run” window: hold down R and Win, write the gpedit.msc key and click OK.
In the “Open” line, paste and run the command gpedit.msc
- In the editor, we immediately open the first main section with the PC configuration.
Expand the contents of the first section “Computer Configuration”
- Now we launch the block with administrative templates.
Open your Administrative Templates folder
- A list of Windows components opens before us. We select all components.
Expand all Administrative Template options
- The list of policies will be large - scroll through it all, paying attention to the “Status” column. Each item must have a value other than “Specified”.
Make sure that each parameter is set to “Not Configured”
- If you suddenly see that some policy is “Enabled” or “Disabled”, double-click on it. In the gray window, set the value to “Not specified” and apply the changes using the button in the lower right corner. In this way, we will remove all restrictions in the operation of the operating system - the error in question should disappear.
If any option has been set to Enabled or Disabled, check the
Via the Command Line console
You can also reset all policy values using another faster method using the standard Windows application called “Command Line”:
- The console must be launched with administrator rights: open the system search panel (magnifying glass sign on the “Taskbar”) and enter the cmd key or “Command Prompt” into the line.
Enter cmd into the search field
- In the search results, right-click on the desired item - click on the first action “Run as administrator”.
From the context menu, select "Run as administrator"
- In the black window, copy and paste the request secedit /configure /cfg %windir%\inf\defltbase.inf /db defltbase.sdb /verbose. To have the console start executing the command, press “Enter” on your keyboard.
Paste the command into the editor and press Enter
- Wait a few seconds or minutes until all policies are reset. As a result, a notification about a successfully completed operation will appear in the black editor. Close all windows and restart the system and check if the error appears.
Close your console and restart your PC
Changing the value from domain to workgroup in system properties
Your PC settings may be messed up. Follow these steps to check this:
- Open a window with information about the system and PC - right-click on “This PC” and select “Properties”. Or you can go the other way: hold down R and Win, write the word control in the line and press Enter.
In the Run window, type control and click OK
- On the “Control Panel”, click on the “System” link.
In the panel window, open the “System” block
- In the block with the name of the PC, domain and workgroup parameters, click on the “Change” link with the image of a yellow-blue shield.
Follow the link on the right “Change settings”
- In the “Computer name” tab, click on the “Change” button.
In the “Computer name” tab, click on “Change”
- The outlined "Is a Member" panel should show "workgroup" rather than "domain". If there is a domain, change it. Click OK to save the changes.
Set the value to “Workgroup” and click OK
- Now return to the system properties window - click on the “Identification” button. Check the box next to the second value indicating that you do not belong to a corporate network. Click “Next”.
Check the second box and click on “Next”
- A window will ask you to restart the device. Close all application windows whose icons are located on the Taskbar. Click “Finish” and reboot the system - the changes will take effect.
Close all windows and restart your PC
Video: how to quickly remove the error “Some parameters are managed by your organization”
We use the O&O ShutUp10 utility
You can solve the problem using a third-party anti-spyware program called O&O ShutUp10 - it is free and has a Russian interface. It also does not require installation - it works immediately after downloading the executable file. Let's look at how to use it to solve the problem with the inscription:
- Let's go to the official resource of the developer of the anti-spyware utility. On the right side of the window, click on the Download button.
Click Download to download the file
- We wait for the file to download and launch it through the downloads panel.
Open the downloaded utility executable file
- In the utility window, scroll through the list of parameters in the “Preventing the transfer of user and diagnostic data” section. There will be items related to telemetry here. Despite the fact that the program recommends leaving these parameters activated, we disable them.
Disable the options in the Prevent transmission of user and diagnostic data list
- Eventually the switches should turn red. Check to see if the inscription has disappeared.
Check if the inscription issue has been resolved
System Restore
If none of the described methods gives a positive result, take advantage of the opportunity to restore Windows to the point. A recovery point is a PC state for a certain period of time, which is saved in a separate file. Using it, you can return to the computer’s operating state and undo the changes that were made to the system after the point was created.
Typically, the operating system itself creates points before updating or other important action. They can be created by the user himself. We will tell you how to do a rollback in detailed instructions:
- Find the standard “This PC” shortcut on the “Desktop” - right-click on it and select the latest “Properties” option in the gray panel.
In the context menu, select “Properties”
- Let’s look at the left area of the window with general information about the “OS” and the PC as a whole. Click on the fourth link from the top “System Protection”.
Click the "System Protection" link on the left side of the screen
- In the new window, click on the “Restore” button.
In the “System Protection” tab, click on “Restore”
- The initial window of the built-in recovery utility will open. Click on “Next”.
Click “Next” to begin recovery
- Place a checkmark next to the item under the list “Show other restore points.” We select a point in the list - you need to remember when the error “Some parameters are managed by your organization” was not on your PC, and then correlate this date with the desired point. Select it with the left mouse button and click on “Next”.
Select the required point and click “Next”
- We start the recovery - click on “Finish”. After this, we confirm in the window the intention to return one or another state of the PC. Your device will reboot - wait for the recovery process to complete successfully. As a result, the operating system will boot in the state that you previously selected - the error should disappear.
Click “Finish” for the system to start the recovery
If it turns out that you do not have a single recovery point on your PC (the corresponding message is on the initial screen of the recovery wizard), you can go the other way - return the PC to its original state using the built-in Windows tools.
If you don't have restore points on your PC, return your PC to its original state
Let's briefly tell you how to do this:
- Launch Windows Settings through the Start menu or using the I and Win key combination. Launch the Security & Updates tile.
- In the “Recovery” block, click on the first gray “Start” button.
In the “Recovery” tab, click on “Start”
- Next, the system will prompt you to reinstall the operating system with or without saving personal data (the media files will be saved, but the applications will still be deleted). At the same time, you do not need a Windows distribution kit - the system uses the operating system files that are already on the PC. Select your option and click on it.
Decide whether to save your personal files or not, and click on the desired item
- If you chose the deletion option, you will once again be asked to completely delete all files (irrevocably - the method takes longer) or simply delete (with the possibility of recovery - the process is faster). Make a selection and start automatic reinstallation using the Reset button.
Click “Reset” to start the recovery
- Wait until the system reinstallation is complete - the PC will constantly reboot. After this, you will receive a fresh “OS” with initial settings and a clean system. If you chose to save your personal files, they will be located in the Windows.old folder on your system drive.
The disadvantage of this method is that if the OS file system was previously seriously damaged or if the hard drive has failed, you will not be able to restore the “OS” using this method. In this case, a recovery disk or creating a full backup of Windows 10 using the system’s built-in tools on a separate hard drive will help.
You can also use another tens function - “Start over”. A clean installation of Windows will also be performed, removing all applications, but preserving personal data - a distribution kit is also not needed.
You can restore system files using the “Getting Started” function
Alternative Methods
There are several more radical methods for clearing local group policies of the system, however, we will not talk about them in this article, since in the hands of inexperienced users, with a 90% probability they will lead to the fact that logging into the system will be impossible, and the computer will have to be taken to a specialist . We have already found the answer to the question “Some parameters are managed by your organization” and how to remove this inscription, so there is absolutely no need to complicate the process. If you find that the lock has been installed recently, perhaps rolling back the system to previous settings will help. This will restore the registry and return the previous Group Policy settings. Share your experience in the comments and suggest alternative ways to eliminate the inscription that blocks the ability to fully configure the system. Good luck to all!
How to fix the “Some settings are controlled by your organization” problem
The user will have to independently apply changes in the operation of the Windows 10 operating system, which are necessary to disable restrictions in functionality. There are several ways to solve this problem:
- Reinstalling Windows on your computer.
- Restoring Windows from a restore point created before applying changes to the OS that caused the appearance of an inscription about the management of the computer by an “ organization ”.
- Restoring Windows 10 from a backup, provided that the system image file was created before changing these parameters.
- Reinstalling the OS using the New Launch function of Windows 10 - a clean installation of the system while preserving user data.
- Making changes to the Windows system registry.
- Change local group policy settings.
- Enabling disabled Windows settings using third-party software.
In this post we will look at less radical ways to solve the problem. About restoring Windows in different ways, read detailed articles on my website by clicking on the links above. If you use OS recovery, Windows will return to the state that the system had at the time the restore point or system backup was created.
We won't look at how to resolve access issues for individual functions, but rather use methods to remove system-wide functionality restrictions.