Description
The concept of this video editor comes down to the fact that, without spending a lot of time mastering the product, the user simply takes and processes his video. Everything here is very simple and clear, and many icons allow you to understand the purpose of this or that element faster.
There are basic functions thanks to which you can add effects to the video, trim it, color correct it, implement transitions, and so on. It is also important that most modern video formats are supported for import and export. Like other video editors, a traditional timeline is used here.
Adding a title
Titles, like watermarks, are SVG or XML (3D) files that, once created, are saved in a separate folder and automatically added to your project. The caption or title is created in a separate “Title” menu (it used to be called “Captions”, which I think is better). There are two items in the menu: “Title” (Ctrl + T) and “Animated Title” (animated titles, Ctrl + B). Select the one you need, after which the title editor appears. Here you need to specify a template, enter text in the fields provided, select the font and color of the text and background. Preview available. After saving, the new title will appear in the project files, just move it to the desired place on the timeline and, if necessary, edit it by calling the context menu. The same items are available in the menu as for the video, that is, the title can be rotated, scaled, animated, and so on.
For animated titles there are slightly more settings; you also need to configure the effects. Each template will have its own, we just select what we want and look at the result. If you need more advanced editing (change location, size, shape), you should click “Use advanced editor” or “Processor”. In the first case, Inkscape will launch, in the second - Blender. Once the file is saved, it will also be added to the project. If you often have to call an advanced editor, then it is better to immediately prepare a new template and place it in the directories mentioned above. This significantly speeds up work on the project.
With watermarks everything is simple. We create a transparent picture with the desired caption (you can use the “Title” menu items for this), put it on the top level and stretch it with the mouse for the entire duration. This is all. As a result, after exporting the project, everything that is in the picture will be placed on the video.
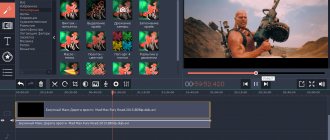
Adding an animated title
Possibilities
In order to understand our application in more detail, let's look at the list of its main features.
- A huge number of different video effects and transitions that allow you to harmoniously design any video.
- All common video formats are supported for data import and export.
- There is flexible functionality for creating inscriptions. Animated titles are also supported.
- When interacting with the video editor, the user can switch to one of several Working Environments.
- There is detailed help that allows you to quickly understand the program.
You will figure out the rest of the functions of this application yourself. And to make this easier, we have attached a training video at the very end of the page.
OpenShot Interface
The interface of the second version and the principle of operation have remained virtually unchanged compared to 1.4. And in general, those who have worked with any video editor before will quickly find everything they need. There are few commands, most are also executed using hot keys. The proportions of windows can be changed using the mouse, the work area can be adjusted to any monitor resolution, and individual blocks can be expanded or removed. From the “View” menu, full-screen mode is called up and the interface type is set (Simple or Advanced). In the second option, icons for calling effects and transitions are added to the panel (in Simple they are hidden behind tabs).
Basic actions (such as saving and calling a project, exporting and importing, canceling actions) are performed from the main menu and buttons on the panel. The buttons are not labeled, but to find out their purpose, just hover your mouse over them. Since these commands are rarely used, the panel can be removed immediately (View → Show Toolbar), freeing up additional workspace.
The “Project Files” tab shows all video, audio, graphic files and created titles added to it. On the right side is the video preview window, at the bottom are the timeline tracks. Between them is a toolbar from which all basic operations in the timeline are performed. For some elements, a context menu is also available, from which you can call up the desired setting and set parameters.
The settings for OpenShot itself are located in the “Edit → Options” menu. There are few of them, and they are understandable. In Autosave, you should set the project autosave interval according to your requirements (three minutes by default). Profiles sets a default profile for all projects - in order not to constantly change settings, it is better to immediately install the most suitable one. In General, you select the default theme and the time (default) for which subtitles, effects, and images imported into the project will be displayed. They can then be specified individually in the project. The default here is ten seconds, which is a lot, and you have to constantly edit. It is better to set within two to three seconds. Although in 2.0, to change it, you no longer need to go into the menu.
Advantages and disadvantages
Now that we're done with OpenShot Video Editor's features, let's also talk about its strengths and weaknesses.
Pros:
- Nice user interface, made in dark colors.
- The software has been completely translated into Russian.
- There is a huge amount of positive feedback from people from all over the world.
- The application will be completely free for you.
- There is a huge database containing many video effects and video transitions.
- The program is very easy to learn.
Minuses:
- The only downside is that the functionality is much more limited than in the same products from Sony or Adobe.
But the user who chooses this video editor strives for simplicity. He doesn't need a huge number of features that will never be used. You need a simple program that has basic functions for video processing.
How to use
The theory is finally over and we can get down to business. The next two sections will look at how to freely download and install the OpenShot Video Editor for your computer or laptop, as well as provide short instructions on how to use it.
Download and Install
The essence of free download and installation of our video editor for Windows XP, 7, 8 and 10 comes down to the following:
- First, we download the archive with the application using a direct link or torrent distribution. Both, available at the very bottom of the page.
- Next, either unpack the archive if you downloaded the program via a direct link, or open the folder with the file. Then we start installing the program.
- Guided by the tips of the step-by-step wizard, we install our video editor.
Done, the program is installed and we can move on to working with it.
Operating instructions
To use OpenShot Video Editor you need to do something like this:
- We launch the program and use the main menu to import all the necessary materials.
- We process our video, trim it, add effects and transitions, overlay numbers if necessary, and so on.
- When the process is completed, export the finished result using the same main menu.
You can learn more about how to use this program from the video attached at the very end of the page.
Working with OpenShot Video Editor
The OpenShot Video Editor is non-linear, i.e. it allows you to place video editing objects anywhere on the timeline, while providing the ability to edit them individually. Working with the program is quite simple:
- In the central window of the application there is a timeline where the user can place video, audio, a picture, or a video editing object created in the editor itself (for example, 3D text). Each of the placed objects can be located on a separate track, which allows them to be moved along the timeline independently of each other.
- Each of the processed objects can also be edited individually - cut, combine, apply effects, etc. To do this, just select it and then select the desired function from the context menu or toolbar.
- Upon completion of work on the video, it remains to be exported to a file of the required format. In the file saving window, the user will also be able to configure the technical parameters of the saved video clip.
System requirements
In order for you to be comfortable working with the video editing program discussed in our article today, you need a computer or laptop that has at least the following system requirements:
- CPU: x2 1.8 GHz higher.
- RAM: 4 GB and higher.
- Hard disk space: 300 MB and above.
- Platform: Windows.
- Graphics adapter: Hardware encoding is not supported.
- Screen resolution: 1280 x 720.
Installing OpenShot
This video editor is supported on Windows, Linux and MacOS. For correct operation, your device must have at least 4 gigabytes of RAM.
Installation on Windows and MacOS
Installing the program is not difficult even for a not very experienced user:
- Go to the official developer website. On the page that opens, just below the Download link, there are buttons for moving between different operating systems. If desired, you can install the 32-bit version or torrent. After selecting the desired version, click on Download.
- Select the location where the file will be installed.
- Open the installed file.
- Select language and about.
- Select the folder where the editor will be installed.
- Wait for the process to complete.
Installation on Linux
If your computer is running Linux, then you should do a slightly different operation:
- Go to the terminal.
- Enter the following commands in it:
- sudo add-apt-repository ppa:openshot.developers/ppa/
- sudo apt-get update
- sudo apt-get install openshot-qt
- To ensure that all the capabilities of the video editor are available to us in the future, we install the Blender program. To do this, enter the following command in the terminal: sudo apt-get install blender