The usual practice of working on a computer involves using several programs at the same time. They are opened in window mode, then switching from one to another is not difficult. But gaming applications are often launched immediately in full screen mode, which prevents them from working in parallel with other windows. Fans of old games also find the full-screen version inconvenient; at low resolutions, everything looks ugly and blurry. It is inconvenient to take screenshots; if you exit the application, then you have to wait for it to load again, which wastes time. Therefore, it is advisable for users to set windowed mode in games, for which there are different ways.
There are several ways to launch the game in a window
Keyboard shortcut
To solve the problem of how to switch the game to windowed mode, certain key combinations help. The simplest trick when the application is running in full screen is to press Alt+Enter. Similarly, you can press F11 or Ctrl+F in Windows, or Command+M in MacOS. Perhaps in the settings you will find other combinations specifically for your application. The method is easy and effective, because pressing the keys again will open the full screen mode.
The first and easiest way is to use a shortcut
How to run old games on Windows 10
What should avid gamers who have installed a new operating system do? Should I return Windows 7 or XP or still force stubborn Windows to open the necessary applications? We offer some tips on how to get old games to work on Windows 10.
Run as administrator
A simple trick often helps - running as an administrator instead of the usual one. The reason for the program not working may be that the new OS does not consider the user to be an administrator by default (unlike previous versions of the system).
Whereas games often require that they be launched with admin rights. So, right-click the “exe” file and select the appropriate activation mode (Figure 4).
Figure 4. Example of running the application as administrator
Troubleshooting compatibility issues
The following recipe is related to correcting system-program compatibility. This is done simply:
- right-click the .exe file;
- select “Properties”;
- open “Compatibility”;
- we launch automatic troubleshooting of problems with it (Figure 5).
Quite an effective method. It will almost certainly work if everything went fine with previous versions of the OS, but it is buggy with the “ten”.
Figure 5. Instructions for setting up system and program compatibility
Games with DRM and SecuROM protection
It is believed that version 10 of Windows is particularly picky about violating the copyrights of manufacturers of intellectual products.
She may also find fault with your disks. The question arises, will old games run on Windows 10 in their pirated version?
The following measures can be taken here:
- visit the developer’s website and look for a patch there to remove the protection;
- reorder the product from the official distribution service;
- patch the program with the “no CD” utility created by third-party developers.
The last option is worse than the others, because it does not guarantee the absence of viruses.
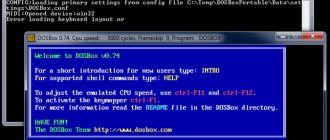
Using DOSBox
If your old games lag on Windows 10, you can resort to using special programs like DOSBox (Figure 6). These programs appealed to those who are nostalgic for the oldest shooters.
Moreover, the oldest of them, created for DOS, do not run normally with XP, not to mention the later versions of the system from Microsoft. But type emulators solve this problem.
Figure 6. Appearance of the DOSBox program interface
Installing a 32-bit OS
There are several other reasons why old games slow down on Windows 10. For example, bit depth mismatch.
Note : This applies to 64-bit Windows, which does not understand 16-bit software.
There may be two solutions here:
- installation of 32-bit “ten” (Figure 7);
- launching a virtual machine with the required OS version;
- using DOSBox.
Figure 7. Logo of the Windows 10 operating system with x32 bit depth
Installing XP via VirtualBox
If the relationship with the “ten” stubbornly does not work out, it is not at all necessary to demolish it. You can install virtual XP through the VirtualBox program (Figure 8). For this you will need:
- the program itself;
- XP image.
Once you install VirtualBox, it’s easy to use it to launch an additional operating system and enjoy old shooters.
Note : The main disadvantage of this solution is that its implementation requires a large amount of RAM, so it is only suitable for owners of fairly powerful machines.
Figure 8. Visual interface of the VirtualBox program
Changing settings
Perhaps there is an option in the settings to switch to another mode, check. Go to the settings section (Options), look at them to see if there is a “Windowed mode” or a similar function: “Play in a window”, “Windowed mode”, other analogues. When you find it, select it by checking the box or activating it in another way provided by the program, and save the change.
⇡#ZSNES - Super Nintendo Entertainment System emulator
The eight-bit Nintendo Entertainment System consoles were replaced by a new generation of consoles - the sixteen-bit Super Nintendo Entertainment System. Their capabilities were somewhat wider. To run old games for this type of console, you can use the ZSNES emulator.
ZSNES runs on DOS, Linux and Windows. The application interface is slightly different from the GUI of most emulators. ZSNES runs in an MS-DOS window, but at the same time imitates standard window interface options - the emulator can be minimized, expanded, or closed. We must give the application its due - it works quite quickly and stably, which is partly explained by the fact that the program began to be developed a very long time ago, and most of it was written in assembly language. There were no problems with sound; the emulation speed was quite high. In the ZSNES settings there is even the ability to control the emulation speed. It can be either increased or slowed down by choosing a multiplier or divisor number for the initial performance.
Applying a modifier
If the option for on-screen deployment of the game is missing, add it using a special modifier.
- Right-click on the launcher shortcut and click on “Properties”. You can also open the Properties window from the main menu of your OS.
- Go to the “Object” line, at the end of the line (using the End key).
- Leave a space and enter “–window”.
- Click Apply - OK, launch the application.
In this way, the launch of various games, for example, the popular Warcraft, Counter Strike, Mass Effect, is edited. In other programs, a slightly different modifier may be used, in Sims2, for example, you need to add “–w”, in some applications “–win” works. Try different modifier options for yourself.
It will be possible to run the game in a windowed version; to return to the old settings, simply delete the entered modifier.
Add the -window modifier to the shortcut properties
D3DWindower
One of the first programs for this kind of manipulation with the launch of a game, although the last update was released in 2020. Works great with old games released at the turn of the century for Windows. In addition, it is very easy to use. To run the game in a window using D3DWindower, you must:
- Launch the program itself.
- Click on the plus icon and specify the path to the exe file to launch the game (not the shortcut on the desktop/start).
- Right-click on the added game and go to settings (gear icon).
- In Options you only need to specify the resolution of the game window and let it be specifically for the launch library: for the “DLL” parameter, click on the “three dots” button and specify the path to the D3DHook dll file. It is located in the folder with the installed program.
For the program to work properly, it is necessary that the path to it be without Cyrillic (folders with names in Russian). To launch games in a window in the future, you need to do this through D3DWindower.
Third party programs
The above methods are applicable if such capabilities are included in the settings. How to run any game in windowed mode when the manufacturers did not provide for this? Third-party programs will help.
You can forcefully switch to the desired launch option in games by taking the old Chinese program D3DWindower; it copes with this task, although it is quite old. Install it, launch it, add your game to the list by clicking on the “plus” button. In the settings, set the desired height and width of the window.
Using the -Window property for a shortcut
If the game does not respond to any of the above methods, or it is not possible to change its display mode in the settings, you can try the method of adding the windowed mode parameter to the shortcut. To do this, you need to find the shortcut for the game on your desktop and right-click on it. Select "Properties" from the drop-down menu. A new window will open in which you need to enter the parameter “ -window ” . This property is written in the “Object” column, as shown in the example below.
When the required parameter is entered, click “OK” to save the changes. After that, launch the game through this shortcut, and it will open in windowed mode.
Please note: In some cases the "-window" option does not work. In such situations, we recommend that you try to specify the “-w” parameter, save and try to launch the game.
Emulators
Emulators do not work on all computers; they are resource intensive. (Vmware, Windows Virtual PC). We recommend using official websites. You create a virtual “computer within a computer” running in a regular window size, and any program running in it will be within the emulator window.
The disadvantages are that a virtual computer requires a lot of disk space, and setting it up is time-consuming and labor-intensive. Installing an emulator just to launch the game is irrational; use this method if you need it for work.
If the listed methods showing how to put the game in windowed mode did not help, try contacting the developers through the official website or support forum. In addition, when this option is not available at all, we recommend minimizing the full-screen application to switch to another program by pressing Alt+Tab, then you can simply expand it.
DxWnd
The most modern program on the list - the latest version was released last year. That’s why all modern projects are supported, working with any version of DirectX. It is a kind of “launcher” or “shell” for launching the game. The program has a debugging wizard that can be used to change parameters if the game does not start correctly. To run the game in a window using DxWnd, you must:
- Launch DxWnd.
- Drag the game shortcut into the program window to open the launch wizard.
- We indicate the game resolution: if in full-screen mode for a comfortable game you set it to 1280 by 1024, then you need to set this resolution in DxWnd.
To ensure that the game always runs in a window, you must do this only through this program. If the game does not start, then use the fine settings: if the game is quite well-known, then you can enter the query in Google “DxWnd (game name) windowed mode”. This is the most popular program, so you are sure to find the necessary parameters for your game. The program is a free download from Sourceforge.