What is DosBox
DosBox is a software emulator of an IBM-PC compatible computer running the MS-DOS operating system (OS). The DosBox program is free software that allows you to run old programs and games on modern computers and devices running Windows, Linux, Adndroid and others.
Official website of the program: www.dosbox.com
A short list of DosBox features and advantages:
- MS-DOS environment without a physical x86 processor and the original OS;
- Emulation of BIOS interrupts and hardware of an IBM-PC compatible computer;
- Connecting any folder on your computer as a working disk in a virtual OS;
- Graphics - Text Mode, Hercules, CGA, EGA, VGA, VESA;
- Audio - AdLib, Sound Blaster, PC-Speaker (tweeter) and other old hardware;
- Network - TCP/IP, IPX, Com-port (Windows);
- Cross-platform;
- Open software, availability of source codes;
- Small distribution size 1.5-2 MB;
- Ability to run in portable mode.
Under DosBox, various file managers from the MS-DOS era, accounting and banking programs, programming environments, programs for amateur radio measurements and communications will reliably launch and work...
The emulator will work perfectly with games such as: Dune II, Quake, Duke Nukem, Warcraft II, Chasm the rift and many others...
Installing the DosBox program on Linux and Windows
On GNU/Linux systems, the latest version of the program can always be downloaded from the official website, as well as installed through the repository system. To install DosBox under GNU/Linux Debian or Ubuntu, just one command is enough:
sudo apt-get install dosbox
For the Windows operating system, you can also download the installer from the official website. However, it is very convenient to use the portable version of the program, which launches and works from a flash drive or removable hard drive.
You can make, for example, a gift flash drive with a set of old games and programs for your friend’s birthday - if he used to work in MS-DOS, then he will probably have something to remember.
Download and install the portable version of the program - DosBox Portable (portableapps) (2MB).
After launching DOSBoxPortable.exe, two windows will open: the first is the program status window. and the second is the window where emulation is performed.
For those who know English, there will be no problems with the built-in help system (HELP).
The INTRO command allows you to quickly go through the main points when working with the program - mounting directories as disks, working with CD-ROM images, a list of hot keys.
Basic console commands
The HELP command displays a list of basic MS-DOS commands available in the emulator:
- DIR - displays the contents of the directory;
- CD - change the current directory;
- CLS - screen clearing;
- COPY - copying files;
- DEL - deleting files;
- EXIT - exit;
- MD - directory creation;
- RD — directory deletion;
- REN - rename one or more files;
- TYPE - display the contents of a text file;
- VER - Displays the current version of DosBox, as well as the version of the emulated MS-DOS.
DOSBox Syntax and Options
Before moving on to specific examples, we recommend that you familiarize yourself with the list of the most popular emulator keys. You already know that the dosbox , with it you can use the following options:
• -fullscreen — launches the emulator in full screen mode. • -printconf - displays the path to the configuration file. • -conf - loads the configuration file.
When working in the DOSBox shell itself, the following parameters will be useful to you:
• imgmount —mounts an ISO image in the emulator. • mount —mounts directories in the emulator. • config - saves the current configuration to a file.
Those wishing to familiarize themselves with the full set of commands can do so at www.dosbox.com/wiki . In addition, you can use different MS DOS commands in the emulator shell.
List of hotkeys
- ALT-ENTER - enable/disable full screen mode ;
- ALT-PAUSE - pause the DosBox emulator;
- CTRL-F1 - launch the hotkey editor;
- CTRL-F4 - update the cache of directories that are mounted;
- CTRL-ALT-F5 - start and stop screen capture and subsequent saving to a video file;
- CTRL-F5 - capture and save a screenshot ;
- CTRL-F6 - start and stop recording sound to a Wav file;
- CTRL-ALT-F7 - start and stop recording OPL commands;
- CTRL-ALT-F8 - start and stop recording of various MIDI commands;
- CTRL-F7 - reduce the number of skipped frames;
- CTRL-F8 - increase the number of skipped frames;
- CTRL-F9 - cold shutdown of DosBox (kill);
- CTRL-F10 - enable or disable mouse capture ;
- CTRL-F11 - slow down the emulator , reducing the number of microprocessor cycles;
- CTRL-F12 - acceleration of the emulator , increasing the number of microprocessor cycles;
- ALT-F12 - disable speed limit, maximum.
Mounting directories as disks in DosBox
Now let's start creating and connecting a directory on the computer as a virtual disk inside DosBox. I would like to note that this can be any directory on any of the connected disks/volumes.
An example of a command that needs to be executed in the console of an already running DosBox program:
mount CD:/DOSGames
Where:
- mount is the name of the command to be executed
- C — name (letter) that will be assigned to the virtual disk available in DosBox
- D:/DOSGames – path to the “DOSGames” folder, which is located on drive D (example for MS Windows).
After startup, a notification will be displayed that the drive with the letter “C” is mounted and the directory “D:/DOS_Games” is used for it. This way you can mount several virtual disks with directories - store programs on one, documents on the other, etc.
The connected directory must exist, I also want to note that in the paths you can use the slash (unix) “/” separator instead of the reverse (win) “\”, no matter what OS you run DosBox under.
Another example, a command to mount the directory /tmp/DOSTEST (from a Linux system) as disk X (inside DosBox):
mount X /tmp/DOSTEST
Configuration files
For each program, you can create your own configuration file with unique emulation parameters.
After the first launch of DosBox, a default configuration file will be automatically created - dosbox.conf. Here is its location on different operating systems:
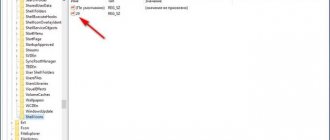
- MS Windows: "{system_drive}:/Users/{user_name}/AppData/Local/DOSBox/dosbox-{version}.conf" ;
- GNU/Linux: “~/.config/dosbox/” (for version 0.75 and higher) or “~/.dosbox/”;
- MS Windows - PortableApps: in the "Data/settings/dosbox.conf" folder relative to DOSBoxPortable.exe.
Instead of “{system_disk}”, “{user_name}” and “{version}” you need to substitute the data that is relevant for your case and system.
To edit configuration files, you can use any text editor - notepad (Windows), gedit, kate, nano (Linux) and others.
To start the emulator with a specific configuration file, you need to run the command:
DOSBox.exe -conf "ConfigName.conf"
Where “ConfigName.conf” is the name of the configuration file. If the configuration file is not located in the directory with the program, then instead of the name you need to indicate the full path to the file (with directory names), examples for Windows and Linux:
DOSBox.exe -conf "C:\Test\games-config.conf" dosbox -conf /tmp/games-config.conf
Installing DOSBox manually.
I don’t know how it will be with installing the new DOSBox - 64-bit version 0.75 in the form of Portable mode, that is, without an installation *.exe file, but at the moment everything is simple. It is enough to copy all files and directories to the folder of your choice. In this case, you must place dosbox.conf and the Capture video capture directory there (in the directory with the main DOSBox.exe file). The dosbox.conf file is a text file, customized based on dosbox-0.74-2.conf. If there is no dosbox.conf file, a configuration file corresponding to the DOSBox version (in our case - dosbox-0.74-2.conf) will be created automatically during the program's working session with default settings (C:\Users\User-1\AppData\ Local\DOSBox\dosbox-0.74-2.conf ).
Configuring commands to autorun after startup
Let's use the support of the principle of the so-called autoexec.bat file from the world of MS-DOS in the emulator; this is very convenient when, after launching the DosBox emulator program, you need to automatically execute some commands and launch pre-installed programs.
As examples of what can be automated:
- clear garbage in any directory (use the DEL command)
- mount a new disk (use the mount command)
- launch Norton/Volkov Commander
- automatically launch a game or other program
- etc.
To set commands for autostart in DosBox, you need to add a list of these commands to a special section called “[autoexec]” in the dosbox.conf configuration file.
For example, after starting you need to do the following:
- mount the “Data/Disk_C” folder for the portable version of the program (Windows - portableapps) as the “C” drive in the emulator;
- go to drive C;
- list the contents of drive C.
Open the dosbox.conf configuration file in a text editor and look for the “[autoexec]” section at the very bottom - all commands specified there will be automatically executed in order after starting the emulator.
Here is a screenshot of the implementation of the above 3 commands for auto-running in turn:
I would like to pay attention to the path to the directory “../../Data/Disk_C” - in this case we indicate the relative path for the portable version of the program, and not the absolute one (for example, “c:/Programs/Dosbox/Data/”) .
The DosBox program will search for a folder relative to the DOSBox.exe file, which is located in the “App/DOSBox” directory, so we go up two levels above “../../” and then indicate the location of the directory from the current level.
This method of mounting directories with relative paths is 100% working and is excellent for mounting directories that are located nearby on the same disk with the program.
This feature is very convenient because it allows you to transfer the portable version of the program and its contents (programs for DOS) on removable media and disks, for example, on a flash drive or external hard drive.
Let's launch DosBox and this is what we should see:
The directory was mounted as drive C, the transition to drive C was made and the folders and files on the drive were displayed.
If you prefer to work in shells like Norton Commander or Volkov Commander, then you can also add the full path to launch the shell to autorun.
For example, you unpacked Volkov Commander into the “vc” directory, which is located in the directory that will be mounted as drive C. Add the line “c:\vc\vc.com” to the example configuration file given above.
I would like to note that for all commands that are executed inside the emulator, you need to use slashes in the paths:
- for Linux - slash “/”;
- for Windows - backslash "\".
In the example shown above, when you launch DosBox (portable version of the program) under Windows, drive C is automatically mounted and Volkov Commander is launched:
How to use DosBox
In most cases, DosBox is launched from the terminal, and certain options are passed to the command to configure execution parameters. First, let's look at the command syntax and its main options.
Dosbox syntax and options
The command syntax is very simple:
$ dosbox options
All other parameters are set using options and the configuration file. Here are the main options we have to use:
- -fullscreen — enable dosbox full-screen mode;
- -noautoexec - do not execute the autoexec section of the configuration file;
- -c execute an arbitrary command after startup;
- -conf — load configuration file;
- -printconf — print the address of the configuration file;
- -eraseconf — delete the default configuration file;
DosBox commands. Once you have launched the DosBox shell, you can work in it, you can use the built-in commands for this. Here are some of them:
- MOUNT - mount the system folder in the DOS environment;
- MEM - available amount of memory;
- CONFIG — write the current configuration to a file;
- RESCAN - rescan information about directories;
- IMGMOUNT - mount an iso image into the shell;
- BOOT - launch another operating system in DosBox;
- LEUB - change the keyboard layout.
Of course, in addition to all these commands, you can use the usual dos commands. Now let's look at some examples of how to work with dosbox.
Examples of using DosBox
On Windows you can launch DosBox from the start menu, on Linux from the main menu or through the terminal with the command:
dosbox
Next your shell will open. Now we need to take a folder on our file system and mount it to this shell. For this we will use MOUNT. The command syntax is:
> MOUNT drive_label folder_address
For example, if our game or program is located in the ~/dos folder, then we need to run:
>MOUNT C: ~/dos
Done, now go to drive C: and look at its contents:
>C:>dir
We see several executable files, now we can run the EXE file:
> cd BCRACERS/BCRACERS.EXE
As you can see, the answer to the question of how to launch a game via dosbox is not at all complicated. This way you can run any DOS program. But that's not all. Next you will learn how to configure dosbox through the configuration file.
dosbox configuration file
First let's see where this file is located:
dosbox -printconf
You can use it to configure many different parameters, including commands that will be automatically executed when the environment starts and to fine-tuning the processor. This file is divided into several sections, each of which is responsible for a certain aspect of the emulator's operation:
- sdl — display settings;
- dosbox — setting the emulator type;
- render — dosbox rendering settings;
- cpu — processor settings;
- mixer, midi, sblaster, gus, speaker - sound settings;
- joystick — joystick settings;
- serial — setting up connected COM devices;
- dos — setting up DOS extensions;
- ipx - allows you to enable network support;
- autoexec is the most interesting section for us; it allows you to execute commands when starting DosBox.
In the sdl section we will be interested in the following options:
- fullscreen=true — open the window in full screen for games;
- fulldouble=true - use double buffering;
- fullresolution=original — use the maximum screen resolution;
- output=opengl - the type of video system that will be used for rendering affects performance. The following options are possible: surface, overlay, opengl, openglnb, and in Windows also directx.
The dosbox section provides several machine settings:
- machine=svga_nolfb - indicates the type of graphics system emulation; the newer the machine, the more colors and the higher the performance. The newest one is svga_nolfb;
- memsize=16 — amount of available RAM;
From the render we will be interested in only one option - scaler . It allows you to improve a picture that was designed to be displayed at low resolutions. The best option is scaler=super2xsai .
The cpu section is interesting because it allows you to influence the speed of program execution:
- core=normal - number of processor cores, it is recommended to set it to normal, the auto parameter may not work in Ubuntu;
- cycles=auto - the number of processor cycles, directly affects the speed of the program. If the game is running too fast, simply decrease this number using the F11 key, or otherwise increase it using the F12 key;
The last section that will interest us is autoexec. Let's just write our folder mounting commands there. The result will be a configuration file like this:
[sdl] fullscreen=true fulldouble=true fullresolution=original output=opengl
[dosbox] machine=svga_nolfb memsize=16
[scaler] scaler=super2xsai
[core] core=normal cycles=auto
[autoexec] MOUNT C: ~/dos C:
I recommend not replacing the default dosbox settings with this file, but simply correcting the necessary parameters. You can go even further and save a separate configuration file for your program, and then run it only by passing dosbox the required file:
dosbox -conf /path/to/configuration/file
Now you know how to launch the dosbox game directly from the terminal and without unnecessary movements. You can also create a script and run it directly by double-clicking the mouse.
Correcting “krakozyabry” (encoding)
When we launch some Russian-language programs, we may see something like this:
To correct incorrect display of Cyrillic characters in MS-DOS, use keyboard Russifier utilities. In our case, there is no need to look for any utilities and everything is solved much easier.
Add the following line to the DosBox configuration file (dosbox.conf), in the “[autoexec]” section:
keyb ru 866
That's it, now after restarting the program, Cyrillic characters will be displayed properly!
Russian characters are displayed correctly!
Russification of DOSBox through the [autoexec] section.
Above, we looked at how to enable the Russian language in DOSBox when loading through the “keyboardlayout=” line of the [dos] section, but there is another way that allows you to use an internal program or a third-party driver. In pure DOS, this is done by making changes to the autoexec.bat and config.sys files. In DOSBox, the specified files appear on the virtual disk only at startup and are replaced by the lines of the [autoexec] section of the emulator configuration file.
In order to initiate the Russian language in DOSBox when it starts, you can enter the necessary lines for loading the internal keyb.com program or a third-party driver (in our case, keyrus.com) in the [autoexec] section of the configuration file (in our case, the dosbox.conf file, located in the directory with DOSBox installed):
[autoexec] # Lines in this section will be run at startup. # You can put your MOUNT lines here. @echo off
c:\KEYRUS\KEYRUS #KEYRUS LAYOUT (LeftCTRL+RightCTRL) #or #keyb ru441 866 #KEYBOARD LAYOUT (LeftALT+RightSHIFT/LeftALT+LeftSHIFT)
Step-by-step example of setting up DosBox for Windows
Users of the GNU/Linux operating system will most likely not have problems installing and configuring the program. And for some MS Windows users, the following detailed step-by-step instructions may be useful.
But before we get started, I will give one very important recommendation: after downloading files of any programs designed to work under MS-DOS or MS Windows to your computer, it is advisable to check them with an antivirus program.
For batch scanning of a file with many different antiviruses, there is the VirusTotal.com project. There is a button on the project website to upload a file for review.
We upload the downloaded files there one at a time and look at the results of scanning with many different antiviruses. I don’t recommend uploading files larger than 100MB there; as a rule, most small programs weigh from several units to tens of Megabytes.
The example will use the portable version of the DosBox program.
So, let's go!
Downloading the program
Go to the PortableApps.com website with the DosBox download page - DOSBox Portable (emulator for classic DOS games).
We look for the “Download” button and by clicking on it we download the packaged package with the program.
As a rule, if the browser did not ask where to save the file, the program will be saved in the “Downloads” folder.
We go to the VirusTotal website in the browser, click the “Choose file” button (select file), select the downloaded file “DOSBoxPortable_0.74.3.paf.exe”.
We wait for the verification process to complete and look at the results:
In this case, we see “0/71” - this means that the scan was performed by 71 different antiviruses and no signs of viruses were found in the downloaded file.
Installation
We begin installing the program - click on the downloaded installation file. The installer will prompt you to select a language, for example, select Russian.
We carefully read everything that the program writes and requests, click Next. Then the program will ask where to unpack the program - by clicking on the “Browse” button, you can specify a separate disk or folder, for example, you can unpack it to a flash drive connected to the computer.
Let’s assume that we will unpack the program to drive C, the installation path will be “C:\DOSBoxPortable”.
Click the “Install” button and then click “Finish” when the installation process is complete.
That's it, the program is installed!
In this example, it is located on the C drive - go to “My Computer” on the C drive and see the “DOSBoxPortable” folder there.
First launch, test
First of all, let me clarify one very important point. After any mouse click in a DOSBox window, it will automatically be captured and start working only within this window. To return control of the mouse to the Windows operating system, you need to press the key combination CTRL-F10 (turn on and off mouse capture)!
I recommend studying and writing down somewhere the keyboard shortcuts that are given in the article above - they will come in handy later when working with the program.
Go to the “DOSBoxPortable” folder and run the file of the same name “DOSBoxPortable” there for execution - two program windows will open:
- The first window is a program progress log
- The second window is the working window of the DOSBox program, in which we will enter commands and run programs.
To terminate the program, just close either of these two windows.
Folder with programs for MS-DOS
In the same “DOSBoxPortable” folder we will create a new folder for our programs for MS-DOS. Click the right mouse button (RMB) on the free space of the window - Create - Folder - enter its name “Program” and press ENTER. The program folder is ready!
Now you can save various programs and games that are designed to run under MS-DOS in this folder.
It is important to note that it is better to name all folders and files here so that their name does not contain more than 8 characters, for example:
- For the Norton Commander program, the folder can be called briefly - “NC”;
- For the Bank Accounting 2.0 program - “BANK_20”;
- and so on…
For example, let’s copy the free file manager “DOS Navigator” there; I unpacked the downloaded archive into the “DN” folder. We will also create some kind of text file document. After this, these folders inside will look like this:
Here:
- DN - folder with the DOS Navigator program;
- README - text file README.txt (the txt extension is not displayed in Windows Explorer).
Working in the console
Now we launch the program as we did before. In the working window (where the “Welcome to DOSBox” message is), enter the following commands in order:
mount C Program C: dir cd DN dn.com
Command assignment:
- “mount C Program” - Mount the “Program” folder we created as drive C;
- “C:” - move in the command line to drive C;
- “dir” — displays the contents of the current directory (in this case it is the root of drive C);
- “cd DN” - go to the “DN” folder, which is located in the current directory;
- “dn.com” - launch the executable file “dn.com” for execution.
After entering the last command, the “dn.com” program should start, in this case it is the “DOS Navigator” file manager:
Now, by using the arrow keys to move to '..' and pressing ENTER, we will go up one directory in the file manager (one level up). There we will see the directory “DN” and the file “readme.txt”.
By placing the cursor on the “readme.txt” file and pressing the F3 key (View), we will see the contents of this file; to exit, just press Esc.
Automation
Now we’ll make sure that when you start the DosBox program, preparing the disk and launching programs is performed automatically.
Using Explorer, open the “DOSBoxPortable” folder with the program on drive C, go to the subfolder called “Data”, then to the “settings” folder - the files in the settings of the DOSBox program (in the portable version) are stored here.
Here we are interested in the file “dosbox.cof”, we need to open it for editing and here a simple standard MS Windows editor - Notepad - will come to the rescue.
Launch the Notepad program: press START, type “notepad” or “notepad” in the search, click on the icon with the found program - it should open.
Now we go to the Explorer window, where we display the contents of the “settings” folder, and drag the “dosbox.cof” file into the Notepad program window with the mouse. The program should display the contents of this file.
In Notepad, scroll through the contents of the file to the very end until you see the “[autoexec]” section indicated by brackets. At the very bottom, under it, add the following lines:
keyb ru 866 mount C Program c: cd DN dn.com
Save the file (in the “File” menu, select “Save”) and close Notepad.
All these lines actually repeat the commands that we entered manually in the console to connect the “Program” directory to drive “C” and run the “Dos navigator” program, with the exception of the line “keyb ru 866”, which will be useful in the future for correctly displaying programs with Cyrillic characters (Russian and Ukrainian keyboard layouts).
Now if you run the program, “Dos Navigator” will start automatically.
Cookies 
Some useful comments and ideas from me.
You can now copy the files and programs you need that you plan to run in MS-DOS emulation mode into the “Program” folder. After copying new files to this folder, it is advisable to restart the DOSBox program (close, if open, and start again).
To replace “Dos Navigator” with Northotn Commander, you will have to create a folder for the “NC” program in the “Program” folder and copy the contents of the file manager program into it.
Then all that remains is to edit the “dosbox.cof” file (as shown above), replace the lines in it:
- "cd DN" to "cd NC";
- "dn.com" to "nc.exe".
Now, after launching DOSBoxPortable, Norton Commander will automatically launch, and in it you can already navigate the directory tree and launch other programs, work with files, etc.
You can then access all the files and documents created inside MS-DOS programs by simply navigating through Explorer to the folder along the path: Drive C - DOSBoxPortable - Program.
The entire “DOSBoxPortable” folder on drive C can now be copied to a USB flash drive, transferred to another computer with MS Windows XP, 7, 10, and there you can run the already configured DOSBox program with all the contents of the Program folder inside without any additional changes. Simple and convenient!
Also, the “DOSBoxPortable” folder can be archived and saved as a backup version with intermediate results of work and developments in programs. which are located inside in the “Program” subfolder.
An archive with already configured DOSBoxPortable and the Dos Navigator manager inside for everything done above - (3.3 MB).
How to run a DOS program on Windows 10
There are many useful programs, as well as interesting games for DOS. Can they work on the new Windows 10 (or 7, 8, 8.1)?
Have you asked yourself what kind of PC you have, what version of Windows it has, 32-bit or 64-bit? If you have a 32-bit computer (called x86 for historical reasons), you should have no problems running many (but not all) DOS programs. But if you are using the 64-bit version (x64), running the DOS program is not officially supported.
Some DOS programs may not run with the current version of Windows. As a rule, these are various kinds of hardware utilities, such as defraggers and diagnostic tools. Ordinary old games may also not start, since they may use the hardware capabilities of the old OS and not work in the latest versions of Windows.
If you don't know which version of Windows your computer uses, 32-bit or 64-bit, now is the time to find out. In new versions of Windows (all above XP are Windows 7, 8, 8.1, 10), right-click the Start button and select System.
Or type in the search or immediately select Settings->System->About the system
Make sure you have a 64-bit version of Windows
If you are using the 32-bit version, you can run the DOS program by simply selecting the appropriate .com file. If this is your first time doing this from Windows 7 and above, you will probably be prompted to install a component called NTVDM; Click the Install button.
Some very old programs may not run even on Windows 7 x86.
If the program does not start, or if you are running Windows 10 (7.8) x64, try running it in DOSBox. This simple, free program runs DOS in a virtual machine that creates a fairly close emulation of your old computer.
Setting up DOSBox is very simple, there is one tricky thing you should know. In order to run the program you need in it, you must first mount it. Just like you mount a disk image, only the folder with the program.
This is done as follows:
Launch DOSBox and run the command mount ac:\dosfiles
But in order not to do the same thing every time, we’ll make sure that the specified path is mounted automatically.
To do this, you need to create a folder as close as possible to the root of the real disk or partition, and give it a short name without spaces or punctuation marks. I recommend C:\DOSfiles. Place your DOS programs and files in this folder.
Then, in the Windows programs search field (in the Start menu), type DOSBox 0.74 Options (the number depends on the version). Click on it and a fairly large configuration file will open in Notepad. Scroll to the bottom of the file. You will see the [AutoExec] section; in the line below, write mount ac:\dosfiles. This is exactly the path where you have your DOS programs that need to run. Save the file.
Now when you launch DOSBox, it will automatically mount the C: drive with the \DOSfiles folder as the A: drive.
Then you work with this drive A: just like with any other drive under DOS. Loading
Screenshots of some popular programs and games
To finish, I decided to take a dozen screenshots of games and programs that I managed to run under the emulator, maybe someone will remember the old days:
Operating system Microsoft Windows 3.1 (image from my 80286 computer).
File manager Norton Commander, screen saver - Aquarium.
Game from Westwood Studios - Dune 2. The legendary game that started a series of games in the RTS genre.
Game Lotus The Ultimate Challenge - car racing.
Game Prehistorik 2.
The legendary WarCraft II from Blizzard works great under DosBox.
The game from Id Software is Wolfenstein 3D. The founder of 3D games. When compressed with RAR it fit on a 1.44 floppy disk. )))
Game from Disney Software - DuckTales.
MS-DOS Quick Basic programming environment.
The Turbo Pascal 7 programming shell works great under DosBox.
The development environment is Borland Turbo C++ 3.0, everything works great too!