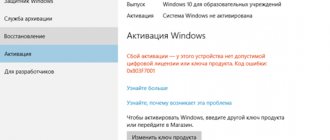
Once upon a time, I worked as a system administrator in a small office and encountered this problem with regular frequency. Ordinary users also encounter it at home. And so you turn on the computer and immediately see this window: “Windows IP address conflict detected.” On 7, 10 the network error message will be the same, but on XP the message will be in the lower right corner in the network connection tray.
Let me try to explain what it is. This error occurs when the IP address of a computer or laptop is already used somewhere on the network. If we talk about a home network, then this can happen when, for example, 192.168.0.14 is used on a laptop. The computer was turned off, and the router somehow forgot that this address was already in use and automatically gave the same address to the laptop.
Now, after turning on the computer on which the address 192.168.0.14 was, an address conflict error occurs. Because the router receives a message with the same address. To put it simply, this problem occurs when two devices use the same IP, and the router cannot understand where exactly to send data packets and begins to ignore the second connection.
It doesn’t matter what kind of Windows you have: seven, eight or ten - the instructions are suitable for any OS. It also doesn’t matter when this error occurs: when connecting via Wi-Fi or cable, the solutions are the same
HELP! If new problems arise during the process or my recommendations do not help you, then write about it in the comments and I will try to help you. Best regards, Bearded Man!
First actions
ATTENTION! If this problem occurs at your workplace, then you don’t need to do anything yourself and call the system administrator or the employee who maintains the network. You can also call for further instructions.
The question immediately arises: what to do if a Windows IP address conflict is detected - how to fix it? First of all, let's reboot the router and computer. Sometimes the router hangs and at the same time can send the same conflicting IP addresses. When rebooting two devices, the router must reset the route table and reassign the IP to the computer, laptop or other devices.
To reboot your router, find the on/off button on the back. It is usually labeled “ON/OFF” or “ON/OFF”. But you can simply unplug the power supply from the outlet and plug it back in a minute later.
If after this nothing helps, then most likely your IP address settings are incorrect or you need to set them manually. I will write about this below.
What is an IP address conflict?
And so let’s imagine that your organization employs two people with completely identical full names. You ask a question at a meeting, who is Ivanov Ivan Ivanovich, and then two people rise up. Here on the local network, two computers with the same addresses also appear, this is called a situation in which a conflict of IP addresses is detected. This will be good if these are two client computers, the problem will be minimal, but what will happen if one of the participants is a server that performs an important function in the organization, for example, a 1C server, believe me, they won’t pat you on the head for this.
Automatic detection
How to fix a network IP address conflict? You may have static settings on your computer. That is, an IP address is set that is used elsewhere. We will set the setting in such a way that the router itself will give us a free address.
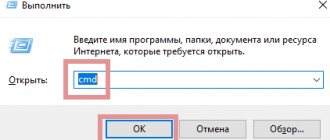
- Press the Windows and the English R key at the same time.
- We write the magic command cpl and click “OK”.
- Look further and you should see all your connections. You need to choose exactly the one you are connecting to. If you are using Wi-Fi, then select a wireless connection. Right-click and go to properties.
- We look for the item with the number 4 and click on it once. “Properties” button lights up – go there. Now we select points as in the picture above so that the computer receives IP and DNS addresses from your router.
- Click "OK".
IP address conflict with another system on the network: what to do? | Your networker
Sometimes, when connecting to the Internet, a computer with Windows OS displays an error with the system message “An IP address conflict has been detected.” This means that there is already a computer or mobile device on your local network that uses the same IP address as your computer.
A Windows IP address conflict has been detected, what should I do?
To resolve the problem with IP address conflict, click on the network icon in the lower right corner of the desktop and select the “Network and Sharing Center” tab.
A window will open where you need to click on your Internet connection and select the properties tab.
In the next window, scroll through the list that opens, find the “Internet Protocol Version 4” tab and go to this section.
Finally, the last window will open, which contains the IP address settings for your connection.
You need to know: a lot depends on the composition of your local network (in other words, how many devices are connected to it). Let's assume that you have 4 computers - then you should register your own static IP address on each of them so that there is no address conflict. As you know, the range of available IP addresses is set by your router or modem, and, as a rule, starts with the addresses 192.168.1.1 or 192.168.0.1. Based on this, you need to set a serial IP address for each computer.
So let's go back to our settings:
- O.
- enter your computer address in the first window (let's assume 192.168.1.100), then in the second window - the subnet mask (in our case it is 255.255.255.0) and in the third window indicate the address of your router or modem (192.168.1.1), then click "OK" key.
Thus, register a static IP address on each computer on your local network, and the problem with IP address conflict will be resolved.
How to fix IP address conflict in Windows 7?
But what to do if you don’t know which local network your device belongs to (or rather, the pool of IP addresses that is distributed to your computers is unknown to you).
To solve this problem, go to the Start menu, enter the command to open the terminal “CMD” in the search bar and press “Enter”.
A console will open in which you will need to enter the command “Ipconfig” and press the enter key again.
A list of addresses of your computer and modem will be displayed, which you will need to remember in order to resolve the address conflict later.
Recommendation: try to register a static IP address by adding the number one hundred to the main IP address of your router (for example, you have a main gateway at 192.168.1.1, accordingly, you should start registering IP addresses from the address 192.1681.101) - this will help you avoid conflicts with mobile device addresses.
tvoi-setevichok.ru
Static settings
If the previous method did not help much, then the problem is with your router’s DHCP. The service either does not work correctly or is completely disabled. But you can set the settings manually.
So first we need to find out the IP address of your router:
- Win + R and type “ cmd”.
- ipconfig and "Enter";
- Look in the line “Default gateway” or “IPv4”. We need the first 3 digits. In my case it is 192.168.1.
- Go to the properties of the network connection. You already know how to do this from the last chapter.
- And so, I set 192.168.1 as the IP (here you can put any number from 100 to 254). I set it to 192.168.1.145. Next, place the cursor in the mask line, and it will be filled in automatically. We set the main gateway as 3 numbers, which you learned, and at the end we set it to 1. For me it is 192.168.1.1. Be careful with the third digit, if you have 0, then put 0, if 1, like mine, then put 1.
- As DNS we set the values that you see in the picture above.
- At the very end, click “OK”.
After this, the problem should resolve itself. But if it appears again, then it is better to set up obtaining IP addresses offline, as in the last chapter. If after this the problem appears again, then you need to look at the DHCP settings on the router. I wrote about this in this article.
Manual assignment of IP addresses
If the above method did not help, and the Windows 7/10 system still shows an IP address conflict, then how to fix the situation in this case? Register a static address manually. Let's say your range is from 192.168.0.2 to 192.168.0.100. This means that the first computer on the network should theoretically receive the address 192.168.0.2, the second – 192.168.0.3, the third – 192.168.0.3, and so on. You need to make sure that each PC has its own address.
To do this, again go to the properties of the TCP/IPv4 protocol and set your IP, changing only the last digit. We set the subnet mask to 255.255.255.0, the IP of the main gateway should be the same as that of the router, that is, 192.168.0.1 or 192.168.1.1. You should set the router's IP as the preferred DNS address; you can also try using public DNS 8.8.8.8 (for the preferred one) and 8.8.4.4 (for the alternative one). To make sure that the assigned static IP is unique, we check the network settings of other computers.
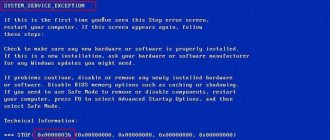
How to fix the error “An IP address conflict has been detected in windows”
Situation: as usual, you want to access the Internet, but there is an exclamation mark on the network connection status icon, indicating that there is no connection. By clicking on it, you will see a window with the message “Windows IP address conflict detected.” In some cases, such an error does not appear; instead, every time you try to enter the site, the notorious “404 Not found” appears in the browser. What to do in such a situation? A considerable number of users face a similar problem. Fortunately, this situation can be resolved easily and quickly. In this article, we will take a closer look at what to do if an IP address conflict is detected in Windows. Let's figure it out. Go!
Users may sometimes encounter the “Windows IP address conflict detected” error, but this problem can be easily resolved
A similar error appears when the IP address of a user is the same as an already active one. At the same time, there is an interesting point - of these two users with the same IP, the one who connected first gets access to the Internet. From all this we can conclude that the problem can be solved by changing your IP, of course, taking into account the range of local network addresses.
Now let's move on to fixing the error. The whole process is the same for all versions of the Windows operating system. Therefore, it makes no difference whether you are using the old XP or the new 10. So, right-click on the connection status icon, which is located on the right side of the taskbar. Go to Network and Sharing Center. In the window that appears, click on the “Change adapter settings” section located in the menu on the left. Next, right-click on the existing connection. If there are several, select the current one. In the window that opens, click "Properties" and then click the "Details" button. Pay attention to the line “IPv4 Address”. It is this value that needs to be changed.
Before you start doing anything, please note that you should only make such changes on your home computer. If this problem occurs at your work, just contact your system administrator.
Close the details window and click the “Properties” button. Confirm execution with administrator rights by clicking on the “Yes” button. Once in the Internet Protocol Version 4 (TCP/IPv4) properties window, go to the address item. You can set it manually by changing the numbers yourself. Please note that only the last number can be changed. It is advisable to indicate numbers ranging from 100 to 254. If your provider supports dynamic addressing, you can simply o. In this case, you don’t need to register anything; the provider will do everything himself. Regardless of which option you choose, be sure to click on the “OK” button to confirm your changes to the network settings. Ready. You can freely access the Internet again.
If you have a Wi-Fi router installed at home, you may need to set similar parameters on the router itself. To do this, type 192.168.0.1 or 192.168.1.1 into your browser's address bar and press Enter. Enter your username and password to enter the menu. The default login and password are “admin”. If you want to obtain an IP automatically, go to the “DHCP” section and go to the “DHCP Settings” subsection. Check the status “Enable”. Below is a range of addresses. After completing the setup, click the “Save” button and close the router menu.
Now you will know what to do if the error message “IP address conflict detected” appears on your computer. As you can see, this problem can be solved very simply and quickly. Write in the comments whether this article was useful to you, share with other users your experience in correcting this error and ask any questions you have about the topic discussed.
NastroyVse.ru
IP address conflict detected during Wi-Fi setup
You purchased a new router, brought it in, connected it and were just about to log into the network, when suddenly you discover that the system is indicating to you a conflict of IP addresses. In fact, the problem, although not very common, still sometimes occurs, so today we will talk in more detail about what to do if you find an IP address conflict when installing Wi-Fi.
In fact, there are not so many reasons: the problem can be either in certain settings of the router or in the network settings of your computer, so below we will try to explain in as much detail as possible what needs to be debugged and how.
Setting up the router
If you have not touched any computer settings related to network parameters, then the first thing you should do is check whether your router is configured correctly. As a rule, it may not produce what you need out of the box. You can check whether this is the problem by simply trying to connect another device.
It is important that the DHCP server is activated and a wide range of addresses is set that the router can distribute - if this is not done, then the correct addresses will not be automatically distributed and our problem will emerge from this.
Let's look at setting this parameter using the example of a TP-Link router. First of all, open the browser and enter 192.168.0.1 or 192.168.1.1 into the address bar (in rare cases, this address can be changed by the manufacturer, so if it doesn’t work, then look at the router).