Although CDs and DVDs are still sold in stores, computer manufacturers do not always equip PCs with disk drives. But even if the drive is present, few people know how to use it, especially when it comes to reinstalling the operating system. Nowadays, flash drives are in fashion, and it is from them that in most cases the OS is installed. But preparing a flash drive is not an easy task, because usually the Windows distribution is presented in the form of an image, which means creating bootable media is required. A considerable number of utilities have been created for these purposes, and today we will look at how to use the WinSetupFromUSB program, which is considered one of the best in this segment.
Where to download the program
Current PC users consider themselves literate, but their literacy extends mainly to the use of social networks and other Internet resources. When it comes to areas that require at least minimal technical knowledge, they give up. But downloading the program is not difficult; just type its name into a search engine. But even here there are many nuances that users do not remember or are not aware of.
The fact is that the search results do not always contain an official resource. If the program is not very popular, then its rating will be low, in contrast to well-known file storage sites that are literally crammed with advertising.
You will go to such a site and will not immediately see the necessary download link, having managed to click on advertisements disguised as the words Download. As a result, you will end up with a bunch of unnecessary and sometimes harmful programs on your disk. In other words, the risk of picking up malicious code such as a virus or Trojan is very high, and in order not to get hooked, you need to have considerable experience and intuition.
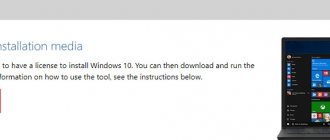
This can be avoided if you use the official website, where the developers have posted distributions with all stable versions of the program indicating their release date. Download link: https://www.winsetupfromusb.com/downloads/.
Installation and launch
Here, in the Downloads section, you can find WinSetupFromUSB instructions for installing the utility. The fact is that installation procedures on different operating systems vary greatly. Since the vast majority of users work on Windows, we will consider installing the program specifically for this OS.
By clicking on the link with the desired version, you are taken to the download page, which describes the differences between the current version and the previous ones. The program itself is presented in the form of a self-extracting archive, which you simply need to download to your computer’s hard drive and run the file.
During the installation process, the program will prompt you to specify the directory in which the installation will be performed. You can specify it manually, or you can use a more convenient option - the “…” button, which allows you to select the installation folder with the mouse.
Ultimately, a folder with a name like WinSetupFromUSB-1-9 will be created in the specified directory, where all the working files will be located along with the executable. But there is one small nuance here: for users of 64-bit operating systems, you need to run the *.exe file, the name of which contains the number 64; for 32-bit operating systems, you need to run the version of the exe file without the number at the end.
Installing the WinSetupFromUsb program
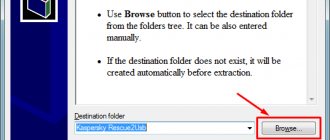
First, you will need the installation file from the developers’ website and unpack it into any folder.
- Use the button with three dots to select the directory to unpack.
- Click " Extract " .
After that, open the folder with the extracted files and run the appropriate version of the program - for 64-bit computers this will be a file ending in x64, and the second option for 32-bit versions.
Creating a bootable USB flash drive
So, the program for creating a bootable USB flash drive WinSetupFromUSB is installed, the Windows image is available - you can start assembling.
IMPORTANT. If you have a computer with UEFI, to create a bootable USB flash drive you need to format it in FAT32. This imposes restrictions on the media size - it should not exceed 4 GB, since operating systems based on the FAT32 format do not support larger files. In most cases, the computer contains a classic BIOS, so you can format the flash drive in the NTFS standard, which does not have the above limitation. In principle, a pure distribution kit fits into the specified dimensions, but on the Internet you can also find “sophisticated” and more functional options. This needs to be taken into account.
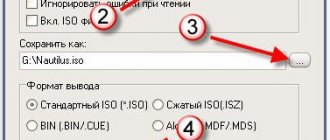
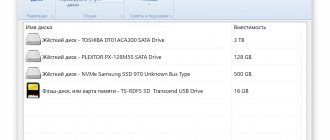
So, we insert a pre-formatted flash drive into the connector, run WinSetupFromUSB. On the main screen we see the name of our external media. We put a check mark next to the phrase “Autoformat it with FBinst”, select the NTFS item, also put a check mark next to the OM version, let in our case it be Windows 7/8, click on the three dots located on the right.
If you specified FAT32 when formatting the flash drive, you will receive a warning window:
Click OK (or don’t click, after 20 seconds the window will close itself), and an explorer window will open in which you need to find our Windows image. Click on it and press the “Open” button.
All that remains is to click on GO to start the procedure for creating a bootable USB flash drive.
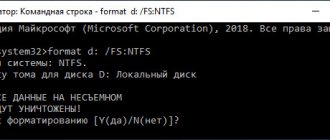
A warning will appear that all data on the media will be destroyed. Since after formatting there is nothing there, we agree.
We wait until the progress indicator is filled, after which the final window will pop up, indicating that our task has been completed.
So, we figured out how to create a bootable Windows 7 USB flash drive using WinSetupFromUSB, but what to do next?
If you have a PC or laptop with a UEFI BIOS, you have the option of converting the hard drive to the GPT file allocation table format standard, and this requires setting the BIOS accordingly. We will not consider how to do this, since this is a slightly different task.
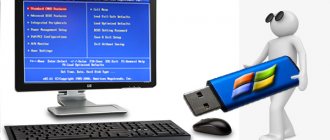
But most computers, desktop or mobile, are equipped with a regular BIOS, and there you just need to set the boot priority, putting removable media first.
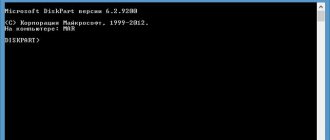
We insert the flash drive and do a Reboot. A bootloader window flashed on the flash drive will appear:
If it contains several options for installing Windows, select the version we need, after which the installation of the OS starts on the computer’s hard drive directly from the bootable USB flash drive.
Note that the procedure for creating a bootable USB flash drive for Windows 10 is no different from the option described above. Some nuances may arise due to the fact that the BIOS from different manufacturers is implemented differently, so the shape of some screens may be different, but the essence remains the same.
It would be wrong to say that WinSetupFromUSB is aimed only at operating systems from Microsoft. Let's consider all the options for images that can be written to removable media in the boot aspect:
- Windows 2000/XP and network version 2003 - used to write an unpacked distribution of any of the listed operating systems to a bootable flash drive. An important nuance - when specifying the path, you need to use the folder where the I386/AMD64 subdirectories are located or simply I. In other words, the operating system image must be mounted indicating the virtual drive, or insert a flash drive into the connector indicating the path to it. There is a third option - open the ISO file using any archiver and specify a separate folder as the unzipping path. In the latter case, the program will need to specify the path to this folder, and WinSetupFromUSB will be able to figure out whether it is dealing with an unpacked distribution or an image.
- Windows 7/8/10, Vista and server versions 2008/2012. The only option here is an ISO image, and when creating a bootable flash drive you will need to indicate where this image is located. Previous versions of WinSetupFromUSB had a slightly more complex algorithm, but the developers decided to simplify the task of creating bootable media for the end user as much as possible.
- UBCD4Win/WindowsFLPC/WinBuilder/Bart PE - here, as in the first option with earlier versions of Windows, you need to specify the path to the directory in which there is a folder I This is the ability to create several bootable disks for rarely used operating systems based on WinPE. For the vast majority of users, this option is unlikely to ever be needed.
- LinuxISO/other Grub4dos-based OS written into an ISO image is an option used to create an Ubuntu Linux distribution (or any other version of Linux/Unix). You can also use it to record PC recovery utilities or antivirus programs (Kaspersky RescueDisk, RBCD, Hiren's BootCD, etc.). Most of them are based specifically on the Grub4dos multibooter.
- SysLinux bootsector - used to create bootable flash drives with a Linux OS distribution using a syslinux bootloader. This is also very rare, even among Linux users, so this option is unlikely to be useful to you. But for the sake of decency, we point out that when creating media, you must specify the path to the directory in which the SYSLINUX system folder is located.
RMPrepUSB program
You may have found the RMPrep USB button next to the previous two buttons. If you are wondering why it is needed, then you will find out below in the text. But the list of its functions is so large that it will take an inordinate amount of time to explain each of them, so we won’t go into detail.
By clicking on the button, a window will open in front of you. Please note that of the entire program, only this is in Russian. If this is not the case, you can change it in the upper right corner.
This program provides the following tools:
- recovering deleted data from a flash drive;
- changing or creating a new file system (you can select all known file systems that currently exist);
- unzipping files directly to a flash drive;
- creating ISO images;
- testing;
- cleaning the flash card;
- copying system files.
And this is not the entire list of this utility, so if you are an experienced user, be sure to check it out.
Installing operating systems using removable media has long ceased to be a big problem. If you don’t have a blank CD/DVD at hand, or the drive itself is faulty or simply doesn’t exist (for example, in netbooks and ultrabooks), then every second person currently has a 1-2 GB flash drive. So, after reading this guide, you can create a bootable USB flash drive with Windows XP (and not only) and thereby greatly simplify the transition from one OS to another.
Creating a multiboot flash drive
We have looked in some detail at how to create a bootable Windows 7 USB flash drive using WinSetupFromUSB, but sometimes it becomes necessary to have a multiboot flash drive that contains distribution kits of several versions of the same OS or different operating systems. We can agree that such cases are very rare, but the process of creating media from which you can install different operating systems is quite simple.
As you remember, on the main screen of the program you can check the box next to several OS options (in the screenshot - under the words Add to USB disk). In this case, the formation of bootloaders will occur sequentially according to the algorithms, a brief description of which we gave just above. When installing the operating system, you just need to select the desired version and follow the instructions and tips. This multiboot flash drive is often used by system administrators in companies with a large number of workstations.
Installing Windows XP from a USB flash drive using WinSetupFromUSB
So, we are given the task of creating a bootable USB flash drive for subsequent installation of Windows xp into it.
Later versions of this OS are installed with Flash with a bang, but with xp there are many problems during installation, especially on older computers. Therefore, this article will show a method that works particularly on new and old PCs. Although this OS is considered outdated, it is still in demand thanks to old working configurations, for which there are practically no alternatives other than Linux and Xp. So as long as the old hardware works, there will be demand.
WinSetupFromUSB is a free program that allows you to create a bootable USB Flash drive (USB flash drive) for installing all versions of Windows. You can download the latest version of the program on the Of Site. After downloading, extract the archive and run WinSetupFromUSB.exe or x64, depending on the bitness of your OS.
Working with different distributions
We have already partially considered this issue, but I would like to dwell on it in more detail. The latest version of WinSetupFromUSB allows you to install Windows of all versions, starting with W2000 and ending with the current flagship product - “ten”.
For all entry-level Microsoft operating systems (2000/XP/2003), you must specify the path to the folder in which the complete unzipped distribution is located. On the Internet, these operating systems can only be found in a zipped version (ISO image). To get around this obstacle, you can use a little trick. Using the well-known Daemon Tools program, you can mount the image on a virtual disk and specify and specify WinSetupFromUSB its letter. The second option is simpler - just unzip the image. Since there are many Windows XP users, information on how to write this OS to a flash drive will be in demand.
When choosing Windows of older generations (7/8/10, server Windows 2008/2012), creating a bootable flash drive can occur without the need to extract the distribution, that is, directly from the ISO file. That is, you simply specify the path to the folder with the image, although the option with the distribution kit is also suitable.
Exactly the same as in the first option, support for the Linux OS is implemented - you need the path to the distribution, but in this case the bootloader is based on SysLinux, so when specifying the path to the distribution, the SYSLINUX folder must be present - otherwise the creation of a boot disk will not take place.
Additional options
In addition to actually creating bootable removable media, WinSetupFromUSB can do some other things. You can find additional options on the main screen. Let's take the “BOOTICE” utility as an example. When you click on the corresponding button, a new window will appear:
The purpose of the function is to convert removable media with the formation of an MBR (the so-called master boot record of the disk) or PBR (the actual boot code). In other words, the utility can install the Grub4DOS bootloader into the master boot record, or, say, the BOOTMGR bootloader into the boot code area, and so on.
These are quite specific functions, and if you do not understand this, it is better not to use the utility. But for specialists, this and other additional functions are very useful, since they provide the ability to create bootable flash drives in a non-standard way, using specifically structured code. The most typical example is the formation of a USB-ZIP type media from a regular flash drive. Note that working in WinSetupFromUSB with this utility is not easy, but if you understand what we are talking about, then in principle you should not expect any difficulties.
The FBinst tools utility is responsible for creating hidden partitions on flash media. The RMPrepUSB function can do everything that the first two utilities can, plus some more things.
At the bottom of the main screen there is a checkbox to enable Advanced options. If you check this option, a new window will appear in which you can specify what adjustments will be applied to the standard procedure for generating bootable media. For example, selecting the “Custom menu names” item for “seven” or “eight” allows you to standardize or individualize the names of OS menu items, and the “Prepare Windows” option helps prepare distribution kits for recording.
Enabling the “Test in QEMU” option allows you to activate checking the contents of the recorded flash drive for errors, and the “Show Log” option is responsible for documenting all actions performed by the user.