Checking the bootable flash drive is necessary to make sure that the bootable flash drive is working and can boot from it on the computer. After writing an ISO image or files to a flash drive, it makes sense to check whether the flash drive is bootable.
Bootable media are USB flash drives, CD/DVD disks, ISO images from which you can boot when you turn on or when you restart the computer. If you select boot priority from removable media in the boot menu or BIOS, the computer will start booting from the boot disk.
The user should take care of creating bootable media in advance in order to be prepared for surprises, which, as a rule, happen at the most inopportune moment.
Basically, a bootable flash drive is used when force majeure occurs. Possible reasons why you may need to use a bootable USB flash drive:
- there is a problem with the system, the Windows operating system cannot boot, to restore the system you will need to boot from a bootable USB flash drive or from an emergency recovery disk
- Due to virus infection, it is impossible to launch an anti-virus scanner from Windows; for treatment, you must use an emergency boot disk from the anti-virus manufacturer
- there was a need to reinstall the Windows operating system
- after a serious failure, you need to restore or copy files from your computer disk
Therefore, it is worth having bootable disks with you to be prepared for all surprises. Boot disks are created using a large number of programs. If the flash drive is not bootable, booting the computer from the USB flash drive will become impossible. Because of this, the user will not be able to solve the problems that arise.
How to check that a bootable USB flash drive is working? There are several ways to check a bootable USB flash drive:
- checking the bootable USB flash drive when booting directly on the computer
- checking a bootable USB flash drive on a virtual machine emulator without rebooting
In the first case, it is clear that you need to boot from the flash drive and check its operation. In the second case, programs for checking a bootable flash drive will help.
The applications are add-ons to the QEMU virtual machine, which allows you to check the ability to boot from a flash drive or from an ISO image without rebooting the computer.
Using programs, you can find out whether the flash drive is bootable, check the ability to boot from an ISO image or USB drive on your computer. The user will be able to make sure in advance that this flash drive or image will boot on the computer.
The programs presented in the article (MobaLiveCD, Qemu Simple Boot) are various shells of the QEMU emulator, others connect this emulator for testing (WinSetupFomUSB), or are an add-on to the VMware Workstation Player program (VMWare WinPE Test). MobaLiveCD and Qemu Simple Boot check ISO images and flash drives, WinSetupFomUSB checks bootable flash drives, and VMWarePETest checks bootable ISO images.
Checking a bootable USB flash drive on your computer
The most reliable way to check whether a bootable USB flash drive is working is to boot from the flash drive directly on your computer. To do this, when you start the computer, you need to enter the Boot Menu using certain keyboard keys (different models of motherboards use different keys).
Starting a bootable USB flash drive in a different way: enter the BIOS or UEFI to select the boot priority from the USB drive.
Next, make sure the flash drive is working and that it boots.
Creating a bootable USB flash drive using the Windows command line
This method may seem quite complicated, but I will try to analyze it in as much detail as possible. As in the previous two methods, first delete all information from the flash drive.
Press the “Win+R” keys on your keyboard simultaneously and enter the “CMD” command (without quotes) in the dialog box. The command line will launch.
I have highlighted all the commands that will need to be entered in bold, they are entered without quotes.
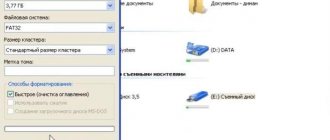
1. Immediately after the command prompt is launched, type “diskpart” and press “Enter”. An interpreter will appear that allows you to manage all disks, partitions and volumes.
Interpreter interface
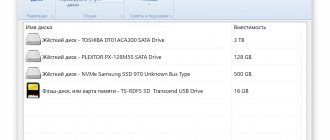
2. To display a list of all devices, enter “list disk” . Determining where our flash drive is is quite simple, firstly, all connected devices are shown at the end, secondly, we previously cleared it of all files and a zero will be shown in the “Free” column, thirdly, the size of my flash drive is approximately 8 GB, so we conclude that the flash drive from which we will make a bootable one is number 6.
3. Select our flash drive by entering the command “select disk 6” , instead of “6” you enter the number of your flash drive.
4. Immediately enter the “clean” so that the flash drive is 100% cleaned.
Click to enlarge
5. Next, we create the main partition, enter the command “create partition primary” and make it active, for this you need to enter two commands: “select partition 1” , and then “active” .
6. Now let’s format the disk again using the command “format fs=fat32” or “format fs=NTFS” . To make formatting quick, add the word “quick” to the end of the command, for example, so it looks like this: “format fs=fat32 quick” . After formatting is completed, the message “Diskpart successfully formatted the volume” will appear.
7. After this, there won’t be much left, enter “assign” to assign a drive letter. At this point we finish working with the command line and enter the last command - “Exit” . That's it, you can safely close the command line.
Click to enlarge
The last step is to unzip the ISO disk image with the operating system onto a flash drive, for example with WinRAR.
ISO image opened in WinRAR
How to boot from a bootable USB flash drive
To install the operating system from a bootable USB flash drive, you must select boot priority from a USB drive in the BIOS settings. Different motherboards have their own BIOS version, so see how to do this in the user manual.
For example, this is what it looks like in the BIOS on an ASUS motherboard:
Click to enlarge
Checking a bootable USB flash drive in MobaLiveCD
The free program MobaLiveCD is designed to check bootable flash drives and bootable ISO images. MobaLiveCD works without installation on your computer; to launch the program, click on the application file.
The program must be run as an administrator, otherwise an error message will appear.
To start the test in the MobaLiveCD program, you need to select an ISO image (Run the LiveCD button) on the computer, or a bootable flash drive (Run the LiveUSB button) connected to the PC.
The program allocates only 256 MB of memory for operation, so due to lack of memory, the application may not be able to cope with a large image or a large bootable flash drive.
On my website there is a detailed article about working in the MobaLiveCD program. From there you can download the Russian version of the application.
Program description
The program does not require any installation and runs directly from the downloaded exe file.
You must run the program with administrator rights, otherwise it will not work!
The program interface is quite simple - the main menu has several buttons, equipped with brief comments in English.
Here is a description of each item:
Install MobaLiveCD's right-clic association - clicking this button will add a button to the context menu of ISO files for opening them with this program. Start directly a CD-ROM ISO image file - starts the specified iso file from the hard drive - useful for checking bootable disk images. Start directly from a bootable USB drive - boot from a bootable USB drive - for example a flash drive. Useful for checking bootable USB flash drives.
How to check bootable USB flash drive in Qemu Simple Boot
Qemu Simple Boot is a free program for testing boot loaders from USB drives (bootable flash drives), boot images recorded on CD/DVD discs, bootable ISO and IMA images. The Qemu Simple Boot program does not require installation on your computer; it is launched from a folder.
Launch the Qemu Simple Boot application by double-clicking on the “Qsib” file. To enable the Russian language in the program, click on the “Menu” button, select “Language”, and then “Russian”.
Qemu Simple Boot can use up to 1 GB of memory. The size of the allocated memory can be adjusted manually by moving the slider on the scale to the desired position. To check the ability to boot from a flash drive or from an ISO image, especially if it is a Windows operating system or the like, it is better to use the maximum possible memory size.
Testing in Qemu Simple Boot proceeds as follows:
- First, bootable media is selected. Qemu Simple Boot supports bootable media:
- HDD (physical disk) - to check the bootable flash drive
- CD (CD/DVD drive) - checking the boot image recorded on a CD/DVD disc
- ISO (ISO image file) - checking the boot image in ISO format
- IMA (image file in IMA format) - checking the boot floppy image file
- When testing a USB flash drive, select HDD. Then select the physical disk that matches the flash drive connected to your computer. To test other media, select the appropriate media type.
- Click on the “Run Qemu test” button.
Next, you will see a QEMU emulator window with a choice of the boot menu, which is on a specific boot disk.
In principle, everything is already clear. This flash drive is bootable, it will be able to boot on your computer. The further performance of the flash drive or image depends on the contents of the boot disk itself.
Part 1: Check if your computer supports USB booting
Your device will not boot from the installation media if it does not have this feature. While most modern gadgets boot from a flash drive, there are also some that lack this ability. To determine whether your computer supports USB booting or not, check your BIOS settings. The steps may vary between models, but remain more or less the same for all PCs:
- Reboot your device (turn it on if it's turned off).
- When the computer starts up, the first screen will display a key that you need to press to enter the BIOS settings. Usually this is the “Delete” or “Del” button.
When restarting the computer, press the “Delete” or “Del” button
Note! If you have previously set a password, then enter it to enter the BIOS settings. Forgot? Perform a reset. To do this, remove the CMOS battery from the motherboard. If you have not done this before, it is better to take the help of a specialist. If you've forgotten your Windows password, try resetting it using PC Unlocker.
- You'll have to look into the BIOS and find "Boot Options" (or something like that). Then try setting the priority device.
In the BIOS go to the “Boot” tab, then open the “Hard Disk Drive” item
Open the “1st Drive” parameter, set the flash drive to first place using the arrows
If you don't see the USB boot option, it means your motherboard doesn't support it. You need to use another method or update the BIOS.
Important! You need to be very careful when updating the BIOS. The BIOS firmware must match the computer's motherboard.
How to check bootable USB flash drive for functionality in WinSetupFomUSB
The free program WinSetupFomUSB, designed for creating bootable flash drives, has the ability to check the bootable flash drive. Read more about creating a bootable USB flash drive in the WinSetupFomUSB program here.
You can check the bootable USB flash drive for functionality in WinSetupFomUSB immediately after creating bootable media in this program, or at any other convenient time. The application checks bootable flash drives created using other similar applications (not necessarily WinSetupFomUSB).
- Run the WinSetupFomUSB program.
- The application will automatically detect a USB flash drive connected to the computer. If necessary, to reselect the disk, restart the flash drive detection using the “Refresh” button.
- ABOUT.
- Click on the "GO" button.
Next, the QEMU virtual machine window will open with a boot menu for selecting how to launch applications included in the bootable media.
Checking the bootable USB flash drive in WinSetupFomUSB was successful.
BIOS does not recognize bootable USB flash drive
You decided to install Windows: you recorded a digital copy on a flash drive, configured the BIOS, rebooted your computer or laptop, but for some reason the installation did not start. What the heck? Why doesn't the BIOS see the bootable USB flash drive? It seems like everything was done correctly...
There are 2 most likely reasons here. The first is that the BIOS does not display the flash drive because it is not bootable. Second, you haven’t configured the BIOS quite correctly.
As for the first two reasons, we will look at them in more detail.
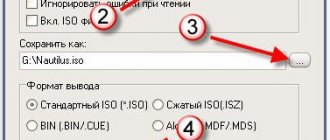
VMWare WinPE Test (VMWarePETest) for checking ISO images
The VMWarePETest (VMWare WinPE Test) program was created by the famous developer Ratiborus from Ru-Board. The application is used to check bootable ISO images (Windows PE or other ISO images).
VMWarePETest is an add-on to the free VMware Workstation Player program that must be installed on your computer. VMWarePETest also works if VMware Workstation Pro is installed on your computer (VMware Workstation Player is included with this program).
The free program VMWarePETest can be downloaded from here. The application does not require installation on your computer; the program is launched from a folder.
To test the boot image in VMWarePETest, you do not need to create a new virtual machine in VMware Player.
- Launch the VMWarePETest program by clicking on the application file.
- In the “VMWare WinPE Test” window, click on the “WinPE ISO” button. Using Explorer, select a bootable ISO image (Windows, Windows PE, antivirus rescue boot disk, or some other image). The image can be dragged into the program window using the mouse.
- Use the slider on the scale to select the amount of memory required if the default size selected is not sufficient.
- Click on the “Start WinPE” button.
Next, the VMware Workstation Player program window will open, which will display the boot selection menu.
The user can then view the operation of the boot disk, in this case Microsoft Diagnostic and Recovery Toolset (MSDaRT).
To exit VMware Workstation Player, close the program window, in the message window that opens, click the “Turn off” button.
The VMWarePETest by Ratiborus program opens virtual disk files in the “VHD” and “VMDK” formats, located in the same directory as the program. Prerequisite: the virtual disk must have the same name as the program - “VMWarePETest”.
Adding programs for a bootable flash drive
1. To work with hard drives, I downloaded the Acronis Disk Director
(available on torrents).
I dropped it into the /program
and added the following entry to the menu:
Title Working with hard drives Acronis Disc Director map /program/acronis.iso (hd32) map —hook root (hd32) chainloader (hd32) boot
Now I have a good tool for working with disks in my arsenal
2. To test RAM, I will use the “MemTest” program
I downloaded it from . Unpacked and put the image in the /program
, added the following to the menu:
Title Check RAM MemTest 4.10 map /program/mt410.iso (hd32) map --hook root (hd32) chainloader (hd32) boot
Trying to run from the emulator...
Works! Let's move on.
3. A huge set of different tools can be found in Hiren`s BootCD. You can download it. Unzip and copy the image to the /program
, you also need to copy the firadisk.IMA file from my archive into it.
firadisk.IMA is a driver that allows you to load a disk image into RAM and work with it as with a regular disk.
We enter the following in the menu:
Title Hiren`s BootCD v9.3 map —mem /program/firadisk.ima (fd0) map —mem /program/hbcd.iso (hd32) map —hook chainloader (hd32)
When loading Hiren's BootCD, you need to wait a little while the disk is loaded into RAM, after which it will start.
4. Add a utility to the flash drive to reset the administrator password. You can download it and copy the ISO image to the /program folder.
Added the following entry to the menu:
Title Reset Administrator password map /program/BOOT-DSK.ISO (hd32) map --hook root (hd32) chainloader (hd32) boot
The image contains several utilities, we are interested in the one highlighted with an arrow:
5. I will add the Victoria program for diagnosing the hard drive. You can download it. I throw the image into /program,
I write the following in the menu:
Title Hard drive diagnostics Victoria 3.5 map /program/vcr35r.iso (hd32) map —hook root (hd32) chainloader (hd32) boot
In principle, you can add a bunch more things, you can only be limited by your imagination and the size of the flash drive. For me, this toolkit is quite enough.
Here is a screenshot of my bootable USB flash drive
And here is my menu.lst file:
Gfxmenu /winlin.gz title Installing Windows 7 SP1 x86-x64 RU map —unmap=0:0xff map —unhook root chainloader /bootmgr title Installing ubuntu-10.04.4-desktop-i386 kernel /ubuntu/vmlinuz iso-scan/filename= /ubuntu/ubuntu.iso boot=casper only-ubiquity initrd=/casper/initrd.lz locale=ru_RU quiet splash — initrd /ubuntu/initrd.lz title Run Windows LiveCD map /os/LiveCD_Seven+LEX.ISO (hd32) map —hook root (hd32) chainloader (hd32) boot title Working with hard drives Acronis Disc Director map /program/acronis.iso (hd32) map —hook root (hd32) chainloader (hd32) boot title Check RAM MemTest 4.10 map /program /mt410.iso (hd32) map —hook root (hd32) chainloader (hd32) boot title Hiren`s BootCD v9.3 map —mem /program/firadisk.ima (fd0) map —mem /program/hbcd.iso (hd32 ) map —hook chainloader (hd32) title Reset Administrator password map /program/BOOT-DSK.ISO (hd32) map —hook root (hd32) chainloader (hd32) boot title Victoria 3.5 hard drive diagnostics map /program/vcr35r.iso ( hd32) map --hook root (hd32) chainloader (hd32) boot title Shutdown PC halt
If you have any questions, welcome to the discussions!
When preparing a bootable flash drive, the full range of actions should include the stage of testing it. You should always check whether the media will present any unpleasant surprises when carrying out some important event such as reinstalling Windows or resuscitating it using LiveDisk
.
To check the created bootable USB flash drive, you need to restart the computer and configure the priority of boot devices in the BIOS
.
And then reconfigure everything again to start the computer from the hard drive. And if it turns out that the flash drive was written incorrectly, after overwriting it, all these steps must be repeated again. If the media is being created for the prospect of being used someday, but not now, it is not at all necessary to bother with all these actions. Everything can be checked without restarting the computer in a Windows environment using PC virtualization tools. And if the boot priority from a flash drive is configured on a hitherto unfamiliar device with a specific BIOS
, such a check will help eliminate the possibility of media failure and confirm the search vector for causes in the settings of the computer’s basic firmware.
What are these virtualization tools and how to use them?
is a small portable program for writing bootable flash drives. Among its arsenal, it provides the ability to test both its own work results and the results of work of similar software in the QEMU
- the simplest PC emulator.
We launch this program, check the box below for testing in QEMU
and start the operation.
In the QEMU
we will see everything that we would see on the screen during a traditional media check on real
hardware
.
– another simple portable program that offers the ability to test bootable flash drives using the QEMU
.
Plus, it allows you to test the distributions themselves. in the same environment, QEMU
can run
ISO
files without writing them to media.
This way you can see what exactly is offered as part of a particular LiveDisk
, investigate it, and also identify possible problems with the distribution itself.
Important point:
must be run as administrator.
If the program is opened in normal mode, without administrator rights, it will generate an error and will not launch the QEMU
.
To check the bootable USB flash drive, in the window, click the button to launch the last function.
(as it appears in Windows Explorer)
.
And we refuse to create a virtual disk image. This is an unnecessary action and does not in any way affect the startup process of the flash drive.
QEMU
– the simplest emulator, it is suitable for testing bootable media for their ability to boot.
Well, maybe just for a superficial inspection of their contents. But QEMU
will not provide the ability to interact interactively with
LiveDisk
.
If you need to explore the functionality of LiveDisk
, you need to resort to more complex computer virtualization tools.
You need to use a hypervisor program to create a full-fledged emulator - a virtual machine. Connect a virtual hard disk to it, perhaps place some test data on it, connect to the Internet, etc. Such hypervisor programs are and. With their help, you can test both the contents of ISO
images without writing them to media, as well as already recorded bootable media. The specifics of how this kind of software works cannot be learned in a couple of hours, so further instructions are provided for those who are familiar with at least the basics of this topic.
Checking UEFI flash drives on hypervisors
EFI virtual machines
– emulators of modern computer systems with BIOS UEFI. Like the latter, these machines:
Works with virtual GPTs
- disks;
loads a little faster thanks to the accelerated loading feature; interact with UEFI bootable flash drives: they are distinguished from the usual ones, which can be worked with in BIOS Legasy
, by the presence of special program codes in the distribution kit and the FAT32 file system.
To check such a UEFI
, you need to create an
EFI
and run it in a certain way.
In an EFI
are created in the same way as regular ones.
Only immediately after the creation stage you need to enter the machine settings and enable EFI
.
To boot EFI
-machine from a
UEFI
, you need to enter its window in the first seconds of startup
(double-click)
and press F10. Thus, we will find ourselves in some primitive analogue of BIOS. First, we connect the USB flash drive to the machine, then go to the section of this BIOS.
Select boot from USB
.
EFI virtual machine type
, implemented by means , is specified initially during creation. And subsequently cannot be changed.
In the active EFI
- machines of this hypervisor, first connect the flash drive.
Then turn off the machine and start it in the BIOS
.
As in the previous case, select launch from USB
.
Ready:
After the restart, we will see the media environment in the window.
Checking regular flash drives on hypervisors
Neither, nor do they know how to work with regular bootable flash drives. If the media is formatted in NTFS
and/or its distribution does not contain software codes for
UEFI
, it cannot be used either on real devices with
UEFI
or on their emulators. However, there is a way to interactively explore the contents of such media.
A special program is designed for testing ordinary bootable flash drives in the environment. It can be downloaded for free on a specialized forum using the link:
Download the program and unpack it. But before launching it, we will turn off the machine on which testing will be carried out and configure it. If it's an EFI
, then disable this mode for the duration of testing.
Next in the settings section “Media”
add
an IDE
controller.
It is considered an outdated technology and is not enabled by default. But it is with his participation that it is possible to connect bootable USB
devices.
Now let's launch. Click “Add”
.
In the columns shown in the screenshot below, select the test machine from the drop-down list (the one we just configured)
and a flash drive.
Click on the only line with the newly specified settings in the center of the window and click “Start”
.
Click “Yes”
.
The window should display the contents of the media.
To test a regular flash drive, you need to work with it in a virtual machine, when creating which the type was initially specified as non- UEFI
, and
"BIOS"
.
boot from a USB
drive using a universal tool - . It is designed for older computers that can only run from floppy disks and optical disks. We go to the website of this tool:
And download the latest current version. Unpack, remove everything except ISO
-file named . It must be connected to the virtual machine.
Setting up launch from CD
-drive.
The machine will start from the image. First of all, we connect a flash drive to it. Then in the menu itself we indicate “USB”
.
Ideally, this is the final stage: in the VMware window we should observe the contents of the media.
If this does not happen and displays an error, connect the flash drive to the computer port and repeat the last steps. If problems arise after this, we configure the machine to be compatible with the port.
MobaLiveCD is a free program for checking bootable flash drives and bootable CD/DVD discs. The MobaLiveCD program allows you to test the bootability of a bootable disk (flash drive, disk image) with an operating system, a bootable LiveCD, LiveDVD, or LiveUSB disk, or a bootable image in ISO format.
Many inexperienced users have difficulty checking bootable media, because to do this they need to enter the BIOS and then correctly set the computer boot priority.
How to check a bootable USB flash drive without restarting the computer? There are ways to check the functionality of a flash drive (bootloader operation, boot menu) without entering the BIOS and without using a virtual machine. Moreover, there is practically no chance to check the bootable USB flash drive on a virtual machine.
The free program MobaLiveCD is a simple tool for checking bootable media, the application emulates booting (works based on the QEMU emulator), thanks to which the user can check the bootability of a flash drive or disk image.
Many users download images from the Internet, various assemblies from unknown sources. MobaLiveCD will help check the operation of the bootloader so that the user can be confident that in the event of an emergency, the boot disk will do its job: boot onto the computer to perform the necessary actions.
You can download the MobaLiveCD program from the official website of the developer - Mobatek.
download mobalivecd
The MobaLiveCD program does not require installation on your computer; to launch the application, click on the executable file.
MobaLiveCD is the simplest and most convenient tool for testing bootable flash drives and ISO images.
Mobalivecd
- free and open source software for testing boot disks using virtualization technology from
Mobatek
.
The program simplifies and speeds up the entire process of creating, testing and configuring bootable media, which can be used as .iso
and removable USB drives (flash drives).
MobaLiveCD provides the user with the opportunity to perform all the necessary work on testing bootable media in the Qemu
, without affecting the operation of the main OS in any way and without the use of any additional software products, drivers, libraries, etc. In most cases, you don't even need to have administrative privileges for the current Windows user. And, in addition, the program does not require installation on the system, is small in size, and can be used as a portable application, including in the environment of system recovery and diagnostic tools based on Windows PE (ERD Commander, MS Diagnostic and Recovery Toolset, etc.) .P.).
You can download the MobaliveCD program from the Mobatek labs page.
Also, there is a Russian-language version of the program MobaLiveCD_ru2.1.zip, version 2.1, approximately 1.5MB
The program interface is very simple - all actions are performed using three main buttons of the main window:
Right-click menu
— creating a context menu item called with the right mouse button in relation to .iso files for direct loading of the ISO image.
Run the LiveCD
— loading from a selected ISO image.
Run the LiveUSB
- loading using physical media, which can be a flash drive, portable USB drive, memory cards, etc.
Overall, the MobaLiveCD
is not a tool with unique capabilities among virtualization software for testing bootable media, and its main advantage is ease of use. In order to test a bootable flash drive, it is enough to have the original image of the bootable system or bootable physical media and be able to press the desired button.
When booting, either from an image or from a USB device, the program asks for permission to create a virtual hard disk - Do you want to create a hard disk image for your virtual machine?
. Such a disk may be required in cases where the loading and performance of installation products that check the presence of at least one hard drive in the system are tested. To check the functionality of a bootable flash drive, as a rule, such a disk is not needed, and you can answer the request with “No”.
To switch input to the virtual machine, just click the mouse within the boundaries of its window; to release it, use the CTRL+ALT key combination. Switching the VM to full-screen mode and exiting it is performed using the key combination CTRL+ALT+F.