Pirated content, despite everything, remains relevant today. This happens because licensed games are very expensive. But everyone wants to play. Therefore, in this article we will look at the topic - how you can record any game on a flash drive for the Xbox 360. You will also learn how you can install any game for the console from the Internet.
What you need to install the game on Xbox 360
You will only need a flash drive and a Windows computer to download the game file. The size of the flash disk must match the size of the installation package. But that is not all. Every new Xbox 360 console comes with internal protection against pirated games. It will block all your attempts to install an unknown file. If you have not flashed it, then, unfortunately, you will not be able to install anything from a flash drive. There are many lessons and material on the Internet that will show you how to reflash your device. You can also contact one of the computer services. They will definitely help you here.
This is interesting: Xbox 360 gamepad emulators.
Summarizing
Now you know the algorithm for installing games from a flash drive on PS3. The protection system for consoles is constantly being improved and complicated. However, this is not the case with the PlayStation 3. Almost all versions were hacked by hackers. Of course, don't forget about Super Slim. It is recommended to bypass it for now and choose a console that came out a little earlier.
Instructions
Today, every PC user can install computer games on any type of removable media. It doesn’t matter whether it’s a large hard drive or a compact one – the game will work the same from any media. To install the game you are interested in on fl0-, you need to perform a number of specific steps during its installation. You should also consider games when choosing a flash drive for subsequent recording.
Select a flash drive for recording a computer game. To optimally use a flash card for such purposes, pay attention to how much space the unpacked game will take up. For more accurate information, you can initially install the game on your PC and look at the necessary data in the properties of the root folder. Having specified the size of the unpacked game, buy a flash drive so that its volume is 1-2 GB larger than the total volume of the game. So, if the game weighs 1.5 GB, a flash card with a memory resource of 3 GB is ideal for it.
Install the game on the flash drive. Insert the game disc into your computer and wait for the installation window to appear. As the installation folder, select the flash card that should be connected to the computer. After setting the necessary parameters, begin installing the application. Once the installation is complete, you will be able to run the game from the flash card.
Sources:
- installing a game from a flash drive
Xbox 360 is a game console from Microsoft, which is the main competitor of Sony Play Station consoles. In addition to its main purpose - connecting to TV for games, it also provides gaming via the Internet and supports downloading content.
You will need
- — a computer with a write drive;
- - double-layer DVD;
- - an image with a game.
Instructions
Use the CloneCD program to burn a disc for the Xbox 360. Download the application for this from the developer's website: https://static.slysoft.com/SetupCloneCD.exe. Install and run the program. Select the Write from ImageFile function, i.e. burning a disc from an existing image file. Click the “Browse” button in the window that opens.
Locate the folder on your hard drive that contains the disk image. Select a file with a dvd extension. The file name can be anything. Click the Open button. After selecting the image, click the “Next” button.
Select a drive to burn your Xbox 360 game if you have multiple drives installed on your system. Click Next. Select the desired recording speed. The time will range from 18 to 40 minutes. Ideally, the recording speed should be about 2.4, since the lower the speed, the fewer errors will be made during recording and the higher readability of the disc by the set-top box. If the disc is from Verbatim, select speed 4. Wait until recording finishes.
Burn a disc for Xbox using the ImgBurn application. Go to the Tools menu, select Settings and the Write option, check the boxes next to Dvd-r finalise disc, Enable burn-proof, cycle tray, verify against image file. In the Layer Break field, set the radio button to User Specified and enter 1913760. Set the process priority to high. Click OK.
Select the Write image file to disc command and specify the game image, then select the drive and set the minimum write speed. After that, insert the disc into the console.
Please note that if you downloaded the image to cut a disk for a set-top box, and there are several files, their names at the end contain part1, part2, which means that these are archived volumes and need to be unpacked before recording. Just right-click on the first part and select "Extract to current folder."
Video on the topic
Having found a game that you want to download to disk for xbox 360, you may encounter image files. You can rewrite them in the usual way, but they will not be read by the console. To display the game well on the Xbox 360, you need to correctly transfer the image files.
You will need
- - DVD+R DL disc (better TDK/Verbatim)
- - CloneCD program
- - image of the game
Instructions
Download the CloneCD program to your computer: https://www.slysoft.com/en/clonecd.html. Install it. Download the game to your computer. Remember the path to the desired folder and its name. Image files are represented by the extensions .dvd and .iso. Look carefully at the ending in the file name to accurately determine your format.
Launch the CloneCD program on your computer. To record, you will need the second option in the menu - “Burn CD of an existing file” / “Write from ImageFile”.
In the window that opens, click “Browse”/“Browse”. Find the game folder on your hard drive. Among the files, select an image file with the correct extension. It can have any name, just follow the designations at the end, after the dot, or in a separate window under the name. Click “Open”, then “Next”.
If you have several recording drives, choose the one you will use now. Click “Next”.
Specify the recording speed. It varies from 2.4x to 6. The best option is to record at 2.4x speed, then you will get a disc with fewer errors. For Verbatim 2.4x you can select mode 4 - the quality will be good and the recording time will be shorter than with 2.4x. On average, the entire burn will take from 18 to 40 minutes. Once selected, click OK.
Wait for the recording to finish. Check the disc on Xbox 360.
note
The recommended recording speed is written on the front side of the disc. You can stick to it, or, if you lack time, set a faster mode. Remember that this will degrade the recording quality, and when using the 6th speed mode, the disk will take longer to load.
Helpful advice
To choose the right disc, carefully read its name on the front side or box. It must indicate that it is DVD+R DL 8.5Gb. These are not simple discs, DVD5 format, but DVD9.
Xbox 360 is a popular gaming console developed by Microsoft. Unlike its predecessors, this console has a hard drive and is also capable of recording games to external memory media. To record, you must use the console interface.
To begin with, you need to choose, or rather select a game. It is necessary to take into account several factors, the size of the game (“weight”), system requirements and the presence or absence of the Internet. The “weight” of the game should be no more than the volume of the “flash drive”, and the system requirements must correspond to the computer on which we will play. If you are going to the country, with an old computer, without the Internet, I would recommend the following games to you: “Counter-Strike 1.6” (or “Source”)
“Minecraft” “Need for Speed” “GTA”
If the computer is powerful enough (the Internet is available again, missing):
“Call of Duty” “Battlefield” “Crysis”
Step 2
Utorrent icon
Now let’s move on to downloading the game (of course, it’s better to install the official version, not a pirated version, and from a disk, but you can’t argue with reality), I recommend downloading using “Torrent”, for this download the “Utorrent” program. Now, when searching for a game, enter “Download (game name) torrent”
Then I think you'll figure it out for yourself.
Step 3
Deamon Tools Icon
Now installing the game, if you are unlucky and you downloaded a disk image, that is, a file in “.iso” format, you need to download a program for mounting images, called “Deamon Tools Lite”, after downloading the program, add the file you downloaded to it, and select “Mount” (green triangle “Play”), then the installation window will appear, now the most important thing, select not “Disk D” or “Disk C”, but a “flash drive”, that is, “Disk F” (of course, in the beginning you need insert the flash drive into the USB port). After installation, a game shortcut will appear, clicking on which will launch the game. The “flash drive” itself will contain game files; they cannot be touched. Now drag the game shortcut to the flash drive. When you want to start the game, just insert the flash drive into the computer, drag out the game shortcut to the Desktop, and use it to launch the game.
Preparing a flash drive for recording
Our USB drive needs to be formatted. With these actions, all files on it will be destroyed. And it will be very difficult to restore them. Take care of them in advance and move them to a separate folder on your computer.
Next you need to do the following:
- The flash drive must be inserted into the appropriate slot on the computer. Open Windows Explorer and find it in the window. Right click on the icon and select “Format”;
- In the new window, you need to select “FAT32” or “FAT by default” in the “File system” line;
- There is no need to change anything else. You can uncheck the “Quick cleaning” checkbox at the bottom so that the system completely deletes the files without the possibility of recovery.
Select the USB flash drive in Windows Explorer
The set-top box only understands this file system format. If your flash drive has NTFS, then it must be formatted. Many flash drives are already sold in the format we need. If this is your case, then it is already ready for recording.
Loading a game onto a flash drive
If your console already has Freeboot firmware, the next steps will be easy to complete yourself.
- Format the flash drive in the system. To do this:
- connect the flash drive and right-click on its icon in Explorer;
- select “Format”, in the “File system” field select “FAT32”;
- click "Start".
Remember: formatting will delete all data from the drive!
- If the program does not read the desired image, that’s okay. This means that the image does not fit Freeboot firmware and needs to be converted. To do this, you need to download and install ISO2GOD, run it and open the image in it using the “Add ISO” button. Select the desired image, the folder where the converted version will be written and click “Save ISO”. The image will appear in the list and you can convert it.
Once the game has finished recording, safely remove the drive. Now you can run the game from a flash drive on your Xbox.
Preparing the file for installation
In order to record a game on a flash drive for Xbox 360, you need to create one single folder on the flash drive - GAMES. And it will contain the game you downloaded. Please also note that all words and folder names must be in English. The system will not allow the Cyrillic alphabet. And errors may appear during the installation process.
If you found a game and downloaded it in an ISO image or in an archive, you need to unpack it and move it to the GAMES folder only in its “clean” form. For Xbox 360 game images, you need a special utility - ISO2GOD. In it you need to unpack and move the file. If the game is in an archive (RAR, ZIP), download another utility - WX360. This can be used to unpack games. There is nothing complicated about this process.
The following steps in installing the application on the console should not be accompanied by problems or failures. The finished flash drive just needs to be inserted into the Xbox connector. Then open Explorer or file manager, in which you need to find the game file.
This may be useful: How to buy a 1-12 month Xbox Live Gold subscription.
If the software weighs more than 4 GB
Attention! If you are the owner of a PS3 Super Slim game console, no instructions for installing games will help you. To date, hacking it is not possible. The FAT32 format has remained very popular for a long time; almost all devices support it. But it has a big drawback - it does not recognize more than 4 GB of information on the disk.
If the game weighs more:
- The flash drive needs to be formatted in a new way. But now you need to specify NTFS instead of FAT32;
- Transfer the game files to a flash drive and insert it into the connector on the console;
- Turn on your PS3 and open MultiMan in it. This program works in two modes. We need the "MultiMan" mode;
- To go to it, open the menu of this program and select the desired mode here using the L1 or R1 button;
- Then go to the left in the program for settings;
- Select the line called “Switch to MultiMan mode” and confirm to open it. You need to press the cross button on the joystick;
- MMCM mode should reboot. After which MultiMan should be displayed. We go down in this window to find the switch between two formats - NTFS and FAT32;
- Then you need to enter the file manager and transfer the game to the following path “dev_hdd0-GAMES”.
After this, we reboot the console. This completes the process of installing the game from a USB flash drive to the PS3 console. Now you can play your favorite strategy game on your console.
Installing a game on Xbox 360
To continue, we need to transfer game files to the Xbox 360 hard drive. The standard explorer of this console is very similar to the well-known file manager for PC Total Commander. On the left we can open the disk itself, and on the right its contents will be displayed. Find it in the main menu and launch it. After this, you need to open the game folder and press the right Shift of the joystick. To start copying, press button A.
File Manager for Xbox 360
The process will start. After it is completed, you need to go to the main screen. Then select console settings. Here, find the “Scanning” item and activate it. This will allow the Xbox system to search internal memory and update the list of applications if new ones are found there. When the system carries out such a check, you will be able to launch the game from the general list. You can also simply restart your game console. Every time the system starts, it checks for updates on its own.
Formatting external media
To properly launch a game from a flash drive on PS3, you need to prepare the external media itself for further use. The correct file format is very important, otherwise your set-top box will not be able to read the information correctly.
You can format a flash drive yourself, using a computer or laptop. It is very important to save all the files from your drive somewhere else. They will be deleted after formatting is complete. The file system must be named FAT32.
Once you are done with this (the formatting manual can be found in the public domain), create a folder on a blank flash drive. It should be called Games. This is where you will need to drop all the files that you will download a little later.
Now it’s worth considering how to install the game on a flash drive so that the console can see it. To do this, download the file as usual, using any torrent convenient for you. Then check everything you downloaded. Folders named PS3_GAME and Usrdir are important for you. If they are not inside, it means that this distribution is not suitable for further use. It is also worth paying attention to the fact that the names do not contain the Russian alphabet.
On a FAT32 system, there is a limit for writing files - only four gigabytes. The Split4GB program should help you record files that exceed these dimensions.
Where to get games for the console
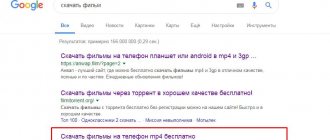
There are a lot of resources for downloading games for the popular Xbox 360 console. There is both a site with executable files and torrent trackers. To download torrents you need a special program - a client. The most famous of these are uTorrent, BitComet, MediaGet, ComboPlayer, etc. But be careful when installing them. Since clients often suggest installing other unnecessary programs for their PC.
As for resources, you can find popular games, for example, on the special https://xbox-torrent.ru/. The clients themselves allow you to search for the files you need on popular trackers. Install one of the suggested ones and open the search section. The search can be configured to only search for games. You can also tell the program which trackers you want to search on. Today this is the most popular way to quickly get the desired new product. After which you can record any game onto a flash drive for the Xbox 360 console using the instructions already provided.
Let's sum it up
Despite the serious fight against pirated products in the country, the opportunity to download your favorite gambling entertainment is always available on the Internet. For PlayStation 2 owners, launching games from a flash drive is an excellent opportunity to use your favorite video games for free and return to childhood, at least for a short period of time.
Follow the instructions, be careful when downloading and uploading files, and the result will justify your efforts.
Hello dear readers. Often there is a need to install a game on a flash drive. After all, you don’t need to carry the installation disk or the same laptop with you. In addition, the issue of moving to a country house or to another city is simplified. The flash card should be inserted into the USB input of a computer suitable for its technical characteristics and easily plunge into the virtual world of games.
The procedure for installing the game on a flash drive is very simple. A little patience and free time will allow you to record data about any game on a memory card.
To begin, you need to save a disk image of your game to your computer from the Internet or create it yourself. Most often, this is the “*.iso” format, which can be obtained using simple disc processing programs such as Ashampoo Burning Studio, Alcohol 120%, etc.
Installing games on a flash drive requires the mandatory step of formatting the memory card. This procedure must be carried out to ensure that the disk drive is displayed correctly during installation and recognized by the operating system.
At the preparation stage, you should download and install the Deamon Tools Lite program. The most popular tool for creating virtual disks and modulators for games. With it you can easily install any game and professional software without additional in-depth knowledge.
The preparatory stage is over. Open the Deamon Tools Lite program and add the image of our game. At this time, insert the flash drive into the connector. Physical and virtual drives are displayed at the bottom.
Right-click on the image that appears on the right and see the mount option.
Do not hurry.
First, it is important to select the flash drive from the list of drives.
Then, during the installation process, working files will appear on it, a shortcut on the desktop. We transfer it to a flash drive and that’s it. Installation of the game on the flash drive is complete. You can try removing and reinserting the drive in test mode to see if your game will launch.
how to install a game from a flash drive on a computer
https://ru-sku.livejournal.com/533883.html
"Choice of Chinese tablet 2013
Dozens of Chinese online stores sell hundreds of different tablet models with prices ranging from $60 to $400. How not to get confused in such abundance and choose exactly what you need? In this article I will give general recommendations that will help you make your choice.
First of all, let's figure out why you need a tablet. Here are its main uses: • Internet browsing • Games • Watching movies • Watching Internet videos • Reading electronic documentation (pdf, djvu) • Reading e-books (fiction) • Listening to music • Use as a large navigator, working with maps • Special applications (equipment control, etc.). In my opinion, fiction should not be read on a tablet - an electronic book with an e-ink screen is more suitable for this. At the same time, documents in pdf format are inconvenient to read on such books (as a rule, pdf is laid out for a large format, so for comfortable reading you have to constantly move the picture, and on books with e-ink this is quite slow), so reading electronic documents is the prerogative tablet. Perhaps the most important thing in any tablet is the screen, so let’s start with it.
Screen size
There are four standard screen sizes - 7″, 8″, 9.7″ and 10″-10.1″. At the same time, 7″ and 10″ screens have an aspect ratio of 16:10, and 8″ and 9.7″ screens have an aspect ratio of 4:3 (let me remind you that the iPad has a screen size of 9.7″, the iPad mini has a 7.9″ aspect ratio. Both have an aspect ratio of 4: 3). A 16:10 wide screen is better for watching movies. For browsing the Internet and reading, a 4:3 format tablet is more convenient: it can be used both horizontally and vertically. It’s not very convenient to use a 16:10 format tablet vertically - it turns out to be too narrow and tall. The big advantage of a seven-inch tablet is its light weight and size. It is easy to hold in your hands for a long time and fits into a jacket pocket or handbag. The 7″ screen size is quite sufficient for games (after all, almost all of them were created for mobile phones with much smaller screens) and watching movies on the go. For the Internet and reading, the wide 7″ screen is too small. Yes, everything is visible and you can use it, but 8″-9.7″ is much more convenient. Tablets with a wide screen 10″-10.1″ are not very practical in my opinion.
Tablet weight
When choosing the size of your tablet, you should pay attention to its weight. A good weight for a seven-inch tablet is 300-330 grams. A 9.7″ tablet weighs 586-730 grams (iPads weigh from 601 to 662 grams depending on the model). 662 grams of the New iPad 4G is quite noticeable - it’s difficult to hold it for a long time. After the release of the iPad mini, Chinese 8-inch tablets with light weight (390-430 grams) began to appear, but they are still far from the 309-gram iPad mini. All old models of 8-inch Chinese tablets are very heavy - from 490 to 620 grams.
Screen type
There are two main types of screens used in tablets - IPS and TN. IPS has maximum viewing angles and excellent picture parameters, but it is more expensive. TNs come in very different quality: on some screens the picture may darken when the angle is deviated downwards by as much as 5 degrees, on others it looks quite decent when viewed at large angles. If you buy a tablet with TN, it makes sense to look for reviews on the Internet about its screen or, if possible, look at the screen before purchasing. Another type of matrix - MVA is almost as good as IPS, but it is rarely used.
Screen resolution
Seven-inch tablets use screens with resolutions of 800×480, 1024×600 and 1280×800 pixels. If you plan to use the tablet for browsing the Internet and reading, I strongly recommend not to buy a tablet with an 800x480 pixel screen, because the text on it does not look clear enough. Modern 8″ tablets have a resolution of 1024×768 pixels, but there are also older models with a screen of 800×600 pixels. Of course, I don’t recommend taking a tablet with a screen of 800x600 pixels, because 800 pixels wide is not enough even for a 7-inch screen. For 9.7″ tablets, the standard screen has a resolution of 1024×768 pixels (like the iPad 2), but tablets with retina screens of 2048×1536 pixels (like the iPad 3 and 4) have begun to appear.
Screen sensor type
All modern tablets have a capacitive sensor that responds to touch. Different tablet models support different numbers of simultaneous clicks (points) - usually from 5 to 10, but this is not very important. Capacitive sensors may vary in quality - some models may have a sensor that performs worse than others. There may be a decrease in sensitivity at the edges of the screen, and a decrease in sensitivity occurs when contact between the tablet body and hands worsens, so it is important to look at reviews for specific models. There are still older tablet models with resistive touchscreens on sale. It requires tapping on the screen and does not allow for full multi-finger control. I recommend buying a tablet only with a capacitive sensor.
Nutrition
Tablets differ in power consumption and battery capacity. The standard is considered to be 3 hours of operation at maximum load and 5 hours of video viewing mode with WI-FI turned off. There are models that work in video viewing mode for up to 10 hours. In addition to data on sellers’ websites, it makes sense to look for customer reviews, because sellers’ data is not always true.
CPU
The most popular processors of 2012 are dual-core Rockchip RK3066 and Amlogic 8726-M6(MX), operating at frequencies of 1600 and 1500 Mhz. These processors are built on the Cortex A9 architecture and have an integrated Mali 400 GPU. Cortex is not a processor model, but an architecture from ARM, which does not make processors itself. You can read more about the types of processors here: https://androidtabs.ru/processory.html. Now tablets are appearing on the new Allwinner A31 quad-core processors with built-in PowerVR SGX544 MP2 graphics core. Most likely, these processors will be very popular in 2013 models. There are also tablets with older processors on sale. Thus, at the beginning of last year, the AllWinner A10 chip was popular, including an A8 core operating at a frequency of 1000-1200 Mhz and a Mali-400 graphics core. Although this processor is outdated, the Internet, video, and toys work quite normally on it. There are still cheap tablets on sale with VIA WM8650 800Mhz processors. These tablets work extremely slowly (so slow that you won’t even be able to fully use the Internet or play the simplest games).
Memory
The tablet has three or four types of memory: 1. RAM - random access memory necessary for running programs. Available in sizes from 256MB to 1GB. Must be at least 512 MB, but 1 GB is better. 2. System flash memory on which the operating system and programs are installed. It is desirable that this memory also be 1GB. 3. MicroSD card slot. The card can store video files, music, data, and also install some large programs and games. 4. Internal storage. Replaces or supplements a memory card. Typically it has a capacity of 8GB or 16GB, but the actual capacity will be 6 or 14GB. It is not at all necessary to strive for 16GB, because you can always use a MicroSD card.
Means of communication
All tablets have WI-FI. Some models have problems with reception quality, so it's worth reading reviews. Bluetooth is quite rare, and is it really needed? There are quite a few Chinese tablets with a built-in 3G modem and SIM card slot. Therefore, you can hardly hope to find a tablet with 3G that is good in all respects, but there are two solutions that replace the tablet’s built-in 3G: 1. Most tablets support an external USB modem. You don’t even need to configure anything: after connecting the modem, the tablet goes online on its own. It is only important that your modem is included in the list of supported ones. The most standard modems that support everything are Huawei E1550, E1750. To connect the modem, you may need an OTG cable, which may not be included with the tablet. 2. All Android smartphones (and iPhone too) can work in access point mode. In this case, the phone becomes a wi-fi router. Setting up this mode on your phone is very simple.
USB and OTG
All tablets have a USB port for connecting to a computer, almost all have an OTG mode (connecting USB devices to the tablet). For OTG there can be either a large USB connector, a separate MiniUSB connector, or even a single MiniUSB connector used both for connecting to a computer and for OTG through a special OTG adapter. Some tablets come with an adapter, while some need to be purchased separately.
Via OTG, you can connect USB modems, flash drives, card readers, mice, and keyboards to the tablet.
GPS
Most cheap tablets do not have a GPS module. If you plan to use the tablet as a navigator or to work with maps, look for a model with a built-in GPS receiver.
Camera, HDMI
All tablets have a front camera (some also have a rear camera). Is it necessary? In my opinion, not very much. Front only for Skype. Using a tablet as a camera seems quite funny to me. The quality of cameras in most Chinese tablets is very low - manufacturers install the cheapest camera “for show”. Many tablets have an HDMI output (usually a MiniHDMI connector) for connecting to a TV.
Model fame
Many Chinese tablets do not have any name or model. When buying such a tablet, you need to understand that if something goes wrong, you will be left alone with it and are unlikely to find help on the forums. You can't count on new firmware either. At the same time, almost every nameless tablet is an analogue of some well-known model, but the analogy may not be complete. I recommend choosing a tablet that has a brand name and model. Before purchasing, you should see if there is a thread dedicated to this model on the main tablet forum - 4pda.ru (https://4pda.ru/forum/index.php?showforum=400 and https://4pda.ru/forum/ index.php?showforum=336). Chinese brands Ainol, YuanDao (Window, Vido), Pipo, Onda, Ployer momo, Hyundai, Cube, Ramos have proven themselves well.
operating system
Almost all Chinese tablets run on Android. Tablets with Android versions lower than 4.0 are no longer worth buying. Before purchasing, it makes sense to see if there are alternative and improved firmware (https://4pda.ru/forum/index.php?showforum=401 and https://4pda.ru/forum/index.php?showforum=327). So for many Ainol tablets there are Cyanogenmod firmwares that completely replace Chinese builds of Android.
Google Play
It is very important that the tablet operating system supports Google Play (formerly Android Market). This will allow you to install any programs, of which there are hundreds of thousands on Google Play. If support is not available initially, installing it can be difficult and sometimes impossible.
Search, selection and reviews
You can read reviews about tablets in buyer communities: ru_sku
and https://mysku.ru, as well as on the forum https://forum.4pda.ru. Once you have made your choice, you can start looking for specific models in Chinese online stores. There are now several dozen well-known stores; to search for them you can use https://chinaprices.ru and https://searchsku.ru. There you can also find discount coupons for all stores. I hope the above recommendations will help you with choosing a tablet. So, what, in my opinion, is not worth buying: - nameless tablets; — tablets with resistive touchscreen; — low-resolution tablets (800×480 for 7″, 800×600 for 8″ and 9.7″); — tablets with Android versions lower than 4.0 (since they have old Android, the hardware is outdated); — tablets with a large weight (more than 350g for 7″, more than 450g for 8″, more than 650g for 9.7″). When buying a Chinese tablet, I would choose one of the options for myself: 1. 7″ IPS 1024×600 or 1280×800, up to 330 grams, a well-known model. 2. 8″ IPS 1024×768, up to 430 grams, well-known model. 3. 9.7″ IPS 2048×1536, up to 650 grams, well-known model. Don't be surprised that I don't specify the processor type. The fact is that with the combination of an IPS matrix type, good resolution, low weight and a well-known model, the processor will automatically turn out to be modern. In conclusion, I note that any Chinese tablet will most likely have some disadvantages. Perhaps you will be lucky, and the shortcomings will be so insignificant that it will seem that they do not exist. But in any case, you need to understand that the Chinese tablet will be inferior to models from world-famous manufacturers, but it will also cost 3-5 times less. ps Six months ago I already wrote about choosing a Chinese tablet (https://ammo1.livejournal.com/270349.html). During this time, a lot has changed, so I brought the article about choice to today’s realities.” © 2013 Alexey Nadezhin
How to download a Flash game in Yandex Browser?
Any user can easily find the link and save the necessary data for later offline use if they strictly follow the instructions below.
Instructions:
- Open the game application page
- Launch the program. There may be problems with this step. If the latest version of Flash Player is not installed on your computer, plug-ins are not allowed to run, or the server does not support working with this browser or with users from certain countries, then the data download will be interrupted. You will not be able to use the program or download it to disk until the problem is resolved.
- If the download and launch process is completed successfully, right-click on the page and select “View page code” from the drop-down menu.
- Go to the page with the source code.
- Press the key combination Ctrl+F.
- In the form that appears, enter swf.
- We are looking for the link https://www.shockwave.com/content/plantsvszombies/sis/pvz_9_15.swf?hash=4d54d09a3145c2898fa330616450e15d or similar, depending on the game and the address of the site on which it is located.
- Copy the found link and paste it into the address bar of a new window. Press the Enter key.
- The download will begin. We wait until the file is completely downloaded, and we can start having fun. Now all the necessary data is in the cache. The user can use them at any time to run the program without an Internet connection. To extract the application, you need to click on the “Save” button. It's in the address bar on the right. A file with the SWF extension will be saved in the “Downloads” folder, which can be played at any time using a special player. It was not possible to extract this particular game. The saved file cannot be played. If the user does not clear the history, then it will be possible to play without extraction directly in the browser. To avoid searching for the required file in the cache, make a bookmark.
Game installation options
❶. If it was downloaded from the Internet (working with the image)
Most often you have to install games that were downloaded from the Internet. They usually present an image in ISO format (less commonly MDF, MDS, BIN, NRG and a number of others). Many beginners simply don’t know what to do with such a file (after all, you can’t launch it with a double click of the mouse