Types of platforms on Android
Due to the fact that computers use a different architecture from mobile, installing an Android distribution for a smartphone on them is simply impossible. Therefore, modified versions of the operating system are used. They are optimized for the currently most popular x86 computer architecture. The most common distributions include the following:
- Android x86;
- Remix OS;
- Phoenix OS.
Let's look at each of them in more detail.
Android x86
Android x86 is an unofficial mobile OS distribution that is designed to be installed or run on computers with x86 architecture. It was developed by Chinese programmers Zhi-Wei Huang and Li Song.
Essentially, the OS is an almost unchanged Android kernel, which is supplemented with patches that allow it to work with x86 devices. The OS has retained its familiar appearance, which can be seen on any mobile device, as well as all functionality (including the ability to use installation files with the .apk extension, install programs using them, and then launch installed applications).
At the same time, Android x86 is compatible with almost all computer hardware currently in use. It works great with Intel and AMD processors, and works successfully with nVidia and Radeon video cards. Full compatibility with the integrated Intel graphics core has also been confirmed. If the installed video adapter is not supported, the OS will process the image programmatically, using processor resources.
Like other Android-based operating systems, the software is completely free. It can be downloaded from the official website of the developers. The distribution download page is located here.
Remix OS
Remix OS is an operating system that was developed based on Android x86. However, it has a number of significant differences from its ancestor. Here are the main ones.
- Interface. If in Android x86 the interface has not changed at all, then in Remix OS it has become different. It was optimized for use on desktop devices and brought as close as possible to the appearance of other OSes, incorporating all the best. Now there are full-fledged windows, an analogue of the start button, taskbar and even the start menu. It is convenient to interact with all interface elements not only with your fingers, but also with the mouse.
- Compatibility. Remix OS is designed to work with Intel processors. The developers do not guarantee normal functioning with AMD.
- All Google services have been removed. Remix OS lacks software from Google. At the same time, the operating system can fully function without it.
- UEFI support. The system is optimized to work with modern UEFI bios.
- Closed source. Any Android OS is open source and anyone can make changes to it. In Remix OS it is closed. This means that only operating system developers can edit it.
Remix OS development is currently closed. New versions of the OS are not released, and old ones are not supported. However, it has a successor - Prime OS, developed on its basis. It is completely free and available for download on the official website of the developers at. Remix OS can now only be downloaded from third-party sources.
Phoenix OS
Phoenix OS is an operating system that is also based on Remix OS, which is no longer supported. In fact, the software is an improved version of it. The operating system interface is even closer to the appearance of Windows. The OS also works only with processors manufactured by Intel.
Because Phoenix OS requires relatively new processor instructions, it will not run on processors that were manufactured more than five years ago.
Phoenix OS is completely free. You can download its distribution on the official website of the operating system developers. The download page is located at. For Russian users there is general information and instructions on the OS in Russian.
Selecting an operating system based on Android OS: Android x86 and Remix OS
Table of contents
- Introduction
- Android-x86 (Android 5.1)
- Acquaintance
- Beginning of work
- Application testing
- Performance
- conclusions
- Acquaintance
- Beginning of work
- Application testing
- Performance
- conclusions
Introduction
For a whole month, the laboratory of the Overclockers.ru website has been testing OS Android emulators. But what if you need a full-fledged operating system built on the source code of that system? Perhaps it's time to consider a couple of contenders.
We currently have two participants in the list of test systems - the original Android-x86 and the deeply customized Remix OS. These operating systems differ markedly from each other, and their common points of contact are the source code and support for the corresponding applications.
Let's take a look at each of the systems separately, consider all the details and oh. And to get a complete picture, at the very end we will say a few words about another developing operating system, which is built on Android, but has not yet left the test mode.
The test equipment used was a Lenovo Y510p laptop (Intel Core i5-4200M 2500 GHz, GT 755 SLI with 2 GB of memory, 4 GB of RAM, 1 TB HDD, Full HD, OS Windows 10 64-bit), as well as Acer W701 tablets ( Intel Core i5-3337U 1800 GHz, Intel HD Graphics 4000, 4 GB RAM, 120 GB ROM, Full HD, Windows and Lenovo Miix 2 10 (Intel Atom Z3740 1330 MHz, Intel HD Graphics, 4 GB RAM, 64 GB ROM, Full HD, Windows 8).
announcements and advertising
2080 Super Gigabyte Gaming OC for 60 rubles.
Compeo.ru - the right comp store without any tricks
RTX 2060 becomes cheaper before the arrival of 3xxx
Ryzen 4000
series included in computers already in Citylink
The price of MSI RTX 2070 has collapsed after the announcement of RTX 3xxx
Core i9 10 series is half the price of the same 9 series
The price of memory has been halved in Regard - it’s more expensive everywhere
Android-x86 (Android 5.1)
Acquaintance
A pure classic Android system is always good because it does not contain anything superfluous and provides a decent level of performance. But this is only on those smartphones and tablets that are approved by Google. What about the operating system created based on the original image?
Android-x86 is a user project that has nothing to do with Google and is supported only by the users themselves.
Beginning of work
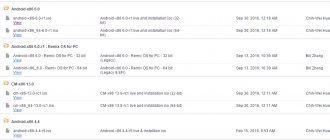
To download the system image, you need to go to the official Android-x86 website, which does not shine with design and beauty, and select the required OS version. And since the project originated in the summer of 2009, the choice of operating systems is wide, ranging from Android 2.2 Froyo to the more or less current revision of Android 5.1 Lollipop. We will be testing the latest version - OS Android Lollipop.
Download the image, write it to a USB drive and install it. By the way, from “everyday experience” I will say that the drive on which the system will be installed is best formatted in EXT4 for Lollipop and EXT3 for other versions. Otherwise, Google applications and system maintenance software (such as SuperSU) will display a drive error.
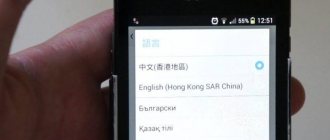
After all the manipulations, the system boots, naturally, a little longer than usual. And then we need to go through the process of pre-configuring the operating system: select the language of use, connect to a wireless network, add your Google account, and so on.
Then we find ourselves on the main screen of OS Android 5.1.1, which does not differ in anything supernatural from the classic image of the operating system.
Accordingly, the menu with applications, the curtain with notifications, settings and all other elements have retained their original appearance: nothing has been redesigned, nothing has been changed. Only adapted for computers.
There are a minimum of pre-installed applications, basically all standard programs are present and nothing superfluous. Even GAPPS is not included in all assemblies; in our version, a couple of Google programs followed the standard.
Since there is nothing new in the Android-x86 system image, let's talk about operational details. Let's start with the main thing, namely management. Due to the fact that the system is completely original, and the Android OS is not intended for use on a PC, corresponding management difficulties arise. Most modern games require using two or three points of contact with the screen at the same time, but this is not possible here - most computers are not equipped with a touch screen. If it is, then the display will work, but if not, then you need to use the Tincore Keymapper application for these purposes.
Android-x86 has a sleep mode that is automatically activated after closing the laptop lid or tablet case (of course, with a magnetic sensor or if there is a proximity sensor). True, depending on the build and version of the system, the operation of sleep mode and even its presence may change. In the case of the “original” OS Android 5.1.1, everything is exactly as described above.
And one more important point. In Android-x86, by default, all combinations of the Fn function keys work, as well as Print Screen - one press and the screenshot is saved in the system. It's comfortable.
Application testing
To my surprise, Android-x86 works great with almost all applications and games. Everything we tried launched and worked without any problems, even Real Racing 3.
The WOT Blitz game on both Lenovo Miix 2 and Lenovo Y510P worked with the maximum number of frames - 60 FPS. Only sometimes the number of frames per second dropped to 45-50. You can even install higher quality textures, increase detail and enable effects - with this set we will get 30-35 FPS.
Here is a summary table of application performance.
| Application | Version | FPS | Problems |
| Angry Birds 2 | 2.5.0 | >60 | – |
| Riptide G.P. | 1.6.3 | 50-60 | – |
| WOT Blitz | 2.7.0 | 50-60 | – |
| Need for Speed No Limits | 1.2.6 | 30-45 | – |
| Clash of Clans | 8.116.11 | >60 | – |
A small nuance. If any game crashes with an error or does not start, you need to go to the following path: “Settings” - section “Device” - “Application Compatibility” - and check the box next to “Enable native bridge”.
And if in some games you have problems with textures, from which no one is immune, then you need to wait for the system or game to be optimized, or install GLTools or Chainfire3D and try to configure the game for a specific device.
Performance
Android-x86 latest build is based on Android OS 5.1.1 and contains all the necessary security packages. The system boot speed depends on the device configuration, generally up to one minute even on the most ancient device.
Hardware acceleration works with video adapters from Intel, AMD and Nvidia. But you need to be more careful and familiarize yourself with technical forums in advance, since GMA series video cards, which are based on PowerVR, and AMD Radeon up to the seven thousandth series are adequately supported. Various problems arise with other hardware. In this case, you need to test various assemblies, including custom ones, but all this is at your own peril and risk.
Wi-Fi and Bluetooth can be problematic, especially if the device is very old and lacks software support. Basically, only Broadcom chips work well. You can check support for a specific model in a special table on the official website of the project.
The results of synthetic tests are quite average, say, a little better than those of emulators. True, depending on the build and version of the system, the performance and operability of the system can change dramatically.
| Test | Program version | Grade |
| AnTuTu Benchmark | 6.0.4 | 110 000 |
| Geekbench | 3.4.1 Build 1047 | 1 300 and 2 200 |
| Quadrant | 2.1.1 | 7 300 |
conclusions
Android-x86 is a good option for those who know first-hand all the intricacies of using the Android system. In this case, users may have to struggle with hardware compatibility, look for a suitable OS version, and install the operating system more than once. And if you are ready for this, then it will please you with good performance and stable operation.
| Developer | Android-x86. |
| Price | For free. |
| Requirements | 1 GB RAM, 15 GB ROM. Processor and video adapter support may vary by model. |
Selecting a distribution and downloading
So, we have decided on the distribution. Now you need to download it. To do this, just follow a few simple steps:
- go to the software developer's website;
- go to the OS download section;
- select the appropriate file type;
- click on the link;
- wait for the download to complete.
Typically, developers offer several types of installation files at once.
- EXE. Executable file for Windows. Suitable for installing Android on a separate disk partition while maintaining the previous operating system. Can be used while Windows is running.
- ISO. Installation disk image. Designed for recording to DVD or memory card.
- RPM. Package manager for operating systems based on the Linux kernel. Requires certain knowledge in working with them, as well as using the command line. For this reason, it is not suitable for most users.
Files with the ISO extension are most suitable for use on a desktop PC. They can be written to a flash card and used on any device. In addition, the OS can be launched directly from the drive without installation.
What is Android
The Android base began to gain crazy popularity in 2008-2009, displacing outdated Windows Mobile and Symbian and presenting serious competition to the neighboring renovator - Apple products. Its appearance created an incredible sensation on the market of smart gadgets - Android instantly became an impeccable, undisputed leader in its field. According to statistics, by the middle of the second decade of the 21st century, more than 80% of all mobile devices were based on Android, while Apple products faded into the background. Android is an operating system that is positioned for multitasking, and has a modern Linux base. Its undoubted advantages are competitive performance and open, proprietary code. The first version of the program was presented back in 2008. Since then, automatic updates appear several times a year - so, by the end of 2020, devices were already running Android 8.0 Oreo.
With each new version, the program adds more and more useful features, and the best performance indicators and economical energy consumption of the gadget are noted. At the moment, not only smartphones work on Android, but also tablet personal computers, “smart” systems and other devices from dozens of European, American and Asian companies.
Main advantages of Android OS:
- Mode for receiving/making voice calls;
- Working with mails;
- Support for many wireless modules that provide round-the-clock, continuous access to the network and more (3G, 4G, GPS/GLONASS, Wi-Fi, NFC, etc.);
- Ease of use thanks to a variety of touch surfaces, sensitive touchpads, electronic keyboards, etc.;
- Support for video calls to communicate with loved ones at a distance;
- Shooting video in high resolution, as well as the ability to create high-quality, almost professional photographs;
- A wide range of options for protecting and maintaining the confidentiality of personal data (for example, fingerprint or voice verification);
- Convenient work with external devices and storage devices.
However, the main advantage of Android can be considered the unlimited ability to install absolutely any application at the user’s discretion. Since modern developers do not stop short of achieving their goals and constantly release interesting, entertaining games, useful gadgets and other cool content, the ability to download it at any time (if there is enough free device memory) is a huge plus for users who keep their finger on the pulse of events . Nowadays, Android-based phones literally contain a whole life: with their help you can communicate on social networks, study the necessary information, watch the latest cinema, enjoy new songs from your favorite artists and much more.
Creating bootable media
After downloading the ISO file, you need to burn it to a disk or flash drive (that is, bootable media).
Writing to a CD or DVD is possible using standard Windows tools, which have appeared since version 7 of the operating system. To do this you will need:
- insert the disc into the drive;
- open the folder with the image and double-click on it;
- select the disk on which the system will write the image;
- wait for the recording to finish.
As for the flash card, it cannot be written using standard Windows tools. To do this you will have to use special software. The Daemon Tools application is best suited for this purpose. However, you need to take into account that the program is paid. There is also a freely distributed version, but it does not have the function of writing images to a memory card.
The paid option has a trial period of several days. It is quite enough to create a boot image of Android.
To write an image to a memory card using Daemon Tools, you will need to perform the following steps:
- on the main screen of the program, select the memory card icon;
- connect the drive to the computer;
- select disk;
- choose an image;
- select record type;
- press “Start”;
- wait for the recording to finish.
After this, the flash card is ready to be used as bootable media.
Creating a partition on a hard drive for Android OS
If you need to save an operating system already installed on your computer, you must create a partition on your hard drive before installing it. On Windows 7 and 10, this will require the following steps:
- right-click on the “My Computer” icon on the desktop;
- in the menu that opens, select the item called “Management”;
- in the window that opens, find the “Disk Management” section in the right panel;
- right-click on the disk where the OS will be installed;
- select “Compress volume” and select the compression volume;
- wait for compression to finish;
- right-click on the new section that appears;
- select “Create simple volume”;
- indicate its size and assign a letter;
- format the new partition (to do this, check the corresponding box in the volume creation dialog box);
- Click the “Done” button.
That's it, a new partition on the disk has been created. Now you can proceed to the next step.
BIOS setup
The next step that needs to be done is setting up the BIOS to boot from exactly the media on which the distribution of the Android operating system is recorded.
You need to remember that BIOS comes in two types:
- the BIOS itself;
- UEFI.
The differences are that the first one does not have a graphical shell and is controlled using the arrow keys and the Enter button. The second is essentially an operating system within an operating system. It has a full-fledged graphical shell, with which you can interact in a way more familiar to the modern user - using a computer mouse.
To enter the BIOS, you must press the Delete key while the computer is starting. It is enough to do this once. In order not to miss the moment of pressing, you can press it several times in a row. This must be done before the operating system boots. After completing this action, the user will be taken to the BIOS.
In order to set the priority of the bootable media, you need to go to the menu called Boot. It lists all media connected to the computer, as well as the order in which they are used. The first place is the hard drive on which the operating system is installed. Instead, you need to set priority to the previously created bootable media.
The procedure for changing boot priority on computers with UEFI installed is fundamentally no different. Even the corresponding menu there is called exactly the same (or in Russian: “loading”).
On most older motherboard models, the boot menu can be accessed without entering the BIOS. To do this, you must press a key before the operating system boots. It is different for different motherboard models. For example, on ASUS it is F8, and on ASRock and MSI it is F11. After pressing the corresponding key, a small menu will open in which you can set the priority of the media to boot.
What should you pay attention to?
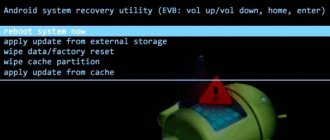
All settings are visible in the figure. The utility does a lot for the user, and therefore I am writing after the creation of the flash drive with Android is completed. However, before you begin installing Android on your computer, note the following:
- The file system type is correctly specified (FAT32 by default)
- the correct letter is assigned to the disk (it should not be duplicated with other volumes of the system)
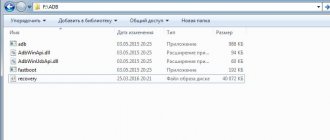
At the time of editing the article, the Rufus when recording a bootable USB flash drive for Android looks like this (pay attention to the cluster size):
To avoid boot errors, carefully read the contents of the window (so check your BIOS settings):
so as not to see this window when loading:
How to install Android on PC
There are two options for installing Android on a personal computer:
- as the main operating system;
- as an additional operating system.
Let's look at each of them.
Primary OS
Installing Android as the main OS means completely erasing the Windows that previously controlled the computer.
However, this approach has a number of disadvantages. Here are the main ones.
- Android cannot properly run Windows executables with the EXE extension. And they are used by most of the software that is used by every user.
- The interface of desktop versions of Android is not as convenient as the interface of full-fledged operating systems for a personal computer.
To install Android as the main one, you only need:
- create bootable media;
- set the boot priority for it in the BIOS;
- run the installation, specifying the drive partition containing another operating system.
After the installation procedure is completed, the old OS will be completely erased, and Android will take its place.
During installation, you must allow the system to edit and delete files located on the hard drive.
You can make Android your main OS without deleting the old one. To do this, you need to install it in a previously prepared separate disk partition, and then set the default boot. You will need to do the following:
- install Android;
- run on a Windows computer;
- right-click on the “My Computer” icon;
- select the “Properties” menu;
- select “Advanced options”;
- open boot options;
- select Android as the default boot OS.
As a result, Windows will remain on the computer, but will become an additional operating system. The main one will be Android. It will be the one that will load when you turn on the computer. However, if necessary, you can also start Windows. To do this, you will need to press the F10 key before loading the operating system, and then select the appropriate OS from the list that opens.
Additional system
Installing as a secondary system means that another OS (for example, Windows) will boot by default. Android can be initiated to boot if necessary by pressing the F10 key while the computer is starting.
Installation as an additional OS is always performed on a previously created hard disk partition. This ensures that the previously installed distribution of another operating system is preserved.
Preparatory work
Before installing the Android OS on a PC, the user needs to decide how exactly he plans to use the new system. If the owner of the device wants to replace Windows with Android (that is, install the latter as the main system), you need to transfer all important information from the C drive to another drive, since the files will be destroyed during the installation process.
If you plan to use Android as an additional OS, you should create a separate partition in advance (from Windows or using a disk with special utilities) to install the new system. The fact is that working with the hard drive repartition tool built into the installation image can be quite difficult even for an experienced user.
If Android is needed only to perform individual tasks, and the PC owner does not intend to use this system constantly, you can do without installation, limiting yourself to launching from Live USB or installing an emulator.
To install Android on a PC, the user will need a flash drive with a capacity of at least 4 GB, as well as a separate partition on a hard drive of at least 8 GB in size. In addition, you can install the operating system on a second USB drive and boot from it if necessary.
How to install on a virtual machine
You can run Android on a desktop computer or laptop without a full installation. To do this, they use a so-called virtual machine - software that emulates the architecture and hardware devices necessary for the normal operation of the OS. It should be noted that using an emulator allows you to run on your PC even those versions of Android that are not designed to work with devices based on x86 architecture.
To emulate the environment necessary for the operating system to operate, special programs are used. An example is the VirtualBox application. It's completely free. You can download the program on the official website of the developers, which is located at.
To emulate the Android OS you will need to perform the following steps:
- launch VirtualBox;
- specify the path to the image with the operating system distribution;
- specify parameters (size of RAM, virtual hard disk);
- launch the OS emulator.
After this, a window will appear on the Windows desktop in which the Android desktop will be located. It will be fully available for interaction. In it you can set the necessary settings and install the necessary applications.
Part two. Smartphone interface
The interface of an Android device depends on the version of the operating system and on the proprietary shell installed by the manufacturer. However, the operating logic of the OS remains unchanged.
Gestures
Control of a device based on Android OS is based on gestures. The main ones include:
- Tap – a single touch of a finger on the screen.
- Double tap is analogous to double clicking the mouse. Double tap on the smartphone touch screen.
- Long tap – touching the screen for several seconds.
- Swipe – sliding touch on the screen. It involves swiping your finger across the smartphone screen from left to right, top to bottom, or bottom to top.
- Pinch – involves touching the screen with your thumb and index finger, then bringing them together.
Desktop and dock bar icons
There can be several desktops on an Android device. Scrolling through them is done by swiping from left to right and vice versa. The dock bar icons are located at the bottom of the screen. As a rule, there is an icon for the phone book, browser and a program for creating SMS messages. The central button is used to call up a menu with all installed programs.
Status bar
It is located at the top of the Android device screen. This displays information about the current time, battery charge, and active notifications. Some users call it a “blind”. To open it, you need to swipe from top to bottom. The status bar provides access to the main toggles: mobile data, location, energy saving, sound, portrait screen, airplane mode, flashlight, Bluetooth and Wi-Fi.
Wallpapers, widgets, icons
The device's desktop contains application icons and widgets. The latter allow you to display the necessary information on the screen, which does not require restarting the program. During the existence of the Android OS, widgets for a wide variety of purposes have been released. These include a clock widget, weather widget, notes, shopping widgets, and more. Most are able to work on any firmware. However, there are widgets that cannot be installed on another OS.
Setting the ringtone
To set a ringtone, go to the “Settings” of the device, then to the “Sound” and “Ringtone” sections. From the list of standard melodies, choose the one you like. The user is given the opportunity to set ringtones downloaded from the Internet for calls. To do this, download your favorite song to your device and set it as a ringtone. In the same section where the standard ringtones are located, click on the “Plus” icon in the upper right corner. Thus, add the downloaded melody to the list of available ones.
Setting up Android OS
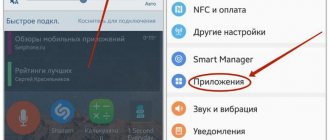
Setting up the desktop version of Android is not fundamentally different from that on the mobile one. After starting the operating system, the user will be offered:
- select language;
- select a Wi-Fi network;
- Sign in to your Google account.
The remaining settings are made from a special application.
If you are using a desktop version of the OS (for example, Remix OS). The setup procedure will vary. In particular, you will not need to log into your Google account and specify a suitable Wi-Fi network.
Possible problems and their solutions
Vyacheslav
For several years he worked in mobile phone stores of two large operators. I understand tariffs well and see all the pitfalls. I love gadgets, especially Android ones.
Ask a Question
Question to the expert
I can't build and burn the distribution image to disk.
Most likely the problem is a damaged ISO file. You need to try downloading it again. If the problem occurs again, you need to download the file from another source.
After starting the PC after a while, Android “goes” to a black screen
The problem can be caused by a time discrepancy in Android and Windows next to it. To do this, Android sets the time zone to zero. After such synchronization the problem disappears
I can’t create an additional disk partition, Windows says that there is not enough space
You can try scanning the disk with Acronis Disk Director. Installing on another disk or completely formatting the existing one will also help.
4.4 / 5 ( 28 votes)