Printing devices have become essential home office tools for many users. Their installation has become much easier over the years. For those who have the Windows 10 operating system installed on their computer, setting up a Canon printer for most modifications will happen automatically; you just need to connect it to the computer. If this does not happen, then it’s okay, you can turn on the MFP, adjust photo printing and print quality yourself, using the simple recommendations outlined in this material.
What type of printing does your printer have?
- Jet 71%, 15 votes
15 votes 71%15 votes - 71% of all votes
- Laser 29%, 6 votes
6 votes 29%
6 votes - 29% of all votes
- LED 0%, 0 votes
0 votes
0 votes - 0% of all votes
Total votes: 21
16.07.2020
×
You or from your IP have already voted.
Manufacturer
Canon is a powerful manufacturer originally from Japan. The company is considered multinational. It was founded back in 1937. The main office is located in Tokyo.
The company is engaged in the production of various products. In addition to printers, scanners and cameras, medical equipment, diagnostic equipment, as well as equipment for information technology and television broadcasting are also known.
In addition to producing various types of equipment, Canon is a sponsor of various public organizations, the most famous of which are the International Red Cross and the World Wildlife Fund.
Device
Setting up a Canon printer is not much different from setting up equipment from other manufacturers. In most cases, this peripheral device performs the same function - outputting text or graphic data to physical media. Most often it is paper, but you can also use polymer film.
In most cases, the printer works in tandem with a computer, so it is necessary to connect and configure it on this device.
Using the correct port
Installing a Canon printer begins by connecting it to your computer. Most often, printing equipment is connected using a cable. In some cases, this may be an LPT port, which is somewhat similar to an Internet connection. But LTP is now found almost nowhere, so its appearance is unlikely.
Canon printer installation can also be done using a USB cable. This is the most common option at the moment. In addition, it allows you to use not only a computer, but also a laptop for connection. But the likelihood that you can find an LTP port connection on a laptop is extremely low.
An alternative way to reset the absorber counter. Firmware for Canon printer control board
When your Canon MFP starts to “swear” because the absorber counter is full, do not rush to take it to a service center (except when the printer is still under warranty). Try resetting the counter using one of the methods indicated earlier. However, there are cases when it is not possible to overcome the error using the software method. Then you can do things a little differently. Remove the control board from the Canon printer and change or reflash it.
In the case of replacement, everything is clear. You buy a “donor”, charge it and install it on your device. But with flashing, everything is not so clear. This process is quite demanding on accuracy, since the slightest mistake can completely damage the product. In principle, flashing Canon inkjet printers for all models is done in virtually the same way. Nevertheless, just in case, we will give several examples of zeroing the absorber using the method of flashing the control board of the printing machine.
Firmware for Canon PIXMA MP280 and Canon PIXMA iP2700 MFPs
Some versions of the Canon PIXMA MP280 and iP2700 printers refuse to enter the service menu in the classic way (you can try instead of pressing the “Stop/Reset” button five times, press it 1, 2, 3, 4, 6, 7, 8 or 9 times, but this It rarely helps).
In order to reset the absorber in this case, you will need to reflash the printer.
Flashing the Canon PIXMA MP280 and Canon PIXMA iP2700 printers is carried out as follows:
- Remove the housing cover from the side USB connector.
- Remove the control board.
- Solder the chip marked 95080WP (for iP2700 – 93C66WP) with a soldering iron.
- Using a programmer, reflash the resulting microcircuit with a copy of the software contents from the new printer (however, first read and make a copy of the original printer firmware).
- Solder the chip back.
- Install the board and close the housing cover.
After this, the printer will receive new software and the absorber (diaper) counter will be considered reset.
Firmware for Canon PIXMA MG2440/2540 and Canon PIXMA Ink Efficiency E404 MFPs
These models of office equipment are the most capricious. Resetting the diaper counter on them is a very difficult task.
You can try to select the Service Tool program, since some variations of these printers can be reset on the nth attempt through the application version v2000, v3600 and later. However, this can usually be fixed only by flashing the printer control board. This is done as follows:
- Disassemble the printer and remove the control board.
- Solder the chip marked 508WP or 508RP with a soldering iron.
- Using a programmer, flash the resulting chip with a software dump from a new printer (do not forget to first make a copy of the original printer software).
- Solder the chip back.
- Assemble the printer.
Now everything should work. If you have never done such work, it is better to entrust this matter to professionals. You can also buy a chip that has already been reflashed and immediately solder it into the device board.
Firmware for Canon PIXMA MG3540 MFP
The uniqueness of the firmware of this device is that it does not have a built-in EEPROM chip,
which is responsible for resetting the printer's absorber counter. Therefore, to reset the absorber, if the program does not work, do the following:
- Remove the housing cover and take out the control board.
- You will not find a regular EEPROM on it either front or back. Therefore, look for a chip marked 25Q64, which is responsible for the main firmware of the device.
- Flash the chip with a dump from a new printer (it is not necessary to unsolder this chip; you can reflash it directly on the control board).
- Assemble the printer.
We remind you that the process of flashing a Canon printer board is quite complicated. Therefore, if you do not have the appropriate tool and the skills to use it, it is better to contact a specialist or buy a used MFP and transfer the control board from it to your device.
Please note: Since the Canon Pixma MG3040 diaper counter cannot be reset by software, the printer will have to be reflashed. Chips that should be flashed: 25Q16 and 25L64.
PC connection
For proper connection, it is best to use the instructions for the Canon printer. Depending on the model, hardware installation may vary slightly. But in general it requires the following steps:
- Install the USB cable into the interface panel of the motherboard.
- We connect the device to the outlet.
- We turn on the printing equipment.
- If the printer is plug and play, then the system will automatically detect it and load the necessary drivers.
- Sometimes you will need to help the system cope with loading drivers.
- If the Find New Hardware Wizard appears on the screen, just follow the instructions so that you can start setting up your Canon printer.
During connection, you may also need device drivers. They usually come with it. If they are not there or your computer does not support an optical drive, you can go to the official Canon website and download the necessary files from there.
Connecting a wireless device
Technologies do not stand still, and users can already connect a printer from the PIXMA series to a wireless network. What to do in this case?
You need to make sure that your Internet connection is configured with an access point. If you use Wi-Fi, then you definitely have it.
Next, you need to connect your computer or any other device to the Internet. Then we look for the WPS button on the router. It is responsible for securely setting up a wireless connection. Using it, you can make it so that you can connect the printer without entering a password.
If WPS is available, you need to select a connection using this option. Next, start the printer and click on the Wi-Fi button on the device. Usually you need to hold the key for a few seconds to wait for the indicator to react. The button itself will start flashing blue. At this moment, you need to hold down WPS on the router for a couple of minutes. When the device connection is complete, the white and blue indicators will stop flashing and will simply remain on.
Connecting the printer to a computer or laptop
The process of installing a new printer will take the user approximately 15 minutes, but first you will need to carefully unpack the device from the box, check the contents according to the specifications and select a location for placement.
Device installation location
When choosing a place to place the printer, you need to follow certain rules so that it is operated in accordance with safe rules. It is prohibited to install the device in damp and dusty areas, near flammable substances, or on unstable or vibration-prone surfaces.
At the same time, make sure that the ventilation holes on the housing are not blocked. Therefore, it should not be installed on surfaces covered with soft fabrics. For example, on sofas or carpets. There should be easy access from all sides and the feeder or platen covers should be easy to open completely.
Connecting wires
You also need to connect the printer cable to your computer or laptop, and then connect them to the network. Printers are equipped with one of two options: a port of the old LPT standard, which is located on the rear panel of the system unit of a personal computer, and USB ports, located on the back and front panels of the PC case or on the side of the laptop.
The cable connecting the printer and PC is connected when all equipment is disconnected from the network. After completing the cable connection to the USB or LPT ports, plug the PC and printer into a 220 V socket.
LPT
Many outdated printing devices are equipped with an LPT port, which in modern computers is not displayed on the panel, but is left on the motherboard, therefore, if the user needs to turn on a printer with an LPT port, they solve the problem with two options:
- Find the LPT connector on the PC “matboard” and connect the cable from the device to it.
- Buy a USB-LPT adapter from a retail chain to connect the printing device and computer with a cable.
What is LTP? Details about the complex ones!
LPT USB adapter Features, how it works, use.
USB
Modern laptops only have a USB port, so the user should not have any problems. The usb cable has two inputs: the usual type A, suitable for the PC port, and type B, smaller in size, which fits the printer port; it is simply impossible to confuse them. After connecting the cable to the printer, turn it on via the main button.
If at this moment the PC or laptop is already connected to the Internet, they are independently capable of installing a modification of the printing device using “plug and play” technology. More information about USB cable.
Nutrition
The device is “powered” from a 220 V household AC network through a standard three-pin grounded socket. Before turning on the network, the user must make sure that the voltage is stable. The outlet to which the device is connected must not be overloaded; other household appliances and various carriers must not be connected to it.
Insert the plug into the socket as far as it will go so that the contacts are well connected, then press the power switch on the device body and the power indicator on the control panel will light up.
How to connect a wireless Wi-Fi printer
Modern Canon printing devices have a simple system for connecting to Wi-Fi wireless networks; this does not even require an LCD display or SSID code on the panel. First, press the Wi-Fi button on the front panel, the indicator will start blinking, this means that the device is trying to connect to the network.
Then they find the WPS button on the router and press it, so the user agrees to connect Wi-Fi to Canon. The process will be completed successfully when the light on the control panel turns green.
There are other ways to connect your printer via WiFi to a wireless network.
Online setup
Canon printing and scanning devices can be controlled online even without a router; all you need is a smartphone or tablet. This way you can control its operation and change settings using a web browser by opening the “remote interface” in it.
Such a system will perform all the necessary user operations that are installed on the control panel of the device, outside the area of its location; it only requires that the Canon be connected to the mains and have access to Wi-Fi.
Downloading drivers
Separately, it is worth indicating instructions for installing drivers. Suppose you connected a printer, but the system could not find suitable drivers for it and notifies you that this connection is unknown. What do we have to do?
- Go to the official Canon website.
- Select the “Drivers” tab.
- Enter the exact model of the device, without missing a single number or letter.
- Select the system bit depth and type.
- Download and install the file.
- Next, the system will ask you to reboot.
- After turning it on again, you need to go to the “Devices and Printers” menu. This can be done through “Start”.
- Click on the installed printer and click “Set as default”.
How to set up a Canon printer
It often seems to novice users that setting up and installing a printer with the necessary parameters intended for printing is too complicated and confusing; it seems to them that only a highly qualified programmer can figure it out. But in fact, Canon printers can be configured quite simply. The installation process may not take approximately 15 minutes at most, and after this process the pop-ups will be carried out at the level of intuition.
The first step in setting up printing with a color printer should be to connect it to the computer, and then directly to the network. To do this, you need to connect the printer cable to your computer or laptop, and immediately connect them to the network. Before printing documents, it is recommended to configure all the necessary settings on the printer (including brightness, ink saving, color, and all others). For this process, go to the Control Panel, then in “Devices and Printers” select a shortcut with the name “Printers/Faxes. A window will open showing all the devices installed on our computer. Then you need to select the desired printer, open its settings and configure all the most necessary parameters for printing documents or photographs there.
Setting up a Canon printer
More experienced users are beginning to appreciate the fact that the printer is capable of much more than simply printing text. After all, a lot depends on the correct printing settings, including saving money. Moreover, some printers have a wireless connection via WiFi (Canon Pixma line of printers). But it’s worth starting in order:
When you print the document you need, there are several ways to send it directly to the printer. Quick - a shortcut displayed on the document taskbar prints the entire document in a single copy. Normal printing is achieved by pressing Ctrl + P or in the File - Print menu. This menu allows you to change the settings of your Canon printer. In addition, you can choose horizontal page orientation - for home printing of your own photos and memorable moments, printing a document on both sides, which is very convenient and allows you to save on paper, ink consumption - printing at a certain percentage of brightness from a given parameter, etc.
Setting up the printing of a Canon printer You can and should adjust the brightness of a Canon printer to get a more professional print. First, you should understand the quality of the paper used: glossy or matte paper. In addition, you can remove margins, add shades of gray, and experiment with images on different paper sizes. Brightness can be adjusted using blanks or manually in the “Adjust color/intensity manually” tab. Next, select the required option. But you can clearly see the result only on paper, so it’s worth spending some free time to determine the necessary settings. You can also reprint old photos that start to deteriorate over time. To do this, you need to set up your scanner and use a Canon printer to give new life to your precious photographs.
A manufacturer that has been on the market since 1933 and employs more than 200 thousand people in its divisions simply cannot afford to remain in place, because Canon has long been the flagship of the printing and photography industry. Existing models are constantly being improved and new ones are created. There is also an official website with a detailed description of the models, the availability of drivers for them and technical support. Setting up a Canon Pixma printer with a WiFi connection will take no more than a few minutes, as a detailed description is given. Among other things, detailed instructions are provided for synchronizing the device’s wireless connection via WiFi to a computer. Possible problems and ways to resolve them are also given. Therefore, if you are hesitant to take on this simple job yourself and are still asking yourself the question of how to configure the printing parameters of your printer, read these instructions and you will definitely succeed!
Installing a Canon pixma printer 1. Wait until the operating system loads completely;
2. Connect the USB cable; 3. Go online and visit the official page of your printer manufacturer (in our case it is Canon); 4. In the search, you must type the exact numeric or alphabetic code indicating the printer model; 5. Then you should select the type and bitness of your operating system from the list and put the driver for download; 6. After the required file has been completely copied to your computer, you need to launch it; 7. After installation is complete, the system will prompt you to reboot - agree; if not, reboot your computer manually; 8. After restarting the computer and starting all services, you need to go to the “Devices and Printers” section - this section is located in the computer control panel; 9. Find your color or black and white printer and right-click on the “Set as default” tab. We also carry out: refilling and repair Error b200 Canon
Support programs
There are few programs for Canon printers. Firmware can be found on the manufacturer's website. Using the helper utility, you can configure additional functions.
For example, Easy-PhotoPrint EX is a program for a Canon printer that optimizes images and helps eliminate red-eye. My Image Garden is a utility that works with organizing and printing photos, so it is more suitable for the PIXMA line of devices.
Canon Print Inkjet is suitable for working with a printer via a mobile device. The program can be installed on a smartphone, connected to a printer and controlled from the phone.
How do I know which driver is needed?
In order for the connected equipment to work correctly, you need to find suitable drivers. To successfully complete this task you need to know:
- Printer model.
- Version and bitness of the operating system.
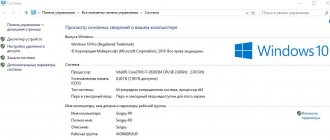
Look at the device case, box or user manual for the exact model. You can find out the version and bit depth in the system properties:
- Right-click on "Computer".
- Open Properties.
- Check system type and edition.
Knowing these parameters, you can download drivers from the manufacturer’s website for printing. If you have a Canon printer, go to canon.ru and go to the “Support” section. For HP Laserjet drivers can be found on hp.com, etc.
Print device
Setting up a Canon printer continues during the printing phase. After connecting and installing the drivers, you can start working with the device. But before the process itself, it is better to configure all the parameters.
To do this, go to the “Devices and Printers” menu, which is located in the right column of “Start”. Next, select “Shortcut and Faxes”. In the new window you need to find your printer model and click on it.
Setting up printing on a Canon printer is an individual process, so you will have to figure it out yourself, taking into account your desires and preferences.
It is worth paying attention to the method of sending the document. There is fast printing, which immediately sends information to the printer, and it produces one copy of the file in standard settings.
But you can use custom printing by pressing Ctrl + P. In the new window, you can select the page orientation, printing the document on both sides of the paper, ink saving mode, draft, brightness percentage, etc.
Turning on the device
After pressing the start button of the device, the power indicator will turn on, which will mean the printer is ready for operation. Go to the “Start” menu of the PC and call the “Printers and Faxes” command on the monitor screen. In the left column of the computer desktop, select the “Install” command; an installation wizard window opens on the screen, which will ask you to install the Canon driver.
Installing drivers
The driver is included when purchasing the device; it is easy to use if your PC has a disk drive. It is inserted immediately after the device is connected to the network. The computer operating system will independently analyze it and complete the installation process, informing the user that the Canon device is ready to perform work. If your PC or laptop does not have a disk drive, the program is transferred to a flash drive via a third-party PC with a disk drive. Next, the driver installation process will proceed in a similar way.
Where to get?
If for some reason there is no driver disk when installing the printing machine, the necessary program can be downloaded from the official Canon website by specifying the desired printer brand. Many users use drivers from other Internet sources, but this is a more dangerous installation option, after which the device may partially or completely not work.
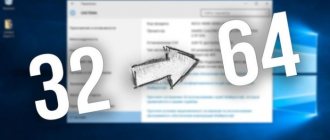
PC size and OS version
Before downloading the installation package of files, the user must know which OS is installed on the PC or laptop. Because when downloading, you will be offered options that work with Windows 7/8/10 for 32/64-bit systems. Drivers are downloaded in an archive, which must be unzipped before use.
Ways to determine the version and bitness of your Windows And also a large database of drivers for downloading.
Mark as main by default
To further install the printer, disconnect it from the PC, go to the unzipped folder and find the Setupс.exe file. Double-click on it and launch the installation wizard process. Follow the recommendations on the screen by clicking the “Next” button. At the end of the process, the wizard will indicate the need to connect the device to the PC. And in the “Printers and Faxes” window on the monitor screen, an icon of the installed model will appear, which should be marked as the main one by default.
Errors
Sometimes Canon printer errors also pop up. In this case, the main thing is not to panic, but to take a closer look at the options for problems that could happen to the device. Firstly, on the manufacturer’s official website there is a list of all the codes that symbolize errors. Secondly, you can immediately contact the service center representatives, who will quickly fix problems with the printer.
The most common Canon error type is "E". The LED indicator can display this letter paired with a number and report various types of problems or problems.
For example, if the code is E02, it means that the printer has simply run out of paper. In this case, the printing process has started, but there is no raw material in the tray for the finished document. Just load the paper and click on the print button.
E03 usually notifies you that a paper jam has occurred. Perhaps it was installed incorrectly in the tray, lay unevenly, which is why the roller began to twist it onto itself and jammed it. All you have to do is carefully remove the paper and load a new one.
E04/5 is an error that notifies the user of problems with cartridges. To fix it, it is better to reinstall them or check the correct position.
Some errors “E” can be corrected yourself, but with “P” you will have to go to a service center, since most often such failures are associated with the hardware of the device: failure of a certain element, overcurrent, overheating, etc.
Update centre
You can try installing the printer through Windows Update. There is nothing complicated here:
- Disconnect the printer from your computer.
- Open the "Devices and Printers" section.
- Click on the "Install" button.
- Select "Add Local".
- Leave the port unchanged.
- Click on the "Update Center" button.
- Wait until the available drivers are downloaded and select the software for your model (or at least series).
- Leave the printer name unchanged and wait until it installs. You do not need to allow public access.
After installation, an icon for the added equipment will appear in the “Devices and Printers” section. Right-click on it and select "Delete". Then connect the printer and wait until it “grabs” the previously installed software.
You can repair or update your printer in Simferopol at the service center on the street. Starozenitnaya, 9 (entrance from the fence). Please contact us during business hours from 9.00-18.00 at
Don't forget to rate the post and share it with your friends on social networks by clicking the special buttons below. Don't forget to leave a comment and subscribe to our youtube channel
Save
Save
Rate this article:
(
9 ratings, average: 5.00 out of 5)
Share with friends:
Related posts:
USB Debug for restoring Samsung, Xerox, Dell printers.
Instructions for refilling Canon PG-37, PG-40, PG-50, PG-510, PG-512, CL-… cartridges
Resetting ink levels for Epson printers from the L series - “Print Factory” L132, L222, ...
Installing CISS on Canon Pixma MP230, MP235 printer. Installation instructions.
Xerox Phaser 3100MFP/S - how to view the firmware version? Video.
Recommended products:
- 7 in stock