What to do if the capacity of the flash drive has decreased?
Hello friends, today I will talk about a common user problem related to flash drives.
We have already written quite a lot of articles about them, especially about how to format a flash drive. But now about something else. A friend had a problem - after formatting the flash drive decreased in size. A strange phenomenon, other external drives are formatted normally and he had similar problems; in fact, I’ve never had this happen either, but I need to help a friend. In general, he has a 16 GB flash drive and 7.5 GB of it remains. Unfortunately, I can’t say why this happened, but I have a solution to this problem; returning the flash drive to its original volume is easier than you think, and now we’ll do it.
Let's first look at what we have in the Disk Management . To get there you need to open the Run by pressing the Win+R and entering the command diskmgmt.msc .
As soon as you get into the utility, take a look. There we have a 15 GB disk, that is, this is our 16 GB flash drive. I’ll say right away that manufacturers actually indicate a larger amount of memory on the packaging than it actually is.
As you can see, our flash drive is divided and part of the area is not allocated. If we click on any partition of this flash drive, we cannot expand the volume, delete it, or make the partition active. The same thing applies to the unallocated area; we cannot create a simple volume.
It's a sad picture, but something needs to be done. Therefore, let's start repairing our flash drive.
The size of the flash drive has decreased, how can I restore it?
To begin, open a regular command prompt. To do this, open the “Run” window again and enter the cmd , or, if you have Windows 10, you can right-click on Start and select the appropriate option.
In the command line, enter the command diskpart . Now we can work with disks in a cooler way than in a regular disk management utility.
Now enter the list disk , which displays all disks connected to the computer. The most important thing here is to determine which disk number is our problematic flash drive; we will look at the volume.
Let’s say we have a lot of things connected to our computer: disks, flash drives, card readers, etc. Judging by the screenshot above, our flash drive is disk 5 , since the first two disks are too large in volume, two disks have no media at all, the other disk has a capacity of 1886 MB, which is much lower than our flash drive.
Once you have decided on the flash drive number, enter the following command on the command line:
select disk = 5
A message will appear indicating that drive 5 is selected . Now we must delete all partitions, which will delete all data on them. If there is still some important data there, then I advise you to transfer it somewhere.
Now enter the clean and press Enter.
We've sorted that out, what's next? Next, we must go back to the Disk Management , where we see one partition that is not allocated. Now we can perform various operations on it. Let's create a new volume and give it a letter.
You can choose any parameters when formatting, if this is a flash drive for a camera, then I recommend choosing the default cluster size, and the file system – FAT32, do not forget to check the box next to “Quick formatting”. In the “Volume Label” section we give a name to our flash drive. After formatting, the flash drive will again be the same size, in our case – 16 GB.
Using this guide as an example, you can restore the capacity of any flash drive. I hope I helped you solve this problem. Good luck to you!
How to activate ReadyBoost technology
After you have formatted the flash drive, you need to configure it to use ReadyBoost.
- Go to Explorer .
- Find the flash drive in the menu on the left, right-click on it and select Properties .
- Go to the ReadyBoost .
- Check the Use this device .
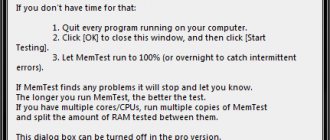
- Enter the amount of memory that will be used in addition to RAM. Microsoft recommends using a RAM to ReadyBoost memory ratio of 1:1 to 1:2.5 . This means that if you have, for example, 2 GB of RAM in your device, then you should set the ReadyBoost memory value from 2 GB to 5 GB.
- Click Apply .
Ready. Now your flash drive is used to increase the performance of the device. Note that the page file on it is encrypted using the AES-128 , which ensures the security of your data.
The most important thing is to never remove the flash drive from the device without preparation ! This can lead to failure of the drive itself and the USB port. If you want to get a flash drive, use the instructions below.
Volume restoration instructions
To restore the actual size of the flash drive, you need to perform a low-level format. As a result, all data will be deleted from the flash drive, so first transfer the information to another medium.
- In the Start menu, find Command Prompt and run it with administrator privileges.
- Enter the command “diskpart” to open the disk utility of the same name.
- List all connected media with the “list disk” command. Find the connected flash drive by its capacity (if you have a 16 GB drive, it may appear as a 15 GB drive).
- Select the disk number – “select disk=5”. Instead of “5” you indicate the number of the flash drive.
- Use the “clean” command to clear the contents of the flash drive. The markup will be deleted along with the files.
You have received a completely clean media, now you need to re-label it. This procedure is performed through the task manager:
Instructions
2 The utility from Transcend will perform low-level formatting, after which the actual available memory will be displayed in the properties of the flash drive.
- Launch Task Manager and locate the flash drive. Instead of sections, it will have an unallocated area. Right-click on it and select “Create simple volume”
- Oh and set the parameters. File system – FAT32, cluster by default.
After formatting is complete, the storage capacity will be the same as it was before. If you have a flash drive from Transcend, then you can restore its actual size using the free Transcend Autoformat utility. This program independently determines the volume of the flash drive and returns its correct display.
- Launch the utility. In the “Disk Drive” field, select the letter of the connected removable drive.
- Select the drive type – SD, MMC or CF (written on the case).
- Check the “Complete Format” checkbox and click “Format”.
- Transcend's utility will perform low-level formatting, after which the actual available memory will be displayed in the properties of the flash drive.
How to check a flash drive for memory capacity and recover space using third-party programs
In some cases, it may be advisable to use third-party applications that are designed to troubleshoot specific devices. Typically, such utilities can be found directly on the website of flash drive manufacturers. This could be a program for formatting a flash drive, an application for checking media, etc.
In our case, the best option would be to check and then restore the full volume, which can be performed using the AxoFlashTest utility. In it, to automatically fix problems, you need to perform both a volume test and a speed test.
If this does not help, use a flash drive formatting program called AutoFormat from Transcend, select the drive type, check the Full format option and wait for the process to complete.
Working with Chinese flash drives.
Chinese flash drives, purchased on Aliexpress and other similar online platforms for little money, often have one hidden drawback - their actual capacity is significantly lower than the declared volume. The flash drive says 16 GB, but you can read no more than 8 GB from it - the rest of the information is not actually written anywhere.
This effect is achieved by flashing the controller. If the recorded files do not exceed the actual available capacity of the flash drive, then you will not understand that you have been deceived until you are faced with the fact that some of the information has disappeared. But you can determine the size of the drive in advance without leading to an unpleasant situation:
- Connect the drive to your computer.
- Download and run the free H2testw utility.
- Click “Select Target” and indicate the letter of the flash drive that you suspect of incorrectly displaying the volume. Click Write +Verify to run media verification.
- If the actual size of the drive matches the declared parameter, then the test will end with the phrase “Test finished without errors.” If the memory of the flash drive is actually not so voluminous, then you will see a report in which there will be two lines - “OK” and “LOST”.
Why is the actual size of a flash drive smaller than the advertised size?
If you have ever purchased flash drives, hard drives or other storage media, you may have wondered, “Why is the actual size smaller than what is advertised?” Previously, about 10-12 years ago, this question did not arise because the difference between the advertising and real volume was minimal. For example, I first encountered the bitter truth when I wanted to record the game on a floppy disk. Everywhere they wrote that its volume was 1.44 MB, but it turned out to be 1.38 Over time, the storage capacity became larger and larger. Along with the capacity, the difference between the actual size and the advertised one became larger and larger.
And all because the labels and packaging indicate the volume calculated per 1 kilobyte as 1000 bytes, instead of 1024 bytes. All computers count 1024 bytes per kilobyte. Nobody anywhere counts the volume of files in the decimal system. Only the manufacturers decided to count in decimal instead of binary.
Here is a table where everything is clearly shown
| Buy | You receive | You were deceived by |
| 1 gigabyte | 953 Megabytes | 61 Megabytes |
| 4 gigabytes | 3.72 gigabytes | 190 Megabytes |
| 16 gigabytes | 14.9 gigabytes | 1.1 gigabyte |
| 32 gigabytes | 29.8 gigabytes | 2.2 gigabytes |
| 64 gigabytes | 59.6 gigabytes | 4.4 gigabytes |
| 320 gigabytes | 298 gigabytes | 22 gigabytes |
| 500 gigabytes | 466 gigabytes | 34 gigabytes |
| 1 terabyte | 931 gigabytes | 93 gigabytes |
| 2 terabytes | 1.81 terabytes | 185 gigabytes |
I don’t know why manufacturers do this, but I know that everyone is already accustomed to such a scam. It’s a pity that some people think that some service files on a flash drive take up some memory. Service files and the file system take up a tiny amount, which is not even worth remembering.
Most likely these are marketing tricks. The same story is observed with Internet connections. ISPs indicate connection speed in bits, while computers measure data in bytes. So, for example, a user sees an ad “connect high-speed Internet 50 Mbit/s” and he thinks, wow, I can download a 100 megabyte file in 2 seconds. But in fact, this speed of 50 Mbit needs to be divided by 8 or even 9 to get the real speed in the usual megabytes. 50/8=6.3 MB per second.
Why am I writing all this? It’s just boiling over, everywhere you look there’s deception and reticence. Everywhere they try to deceive and get more money.
By the way, these memory tricks are not used in RAM. That is, the RAM sticks have as much memory as indicated on the packaging.
How to find a program to repair a flash drive.
In fact, there are much more such free utilities for repairing flash drives than are listed here: I tried to take into account only relatively “universal” tools for USB drives from different manufacturers.
It is quite possible that none of the above utilities are suitable for restoring the functionality of your USB drive. In this case, you can use the following steps to find the program you need.
- Download the Chip Genius or Flash Drive Information Extractor utility, with it you can find out which memory controller is used in your drive, as well as get VID and PID data, which will be useful in the next step. You can download the utilities from the pages: https://www.usbdev.ru/files/chipgenius/ and https://www.usbdev.ru/files/usbflashinfo/ respectively.
- Once you know this data, go to the iFlash website https://flashboot.ru/iflash/ and enter the VID and PID obtained in the previous program into the search field.
- In the search results, in the Chip Model column, pay attention to those drives that use the same controller as yours and look at the suggested utilities for flash drive repair in the Utils column. All that remains is to find and download the appropriate program, and then see if it is suitable for your tasks.
Additionally: if all the described methods for repairing a USB drive did not help, try low-level formatting the flash drive
Incorrect USB drive size, how to fix it
If your USB drive is the wrong size, it may be because the drive was not formatted correctly. Instead of seeing the actual 16GB or whatever size your USB drive is, you'll see something like a couple hundred MB on it.
When you see this, don't panic because your drive still has the original amount of available memory. There may be other reasons, for example, that your computer is infected with a virus. In any case, reformatting your USB drive should solve this problem and you will be able to use all the space available on your flash drive. I also recommend reading “ How to fix a USB drive in Ubuntu
».
Fix Incorrect USB Drive Size Problem with EaseUS Partition Master
The reason we don't use the default format option, which can be found in your system's context menu, is because sometimes it doesn't help solve problems like this. It's a very simple tool and doesn't go into great detail to figure out what's wrong and fix it.
EaseUS Partition Master, on the other hand, has the ability to reformat your drives and fix any problems on them.
- Download, install and launch EaseUS Partition Master on your computer.
- Connect the USB flash drive to your computer and it will appear in the tool interface.
- Click on your drive in the list and you will see a menu appear in the right pane. From the available options in the menu, select the one that offers "Delete All" to delete all partitions on your drive.
- When it finishes deleting all the partitions on the drive, right-click on your drive and select the New option. This will allow you to create new partitions.
- Enter the following values in the fields provided, and then click the button labeled “OK” at the bottom. Section Label - Enter any name here. File System - Select a drive letter FAT32 - Select the drive letter you want to assign to the USB drive. Determine the size and position - make sure the slider covers the entire size of the disk.
- When your USB drive is formatted, it will show up with full capacity on your computer.
Troubleshoot USB storage capacity issue at boot
If you don't want to install a tool on your computer to fix your USB drive's incorrect capacity, you can use Bootice, which is a portable tool that doesn't require installation.
You just need to download the tool from the website, run it, enter a few parameters, and it will repair your USB drive in no time.
- Download the Bootice tool from Softpedia, extract the archived files and double-click the executable to run the tool.
- Connect the USB drive to your computer, select it from the Destination Drive drop-down list in the utility, and click Manage Parts.
- A new screen will appear with all available partitions on your drive. You don't have to do anything with them - just click the re-split button at the bottom.
- On the next screen you will be able to specify how you want to repartition your drive. Select the following options and click OK. Disk Mode - select USB-HDD (Single Partition) mode. File system - FAT32 Vol Label - here you can enter any name for your disk. Launch LBA - enter 1 Reserved Sec - enter 32.
- You will receive a quick warning that all data on the drive will be lost. Click OK to continue and format the drive.
- Once the formatting is complete, you will see that your computer is now showing the full capacity of your USB drive.
Fix Incorrect USB Drive Size Using Command Prompt
Incorrect USB drive size can also be fixed using the command line. There is a command that allows you to delete all partitions, format your drive, and then re-partition the drive. If you don't know how to open the command line in Windows 10, read this topic.
- Open the Start menu, find Command Prompt, right-click it when you see it in the results, and select Run as administrator.
- Type the following command “diskpart” in the Command Prompt window and press Enter. This will launch the command line version of Disk Utility.
- To perform the operation on your disk, run the following "list disk" command, replacing N with the actual number of your USB drive.
- Use the following "clean" command to clean your USB drive.
- After wiping the disk, run the following command “create partition primary” to create new partitions.
- Finally, use the following command “format fs=fat32 quick” to format the drive to FAT32 format.
Once your drive is formatted, you may need to unplug it and then plug it back into your computer. You will then find that your computer allows you to use the full capacity of your drive.
The reason for the loss of data from the memory of drives from China
The main components of any USB drive are the NAND chip and the controller. The NAND chip is responsible for the maximum amount of data that can be written to the media. The controller provides communication between the chip cells and the computer. When a flash drive is manufactured, all information about the characteristics and size of the memory is recorded on it. A discrepancy between the data in the controller and the actual capacity of the flash drive causes the device to malfunction. When the true volume is full, information begins to be recorded in a circle, overwriting previous data. As a result, the files become inaccessible. Often the file system of full media is recognized as RAW. In some cases, it is possible to format such a device using standard Windows utilities, but the solution to the problem will be temporary, because after the actual memory volume is filled, the drive will begin to malfunction again.
The NAND chip of most Chinese flash drives is functional and usable. But to restore its correct operation, you need to make changes to the drive controller, indicating the actual capacity. After this, you can use the flash drive without fear for the information on it.
Analysis of flash drive memory capacity
Before you begin to restore the true value of memory capacity, you need to find out it. The simplest way is to gradually fill the storage media with files, waiting for a critical capacity value, after which the failure will begin. But in this way it will not be possible to determine the exact value of memory and the number of sectors of the chip. It would be more correct to use a program for testing drives. The most convenient free program for this is H2testw. It has a simple and intuitive interface. With its help, it is possible to quickly and accurately determine the true size of the media memory.
The algorithm for working with the program is as follows:
- specify the desired device (select target);
- select full data check (all available space);
- run test writing and reading information (Write + Verify).
Depending on the declared volume of the flash drive, the analysis time can last more than 10 hours. But there is no need to wait for testing to finish. You should wait until the write speed drops significantly. This is evidence that the drive is completely full and the process of superficial overwriting has begun. You can stop recording testing (Abort). Next, you should select the reading process (Verify) and wait for it to complete. A value of the following type will be received: “6.7 GByte OK (14162432 sectors)”. The value in brackets is the actual number of memory sectors that will be needed to restore a Chinese flash drive. In most cases, the true capacity of the media is 5-10% of the specified one, so the amount of usable memory for drives with a stated 32-64 GB will not exceed 6 GB.
Restoring the real capacity size of Chinese flash drives
Restoring the real size of fake flash drives requires special utilities. But before using such programs, you need to remove other media so as not to format them by mistake. The most convenient program for this is Acronis Disk Director.
Instructions for recovery:
- Select the media that needs to be recovered, press RMB and start the initialization process. If the flash drive is formatted, skip this step.
- In the operations menu, select “create volume”. In the window that appears, indicate the creation of a basic volume and select the required media.
- Set the volume size to no larger than that obtained during testing. The volume type is logical. Choose a file system depending on your needs. Click on the “finish” button.
- On the main page, select “apply pending transactions”. The formatting process will begin, after which you can use the media. If an error occurs, you must return to step 2 and set a smaller volume size.
In this way, information about the total memory capacity in the controller will not change, but only its actual size will be available to all reading devices. This method is fast and safe, so you should give it preference.
To reprogram the controller, you must use the MyDiskFix utility. This program was developed by the Chinese to change information about the storage capacity of media. There is only an alpha version of this program, so glitches may occur. It is more convenient to use its English version.
For the program to work correctly, media recovery must be performed in safe mode. To do this, when booting the PC, press F8 and select “Safe Mode with loading network drivers.”
Algorithm for working with MyDiskFix:
- select the required media;
- check low-level formatting (Low-Level);
- leave the first sector field (Sectors) unchanged, in the second field indicate the number of sectors not exceeding that which was obtained during testing, for example, 14162000;
- start formatting “START Format”.
This method is more time-consuming, but allows you to permanently fix the problem by changing the information about the NAND chip in the flash drive controller.
Regardless of the chosen recovery method, after completing the formatting process, you must re-run the test using the H2testw utility. Once you make sure that the USB drive is working properly, you can use it safely.
The flash drive has become smaller: simple recommendations for memory recovery
A flash drive is nowadays an essential attribute for people who deal with computer technology in everyday life or at work. Most often, when buying a flash card, the buyer pays attention to its volume and pricing policy, missing the point about its manufacturer and reliability. Unfortunately, situations often occur when the owner tries to download the necessary materials to the device, but receives a response that there is not enough space on the USB drive. The problem when the drive's properties indicate a free capacity of several megabytes instead of the stated 8 or 16 gigabytes is not only a huge surprise for the owner, but also causes a lot of trouble due to the fact that there is no way to upload the necessary large files to it. In this article we will look at what to do if the capacity of the flash drive has decreased, and how to increase it.
Find out what to do if the capacity of the flash drive has decreased and how to increase it
Setting up ReadyBoost
After doing all the above, go to the properties of the flash drive. In the ReadyBoost tab, opposite the “Use this device” item, check the box. Use the slider to set the amount of memory you need. Click “Apply”, “OK”...
Windows will create the ReadyBoost.sfcache file on the flash drive. Where our cache will actually be archived (this file is encrypted and, even if lost (flash drive), no one will ever see the data from it).
As you can see, a little less than half of the space on the removable disk is occupied, approximately 2.5 GB.
That's basically it. After such simple manipulations, your flash drive began to work as RAM. Which is added to your computer and serves as a cache.
Troubleshooting Methods
Most often, the reason that the volume of a flash drive has decreased is a program failure, as a result of which the flash drive’s memory is divided into two parts: the working part, which the user sees as active and can use, and the unallocated part, which is an inactive area of the drive’s memory.
First method
Before you begin restoring the drive's memory, you should verify the cause of the problem. If the reason is precisely the incorrect allocation of memory, and not that the purchased device is of unknown origin, its actual capacity does not correspond to what was stated by the seller, then you can begin to restore the functionality of the device.
Sometimes the source of the problem may have roots that are completely unrelated to the software problems of the drive. The fact is that in the sales market, with the growing demand for USB drives, there are often defective products that have a large declared size and are sold at a low price. Most often, these are flash drives from unknown manufacturers that have poor performance, as well as memory that does not correspond to reality. In such a situation, it will be impossible to restore the device’s memory, so a reasonable solution would be to immediately return it to the seller in accordance with the consumer rights law and purchase a high-quality flash drive from well-known suppliers who are licensed to sell drives and provide a quality guarantee.
If the drive’s memory has become smaller during its operation and at the same time the size previously corresponded to that declared by the manufacturer, then, most likely, the reason is incorrect memory allocation, which can be diagnosed using several methods.
In order to verify the cause of the problem, you need to open the Disk Management window. There are two ways to do this. The first involves pressing the Win+R key combination, which brings up the “Run” pop-up window. In the command line you need to enter diskmgmt.msc and press the Enter key.
You can see that the flash drive (in this case EOS_DIGITAL J:) is divided in a very strange way - half is occupied by the active partition, and half is simply not partitioned
Second method
The second option involves logging in via “Computer”. You need to go through the control panel to the “Administration” utility, select the “Computer Management” menu. After this, through “Storage Devices” you need to go to “Disk Management”, where all storage devices connected to the PC are displayed.
You need to double-click on the name of the flash drive; the window that appears will display the actual state of its memory. If the drive's memory is not allocated correctly, two areas will appear in the window. One of them will be marked in blue, this is the volume with which you can work, and a black rectangle with inactive memory. If you click on this section, you can see that the program at this stage does not allow you to increase or reunite memory blocks. There is no need to rush to close this window; it will still be useful during the procedure when we restore the drive’s memory.
Let us further consider in detail how to restore the memory of the drive, or more precisely, how to increase the memory of the flash drive to the size declared by the manufacturer.
You can click on the active partition of the flash drive and see if you can delete this partition or expand it to cover the entire volume of the flash drive
Flash drive shows less capacity: how to restore memory
As already mentioned, during operation, the memory of a standard drive can be significantly reduced due to improper use. By previous actions, we made sure that the problem was precisely the incorrect allocation of drive memory. In order to increase the capacity of a flash drive, you need to enter the command cmd through the “Start” menu in the “Search” line, after which the “Programs” window will appear. In it, select the item “cmd.exe”, and in the drop-down list “Run as Administrator”.
If you are the owner of Windows XP, then you can press Win+R (or Start Run...) and enter cmd.exe there and press Enter
Step 1
After these manipulations, a black window will appear on the PC desktop. This is where you will need to change the memory allocation of the flash drive. This is a low-level PC program that will allow you to increase the storage capacity.
At the command line of the program where the cursor is located, enter the command diskpart and press the Enter key. Next, enter List disk and Enter, after which the disk management window will open, which will display the removable media.
After the manipulations, you will see a list of disks connected to your computer
Step 2
Now it remains to understand which of the drives is the flash drive the user needs, since absolutely all memory sources that are available on the PC will be displayed. In the window you need to pay attention to the following main parameters: “Disk No.”, “Status” and “Size”. You can exclude those disk names whose status bar shows the status “No media”. Analyze the remaining drives by size and, using exclusion, determine the number of the disk to be restored and which is a flash drive. Next, you need to enter SELECT disk=№ into the command line, where № is the number of the disk under which the drive is located, and press the Enter key.
The program tells you which disk number is selected
The message “Disk No. selected” will appear in the window. After this, enter the command CLEAN and Enter.
Type CLEAN and press Enter
It is worth noting that after entering this command, all data from the flash drive will be deleted and it will be impossible to restore it, so if there is important information on the drive, make sure to save the necessary materials first. If everything is done correctly, the program will display a summary “Disk Cleanup completed successfully.” This completes the work in the command window.
Step 3
Next, you need to go to the window that was opened earlier when diagnosing the malfunction, with the storage areas of the drive, and update it. After the update, the entire memory of the flash drive becomes unmarked and black.
Go back to the standard Windows Disk Manager and click the Refresh button
Right-click on the unallocated partition and select “Create a simple volume” from the drop-down list, after which the “Simple Volume Creation Wizard” window will appear. In the window, you need to set the file system parameters, cluster size and volume label required by the user, then check the box next to the phrase “Quick format” and click the “Next” button.
After formatting was completed, the properties of the flash drive became as they should be.
Upon completion of formatting, the technical parameters of the flash drive will return to their previous form, and the capacity of the flash drive will be restored.
How to increase memory on a flash drive
It happens that you come to a friend’s place to rewrite the latest movie or game, and in the process it turns out that “there is not enough disk space” - the flash drive is simply full. And why isn't it rubber? Unfortunately, the size of the memory card is specified by design, and it can only change downwards. But you can’t delete information from a flash drive - it’s all necessary, and you can’t go home without a movie.
You will need
- Computer (laptop), software.
Instructions
1. Any information (file) can be compressed - its size can be reduced from its original size. Find folders with text documents (.doc, .xls) on the memory card; many programs have been invented to compress them: WinRAR, WinZIP, they reduce the size of the document, packing them approximately tenfold into a separate archive folder. But the problem is that the size of the text document itself is initially small, and if you don’t have Lenin’s works stored on your flash drive, then the freed up space for the film will not be enough.
2. What else can be stored on a “mobile” storage medium, finally photographs. The size of the photo after the camera can reach 10 MB, but you yourself have seen great-quality photos of several hundred kilobytes in size, the fact is that the camera attaches a lot of garbage, “cleaning” a photo - reducing its size can also be done with the support of special software, of which there are plenty on the Internet. The main criterion for reducing the size of a photo is to preserve the quality of the photo itself.
3. Yes, you are an inveterate music lover, you carry so much music. This is where you can really carve out megabytes of free space. There are also programs for compressing music files; using them is easy and subconsciously clear. The size of the music file is reduced by reducing the recording bitrate, but you shouldn’t reduce it to zero; it will be simply disgusting to listen to such music later. Let’s also assume the option of compressing the video files on the flash drive, or the movie itself is the one you want to rewrite, but this procedure is quite long and can take from 4 to 10 hours or more.
You have noticed that the capacity of your USB flash drive has decreased during use. Occasionally it shrinks significantly. More likely than anyone, this was a consequence of the impact of viruses on him. In this case, you can return the original storage volume.
You will need
- - computer;
- – antivirus program with the latest updates;
- – file administrator Total Commander;
- – h2testw utility.
Instructions
1. Enable display of hidden and system files on your flash drive. Check the USB flash drive with an antivirus program and, if anything is found, delete it. If after checking for viruses the volume of the flash drive has not changed, format it by saving the data to a hard computer disk or other storage medium in advance. 2. If all the folders on your flash drive have been replaced by a virus with shortcuts, and the ratio of free to used space has not changed, do not rush to format it. The virus then creates a directory in the name of which it writes invalid characters. You can make sure that the information from the flash drive has not disappeared anywhere using the command line. Enter “g:\ /x” in it, where g is a flash drive, and x is the key to show all files. You will see a hidden folder, say, named e2e2~1. 3. Once you know the name of the folder, you can easily access it from the file administrator. Using the command line, rename this name, which contains an invalid ~ symbol, to something else, say, 111. Another method of combating this virus can be to create a bat file containing the line “attrib -s -h -r -a /s /d” and running it from a flash drive. In addition, you can pack a flash drive with an archiver, and after opening the archive, extract all the necessary folders. 4. Determine the actual size of the flash drive using the h2testw utility. To do this, connect it to your computer and make sure that there are no files on it. Run the h2testw utility, click the “Select” button, and select writing data to all free sectors as the selected test method. To test, click the “Write + Verify” button. Video on the topic
Note! Don't fall for scammers' tricks. There are no methods for increasing the amount of physical memory on a flash drive. Helpful advice Regularly update your computer's antivirus software. Duplicate especially expensive information.
If during the operation of a USB flash drive you notice a significant decrease in its volume, most likely this is a consequence of the harmful effects of viruses on the flash drive. You can return its primary volume in the following way.
You will need
- – h2testw utility;
- – file administrator Total Commander;
- - antivirus program.
Instructions
1. Enable display of system and hidden files on your flash drive. Scan the flash drive with an antivirus program and remove all viruses found. Format the USB flash drive if the volume has not changed after the check, saving in advance all the data you need to a hard computer disk or other storage medium. 2. Do not rush to format your flash drive if the virus has replaced all the folders on it with shortcuts, but the ratio of occupied and free space has not changed. In this case, it creates a directory and writes its name with invalid characters. Using the command line, make sure that the information has not disappeared from the flash drive. Enter the command s:\ /x, in which s is a flash drive, and x is the key to show all files. A hidden folder with the name, say, e2e2~1 will be displayed. 3. You can access the folder easily from the file administrator after you know its name. Rename this folder, which contains the invalid ~ symbol, using the command line, to any other one - say, 123. You can also fight this virus using another method - make a bat file containing the line attrib -s -h -r -a /s /d and execute it from your flash drive. Or pack it with an archiver and, when opening the archive, extract only the necessary folders. 4. With the support of the h2testw utility, estimate the actual size of the flash drive. To do this, connect it to your computer and make sure there are no files on it. Run the h2testw utility, then press the Select button, select writing to all free data sectors as the selected method for checking the volume. To start testing, click Write + Verify. Video on the topic
Note! Remember - there is no method to increase the physical memory of a flash drive. Don't fall for scammers' tricks. Helpful advice Back up your expensive information and regularly update the antivirus program on your computer.
Virtual memory, also known as the paging file, is a special special technology of multitasking operating systems that allows you to add a share of the hard drive memory to the computer's RAM. Increasing your computer's virtual memory is accessible even to a novice user.
Instructions
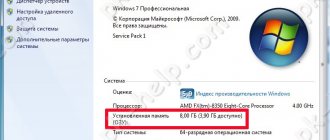
1. In the Windows operating system, the paging file responsible for the amount of virtual memory is called “pagefile.sys”. It makes sense to increase this file if you use high-performance programs that require high computing speed, or play demanding games, or do both at the same time. To change the amount of virtual memory, go to the “Control Panel”, select the category “ System". In Windows XP, select the “Advanced” tab; in Windows Vista or 7, select the “Advanced system settings” tab. In the window that appears on the screen, find the “Performance” section and click the “Options” button, then in another new window select the “Advanced” tab. You will see the size of the paging file currently on your computer, indicated in megabytes. 2. To increase virtual memory, click the “Change” button, select the core hard drive (traditionally the “C:/” drive). Uncheck the box “Mechanically select the size of the paging file”, pay attention to the number of the recommended total paging file size and indicate it in the “Highest size (MB)” field, then click the buttons “Set” - “OK” - “Apply” - "OK". For the metamorphoses to take effect, restart your computer. 3. Virtual memory in Windows Vista and Windows 7 can be increased by using flash drives, say, 4 or 8 GB. To do this, use an empty flash drive and ReadyBust special technology: insert the flash drive into a USB 2.0 port. After the computer detects a new device, in the window that appears, select “Speed up the system.” When the ReadyBoost setup page opens, select the Use this device option and specify the latest virtual memory size. Video on the topic Please note! 1 GB = 1024 MB
In order to be able to transfer files from computer to computer, you need to save them on memory card . Read below about the methods by which this can be done.
Instructions
1. Connect map memory to the computer. 2. Open My Computer. Click on the "Maps" icon memory "or by its name. A window with its contents will open in front of you. 3. Hold down the left mouse button and select the files that you want to save to removable media. 4. Drag the selected files to the map window memory .If the files are large, the operating system will display the copying process and show the time remaining until the process is completed. Wait for the process to complete. That's it, the files are saved on the card memory . Video on the topic
Helpful advice Before copying large files to a memory card, check whether there is free space on it. If you need to save a document opened in an editor, say in MS Word, then click on the “File” menu item in the upper left corner and select “Save as ..." In the window that opens, specify the path to the memory card and click “Save”. Video on the topic
Note! Text documents are compressed to a minimum mechanically, without compromising the quality of the document, and there is no possibility of controlling the compression process (final size). When compressing photos and music, there is a possibility of changing the size of the final file, but do not make the size of the photo and the music bitrate too small, otherwise the result will be You will be disappointed. Do not delete the initial files without checking the result; perhaps it will not suit you in terms of quality. Helpful advice Before compression, determine how much space you need to free up, based on this, look for the type of files that, when reduced, will give you that free space.
Let's sum it up
Due to improper use of the drive or the use of incorrect software on a PC, the volume of the flash drive can decrease tens of times, which will cause significant trouble for the user. Do not rush to throw away the device; simple manipulations will help restore the drive’s functionality and extend its service life for a significant period.
By following the simple recommendations outlined in this article, you can restore the size of your flash drive to its original factory settings. Buy only high-quality devices and operate according to the manufacturer’s recommendations - this will save you from reoccurring problems of this kind.