Any modern phone will function normally only if all its systems work without interruption. This applies to both software and hardware of devices. If the software was flashed or updated improperly, then there is a high risk of seeing an error on the smartphone screen. Therefore, installing third-party programs and utilities is highly discouraged when using phones such as the iPhone.
By the way, it is iPhones that most often bring inconvenience to their owners. It's not that Apple makes low-quality products. Quite the contrary, phones from this manufacturer are considered one of the most durable and reliable devices. The problem is that users very often install applications on their smartphones that are not compatible with the iPhone system. Most often, owners of Apple products are faced with error 21. Let's take a closer look at what this may be connected with. How to fix the situation?
Error classification
Apple support on a special page on the website divides failures by number into several categories. However, you will not find some codes. For example, there is no number 52 on the support page, because iTunes does not crash with such a code. Error 47 is also not listed, although some users complain that due to a glitch with this number they are unable to restore their iPhone.
If you encounter problem 47, there may be several reasons for its occurrence:
- Failure of the modem chip.
- Modem processor failure.
- Liquid has entered the modem part.
As you can see, error 47 is due to a hardware problem. Therefore, if you encounter failure 47 when restoring your iPhone, take your mobile device to a service center. Even the master does not immediately determine the exact cause
problem number 47 appears, so it’s better not to risk trying to repair it yourself.
The main symptoms of error 4005
Error 4005 (when restoring an iPhone 5 or installing programs while iTunes is running, shutting down Windows) has a number of symptoms:
- The notification “Error 4005” is displayed and the active application window crashes.
- Frequently the PC stops working after error code 4005 appears when launching a certain application.
- The message “The iPhone could not be restored” appears.
- Windows is slow and responds to the mouse or keyboard.
- The PC periodically freezes for a few seconds.
Communication errors (1671, 3004, 3014, 3194)
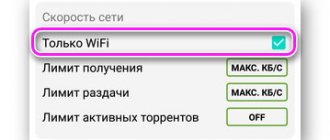
If, when restoring an iPhone, iTunes displays a message with numbers 1671, 3004, 3014, 3194 or 9006, then you are dealing with problems that are preventing your computer from establishing a connection with the Apple server or mobile device. If problems 3004, 3014, 3194, 9006 occur, first try restarting your computer. If this does not help, close the applications that are running in the background, leaving only iTunes. Disable your firewall and antivirus. Since failures with numbers 3004, 3014 3194, 9006 occur due to the inability to establish a connection to the server, disabling the firewall will help remove the firewall.
If these methods do not help get rid of failures 3004, 3014, 3194, 9006, then try the following methods:
The extra entry will end with gs.apple.com. If you find one, delete it immediately and save the hosts file. After editing hosts, error messages 3004, 3014, 3194, 9006 should no longer appear when restoring an iPhone. If problems with numbers 3004, 3014 3194, 9006 appear when restoring an iPhone on a Mac computer, then open hosts through the terminal using the command “sudo nano /private/etc/hosts”.
If iTunes displays error 3194 when the recovery line is 2/3 full, then most likely you are faced with a hardware problem - damage to the modem or iPhone power module.
If you cannot restore your device due to problems with the modem, contact a service center for help, as you will not be able to fix the problem yourself.
Errors 14 and 4005
Failures with numbers 14 and 4005 when restoring an iPhone usually occur when problems are detected with connecting the device via USB. Error 14 indicates that during the recovery process, iTunes detected a violation of the integrity of the firmware file. Error 4005 usually indicates that there is some problem with the cable or port on the computer.
To fix error 14 or 4005:
- Use the original iPhone cable.
- Connect the device to a different port. Try to use connectors that are located on the rear panel of the system unit, then you will have less chance of errors like 14 and 4005 appearing.
- Connect your iPhone to another computer.
If error 14 or 4005 persists, try putting your phone into DFU mode before restoring. If this does not help resolve failure 14 or 4005, download the firmware manually and select the desired ipsw file by holding down the Shift key while clicking the “Restore” button.
Errors numbered 14 and 4005 appear when you try to update the firmware by jumping through the version (for example, from iOS 7 directly to iOS 9). To avoid issue 14 or 4005, select the appropriate firmware version.
Part 1: How to Fix iPhone Error 4005 (5 Best Solutions)
It goes without saying that you want to quickly get out of a bad situation and fix this iPhone error 4005. So, in the first part, we will show you the top 5 methods that will help you solve this problem. Now you can try them one by one to fix iPhone error 4005.
Solution 1: Fix iPhone Error 4005 with iOS System Recovery
If you don't know why iPhone error 4005 occurs, you can turn to Apeaksoft iOS System Recovery for help. It is an easy-to-use iTunes error fixer that allows you to fix Error 4005. So, you can use iOS System Recovery as your first choice to fix iPhone Error 4005.
iOS System Recovery
- Fix iPhone from iTunes, error codes, DFU mode, recovery mode, Apple logo and any abnormal situations.
- iOS system repair only without risk to your device.
- Support iOS 10.3/11/12 and iPhone X/8 Plus/8/7 Plus/7/SE/6s Plus/6s/6 Plus/6/5s/5c/5/4S, iPad Pro, iPad Air, iPad Air, iPad iPod and much more.
- Easy to use and secure enough not to lose data during iOS system recovery.
Step 1. Launch iOS System Restore
Free download iPhone error 4005 fix. Launch it and select "iOS System Recovery" to easily fix iTunes errors 4005 and other iTunes errors.
Step 2. Connect iPhone to PC
Use a lightning fast USB cable to connect your iPhone to your Windows or Mac computer. Then click the Start button in the lower right corner.
Step 3. Enter DFU mode
You may see various instructions on how to put your iPhone into DFU mode. Select the most suitable model according to the iOS model you have. Next, follow the step-by-step instructions to open DFU Mode.
Step 4. Check the information of the detected iOS device
This iOS System Recovery can detect your iOS device automatically. This way, you can see basic information about your iPhone or iPad on your home screen. Check and fix if there is anything wrong with your iOS device. Otherwise, your iPhone may be locked during the process.
Step 5. Fix iPhone Error 4005
Click the "Restore" button to start downloading the firmware and fixing error 4005 on your iPhone or iPad. It will take a few minutes to complete the process. Do not disconnect your iPhone or iPad while troubleshooting Error 4005 on iPhone. This can also be a great help if your iPhone is stuck in the update process.
Solution 2: Restart iTunes to fix iTunes error 4005
If you have iPhone 5/6 error 4005 Hardware and other problems, you can close and then launch iTunes again to fix simple errors automatically. Sometimes iTunes just freezes with small glitches, so you can restart iTunes to fix iTunes error 4005 with ease.
Solution 3: Restart your computer to solve iTunes error 4005 problem
If restarting iTunes is not the right solution, you can restart your computer to try. This is a good way to erase the registry and solve minor problems with iTunes. So, you can consider it as 6 hardware solution for your iPhone 4005. Also, you can force restart your iOS device to fix the problem.
Solution 4: Check the USB cable and USB port
Make sure you have connected your iPhone to your computer correctly. If you are not sure whether it is a problem with the USB cable or the USB port. You can replace the new USB cable or connect to a different USB port.
Solution 5: Update iTunes to fix iTunes error 4005
The first thing you need to do before using iTunes is to always check its version. Otherwise, outdated iTunes may cause many iTunes errors, including iPhone 7 error 4005 and others. Well, you can deal with improper iTunes download or installation by updating to the latest version too.
For Mac users, you can open the iTunes drop-down menu to see whether the iTunes version is available or not. If you're using iTunes on Windows, you can open the Help menu in the toolbar and select "Check for Updates" to complete the iTunes update.
Error 21
Failure number 21 occurs when the device is incorrectly entered into DFU mode. To eliminate the cause of error 21, use programs like redsn0w to transfer the phone to DFU.
Owners of iPhones that have been jailbroken especially frequently encounter crash 21. In addition, failure 21 may occur due to the fact that the battery is not fully charged. Accordingly, to fix problem number 21, you need to put your smartphone on charge.
It may be necessary to carry out the recovery procedure for iPhone 4 if the system or individual modules are not operating normally, or if the lock screen password is forgotten. We'll tell you how to save photos and other user information, revive your iPhone and get rid of failures in which the system issues codes 3004, 2009, 16, 4005, 4013, 3194.
Hardware solution to error 21
The repair method is as follows: Replacing the battery - Replacing the lower cable - soldering the battery connector (1) - jumpers (error 29 solved on YouTube) - check the quartz (2) - replacing the power controller (4) - processor reboot - mussarka.
- First of all, you need to check the voltage on the battery; if it is less than 3.7 V, then we charge it using a “frog” or directly connect the wires to the battery;
- Second, check the cable and the power connector should be undamaged;
- Third, remove the power cables, the motherboard and put them in place;
- Fourth, replacing the power supply (it should preferably be from the original iPhone);
- Fifth, check the power controller if it needs to be replaced.
Creating a backup
Any method of restoring an iPhone involves installing new firmware and losing all personal data on the iPhone. Fortunately, archival copies of photos and other important information are easy to make. You will need iTunes and a computer:
- Connect iPhone to computer;
- When the device is detected, right-click on its icon;
- From the context menu, select the copy creation command.
The iPhone can be synchronized with any of the free cloud services - so every photo taken, when connected via Wi-Fi, the gadget uploads to network storage.
Practical experience fixing error 21
The apple lights up when turned on and constantly reboots; when the cable is connected, the iTunes icon appears and that’s it. When I connected it to the computer via cable, the program said that it needed to be updated or restored.
During the firmware/restoration there was ERROR 21. At the same time, the voltage on the battery was only 3.6 volts. The charging did not respond when measured; the voltage on the board was 0. After disassembling the device, oxide was found at the C135 capacitor next to the transmitter. the capacitor dropped out, put it on charge - charging started; a voltage of 1.2 volts appeared on the connector of the battery board; when flashing/restoring it gave error 6.
I switched to another computer with Windows 7 64 bit and disabled the antivirus and firewall. I connected only the phone, without connecting third-party USB devices, the Internet was via Wi-Fi, I downloaded the firmware separately and when installing the firmware, I pressed the Shift button and selected the firmware file (preferably a path without Russian letters). The update did not work, I restored it. It didn't work the first time. So you have to try. At first there was also error 6. As a result of many attempts, everything worked out. TA worked. Try it, it might help.
Standard reset method
This is a simple method that allows you to get rid of iPhone glitches in many cases. User information and photos are not saved, settings are reset to factory settings. In order not to experience additional difficulties when restoring the firmware, it is better to immediately use the latest version of iTunes, as well as iOS.
Although an application on your computer can download the OS for you during the firmware update, sometimes the iPhone crashes 3194, 3004, 4005, 21, 11, etc. In addition, the iOS version installed automatically will be the latest, which suits everyone not every iPhone owner.
The procedure for flashing the standard firmware of the device is as follows:
The device will go into Recovery Mode and reset the settings to factory settings, the user will be able to return contacts, photos, etc. through the created backup.
Standard update
If you haven’t made any archived saves, your iPhone is crashing, a flashing is required, but you don’t want to lose your personal data, try updating the system rather than restoring it. In this case, iOS will also be reflashed, but the photo and all other information will not be lost. In this case, the chance of fixing bugs is less, and you won’t be able to reset the password
.
Starting from version 5 of iOS, this update method is available not only through iTunes, but also simply when a Wi-Fi network is available. It makes no sense to consider the first method in detail, since it completely repeats the recovery method described above; you just need to click the “Update” button in the 4th step. It's even easier to do this over a Wi-Fi network:
- in the “General” section of the gadget settings, open “Software Update”;
- A line with the latest firmware version will be displayed, click on the bottom line for download and update.
All you have to do is wait for the process to finish. iOS will be reinstalled, password, settings, photos, etc. will be saved.
Fixing errors in Recovery Mode
With Recovery Mode you can solve most problems and reset your password. Recovery is also carried out through iTunes; data, including photos, contacts, etc. are not saved. The flashing method is similar to that described above, only the user enters his iPhone into Recovery mode independently. Sequencing:
- Turn off the device.
- Press and hold Home on your phone, while connecting it with a cable to your computer via iTunes.
- The appearance of the media player icon and USB cable on the display will indicate that the phone has entered Recovery mode.
- If iTunes does not load automatically, launch it and make sure that the media player recognizes the connected device - a corresponding notification will appear on the screen.
- Next, select the iPhone in the same way, hold Shift and click on the restore button.
- All you have to do is indicate the location of the new firmware, start the process and wait for it to finish, enter your Apple ID password and update the settings.
Use standard recovery mode
It is important to properly prepare for a reset in recovery mode:
- Aityuns update.
- Connect the USB cable to your PC.
READ Meizu App Network Error How to Fix
Rebooting iPhone 5S into recovery mode requires a number of steps:
- Turn off the device.
- Hold down the Home button and connect the USB cable while holding down the Home key.
- Release the button when the iTunes logo and USB cable icon appear on iPhone 5S.
- When you release the key, the device will display a successful connection message.
- All you have to do is press the recovery key in the iTunes window on your PC.
- The following procedure will be performed automatically. Within 3 minutes, the user will receive corrected settings while saving user information.
Using DFU Mode
Even with a simple firmware update, the need to reset a password, etc., it is recommended to do this by bypassing the OS through the DFU mode, making a backup in advance, saving a photo, downloading the firmware file and then restoring personal data. In this way, you can eliminate not only the most severe software malfunctions, reset the password, but also avoid all sorts of failures, for example, with codes 16, 21, 11, 4005, 3194, etc., which often arise when reinstalling the OS using other methods.
The reinstallation sequence in this case is completely the same as described above, except that the iPhone will need to be forced into DFU mode, not Recovery. This is done as follows:
- Connect your iPhone to your computer and turn it off, or hold down the power and home buttons simultaneously for 10 seconds.
- After 10 seconds, release the power button while holding down “Home”.
- Continue to hold it down until the PC displays a message indicating that the gadget has been detected.
Judging by the message, it will be detected in Recovery Mode, however, DFU mode can be recognized by the absence of any image on the display - it should be black or white, depending on the model.
Possible failures during flashing
To reset your password and troubleshoot software problems with Apple gadgets, it is better to use DFU mode. However, many users experience certain difficulties logging into it, so in order to remove the password, they reinstall iOS directly from the system or in Recovery Mode, which sometimes causes an error. The codes may vary - 16, 21, 11, 4005, 4013, 4014, 3194, etc. Let's look below at the reasons for update failures and how you can deal with them.
The appearance of failure codes 4005, 4013 and 4014
Codes 4005, 4013 and 4014 appear mainly after the gadget is disconnected from the PC during the update process, or if the program is interrupted for other reasons during execution. To correct the situation:
- install the latest version of iTunes;
- try using another original USB cable or even a computer;
- force a reboot of the device;
- If you used the front USB port, use the rear one.
Often error numbers 4005, 4013 and 4014, along with 16, 21, 11, etc., occur due to faulty iPhone hardware. For example, if the device is dropped, the contacts of the modem chip, compass chip, etc. may be broken. When updating, the phone diagnoses all modules and if it does not find any, it displays a window describing the fault - error 11, 16, 21, 4005, 4013 or 4014. Therefore, if the above methods do not help, the iPhone will have to be taken to a service center, where the technician will have to resolder the problematic chips.
Failure 3004 when updating
Sometimes when reinstalling iOS via iTunes, the process is interrupted by code 3004. There are two main reasons:
- blocking software installation by antivirus, as a result of which iTunes loses the ability to contact the server;
- the work of a firewall that evaluates downloaded information as a threat and also blocks it.
Error 3004 can often be resolved very simply:
- Disable all security software, and then restart the update mode via iTunes.
- Sometimes making Internet Explorer the main browser solves the problem with code 3004. This is done in the “Programs” tab of the browser properties.
If you still see error 3004, clean your system of viruses. Malicious code, along with pirated software used in the gadget, can also make it impossible to reinstall iOS due to failure 3004.
Reinstallation fails due to code 2009
If the connection between the computer and the device is broken, iTunes displays a message that error 2009 has been found and the process is terminated. The problem with the appearance of 2009 is solved in the following ways:
- Change the cable to another original Apple USB;
- Connect via another USB port or a computer with an iTunes player installed;
- Disconnect all working USB devices from the PC except for the necessary ones - keyboard, mouse and the device being directly flashed.
If error 2009, 4005, etc. is not resolved, the iPhone will have to be serviced.
Malfunctions with codes 11, 16 and 21, etc. do not allow you to reflash the device
If the phone does not reflash and displays errors 11, 16 or 21, there is a high probability of hardware problems. This could be a malfunction of the radio module, a mismatch between the checksum and the serial number of the device. For this reason, previously errors 11, 16 and 21, like 4005, could appear on iPhone 4 and 4S after restoration in China - they were sold under the brand “like new” or Refurbished.
- Update iTunes, disable third-party security software;
- Please use another original USB cable;
- Check the functionality of your PC and network, make a couple more attempts to reinstall iOS using DFU mode - this will minimize the likelihood of failures 11, 16 and 21 appearing.
If all attempts are unsuccessful, the system issues codes 11, 16 and 21, 4005, then the problems will have to be fixed in the service.
Troubleshooting 3194
Error 3194 indicates that the iTunes program cannot receive a response from Apple servers when sending a request to sign the firmware. Reasons why code 3194 appears:
- changes to the hosts file, for example, for use when caching Cydia servers;
- Apple does not issue signatures for older firmware, triggering failure 3194.
There are several ways to resolve fault 3194:
- Update iTunes.
- Install the TinyUmbrella application on your PC. After launching the utility, open the Advanced tab and uncheck the box next to Set Hosts to Cydia and try to recover again. In this case, iTunes will stop connecting to Cydia instead of Apple's servers and fail with error 3194.
- Open the system hosts file on your computer using Notepad. Delete the line 74.208.105.171 gs.apple.com from the file, save and restart your PC.
One of the proposed options will certainly be able to save you from the occurrence of a failure - error 3194 will disappear, after which you can reflash the phone, enter a new password, return photos and settings.
Report content
- Copyright infringement Spam Incorrect content Broken links
Send
Any modern phone will function normally only if all its systems work without interruption. This applies to both software and hardware of devices. If the software was flashed or updated improperly, then there is a high risk of seeing an error on the smartphone screen. Therefore, installing third-party programs and utilities is highly discouraged when using phones such as the iPhone.
By the way, it is iPhones that most often bring inconvenience to their owners. It's not that Apple makes low-quality products. Quite the contrary, phones from this manufacturer are considered one of the most durable and reliable devices. The problem is that users very often install applications on their smartphones that are not compatible with the iPhone system. Most often, owners of Apple products are faced with error 21. Let's take a closer look at what this may be connected with. How to fix the situation?
iTunes 4005 Error Correction Instructions
The step-by-step instructions contain a number of steps:
Step 1: Repair registry entries associated with error 4005.
Errors resulting from editing the registry lead to malfunctions of the PC and threaten to damage the OS. Even one wrong comma can prevent your PC from booting. This determines the need to use a reliable registry cleaner (WinThruster) to scan and fix the crash associated with error code 4005.
Registry Cleaner helps automate the process of finding broken registry entries, missing file links, and broken registry links. Automatic backup is performed before scanning. After fixing registry errors, you can experience a dramatic increase in system speed and performance.
To manually repair the Windows registry, it is important to provide a backup by transferring the part of the registry associated with error 4005 (for example, iTunes). It requires:
- Activate the Start command.
- Type "command" in the search bar without pressing Enter.
- While holding down CTRL-Shift, press ENTER.
- In the dialog box, click Yes to access.
- Open the black box with the blinking cursor.
- Type "regedit" and press Enter.
- In the Registry Editor, select the key associated with the 4005 code (for example, iTunes) that you are backing up.
- From the File menu, select Export.
- In the "Save" column, specify a folder to save the backup copy of the iTunes key.
- In the File Name column, enter a name for the backup file, such as "iTunes."
- Make sure the Export Range section is set to Selected Branch.
- Click "Save".
- The file will be saved with the extension .reg.
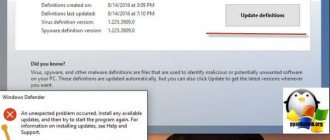
Step 2: Perform a full scan of your computer for malware.
Error 4005 may occur due to your computer being infected with malware that causes file corruption or deletion due to run-time errors. Error 4005 may be related to components of the malicious program itself.
Tip: Before installing anti-malware programs, developers strongly recommend using Emsisoft Anti-Malware.
Step 3: Clean the system of garbage (temporary files and folders) via disk (cleanmgr).
After a certain period of time, unnecessary files associated with normal Internet surfing and daily use of the PC accumulate on the PC. Removing unnecessary files will prevent iTunes from slowing down or causing error 4005 (in case of file conflicts or hard drive overload).
Instructions for running Disk Cleanup (cleanmgr) include:
- Activating the Start button.
- Type "command" in the search bar without pressing ENTER.
- Hold CTRL-Shift and ENTER.
- In the dialog box that appears, select “Yes” to access.
- Open the black box with the blinking cursor.
- Type "cleanmgr" and enter.
- Disk Cleanup will begin counting the free disk space that can be freed.
- The Disk Cleanup dialog box contains checkboxes. Typically, “Temporary files” take up most of the disk.
- After checking the boxes for these categories, click OK.
Step 4: Update device drivers on your PC.
Error 4005 can be caused by corrupted or outdated device drivers. Before you start the process of cleaning them, it should be noted that the error may not be caused by driver problems, but updating drivers helps to maximize PC performance.
Step 5: Use the Windows System Restore option to undo recent system changes.
Windows Update helps restore system files and programs on your computer to when they are functioning properly.
READ How to Connect Super Mts to Your Phone
System Restore will not affect the security of documents, images, or other data. The work procedure includes:
- Press the Start key.
- Type "System Restore" into the search box and press "ENTER".
- Select System Restore.
- Enter the administrator password (if prompted).
- Follow the wizard to select restore points.
- PC recovery.
Step 6: Uninstall and install the iTunes program associated with error 4005.
Instructions for Windows7 and Vista:
- Open Programs and Features by activating the Start button.
- Click "Control Panel" in the right menu.
- Select "Programs", "Programs and Features".
- Find iTunes in the “Name” column, activate the entry.
- Select "Delete" at the top.
- Follow the onscreen instructions to uninstall iTunes.
Procedure for Windows XP:
- Open Programs and Features via Start.
- Select control panel.
- Click Add or Remove Programs.
- Find iTunes in the list of installed programs.
- Click on the iTunes entry.
- Specify the delete command on the right.
- Follow the instructions below.
Key steps for Windows 8:
- Place your cursor in the lower left corner of the screen to display the Start menu.
- Right-click and open the Start menu.
- Click Programs and Features.
- Find iTunes in the "Name" column.
- Click on the iTunes entry.
- Set the delete command in the top menu bar.
- Follow the instructions.
If you have successfully removed error 4005 (i.e. iTunes), you will need to install new software by following the instructions in the Apple Inc. manual.
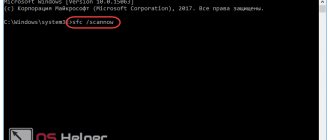
Step 7: Run the Windows System File Checker (“sfc /scannow”).
A tool that checks system files included in Windows; used to scan and repair damaged Windows system files.
To start scanning system files, follow these steps:
- Click the Start button.
- Type "command" in the search bar without pressing ENTER!
- While holding down CTRL-Shift, press ENTER.
- In the Access dialog box, select Yes.
- The cursor blinks to reveal a black box.
- All that remains is to specify “sfc / scannow” and press ENTER.
Checking system files may take some time.
It is important to follow the on-screen instructions.
Step 8: Install all available Windows updates.
Microsoft is constantly updating and improving Windows system files related to error 4005. Often, updating Windows can help resolve the issue with the latest service pack or other fix that Microsoft releases on an ongoing basis.
To check for Windows updates, follow these steps:
- Activate the Start button.
- Type "update" in the search bar and press Enter.
- In the Windows Update dialog box that opens, you must specify the update installation command.
Step 9: Perform a clean installation of Windows.
Before you start reinstalling Windows, you should be prepared to spend a lot of time. Back up important documentation, photos, software installers, etc. to prevent data loss.
Causes
If error 21 appears on your phone, then this is not the most dangerous problem. However, it brings many inconveniences. This code may appear on your phone screen if:
There are a huge number of factors that can affect the operation of the system. In addition to error code 21, owners of modern smartphones often encounter other numerical combinations that appear on the device screen. However, most of these errors are usually related to a glitch in the software update process in one way or another.
Creating a backup
Before you begin any manipulations with your phone, you need to copy all important information from it. Of course, you don’t need to copy everything into a notebook for this. It is enough to create a backup. Fortunately, the iPhone allows you to do this very quickly. In order to save files from your smartphone, you must:
- Connect your phone to your PC.
- As soon as the computer recognizes the device and notifies you about it, you need to right-click on the icon.
- Select “Create a copy” in the context menu.
Standard factory reset
This method is a universal way that will allow you to get rid of the “glitches” of your smartphone. However, it is worth considering that when you reset the settings, all user information (pictures, photos, videos and other files) will be completely deleted. That’s why it’s so important to create a backup first. It is also recommended to immediately download the latest versions of iTunes and iOS from the manufacturer’s official website.
After this, you need to perform the standard firmware as follows:
- Go to the iCloud section and disable the iPhone search function. If the phone version is lower than 5, then this action will not be needed.
- Connect your smartphone to your PC and turn on iTunes. The program can start automatically.
- Next to the iTunes Store button there will be an icon with a picture of the device. You need to click it and go to settings.
- Click on the “Restore via iTunes” button and at the same time hold down the Shift key on the computer. If the recovery is carried out via Mac, then hold down Alt.
- The following dialog box will appear on the screen, in which you need to specify the path to the previously downloaded files of the fresh OS.
After recovery, the device will go into Recovery Mode. The settings will be reset to factory settings. At the next stage, you can return files from the backup to your phone. If error 21 appears again, then continue.
Error 4013 when restoring iPhone
Is this error actually fatal?
Popular sites advise restoring iOS, updating iTunes, downloading the latest firmware to the iPhone, but all these actions most likely will not make the iPhone work. Why? The answer is simple, the iPhone’s memory is like a “flash drive” and fails. Just remember how often your flash drives with coursework, old photographs, and important information break?
And here the principle is the same, although more high-tech. In the production of iPhone boards, modern components are used from reputable manufacturers Hynix, SanDisk, Toshiba, etc. But they also have problems. Service life is limited to 5 years (official information on the iPhone box).
Let's try to understand the reasons for this error. The problem is that it is preceded by various symptoms of iPhone behavior.
For example:
- iPhone reboots frequently;
- A red screen appears when loading;
- iPhone freezes on boot and won't boot;
- “Apple” is displayed on the screen and nothing else happens;
- In the firmware logs, NAND CRC ERROR is displayed (read more about this below).
If the above symptoms appear on your device, don’t panic. The first step is to restore the software (iOS) in Recovery mode.
Do this if you are sure that you have a backup copy or the data was previously synced to iCloud.
After entering Recovery mode, we restore the iPhone to factory settings. Select “Restore” in the window. If at the end of the firmware you receive error 4013, the problem with the nand flash memory has probably been confirmed.
There is another feature when error 4013 appears during recovery, but it is not related to NAND. If the Tristar U2 IC charge controller fails (burnout, short circuit), a similar error may appear. In this case, the iPhone quickly discharges, charges slowly, and after a full charge it may not turn on at all. This failure can be solved by replacing this microcircuit. The cost of replacement work is from 3,500 rubles.
How to read iOS logs?
The software logs are located in Settings -> Privacy -> Analysis -> Analysis Data. In these numerous logs you need to find the first one starting with “panic”. Then fall into it and find the unfortunate inscription NAND CRC ERROR
.
Read what to do about this in our article iPhone Flash memory does not work.
Recovery Mode
In this mode you can also try to fix the error. True, in this case, you will also have to first save all the necessary documents and contacts from the phone book.
- Disable the device.
- Press and hold the Home key.
- Without releasing the button, connect the smartphone to the PC.
- A media player icon will appear on the screen, and the system will report that the gadget has entered Recovery Mode.
- If iTunes does not load automatically, you must force the program to start. A notification should appear on the screen indicating that the device has been recognized by the media player.
- After this, the same actions are performed as during restoration in normal mode.
At the final stage, you need to specify the path of the new firmware and enter your Apple password.
Using standard Recovery Mode
It is important to properly prepare for a reset in Recovery mode:
- Update iTunes.
- Connect the USB cable to the PC.
Further rebooting the iPhone 5S in Recovery mode requires performing a number of steps:
- Turn off the device.
- Hold down the Home button and connect the USB cable while holding down the Home key.
- Release the button when the iTunes logo and USB cable icon appear on the iPhone 5S display.
- When you release the key, a notification indicating a successful connection will appear on the device.
- All you have to do is press the recovery key in the iTunes window on your PC.
- The further procedure will be carried out in automatic mode. Within 3 minutes, the user will receive corrected settings while saving user information.
Summing up
If error 21 on iPhone does not disappear, then the problems may be more serious than it might seem at first glance. In this case, you need to contact a specialized service center and diagnose the device.
Specially developed by Apple to work with devices on the iOS platform, it provides Apple owners with synchronization of the device with the computer, convenient work with content and a lot of other functionality, including firmware recovery. The procedure performed using iTunes is easy to implement, but during the process unexpected problems may arise that interrupt the action. Using notifications with error codes, the program informs users about software failures or hardware problems. Error 21 in iTunes can occur when updating or restoring iPhone firmware of different versions. Messages about program failures appear for various reasons. Error 21 most often indicates mechanical damage to the device resulting from malfunctions of the modem, device battery, internal boards and other components, but it can also appear as a result of software failures during the jailbreak process. Another reason is often a low battery charge or failure.
Options to resolve error 21 in iTunes.
Despite the fact that this failure is often caused by microdamage resulting from an impact or fall, as well as other hardware faults, there are also software solutions with which the user can cope with the problem on their own.
Method 1: Update iTunes
A universal method, which often allows you to get rid of most application failures when updating or restoring an iPhone 4s and other Apple devices, in some cases also eliminates error 21. If the computer does not have the latest version of iTunes, then after updating and restarting the PC, the problem may be resolved.
Method 2: Replacing the USB cable
Sometimes error 21 can be caused by cable damage or the use of a non-original cord. But even if original equipment is used, it is necessary to inspect it for kinks, twists, oxidation and other minor defects. The correct interaction of the device with the computer largely depends on the integrity of the cable, so if any damage is found, it should be replaced with a working original cord.
Method 3. DFU mode
By activating the DFU emergency mode, you can often get rid of many failures that occur during the update and recovery process, including error code 21. For iPhone 4s and other versions, the procedure follows a similar principle. Before entering the device into DFU mode, you should turn it off completely, and then connect it to the computer using the original USB cable. Next we carry out the following actions:
- Press the “Power” button and hold it for 3 seconds;
- Without releasing the top power button, also press and hold “Home” for 10 seconds;
- after this time, release only the “Power” button, while continuing to hold the “Home” button until iTunes detects the device in DFU mode;
- After the manipulations have been carried out, the program will offer to perform the only action - restoring the iPhone. Next you need to follow the instructions on the monitor.
Method 4. Disabling the antivirus
Some antivirus programs, firewalls and other system defenders can block iTunes processes, perceiving them as virus threats, as a result of which the error that appears prevents the continuation of the procedure. You can pause the antivirus while the firmware is being restored, and after restarting the application, see if error 21 occurs again. If the problem is resolved, you need to add iTunes to the antivirus exclusion list, and also cancel network scanning.
Method 5: Windows Update
In rare cases, updating system components helps, for which you need to go to the Windows update and security settings and search for available updates. If they are found, it is worth installing.
Method 6: Fully charge the device's battery
When the source of the problem is the battery of an Apple device, the method of fully charging the battery often helps. Once the battery has been charged to 100%, you can try the update or restore procedure again.
Method 7: Restoring Registry Files
Restoring registry entries often helps in the fight against iTunes errors if files were damaged by viruses or accidentally deleted by conflicting programs. Microsoft's WinThruster tool will help you perform the automatic fix. The program scans and then replaces damaged files with “healthy” ones. Manually adjusting the registry is possible only if you have special skills. Self-correction without specific knowledge can significantly disrupt the operation of the system.
Method 8. Hardware solution
If none of the above methods lead to the elimination of error 21 in iTunes, most likely the problem lies in internal damage to the device. Service diagnostics will help you accurately identify hardware faults. It may be necessary to replace the battery, power controller or lower cable and it is better to entrust the matter to a specialist.
You should not solder or change elements yourself without having the appropriate skills, because one wrong action can only aggravate the situation and lead to irreparable consequences in the form of the final failure of the iPhone.
If nothing helps, what should I do?
You can try to resolve error 4005 when restoring iPhone 5s by completely reinstalling iTunes. To do this, you must first turn on your computer and find all installed iTunes files in it. After removing these components, make sure that there is no residual data on the PC and reboot the device. At the next stage, just go to the official Apple website and re-download the software.
If none of this helps, then most likely the problem is not in the software. In this case, it is necessary to repair the device itself. In the service center, such procedures are carried out only after detailed diagnostics, so you should prepare for impressive financial costs. If it turns out that the phone does not work due to mechanical damage, then repairs will be the most difficult to perform. Therefore, it is better to take care of your favorite iPhone and not try to reflash it yourself, as this can also lead to serious malfunctions.
The iTunes program is a real godsend for users of iPhone 5, 5s and other Apple devices; with its help, you can not only access content from the Internet by synchronizing the device with a computer, but also update or restore the smartphone’s firmware. Ease of use and rich functionality have made iTunes one of the most popular services that will be useful to every owner of an iOS device. Despite a number of undoubted advantages of using iTunes, the program is not without frequent failures during operation, the causes of which can be both software and hardware malfunctions. You can identify the error thanks to its code specified in the error notification that is displayed. A fairly common occurrence when updating or restoring the firmware of an iPhone 5, 5s is a message with information about critical error 4005 in iTunes. It is impossible to say with certainty what caused the problem, since it can be caused by various factors, but most often the root of evil is the malfunction of the device elements. Despite this, sometimes software methods that the user can apply independently help resolve the issue. In addition, in some cases, even the most primitive action can fix error 4005 in iTunes, so it’s better to start with simple solutions, moving on to more complex options as necessary.
Methods to resolve error 4005 in iTunes.
It is not possible to determine the cause “by eye” without technical diagnostics of the device, but it would be useful to try possible solutions using the software method. So, before running headlong to the service center, it is better to try your luck to fix error 4005 in iTunes on your own, especially since actions aimed at eliminating the failure do not require any special skills from the user, but can be very effective.
Method 1: Replacing the USB cable
Errors in the iTunes program are often caused by a non-original USB cable, even if it is certified by Apple. For this reason, it is recommended to use exclusively the original cable that comes with the iPhone 5/5s or other Apple device. You should carefully inspect the cord you are using for damage and any minor defects, if found, replacement is required.
Sometimes the issue is instantly resolved by restarting the computer or laptop, as well as the iOS device, using a forced shutdown. These simple steps help in case of a system failure, but if the iTunes error 4005 appears again, the troubleshooting process will require a more serious approach.
Method 3. Scan for viruses
A common cause of software failures is malware that has settled on the computer and caused damage to iTunes files. After scanning your computer and removing viruses if any, you need to restart your PC and try the iPhone 5/5s recovery procedure again.
Method 4: Update iTunes
For correct operation, the latest version of the program must be installed on the computer, so if any updates are available, you should install them. Sometimes error 4005 is caused by incomplete installation of software files from a previous update or by corruption of the software files. You can see the availability of options in the “Help” - “Updates” section.
Method 5: Reinstall iTunes
Another method to solve the problem is to remove the program and then reinstall it. Having completely removed iTunes from the section with the software installed on your computer, you should download the latest version installer from the official resource and install the application.
Method 6: Update drivers
Damaged or simply outdated drivers can also cause disharmony and the inability to update or restore your iPhone. It is recommended to update the drivers and then try to resume the procedure.
Method 7: Windows Recovery
Operating system tools also allow you to return to a previous state when error 4005 did not yet occur. If the problem is related to a system failure, this solution is quite effective.
Method 8: Restoring registry entries
Method 9. DFU mode
DFU emergency mode often helps to cope with the restoration of an iPhone 5, 5s or other Apple. To use this method, you must perform a number of steps:
- turn off the iPhone in the standard way;
- connect the device to the computer using the original USB cable;
- launch the iTunes service;
- press “Power” and hold it for 3 seconds, after which, without releasing the power button, press “Home” and hold both of these buttons at the same time;
- after 10 seconds, release “Power”, but not “Home”;
- We continue to hold the “Home” button until iTunes detects “apple” in DFU.
The actions taken will lead to the possibility of disaster recovery. The user will be offered the only option for further action - press the “Restore iPhone” button and follow the prompts on the screen.
Method 10: Using a different computer
Instead of going the hard way and using barbaric methods with interrupting the operating system, it is better to use another computer with the latest version of iTunes installed on it. But if the same problem occurs on another PC, then you can completely rule out software faults and proceed to more radical measures.
Error 4005 in iTunes can indeed be serious and cannot be resolved by the above methods. But don’t rush to mourn your smartphone, because if a professional gets to work, the problem may be painlessly resolved with minimal investment.