A huge amount of dust accumulates inside the system unit, and even pet hair, if any. Those who are familiar with computer equipment do not need to explain how important it is to periodically clean the system unit. So in our article we will focus on typical users who know how to connect a device to a USB port as much as possible.
First, let’s talk about how often you need to clean your computer from dust. We recommend doing this at least once every six months. If you have the skills, the process will take about 15 minutes - not so much. In addition, the computer itself may give you signs that it’s time to clean it. They could be, for example, like this.
- The computer makes a lot of noise when working, especially under high loads
- The system suddenly reboots or a blue screen appears
- The computer freezes periodically
- Artifacts appear on the monitor (image distortion and stripes)
ADVANCED TIP. If interested, you can check if the processor or video card is overheating. The processor temperature in modern computers is in the BIOS (Hardware Monitor tab); if it is above 70 ° C, this is a definite overheating. You can find out the temperature of the video card using utilities (for example, NVIDIA Inspector).
Why clean your computer from dust?
It’s clear that they do this not to make it pleasant to look at the hardware. The components of the system unit become very hot during operation, so radiators and cooling coolers were invented for them. Coolers are fan-powered systems that force air through heated radiators. It is in radiators that dust most often accumulates - because of it, cooling is disrupted, components overheat and stop working normally.
Dust is a computer's worst enemy
Nowadays there are computers in almost every home of every family. Over time, they can become clogged with viruses, unnecessary applications, duplicates of the same file, and much more. But the main thing that happens to absolutely every PC is the accumulation of dust inside the system unit.
Dust settles absolutely everywhere: on hard drives, video cards, and the motherboard. It also accumulates on fans and radiators, preventing the PC from cooling, thereby increasing the risk of fire and overheating. Indeed, in the absence of the necessary cooling and maintaining a stable temperature, the computer will automatically reboot, slow down, or even not turn on at all.
Signs that your computer requires dust cleaning
- The computer began to make a lot of noise when working, especially under high loads.
- to reboot abruptly or starts to periodically display a blue screen.
- Frequent freezes .
- Various image distortions or stripes appear on the monitor.
You can also check whether the processor or video card is overheating using the NVIDIA Inspector (to check for overheating of the video card) or through Hardware Monitor tab (to check for overheating of the processor). At temperatures above 70 degrees Celsius, the computer overheats.
Cleaning your computer from dust: where to start?
System units usually have several holes covered with a metal mesh. One is on the side wall (for ventilation of the case), the second is on the back (this is the power supply). If you have a cat or a dog, most likely both of these holes are actively covered with a layer of fur. It must be removed every time you clean it - just collect it with a damp cloth. Even if there are no animals, dust will certainly accumulate on the nets.
To get to the main components, you need to disassemble the case. To do this you will have to remove the side wall. As a rule, it is secured with screws (look for them on the back wall) or with latches. We unscrew the screws or unfasten the latches, move the wall back - and the panel is in our hands. Of course, before disassembling, you should disconnect all cords and cables, especially the power cord.
Now we look inside and are horrified. As a rule, something like this awaits us there.
Putting everything in order here is not so difficult. For this we need:
- Compact vacuum cleaner
- Brush
- Compressed air cylinder
- Wet wipe
In principle, you can get by with an ordinary household vacuum cleaner, but the thinner the tubes and “trunk”, the more convenient it will be to work. A compressed air cylinder is usually purchased at photo or computer stores. This is an ordinary “aerosol”, only inside there is clean air. Costs from 250 rubles.
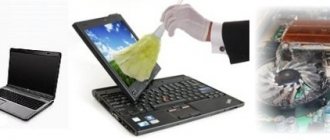
How to clean a laptop at home
To begin with, we will look at the process of cleaning a laptop from dust and dirt, and then we will move on to computers.
Modern compact devices sacrifice a lot to be small and portable. For example, laptops have a weak cooling system and more expensive high-performance hardware compared to PC versions. A particular problem is the difficulty of disassembling to clean the case from dust.
If during operation of the laptop you notice severe overheating and deterioration of the system as a whole, and optimization programs do not help, then it’s time to do a “spring cleaning” inside the case.
This article will not tell you how to disassemble the device down to the screw. Let's assume that you have already disassembled everything, removed the cover and see in front of you the main components of the laptop - the motherboard, HDD or SSD drives, and more. What should an ordinary user do now?
Tools for cleaning your laptop from dust:
- Cloth or napkin to clean the surface.
- Gloves (optional).
- Brush or can of compressed air.
For cleaning, a can of compressed air is the most effective option. You can find it via the Internet in your city. Its price usually starts from 150-200 rubles and higher, depending on the region.
When using a compressed air cylinder, you must hold it strictly vertically and do not turn it over, otherwise liquid air will escape.
Disassemble the laptop
It's not difficult, the main thing is not to break anything. Before performing the process, disconnect the power supply from the laptop and remove the battery. Now unscrew all the bolts. On HP laptops, in addition, you need to pull out the keyboard and carefully disconnect the cable. There may also be bolts under the keyboard.
In general, disassembling laptops has slight differences for each model, the main thing is to be careful.
Cleaning the cooling system
In most cases, the cooling system in laptops is air type. There is a fan and radiator. On some devices, this design is located under the motherboard, like in HP laptops, and then you have to disconnect all the cables and wires and carefully pull everything out of the case.
Look carefully at the fan, spin it, it should spin without effort. If dust interferes with it, it will have difficulty turning.
- The radiator and fan are easily removed from the motherboard, as you need to unscrew a couple of bolts.
- Then use a brush or cotton swab to remove the dust, and blow off the remaining residue with compressed air. Be especially careful with copper radiator tubes as they can be easily bent or crushed.
As soon as you remove the cooling system, you may see a white coating on the processors (one for the video card, the other for the main one). This is thermal paste that needs to be replaced from time to time. Read the article on how to properly replace thermal paste and prevent processor overheating.
Cleaning the rest of your laptop
Use small spritzes to remove dust from the motherboard, if any, and also clean the entire case using compressed air.
You can use a brush or cotton wool with alcohol to wipe the entire body. Thus, I collected quite a bit of dust, but now everything works with a bang.
conclusions
Once you have cleaned all the elements of the laptop from dust, you have to reassemble and connect everything again. I myself took apart and cleaned my 2014 HP laptop. I will say that I have never done this, but the device constantly overheated.
If you thoroughly clean everything inside, I guarantee that the laptop will overheat much less. Also change the thermal paste.
And finally to this part of the article - do not place the laptop on a soft surface, this will prevent hot air from escaping and it will get very hot. Use a flat surface, such as a table or a cooling board.
What exactly should I clean from dust inside my computer?
First of all, take a vacuum cleaner and collect all visible dust. You are unlikely to be able to crawl up all the trains and details - we use a brush in hard-to-reach places. Now you can start general cleaning.
If you have trouble understanding what's inside your computer, look for fans and radiators. You will probably recognize the first ones, the second ones vaguely resemble heating radiators. As we have already said, fans blow on radiators, that is, it is important to remove dust not only on the blades, but also in the radiator honeycombs.
In addition, the power supply needs cleaning. It’s more difficult with it: it has its own body, in which the filling (and, of course, dust) is hidden.
The procedure for cleaning the system unit of a desktop computer
The process of cleaning a desktop PC from dust consists of several stages, which will be discussed in this section. In general, this method is not too complicated, but it cannot be called simple either. If you follow the instructions completely, there should be no difficulties. The first step is to prepare all the tools that can be used when performing the procedure, namely:
- A set of screwdrivers suitable for your system unit for disassembling the device;
- Small and soft brushes for hard-to-reach places;
- Rubber eraser;
- Rubber gloves (if desired);
- Vacuum cleaner.
Once all the tools are ready, you can begin.
Be careful if you do not have experience in disassembling and assembling a personal computer, because any mistake can be fatal for your device. If you are unsure of your abilities, it is better to contact a service center, where they will do everything for you for a small fee.
Computer disassembly and basic cleaning
First you need to remove the side cover of the system unit. This is done using special screws located on the back of the device. Naturally, before starting work, you need to completely disconnect the computer from electricity.
If the last time you cleaned your computer was a long time ago, at this moment huge layers of dust will open up in front of you. The first thing you need to do is get rid of them. A regular vacuum cleaner, which can suck up most of the dust, is best for this task. Carefully walk it over the entire surface of the components. Be careful not to touch the motherboard or other parts of the system unit with hard objects, as this may damage the hardware components.
Once this is completed, you can move on to the next steps. For proper and high-quality cleaning, it is necessary to disconnect all components from each other, and then work with each of them separately. Again, be extremely careful. If you are unsure that you can put everything back together, it is better to contact a service center.
Disassembly occurs by unscrewing all the screws holding the components. Also, as a rule, there are special latches with which RAM or a processor cooler are installed. Everything depends solely on the individual configuration of the device.
Coolers and processor
As a rule, the largest amount of dust accumulates in the fan and radiator that are part of the processor cooling system. Therefore, cleaning this computer component is the most important. You will need a brush prepared earlier, as well as a vacuum cleaner. In order to remove the cooler, you need to loosen the latches that hold it in place.
Blow the radiator thoroughly from all sides to remove any loose dust. Next, a brush comes into play, with which you can get into each element of the grill and clean it perfectly. By the way, in addition to a vacuum cleaner, you can use a rubber bulb or a can of compressed air.
There is no need to remove the processor itself from the motherboard. It is enough just to wipe its surface, as well as the area around it. By the way, in addition to cleaning your computer from dust, this process is best combined with replacing thermal paste. We talked about how to do this in a separate article.
Read more: Learning to apply thermal paste to the processor
It is also worth paying attention to the need to lubricate all fans. If you have previously noticed extra noise when your computer is running, it is quite possible that it is time for lubrication.
Lesson: Lubricate the cooler on the processor
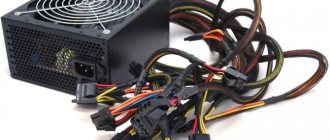
power unit
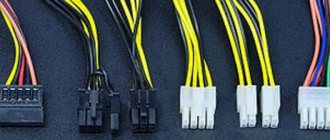
To remove the power supply from the computer system unit, you need to unscrew the screws located on its back. At this point, all cables coming from the power supply should be disconnected from the motherboard. Then it is simply taken out.
With the power supply it's not so simple. This is due to the fact that it not only needs to be disconnected from the motherboard and removed from the system unit, but also disassembled. This can be done using special screws placed on its surface. If there are none, try tearing off all the stickers and looking underneath them. Often the screws are placed there.
So, the block is disassembled. In general, then everything happens by analogy with the radiator. First, you blow everything with a vacuum cleaner or blower to get rid of unstable dust that appeared not so long ago, after which you work with a brush, getting into hard-to-reach places of the device. Plus, you can use a can of compressed air, which also does the job perfectly.
RAM
The process for clearing RAM is slightly different from that for other components. This is due to the fact that it consists of small slats on which not much dust accumulates. However, cleaning must be done.
Just for the RAM, it was necessary to prepare a rubber eraser or a regular pencil with an “eraser” on the back end. So, it is necessary to remove the strips from the slots in which they are located. To do this, you need to loosen special latches.
When the strips are removed, you should carefully, but not overdo it, rub the eraser over the yellow contacts. This way you will get rid of any contaminants that interfere with the operation of the RAM.
Video card
Unfortunately, not every craftsman can disassemble a video card at home. Therefore, in almost 100 percent of cases with this component, it is better to contact a service center. However, you can also carry out minimal cleaning using improvised means, which can also help.
All that can be done in our case is to carefully blow the graphics adapter into all the holes, and also try to get a brush to where it will go. It all depends on the model, for example, old cards do not need to be disassembled, since they do not have a case.
If, of course, you are confident in your abilities, you can try to remove the case from the graphics adapter and clean it, as well as replace the thermal paste. But be careful as this device is very fragile.
How to clean your computer from dust yourself?
The best assistant in the fight for cleanliness is an air tank. For example, you can’t even get under the cooler on the processor radiator with a brush. But a jet of air under pressure blows out dust perfectly; all that remains is to collect it with a vacuum cleaner. This can be done simultaneously.
So, we put the tube on the air tank, make our way to the radiator blinds and press the button on the tank. Be prepared for nasty things to fly out of there - it doesn’t hurt to place the “trunk” of a switched on vacuum cleaner nearby. Carefully and methodically blow the dust out of the radiator. How long to blow? Until the nasty stuff stops flying (or at least until it becomes visually clean). This process was filmed.
Typically, coolers and radiators of the following parts are cleaned:
- Processor (installed on the largest motherboard)
- Video cards (it may not be there if the computer is weak, but usually this is another large board installed end-to-end in the motherboard)
- Hard drives (there is no radiator here, and there may not be a fan either, but they do exist)
- Power supply
Let's talk separately about the power supply. As a rule, this is a large iron box at the top of the system unit. But how can you clean your computer's power supply from dust if you can't get to its insides? Just insert the tube from the cylinder into one of the holes on the back wall and blow. Dust will fly out of the remaining holes, which also needs to be removed.
What you will need
To clean your personal computer, you will have to use special tools.
Vacuum cleaner, compressor or special pneumatic cleaner
Most often, pneumatic cleaners, compressors and vacuum cleaners are used to remove dust coating. It is recommended to use small device models, as they are more convenient to use. People who decide to use vacuum cleaners should choose models that come with a compact attachment with a lint brush at the end.
Phillips screwdriver
An indispensable tool that you will definitely need when cleaning a computer case is a Phillips screwdriver. Most often it is used when removing the side cover. You may also need it to remove the cooler and radiator from the central processor. For the job, you need to select screwdrivers with long handles.
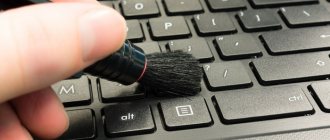
Brush
Sometimes dust particles cannot be blown off the surface even with a powerful compressor and vacuum cleaner. In this case, you will have to use brushes, which are used to superficially clean the motherboard, radiators and other PC components. You can use a regular paint brush or buy a special brush for working with computers.
Pencil
Special cleaning sticks can be used to clean heatsinks and small components on the motherboard. Their advantages include:
- durability;
- the compactness of the cleaning pad, the length and width of which is 6-7 millimeters;
- safety.
See also
Review of 26 Best and Effective Bath Cleaners
Eraser
When removing dust from a computer case, pay special attention to the RAM. Experts recommend taking time to clean the RAM contacts, as they oxidize over time.
To clean contacts from traces of oxidation, it is recommended to use an eraser. Contacts are cleaned carefully so as not to accidentally damage the memory.
Skillful hands
Cleaning your PC yourself should be done by people who know at least a little about computers. If a person has never disassembled a system unit, then it is better to entrust the work of removing dust to experienced people.
Accuracy and attentiveness
The work must be carried out carefully and carefully so as not to accidentally damage the motherboard and the components installed in it.
What to do if blowing doesn't help?
Cleaning your computer is a mandatory operation in any case. But it’s not a fact that the cause of the bugs is overheating. What to do if you have removed all the dust, but the problems we described at the beginning of the article remain?
- Try not to close the removable panel of the system unit case. If everything works perfectly, it means that overheating is still occurring.
- Try touching the radiators with your finger (carefully, without touching the electrical contacts). If one of them is so hot that it is impossible to hold your finger, again it is a matter of overheating (maybe you just need to install a more powerful cooler).
There is another possible reason. There is a layer of thermal paste between the heatsink and the processor - it is used to improve contact. If it dries out, normal heat dissipation is disrupted, the processor begins to heat up more, its performance drops, and the computer begins to slow down. There is only one way out: replace the thermal paste. This is not so simple, so it is better to entrust the operation to those who have already performed it. But if you want to try it yourself, please do so.
- Remove the radiator: unfasten the latches, carefully tilt it and pull it up.
- Remove old thermal paste - you can use a piece of thick paper towel or an eraser.
- Degrease the surfaces with a cotton swab dipped in ethyl or isopropyl alcohol.
- Apply a small amount of new thermal paste (slightly larger than a match head) to the center of the processor pad.
- Apply a very thin layer of it using a brush (often included with new thermal paste) or a piece of plastic.
- Reinstall the cooling system.
What not to use
Not all products can be used to clean a personal computer from accumulated dirt, and therefore you need to figure out in advance what should not be used.
Wet rags and sponges
Some people believe that the computer can be wiped with damp sponges or rags, but this is not true. Cloths soaked in water can only be used to wipe the outside of the case. It is contraindicated to wipe the inside with a damp cloth, as this can damage the motherboard.
Experts recommend using only dry sponges or cloths.
Hairdryer
It is no secret that compressors or vacuum cleaners are often used to blow out dust. However, some people do not have such devices and decide to use a household hair dryer instead. This cannot be done, since modern models of household hair dryers will only spread dust particles throughout the entire body, after which they will again settle on the surface of the processor, video card and other components.
Cotton swabs, napkins
When cleaning hard-to-reach places on the motherboard from dust, some people use napkins with cotton swabs. They should not be used, as such material begins to split upon contact with sharp objects. This leads to small particles of napkins and cotton swabs remaining on the surface.
Instead, it is better to use a flannel cloth, which does not splinter due to its density.
Ethanol
When wiping the monitor, mouse, keyboard and computer case, do not use ethyl alcohol. It contains components that promote the development of oxidation. If you wipe the monitor with a cloth soaked in alcohol, the anti-reflective coating will be damaged.
Products containing ammonia, acetone, toluene
Toluene, acetone and ammonia can damage the motherboard and therefore you should not use cleaning products that contain these substances. Before using a product against dirt and dust, you must carefully familiarize yourself with the components from which it is made.
How to protect your computer from dust?
The lower your system unit is, the more actively it collects dust. If you notice that the insides get dirty very quickly, try moving it higher - for example, on a table. You can use special filters, but sometimes they impede the flow of fresh air into the case and are actually of no benefit.
And, of course, simple advice - clean your apartment more often. If you are too lazy to do it yourself, one of the robot vacuum cleaners from our selection will help.
A little more about proper cleaning of computer equipment:
- How to clean your keyboard yourself without breaking anything
- How to clean your laptop from dust yourself: step-by-step instructions
In what cases should cleaning be done more often?
Under certain conditions, the system unit needs more frequent and thorough cleaning:
- The computer is lower than 20 cm from the floor. Then dust will accumulate in it not only from the air, but also from the carpets.
- In the room where the computer is, there are a lot of home textiles, upholstered furniture, and books. There is always more dust in such rooms. If there are no such items in the office with the computer at all, it can be cleaned less often than once every six months.
- They eat regularly at the computer desk. Crumbs get into the vents.
- Animals love to lie near the system unit or directly on it. This applies not only to cats or dogs, but also to rodents and birds.
- The computer is located near a window that is often opened. Air from the street also passes through the ventilation holes.
How to remove a heatsink from a processor
The radiator can be attached directly to the motherboard with screws, then you just need to unscrew them. Or a plastic slot frame is attached to the motherboard, and the radiator is clicked into it. In this case, to remove the radiator, lift the clamp holding the mounting bracket. We disengage the bracket grooves on both sides and carefully pull up.
If the thermal paste between the processor and the heatsink has dried out, the heatsink may come off along with the processor. In this case, carefully pry up the processor with a wooden or plastic tool and disconnect it. It is better to do this with gloves.
Release the processor latch on the socket. Now you can disconnect the processor itself by pulling it up. Please note: there are metal feet on the back of the processor. Be careful not to bend them.
Having removed the cooler and processor, we clean the system unit from the inside, i.e. We are trying to remove dust from all other elements. To do this, we use a regular vacuum cleaner and a clean, dry small brush. When bringing the vacuum cleaner hose to any dust accumulations on the motherboard or in the case, use a brush to scrape it out of the corners.
You need to be careful with any protruding parts on the board to avoid breaking them. We clean everything that we see and that we can carefully get close to.
An alternative cleaning option is to use compressed air cylinders, which can be used to blow out contaminated areas. But the dust will still settle somewhere, and breathing it is harmful.
The inner surface of the processor must not be wiped with a damp cloth! After this, computers cannot survive!
As a rule, there is no dust on it, but there are remnants of thermal paste, usually dried out. The easiest way to remove them is with a paper towel moistened with alcohol. It happens that the paste has already hardened and alcohol does not take it - then try more aggressive substances such as solvent or acetone. Do not use wet wipes or rags!
We clean the radiator separately, and the fan separately. First, use the same napkin with alcohol to clean the underside of the radiator contact plate from any remaining thermal paste. Then use a brush and vacuum cleaner to remove dust from the ribs. As an option, it is possible to flush the radiator with water, but then thoroughly dry it. By the time it is installed in place, there should be no moisture left in it.
The fan is cleaned with a brush, blown with air, and wiped with a cloth soaked in alcohol. Be careful with the fan blades, they are easy to break.
Once you've finished cleaning, try turning the fan manually. Rotation should be easy, without unnecessary noise and strong axial play. Movement along the axis up and down a couple of millimeters is allowed. But if there is noise, strong play, or the fan generally does not spin easily by hand, it is better to replace it.
Why does dust collect in the system unit?
Cleaning the system unit from dirt at home
The computer structure is a complex thing. Therefore, users do not want to once again get stuck in a mountain of wires and clean the parts of the mechanism. This leads to dust settling on the system unit, hard drive and motherboard. Despite forced air circulation, dust particles still settle on computer parts due to their electrostatic properties. What are the consequences of ignoring cleaning:
- slowing down the heat transfer process. The problem occurs due to dust on capacitors and transistors. In advanced cases, heat exchange can be completely blocked;
- GPU burnout;
- reducing the intensity of cooler operation;
- decrease in personal computer performance;
- overheating of the video card.
All these problems lead to serious damage, which will require spending money to eliminate. This can be prevented if you promptly clean your equipment from the accumulated layer of dust.