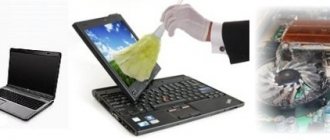
Let's reveal the secret of how to quickly and correctly clean a laptop keyboard from dust and dirt at home. We will tell you about the most effective means of how and with what you can clean the keyboard of a laptop and computer from spilled liquid (if it has been spilled with juice, beer, water, wine or tea, etc.), dust, debris and dirt.
Who among us doesn’t like to eat next to the computer while passing the time watching our favorite TV series or news feed? However, this behavior almost always leads to one result - that the keyboard becomes clogged and will have to be cleaned. Although it is worth saying that even if you have never eaten next to your laptop in your life, it will still need timely cleaning. It is not at all necessary to go to a workshop for such a trifle; you just need to know how to clean a laptop keyboard at home.
External cleaning
External cleaning is the easiest option for cleaning a laptop keyboard. It is quite enough if your keyboard works normally and the reasons for cleaning are rather preventive. This is done quite simply.
- First you need to disconnect the keyboard from the computer. If we are talking about a laptop, you need to turn it off and then remove the battery. Only after this can you start cleaning.
- You should start by wiping the keys. This is done with a regular cloth (it can be dry, or it can be barely damp). First, wipe the top of the keys, and then pay attention to their end part. There's quite a bit of dirt that accumulates there, so be diligent but careful or you risk breaking the keyboard.
- After this, you need to clean the space between the keys from dust. It is recommended to do this with a special brush for cleaning the keyboard, but a regular soft paint brush or toothbrush will do just fine. Also, don't forget about the space under the keys, that's where most of the dirt is. When cleaning, it would be useful, if possible, to place the keyboard perpendicular to the surface on which you are cleaning, then all the crumbs and dust will fall down and not get clogged under the adjacent keys.
The steps described above should be sufficient for preventative cleaning. But, of course, due to the nuances of the keyboard design, you will not be able to clean it completely. Most likely, most of the dirt will remain where you can't reach with a brush. Fortunately, there is another option for cleaning your keyboard without disassembling it.
Disassembly
Some models allow you to disassemble the keyboard on a laptop. This refers to its removable top plate, on which the key mechanics are attached. To do this you need:
- remove the buttons around the perimeter;
- find metal latches or screws;
- release the top plate.
You need to remove the mechanics unit carefully. After removing it, access to the contact plates opens. They do not need to be pulled out of the connectors, just wipe them clean from dirt. The same must be done from the bottom of the keyboard, which has a flat cuvette configuration.
Vacuuming
The next option for cleaning a laptop keyboard at home is to use a vacuum cleaner to clean the keyboard. Such vacuum cleaners are also quite often sold in stores. In fact, this method is not much different from the option with a can of compressed air, except that the dirt will not fly around and certainly will not get deeper into the system.
If you cannot find a special vacuum cleaner, then you can use a mini vacuum cleaner to clean the car interior or even a regular low-power household vacuum cleaner. But be sure to switch it to the lowest power setting, otherwise you risk ripping the keys out of the keyboard or otherwise damaging it.
Periodic cleaning
Keeping your laptop clean is a laudable desire. However, a complex film of finger grease and dust still accumulates on the surface of the buttons. It is durable and difficult to wash. Cleaning the laptop keyboard is done using the following means:
- soapy water;
- diluted isopropyl alcohol;
- special care products.
When working, do not use a large amount of the product. They just need to wet the napkin. After this, just thoroughly wash the keys of your HP, Dell, MSI and other favorite. If soapy water was used as a cleaning agent, the residue formed after drying can be removed with clean water by moistening the key with it.
Today there are special napkins on sale. They can not only clean your laptop keyboard quickly and without leaving any residual marks. The display is also wiped with special wipes to remove fingerprints or dust deposits.
Cleaning with alcohol
Cleaning the keyboard with isopropyl alcohol is a fairly effective procedure for getting rid of dirt, drips, stains and other contaminants of a similar nature (which a vacuum cleaner or brush cannot handle). However, it, in turn, is practically useless against dust and crumbs, and therefore it is recommended to combine cleaning with alcohol with one of the previous methods.
Cleaning your keyboard with alcohol is quite easy. Most often, cotton swabs are used for this purpose. You just need to blot them a little in alcohol, and then wipe the surface of the keys and the space between them. For convenience, you can pour a little alcohol into the cap of a plastic bottle.
The only caveat is that it is not recommended to use ethyl alcohol for cleaning. It won't harm your keyboard, but it can easily remove all the paint and stickers from the keys. Use isopropyl alcohol.
How to care for your keyboard
Not all users pay the necessary attention to keyboard care issues. As a result, the device quickly becomes dirty, starts to slow down and produces software errors. To avoid such consequences, you need to carry out preventive cleaning on time and properly care for the panel.
The keys can only be disconnected and connected when they are turned off. Otherwise, they may fail and the user may receive an electric shock.
The accumulation of hair, debris, and crumbs between the buttons is a nuisance that can lead to many problems. If the internal surfaces of the device are heavily soiled, the keys will begin to stick or function incorrectly. To combat technical and household waste, you should regularly treat each button with a damp cloth or cotton wool soaked in alcohol.
You should not try to remove one key to clean the space underneath it. The fasteners in laptops are quite fragile, so they can easily be damaged if handled carelessly.
For processing, it is better to use a compressed air cylinder, which can remove hard-to-reach dust and contaminants under pressure.
If eating over a laptop is half the problem, then drinking drinks is a recipe for disaster. If the device is flooded with juice, coffee, wine or other liquid, not only the keyboard, but also the device itself may fail.
If there is severe damage, you will need the help of a specialist, but no one gives a 100% guarantee of a successful restoration of functionality. Therefore, it is better to hold a tea and coffee ceremony at a safe distance from buttons or in the kitchen. It is also better to place vases with flower plants further away.
Dirty buttons not only increase the likelihood of keyboard failure, but also pose a threat to human health. A large number of germs remain on the keys, which is why people can develop intestinal infections and other dangerous diseases.
Therefore, as a preventive measure, you need to constantly wash your hands and keep the buttons clean. You should also use your laptop carefully and maintain it on time.
Removing the buttons
To deep clean your keyboard, you may need to remove the keys from the keyboard and then clean everything inside. This should be done if, after carrying out all the procedures described above, some of the keys still do not work, stick, or a crunching sound is heard when you press them. The process of removing the keys is quite simple and straightforward.
- To begin with, it is recommended to take a photo of the keyboard so that when you start putting it back together, you will not have any difficulties.
- After this, you can begin to remove the keys. To do this, you need to pick up the key with some sharp and thin object (a knife or plastic card will do) from one of the corners, and then carefully start moving it to another corner, then to the third and fourth, until you hear a characteristic click and the key comes off . In this case, you need to be as careful as possible and under no circumstances put pressure on the keys.
- It should also be noted that the key will not always be completely disconnected after this. On many keyboard models (for example, island keyboards from Acer, Asus or HP), the keys may be raised, but will remain connected to the keyboard with special jumpers. You can carefully detach them too, or continue cleaning if you feel that the space that has opened is enough.
Once you have disconnected all the keys, you can start cleaning. Be prepared to be surprised by the amount of dirt under the keys. In general, you don’t have to disassemble the entire keyboard, but only disconnect the stuck keys and the keys next to them. But it would still be better to remove all the dirt. It definitely won’t be superfluous.
How to disassemble the keyboard on a laptop
The need to disassemble the keyboard appears after a drink has been spilled on the laptop or before an upcoming deep cleaning. There are a number of factors that should encourage the user to dismantle the device. Among them:
- Rapid heating of the case under minimal loads.
- Application crashes and slow interface.
- Spontaneous shutdown of the laptop due to overheating of the working nodes.
The specifics of disassembly may vary depending on the model features. A wide selection of laptops with different external and technical parameters is available for sale. However, most of them have a similar method of attaching buttons - they are screwed or secured with latches.
The dismantling process consists of the following steps:
- First of all, you should determine which side will be easier to detach the keyboard from. Each button has 2 fasteners - vertical and lateral. Disassembly is carried out in a vertical direction, because If you remove the buttons horizontally, they will be damaged.
- First, you need to disconnect the letter and number buttons, since they have the same mounting mechanism and square shape on all portable devices. In the process of removing the keys, they must be put aside together with the microlifts. Such elements are not universal and correspond to each button, so if they are mixed, problems may arise.
- At the next stage, the top buttons E, Esc, F, etc. are dismantled, and the large buttons are removed. Lastly, remove the space bar and the service keys Fn, Win, Ctrl, Alt.
- After successfully removing all the keys, you need to remove the stencil. First of all, a three-layer film is obtained with each layer being separated in turn. When performing this procedure, you need to be careful not to damage the cable connecting the keyboard to the motherboard. After completing these steps, you can begin cleaning.
What to do if liquid is spilled on the keyboard
Let's say it so happens that the laptop keyboard is flooded with juice, beer, water, wine or tea. What to do in such a situation? First of all, don't panic. The first step, of course, is to remove the container and get rid of the spilled liquid. This can be done with a napkin, rag, toilet paper or sponge (just blot, do not rub).
Then you need to disconnect the laptop from the power supply and remove the battery (if you can’t get the battery, at least just turn off the device). You need to do everything quickly and clearly, because if you hesitate, you risk losing not only your keyboard, but also your entire laptop.
After this, you can more thoroughly and slowly clean the flooded laptop keyboard. You need to act carefully and ensure that as little liquid as possible flows under the keys. After this, you can dry the laptop with a hairdryer (do not forget about cold air). Dried liquid residues can be removed with alcohol.
If you think that liquid has leaked inside the keyboard, proceed to fix it immediately. First of all, remove the keys where the liquid came into contact. If the liquid has not yet dried, carefully wipe it away. Be sure to dry everything thoroughly with a hairdryer. You also need to treat all sides of the keys under which liquid has got in, otherwise they will begin to jam and make a characteristic cracking noise when pressed.
When the main consequences of the incident have been eliminated, you need to check the key contacts. As a result of contact with liquid, they may oxidize. If this is the case, then you cannot do it on your own and will have to turn to a specialist.
How to clean your keyboard
Cleaning the keyboard of an Asus, Lenovo or Samsung laptop can be done in different ways. However, to carry out such a procedure it is not necessary to call a specialist, since with minimal effort and skill you can get rid of dust yourself.
The simplest method is external cleaning using a soft cloth soaked in liquid. Use a damp cloth to wipe all keys and remove any remaining dust or stains from food or drinks. Particular attention is paid to the end elements, because they accumulate the greatest amount of dust and dirt.
To combat hard-to-reach stains, use a small brush. You need to use it in the spaces between the keys, where old dust may be present. During processing you need to be careful not to damage the fasteners. Once cleaning is complete, wipe the surface again with a clean cloth.
Despite the absence of difficulties when cleaning dust from keys, it is important to be as careful and attentive as possible so as not to damage any button or other important element. Before cleaning the keyboard on an Asus or Lenovo laptop, you need to prepare special brushes and wipes. They are sold in specialized computer stores or in the equipment care market. Using small brushes you can reach hard-to-reach dirt. Otherwise, cleaning will only be superficial.
Experts prohibit the use of gasoline or acetone to remove dust.
How to clean your keyboard with compressed air
If you cannot find a brush to clean the keyboard on a Lenovo laptop, it is better to use another method and purchase a can of compressed air. Such containers are sold in all computer stores and on counters with equipment care products.
Using the cylinder is quite simple: you need to present it to the keyboard and press the air supply button. Under the influence of pressure, all dust and debris will appear on the surface. To consolidate the result and remove any remaining dirt, all you have to do is wipe the keys with a clean cloth.
The disadvantage of this method is the rapid scattering of particles, so in addition to processing the laptop itself, you will need to clean the workplace.
How to clean your keyboard with a vacuum cleaner
Another effective cleaning product is a special vacuum cleaner. Considering the delicacy of portable equipment, it is better to use a compact car device and select the minimum power (if such an option is present). Otherwise, the strong suction current may pull out some button and cause you further problems.
After carefully treating the surface, all that remains is to wipe it with a damp cloth.
How to Clean Your Laptop Using Isopropyl Alcohol
Certain types of contaminants are so strong that they cannot be removed using traditional methods. In most cases this is:
- Hand grease.
- Stains from sweets and drinks.
- Drips.
- Traces of food.
In such cases, more powerful agents are used, such as isopropyl alcohol (many people confuse it with ethyl alcohol, but these are 2 different substances). A cotton swab should be dipped into the cleaning agent, and then, with careful movements, get rid of the dirt. This approach provides deep processing of hard-to-reach areas and spaces between buttons.
Using gel
Keyboard treatment gel or slime is a valuable assistant for all computer users. Such products are sold in many stores, especially on large trading platforms like Aliexpress. However, when ordering products from China, you will have to wait 2-3 weeks until they are delivered to your destination. Therefore, craftsmen create a gel for cleaning buttons at home. To do this you will need the following components:
- Sodium tetraborate.
- PVA glue.
- Coloring additive (this ingredient is needed only in the production of colored slimes for children).
You also need to prepare a container in which the listed substances will be combined. The process of preparing the gel is carried out according to the following instructions:
- First you need to thoroughly shake the PVA glue. The adhesive base must be of the highest quality. Otherwise, the gel will not acquire the desired consistency.
- The glue is poured into a container and mixed with the coloring component.
- Next, sodium tetraborate is taken and an additional batch is made. The ingredient determines the viscosity of the mass, so to change the consistency, the borax must be kneaded with gradual movements.
- After the gel reaches the required viscosity and begins to stick to surfaces, it must be removed from the container and thoroughly kneaded with your hands.
- If all manufacturing rules are followed, an elastic mass will appear that quickly stretches and takes on its original shape. If you put the lump on the table, it will quickly spread. This is normal because an overly hard slime will not be able to remove dust and dirt.
This cleaning product is affordable and easy to manufacture.
How to clean the keyboard on a laptop if it is stained with tea, coffee or juice
If the keyboard has been flooded with juice, coffee, tea or other liquid, you will have to disassemble it to restore functionality. First of all, you need to quickly disconnect the laptop from the power supply and disconnect the module. The effectiveness of the repair is determined by the speed of response to trouble: the faster the correct actions are taken, the better the cleaning result will be.
If you leave everything as is and do nothing to clean the laptop keyboard, this can lead to the following negative consequences:
- The keys will completely stop responding to presses.
- Some buttons will function incorrectly, producing characters that are not intended.
- The laptop will not be able to start due to a short circuit. A similar problem occurs after liquid gets on the motherboard or power circuits.
- Important functions of the laptop will be unavailable, and working modules will stop working. Among them: battery, touchpad, RAM strips, etc.
- User data will be lost due to storage corruption.
If the device is accidentally spilled with any drink, before removing the keyboard from the laptop and washing it, you must perform the following steps:
- Quickly turn the device upside down to prevent liquid from flowing deep into it.
- Turn off the power by removing the plug from the socket and the battery.
After carrying out such activities, you can begin to dismantle the laptop or begin removing the keyboard. When disassembled, it is worth determining the degree of spillage.
If you turned the device over in time after the incident, perhaps everything will work out by simply cleaning the keyboard, because... Some models have a protective aluminum or plastic tray under the keys. If substances get on the motherboard, you will have to wash it and dry it.
For effective cleaning without deep dismantling, you need to use a special technical liquid - Kontakt U. It is sold in 300 ml bottles.
This product contains powerful solvents for removing fat and treating small contacts. Active substances fight grease, old grease and oil, silicone impurities or dirt.
During the rinsing process, you need to pay attention to all the buttons so that the product flows down the surface into the prepared container. Savings with such processing are impractical, because the solution should remove all spilled drink residue.
If you carry out the actions quickly and correctly, the processing result will be positive. The device will start up again and work without failures.
If the buttons and motherboard are not processed in a timely manner, the contacts will oxidize heavily and begin to stick. This will increase the risk of board failure due to corrosive processes.
Easy keyboard cleaning with a vacuum cleaner
If you have a vacuum cleaner at home on which you can adjust the suction power, this is a great find for efficiently removing crumbs from your laptop. Namely, by vacuuming its keyboard, you can remove almost all dust and small particles of dirt. This method will provide better cleaning than simply flipping and shaking the laptop.
It is important to emphasize that vacuuming must be done carefully and thoughtfully. Namely, if the power of the vacuum cleaner is high and cannot be adjusted, it may happen that the vacuum cleaner “sucks in” not only some buttons, but also certain parts (mechanisms) that are located under the buttons. Therefore, be careful during this operation and try to reduce the suction power to the lowest possible level.
Button cleaning process
Before you begin cleaning, you need to remove each button. Try not to rush, any careless step can lead to your keyboard losing one or more buttons. And we know that there are no extra buttons!
- Have the buttons been removed? Great! We take a dry brush and carefully go over the base of the keyboard, without the buttons. If there is frozen dirt, you can remove it with a damp cloth, being careful not to touch anything
- The buttons themselves do not have electronic components, so feel free to throw them into a basin and wash them generously under the tap with soap.
- The digs should be dried well with a towel and left to dry at room temperature for 8-10 hours. Do not place them on the battery to speed up the process. They may become warped when exposed to too much heat and may not fit back into the laptop case.
- We look at the photo of the assembled keyboard and assemble the “mosaic”, then place the keyboard back into the device.
This was the most difficult and potentially fragile way to clean the keyboard, but the most effective. After it, it should work as if it had just come from the factory. If, after all the procedures performed, your keyboard does not please you with clear and fast operation, then the problem was a technical failure and the keyboard will need to be replaced.
How to disconnect the cable?
The laptop keyboard is connected to internal devices using a cable. After freeing the keyboard from its mounts, the cable can be easily seen under its plate. Working with the cable requires maximum care and attention due to its fragility. The cable is secured to the keyboard using a special lock. Despite the fact that the design of such locks is different, the process of opening them does not cause any particular difficulties - to do this, you just need to open the fasteners or lift its ears.
Disconnecting the keyboard from the connecting cable is the final step in its removal. Obviously, removing and replacing a laptop keyboard is not difficult. The main difficulties will arise at the stage of necessary repairs or, for example, replacing keys.
After the keyboard has been repaired or replaced, you should check whether all the keys work correctly. If the problem cannot be resolved or the keyboard does not work properly, the best solution would be to take the laptop to a specialized service center to avoid worsening the problem.
Continue
Why do you need to remove the keyboard?
Friends, if you don’t want to read the article, you can safely watch the video and repeat all the steps.
This method is suitable for laptop models such as hp, acer, lenovo, asus, etc. Basically, they turn off the keyboard and cable with all attachments in such cases as:
- Replacing or purging the cooling system
- If you need to clean the cooler from dust, as well as various hair and debris
- If you want to replace the thermal paste on your processor
- Cleaning the keyboard from water and various dirt
Basically, to remove the keyboard, it is enough to have a thin screwdriver to unscrew 2-3 screws. Some keyboards are held in place by plastic clips. See photo.
Deep cleaning
If superficial cleaning does not lead to high-quality operation of the keyboard, then you should deep clean the device. A step-by-step description of the process is as follows:
- Disassemble the keyboard.
- Using a screwdriver, carefully remove the keys.
- Using a cloth and cleaning fluid, clean the rubber bands and contacts.
- Return all keys to their places.
If you are afraid that you might mix up the button cells, take a photo of the entire keyboard before removing the keys. It will be much easier to restore the buttons to their places after cleaning.
Important! If you are not confident in your abilities and technical knowledge, it is better to seek help from specialists. At the service center, the buttons will be removed with special tools without damaging anything, they will professionally clean the device and return everything to its place.
How to remove keys from a laptop's built-in keyboard?
- This question also interests many. After all, it is under the keys that most often accumulates a large amount of crumbs, dust and congealed sugar from spilled tea.
- As in the case of removing the keyboard, removing its keys also has a number of certain difficulties compared to a stationary keyboard.
- In general, the principle of operation is the same: you hook the key with the tip of a knife, pull it up and the button snaps off. However, some precision is required here.
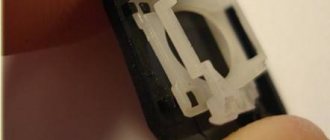
Figure 1. How to remove keys from a laptop's built-in keyboard?
- Pay attention to how the key mounts on the laptop keyboard are arranged. You should hook the lower right corner from the bottom side. Otherwise you may break the mount.
How to clean a flooded keyboard
If water or any other liquid has been spilled on your laptop, cleaning will require removing the keyboard or keys from it. In some cases, you may need professional help and warranty repairs.
You have a better chance of saving your laptop if plain water was spilled on it, rather than tea with sugar or coffee. In the case of water, it is enough to turn the laptop upside down and leave it overnight or for a day. The main thing is to turn it off as soon as possible to protect the insides of the computer from rapid oxidation and deformation.
In some cases, you may need professional assistance and warranty repairs.
In the case of sweet liquids, everything is not so simple. They often cause keys to stick and here you can’t do without comprehensive cleaning. Wash the keyboard in the same way as discussed above. This may very well help, especially if you do not delay cleaning. It is rare that all buttons are disabled; more often than not, one or two stop working. If you ignore this, there is a risk of losing a significant part of the keyboard, so the only way out of this situation is to completely replace it.
How and with what to clean the buttons on a laptop?
It is best to clean the buttons on a laptop with isopropyl alcohol or a special keyboard fluid that is sold in computer departments.
IMPORTANT: Before you start cleaning the keyboard, you must turn off the laptop, unplug it and remove the battery.
If the “rescue” of the keyboard takes place in emergency mode, then you can not turn off the laptop, just unplug it and remove the battery
- Before removing the buttons, you need to make sure you know how to properly return them to their places. To do this, you need to either take a photo of the keyboard, or put the buttons in the same order as you removed them (this method is only suitable when a person is cleaning the keyboard himself, so that no one moves these buttons while they are waiting to be returned to their place, neither a child nor animal, nor a random movement of one's own hand).
- A regular knife, small screwdriver or nail file will help you remove the buttons. The tool being used is placed under the corner of the key and carefully pryed upward. It is better to learn how to remove keys from a laptop keyboard, starting with some little-used key, for example, a hard sign or the letter “e”.
- You can wash the keyboard buttons with a brush (toothbrush, napkin, cotton pad), removing them from it and dipping them in a soap solution and cleaning their internal and external surfaces from dirt and dust. They must be thoroughly dried before attaching them to the keyboard again.
- If you managed to carefully remove all the keys, then putting them back is also not difficult. The key must be carefully adjusted to the desired position and then pressed lightly. If the key is placed correctly, there should be an audible click - the key is secured. For larger keys, spacebar, shift, enter, you may need to first attach a metal mount, but this is also not at all difficult.
It is recommended to place the removed buttons in the same order in which they are located on the keyboard.
Tip 5: Jelly Keyboard Cloth
You can purchase this new product on the Internet. The main properties of a jelly cloth are its sticky base and good plasticity. Thanks to this, the sticky “lump” will collect dust not only on top of the keyboard, but also remove dirt from hard-to-reach places. Using a jelly cloth, you need to carefully crush each key from different sides. This will leave any dust, dirt, hair or crumbs on it. If the keyboard is not too dirty, then the jelly sponge can be used several times.
Computer
Cleaning a computer keyboard is in many ways similar to cleaning a laptop keyboard, but still has a number of its own characteristics. Since it is located separately from the hardware, more drastic cleaning methods can be used. However, first things first.
The habit of eating and drinking at the table is dangerous for your electronics
Superficial
Just like a laptop keyboard, a computer keyboard also needs both superficial and deep cleaning. The first follows a similar pattern:
- Turn over and shake the keyboard, holding it upside down over newspaper or plastic. You will get rid of some of the crumbs, dirt and dust this way.
- A small brush or paint brush can help you clean hard-to-reach areas.
- More “lazy” methods - a hair dryer, a mini vacuum cleaner, a jelly bean, a can of compressed air - you saw these tools in the photo.
- Hygienic wet wipes will help remove greasy deposits.
Advice! Clean only with damp ones (dust sticks to them more easily), but never with wet tools. This applies to both cleaning laptop keys and cleaning the keyboard not on a laptop.
Before removing the keys, do not forget to take a photo and sketch their original position
Thoroughly
Experts recommend performing this procedure at least once every three months. You can use either the method that we described in the topic about laptops, or go to the table where we have included tips for cleaning computer keyboards specifically.
Cleaning of the “filling” is carried out with the utmost care
First, shake the keyboard over a horizontal surface
| Disassembly and washing | Proceed as follows: 1. Be sure to take a photo and sketch the position of the keys. 2. Use a screwdriver to remove the screws on the underside. Set it aside after disassembling. 3. We will only clean the top part. From the inside, carefully press out all the keys. Do not remove just “Enter” - this button is very difficult to fix back on some keyboards. 4. The pressed-out keys are washed under running water. They can be soaked in a disinfectant solution. If they are very dirty, scrub them while washing them with an old toothbrush. 5. Is it still possible to wash the keyboard under water? The top part - yes. Wash under running water. Using a brush or brush, go through hard-to-reach places. 6. Dry all elements thoroughly. 7. When both the part and the keys are completely dry, return the buttons to their place, secure the upper part with screws from the lower part, and connect the keyboard to the system unit. |
| Standard cleaning | It also takes place in several stages: 1. Disconnect the keyboard from the computer. 2. Shake it thoroughly over the newspaper with the buttons facing down. 3. Clean dirt between the keys with a cotton swab, periodically moistening it with isopryl alcohol. 4. Blow the device thoroughly with a hairdryer. 5. Remove the keys with your own hands or using a small knife or manicure file. 6. Blow through the opened filling again with a hairdryer. Remove anything that could not be cleaned with a hairdryer using a brush, a cotton swab, or a brush. |
| Cleaning up spills | Again, simple instructions: 1. Disconnect from your computer. 2. With the buttons facing down, try to shake out as much liquid as possible. 3. Disassemble into two halves, carefully dry them from the inside with a dry cloth or hairdryer. 4. Squeeze out the keys and place them to dry. 5. To make the keyboard dry faster, place fluffy cotton wool or a little rice inside it - this will absorb the liquid. |
| Cleaning without disassembly | You will need to take several steps at home: 1. Disconnect your device from your computer. 2. Take a non-sharp thin “sandwich” knife, a napkin or thin cloth. Wrap the knife blade in it. 3. Dilute the soap solution. 4. Slightly wetting the instrument in the solution (it should be slightly damp, but not wet), carefully clean the surfaces between the keys, as well as the gaps between the buttons and the base. |
But the buttons can be washed, soaked, and washed
And in conclusion, we will introduce you to a number of tips that may be useful to you.
Good to know
Before cleaning, pay attention to several recommendations:
- When cleaning the keyboard, do not remove the long keys, Enter - they are difficult to put back in place.
- If you accidentally spill liquid, cotton wool or grains of rice will quickly absorb it.
- Don't forget to take a photo or a drawing of the keyboard before you remove the buttons from it.
- Dirty keys can be washed in a washing machine in a special bag or sock. But don't try to wash your keyboard in the dishwasher!
- If you have lost the photo or instructions, you can find out the location of the keys in the following way: For Windows: go to Start, then find Programs - Accessories. Next – “Special Features” – “On-Screen Keyboard”. Recreate the picture using the example.
- For Macintosh: “Programs” - system settings menu. Next – “Languages and text”, then – “Input sources”. Oh, and also “Show input menu...”. Click on the checkbox at the top of the screen where you usually change the language - the on-screen keyboard view will become available to you.
Use napkins and a cotton swab as often as possible - and deep cleaning can be done less often
That's all that will help you learn about how to clean the keyboard of a laptop and computer. The main piece of advice in the end is to not forget about superficial cleaning and wean yourself from the habit of drinking drinks while sitting at a PC or laptop.