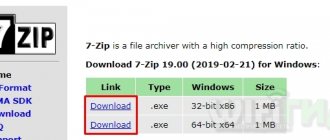
Method one: traditional unpacking
Traditional unpacking does not require any auxiliary programs installed on the system. Everything you need is already preinstalled in Windows.
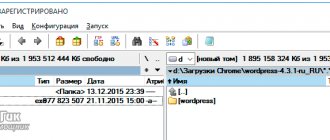
So, the process of extracting the EXE file is as follows:
- Open the File Explorer file manager.
- Go to the folder where the EXE file is located.
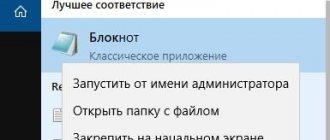
- Launch it. To do this, just double-click on its icon with the left mouse button. Sometimes administrator rights are required to run - in this case, you must first right-click and then select the appropriate item from the menu.
- The installer window will launch. This is where you will need to set the unpacking parameters.
- In the first window you will be asked to select the installer language.
- A welcome window will then appear. It usually indicates what kind of program will be installed on the system.
- Next you will need to accept the user agreement.
- Then select the folder into which all files will be unpacked.
- You will then be prompted to create additional shortcuts in the Start menu and on the desktop.
- After this step, all installer files will begin unpacking.
All you have to do is wait for this process to complete, after which you can close the Setup Wizard window. This is how easy it is to unpack EXE program files.
What ways are there to open a DLL?
To be able to view and/or edit files with the dll extension, you must install special software. Let's look at what program you can use.
Hex editors
The most popular program for opening dlls is Cygnys Hex Editor. This is one of the hex editors that do not require installation on a personal computer, and are popularly called disassemblers. Cygnys Hex Editor has earned its popularity thanks to its intuitive and user-friendly interface, ease of use and, of course, free.
To use this application, just go to the official website of the developers and download the required version from there. Using this disassembler, you can open any dll file, the contents of which will be displayed in a visual editor, divided into two tables. In one table, all content will be in the form of text, and in the other - in the form of hexadecimal code. When you change one of the tables, the data in the other will change, which is very convenient.
Utilities for extracting resources from a DLL file
Resources stored in a DLL can be viewed and replaced by opening the file using Resource Hacker
For any file there is a viewer or utility with editing capabilities. And files with the .dll extension are no exception. For these and other resource files of Windows operating systems, such as the executable file .exe, .res, .rc, and many others, Resource Hacker is perfect. This free utility is the most popular in its category, and does its job perfectly. In addition to the ability to edit the code and text content of dll files, here you can view and even replace most media files with your own, be it images, audio or video materials. All operations are performed in a visual editor with an interface that is understandable to any user.
Now you know which program can open files with the dll extension, and this issue will no longer cause difficulties. However, remember that only you and no one else are responsible for all changes made to OS files. Be careful and good luck in learning about computers!
Method two: extracting installation files
The second method is radically different from the first. If in the first case it was necessary to unpack the program files in order to then run it on the computer, then in this case you need to extract the files of the installer itself in order to manipulate them. The example shows a special program called ResourcesExtract. It works like this:
- Download, install and launch the application.
- A window will appear in which you first need to specify the EXE file that you will unpack. This is done in the Filename field.
- After this, you will need to specify the folder into which the files will be unpacked. This is done in the Destination Folder field.
- After this, you can start unpacking. To do this, click the Start button.
- If desired, you can specify additional parameters. For example, specify which files to unpack. This is done in the area called Resource types to extract.
As a result, the installer files will be located in the folder you specified. You can edit them at any time.
Additional methods
Sometimes, the user thinks that his file association has been broken, when in fact some other equally pleasant changes have occurred. When opening exe files fails, a window is often shown that the program cannot use the data or Windows has not found a handler.
Perhaps the reason that your exe file does not start is that the path to it is incorrect. Typically, such failures occur if you deleted or changed the location of the file. Try going to the folder containing the program and check if it works.
Also, some “high-quality” antiviruses, if installed on a system that is quite heavily infected or even completely clean, characterize some or all exe files as viruses. In this regard, they may be deleted or added to quarantine. Then you need to configure your antivirus by whitelisting the file.
Using one of the utilities or performing manual steps, all programs should start in standard mode.
If you still have questions on the topic “Why doesn’t the .exe file start?”, you can ask them in the comments
Rate the material
Article rating 3.9 / 5. Votes: 7
No votes yet! Be the first to rate this post.
Share on social networks!
How to Unzip EXE Files on Mac
Unpacking in the Mac operating system occurs in a completely different way. In order to get the files themselves from EXE, you can use a simple archiver. The principle of unpacking is the same as with archives. The article shows how to unpack EXE files so that you can then run the program on your computer. This is how you can run Windows programs on a Mac operating system.
So, in order to perform the stated actions, you need to do the following:
- In the operating system, click on the magnifying glass icon located at the top right.
- In the field that appears, enter “Boot Camp Assistant.”
- In the results, select the line of the same name.
- Next, a program will launch in which you need to check the box next to “Download the latest Windows support software from Apple.”
- Insert the USB flash drive into your computer - this is where the additional software will be loaded.
- Prepare an empty partition on the disk with at least 50 GB of space.
- Click the Continue button.
- Select a pre-prepared partition on which Windows will be installed.
- At this stage, you need to insert the Windows operating system disk into the drive and click the “Start installation” button.
- The computer will restart - don't worry, this is completely normal.
- Again, specify the partition that you prepared for Windows.
- Select the file system type. If you are installing Windows above XP, then select NTFS.
- Next, the process of formatting the partition will begin. This can take quite a long time.
- Insert the USB flash drive into which you downloaded the additional software. The process of installing all drivers from the flash drive will automatically start.
- The computer will restart again.
After this, you will be able to run the EXE file without any problems. Next, the installer will launch, and further actions are similar to those in Windows.
What to do if EXE files do not launch?
Files with the EXE extension are executable files for most of the applications we use every day. When installing any program on a computer, we create a shortcut for it on the desktop to make it easier to find. But it happens that a program that was running just yesterday does not open despite any manipulation.
Let's assume that you are faced with this problem: EXE files do not launch. In this case, a window often appears asking you to select a program to open the file. In this case, first you need to check your computer for viruses and malware. If your antivirus is outdated or missing altogether, the first thing you need to do is install a scanner or an updated version of the antivirus and deeply scan your computer. If you often use a portable flash card and take information from different computers, then it is simply vital for you to install a program designed specifically for portable USB devices. When you connect the flash drive to your computer, it scans it for viruses, worms and malware that prevent EXE files from running. There are many such instructions, but they take up few resources in your machine’s system. But it also happens that the user himself accidentally makes changes to the registry, thereby disrupting its operation. Of course, then EXE files do not open. In this case, you need to restore the registry to make the file executable.
How does this happen? Let's describe the problem in more detail. The user or malware disables the registry editing feature. To enable it and make the necessary changes, you need to:
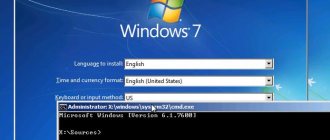
Go to “Start>Run...” Then in the command line enter: “gpedit.msc”, click OK, then “Group Policy”, select “Local Computer” from the list that appears, then go to the line “User Configuration”, then “Administrative templates". In the dialog box that appears, select "System"... In the "System" window, find the line called "Disable registry editing tools." After all, the problem with EXE not launching is related to the operation of the virus. It switches registry editing to the “Enabled” state, making changes impossible. In the Properties window, disable the feature that prevents you from making changes to the registry. After a reboot everything should work. In order not to enter information into the registry yourself, you can download data for it that is suitable for your operating system.
If after this EXE files do not launch, you can enter the information manually or you need to name it arbitrarily, double-click on it and open it. Then you need to go to the command line: “Start>Run”, enter the name of your created file (with the reg extension) and click Ok. If after all this work nothing happens, use an anti-virus utility to restore data. If even after running this utility the EXE does not start for you, try reinstalling the operating system on your computer. Before performing this procedure, save all important information to a disk that will not be formatted.