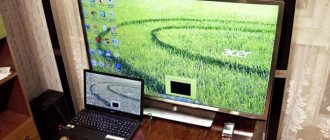
The abbreviation HDMI stands for High Definition Multimedia Interface. That is, a high-definition multimedia interface. Physically it consists of two devices connected via a cable. In our case, a laptop and TV are connected. Naturally, they both need to have HDMI ports. Before you display your laptop screen on your TV, you should know that there are several versions of the interface, and the technology is constantly evolving. Depending on the version, the capabilities of the interface change in terms of supported resolutions, bandwidth and other parameters. The latest current version, released at the beginning of 2020, is 2.1.
- The laptop does not see the HDMI cable from the TV
Types of HDMI cables
There are three main form factors that an HDMI cable can come in. The first is a simple type A, which has 19 contacts, and is used in full-size devices - computers, televisions and set-top boxes. This is the most common type. Mini-HDMI type C is a more compact connector that is used in equally compact devices - smartphones, tablets, netbooks and sometimes video cards. It is also equipped with 19 contacts and its characteristics are in no way inferior to its “bigger” brother.
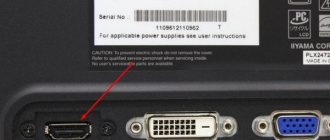
Variety of connectors. Micro-HDMI type D is the smallest connector in the entire family. Despite its size, it also contains 19 contacts and fully complies with the specifications. Along with the mini version, it is used in smartphones, tablets, video cameras and other portable devices. In fact, there are two more types - B and E. The first is only in the official specification, and has never been used in real devices, since it has 26 contacts and is quite large in size. The second one is quite rare - it is used in car multimedia systems. Equipped with 19 contacts and has additional shielding to protect against interference from other vehicle devices. There are a huge number of adapters for other types of connectors that allow you to output images from a laptop via HDMI for devices such as old TVs or PCs.
Connecting a laptop to a TV via HDMI
There is nothing unusual or complicated in the connection process itself. The only thing is that before connecting the laptop to the TV via HDMI, it is advisable to make sure that both versions of the interfaces meet the parameters of the transmitted data.
Where is the HDMI input on a laptop and TV?
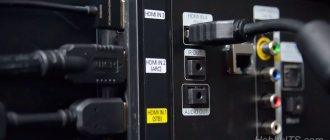
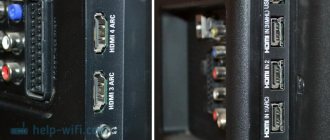
On TVs, the connector can be located either on the back or on the side panel. It is not difficult to identify it, since it is unique, and it will not be possible to connect another cable there.
The connector is usually labeled, so it is easy to find. The HDMI input on a laptop is also not particularly standardized, so it can be anywhere. But it is most often found on the back of the device.
Setting up your TV to connect via HDMI
To switch the TV to HDMI signal reception mode, you need to explicitly indicate this in the menu. Usually the remote has buttons like Source or Input. In the TV menu, you need to look for items called “Signal Source” or “Data Source”. Naturally, the setup must be done after the HDMI cable is connected to the TV and laptop.
How to set up and enable HDMI on a laptop
If on TV it is enough to simply indicate the signal source, then on a PC sometimes you will have to adjust the connection a little. Before you connect your laptop to your TV, you can select the display type. Usually by default it will simply duplicate the source screen. But you can specify other types. In versions of Windows 7 and higher, this can be done by pressing the Win + P keys. A window will immediately open in which you can select connection options.
Call up the menu for connecting to the projector. There are only 4 of them:
- only computer. The signal will not be transmitted to the TV, but only to the laptop screen;
- duplicate. The TV screen will exactly replicate the PC screen;
- expand. This type adds another screen on which you can separately launch, for example, a video or open a website, while another application will be used on the laptop;
- only a projector. The signal will not be repeated on the PC, but will only go to the TV.
TV resolution usually adjusts automatically. But you can change it manually in the operating system screen settings.
Setting up audio transmission from laptop to TV
As we know, HDMI is also capable of transmitting sound. But this does not always happen in practice. In order to switch the sound, you need to refer to the sound settings in the operating system. To do this, just right-click on the speaker icon in the notification panel and select “Playback devices”.
Sound menu in the notification panel. A window will open that displays all possible devices capable of outputting sound. Among them there should also be a connected TV. By right-clicking on it and selecting “Set as default”, we will switch the sound to TV.
Window with sound settings.
How to set up a laptop
After connecting the TV to the laptop, the first thing you need to do is adjust the quality of the broadcast image. This is a mandatory measure, especially if the connection is being made for the first time. Otherwise, the picture will be unclear and blurry. Since this option involves using the TV as an additional screen, only larger, this problem can be solved in two ways:
Using desktop settings;
- Using the Windows Mobility Center feature.
To implement the first option you need:
- Right-click on an empty space on the desktop.
- Select the “Screen Resolution” option from the drop-down context menu.
By changing the existing parameters, select the option that will guarantee optimal picture quality.
It may happen that there is no HDMI connector on the TV panel. In this case, you will need to purchase a special adapter with which you can pair two devices.
To use the Windows Mobility Center feature, you will need to do the following: First, use the key combination “Win + X” to go to the settings section of the same name. Then, in the “External Display” tab, activate the “Turn off screen” option, after which you will be able to control the operation of this element. There will be several options available for this, each of which has its own characteristics and should therefore be explored more carefully.
- Computer only. The signal will not be output to an external monitor.
- Duplicate. Using the function will allow you to display the desktop image on the screens of both devices.
- Expand. This mode will allow you to combine the image from two monitors, turning it into a single whole.
- Projector only. In this case, the desktop image will be displayed only on the TV screen. The laptop monitor will not function at this time.
What to do if your laptop cannot connect to your TV via HDMI
Yes, connection problems may arise, but they can and should be dealt with. Let's look at the two most common cases.
The laptop does not see the HDMI cable from the TV
This situation can arise in only two cases: a physical malfunction of the cable or connector and a problem with the video card drivers.
The cable also has its own strength limit, so it can be damaged. To figure out whether the wire from the laptop to the TV is really damaged, you can try connecting another one. You also need to make sure that the versions match and select the cable of the appropriate version. With the connector, everything is more complicated; it is quite difficult to determine whether it is really the problem at home. If only you try to switch the cable to another available connector. With a video card, everything is simpler - you just need to update the drivers or, conversely, roll them back to an older version.
TV can't see laptop via HDMI
There may be few reasons why the TV does not see the laptop via HDMI either. The first thing that comes to mind is an incorrectly installed signal source. On some models, with 2 or more connectors, you can get confused and choose the wrong one. It's worth checking that your choice is correct. There is also a possibility that HDMI may not work properly due to Smart TV. The situation is rare, but it does happen. It's worth trying to update the software. In all other cases, suspicion can only fall on a malfunction of the cable or the connector itself.
If the TV does not have Wi-Fi
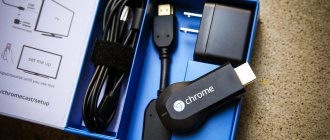
It happens that a buyer thinks about wirelessly connecting a computer to a TV some time after purchase, but he discovers that the TV is quite old or simple. It does not have a built-in Wi-Fi module; it is not possible to buy it separately; they are not produced for TVs. In this case, a smart set-top box will come to the rescue. This is a small device that looks like a flash drive. Most often, such set-top boxes are connected to the TV via an HDMI connector. A few years ago, you could find a Google Chromecast or an Intel Compute Stick on the market, but today the choice of options is much wider with a variety of prices.
The smart set-top box has not only a built-in Wi-Fi module, but also its own chipset, permanent memory and RAM. In fact, using a smart set-top box turns the TV into an analogue of a tablet and adds SmartTV functions to it. With this set-top box you can easily connect your computer to your TV wirelessly.
In addition, most smart consoles are equipped with the Android operating system. Users with smartphones on the same system can log into their own Play Market account through the set-top box and launch games, useful applications, and use all the features of the system on the TV. A smart set-top box solves the problem not only with access to the Internet. Usually it contains a large number of connectors that will allow you to connect peripheral devices - keyboard, mouse, hard drive.
How to connect a laptop's HDMI output to an old TV
Since the standard is young, older TVs are not equipped with these connectors. Therefore, you will have to figure out what inputs the TV has, and, based on this, look for an adapter or adapter for HDMI. In fact, there are not so many connectors, and they all differ in the number of contacts and shape. But there are adapters for all of them. This is what the TV inputs might look like:
| Name | Photo | Description |
| SCART | SCART connector | A universal and old standard that can be found even on new TVs. Transmits both sound and video. |
| S-Video | S-Video connector | The standard divides the video into two parts and transmits it separately. Does not transmit sound and is becoming increasingly rare. |
| Component | Component connector | Divides video into three gradations, and audio into two channels. It still occurs today. |
| Composite | Composite connector | It transmits video over one cable, and the sound is divided into right and left channels. Used less and less. |
| VGA | VGA connector | Well-established interface for transmitting video to a PC. Doesn't transmit sound. By the way, if the laptop has an additional VGA, which is not uncommon, then an adapter will not be required. |
| DVI | DVI connector | Gradually becoming obsolete standard. Only transmits video. |
Now you can determine which type of connector is installed on your old TV and select the appropriate adapter or adapter.
How to output sound to TV
You can transfer not only images but also sound from your computer to your TV.
Outputting an audio signal via an HDMI connection is possible only if the video card installed on the PC supports this function. To clarify, you will need to open the “Device Manager”, go to the “Sound, game and video devices” tab and find a device that supports “High Definition Audio” in the list. If this item is available, then you can safely use this connection option. Next, you need to make sure that you can transmit high-definition audio. You can do this as follows:
- Right-click on the speaker icon located on the taskbar.
- Select the “Volume Mixer” option, go to the “Speakers” section, and expand the list of devices.
- Here you need to find the item “Realtek Digital Output” (“Realtek High Definition Audio”).
- Activate this option to subsequently be able to output audio in HD format.
Some TV devices are not capable of receiving sound via the standard HDMI interface. In this case, it is advisable to use the HDMI 1 input, provided that it is installed. To take the guesswork out of things, you should go to your TV's settings and make sure it supports digital (rather than analog) audio streaming.
How to connect a TV to a laptop if the laptop does not have an HDMI connector
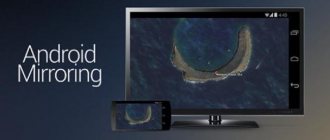
In general, it is difficult to imagine a situation where a laptop does not have a single video interface connector that would allow connecting HDMI in an alternative way. But perhaps the HDMI output on the laptop simply does not work. Since all modern TVs have a built-in Wi-Fi adapter, and PCs have USB, which is universal, there are always other connection methods.
One of the adapter options. You can solve the problem by connecting the laptop to the TV wirelessly, either via DLNA or using various WiDi or Wi-Fi Direct. For DLNA you need to be on the same network, and for the other two, both devices need to support these technologies. The second interesting way is to connect a special USB-HDMI adapter. This is nothing more than an external video card with an HDMI connector. It’s quite a rare thing on the Russian market, but you can find the device on foreign online store sites. If you know interesting ways to connect a PC to a TV, you can share them in the comments.
Connection difficulties
During setup, the user may encounter the following problems:
- nothing happens when the cable is connected. The cord or one of the ports may be damaged. In such a situation, the picture is either not displayed at all or “breaks”;
- The wireless connection is not working. The signal may simply be weak (especially if there are many obstacles in the room). And to transmit high-quality content, a stable high-speed Internet is required;
- There is no “Source” button on the remote control. Some manufacturers leave it unsigned. As a rule, it is located near the power button and looks like an arrow entering a square;
- old technology, even without VGA. In such a situation, an adapter will help: on one side there are “tulips”, on the other – VGA/DVI.
There are enough ways to display a picture from a laptop on a TV screen. Everyone is free to choose which one they like best. To watch high quality movies and games, a wired connection is recommended. If you plan to open photos, documents or simple files on the TV, the “over the air” option is also suitable.
