Version check
There are two ways to check which version is on your computer.
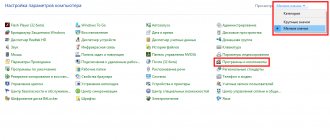
Using the Java Control Panel program
To find the Java control panel in Windows 7, you need to go to the OS control panel (“Start - Control Panel”) and enter “Java Control Panel” in the search bar.
- Open the Java Control Panel.
- Find the General tab.
- Click on the About button.
Find out the version using the Java Control Panel program
Usually the version is indicated in the first three words - right under the picture.
Via "Command Line"
- Call the “Run” command (Win + R). Then you need to enter “cmd” to open “Command Prompt”.
Call the “Run” command (Win + R) and enter “cmd” - Enter java –version in the query line.
- Press the enter key or the “Run” button.
The version will be listed right below the query string.
The Java version is listed right below the query string
Correct uninstallation of Java
Oracle, which develops and maintains this executable package, has met users halfway and released a special tool for removing old versions called the Java Uninstall Tool. You can do without this utility by removing the package manually using system tools or using an application for uninstalling programs.
Java Uninstall Tool
The easiest and most convenient way to remove Java from your computer once and for all is to use a special utility.
Java Uninstall Tool download page
- Open any suitable browser and follow the link above. Find and click the “I accept the terms and conditions and want to continue” button. If you would like to read the license terms, there is a link to the text below the button.
- Save the utility executable file to your hard drive. Once the download is complete, close your browser, navigate to the location of the downloaded file, and run it.
Please note that your account must have administrator rights to use this tool.
- In the start window of the utility, click on the “Agree” button.
- A warning appears indicating that only the latest version of Java is detected on your computer. Click “Yes”, since this is the one that should be deleted.
- In this window you will need to select the version that will be uninstalled. As a rule, there should be only one item in the list - mark it and click “Next”.
- Another warning will appear, in which you also click “Yes”.
- Next, you will be asked to delete the cache of Java-related applications. As a rule, without the package itself it is useless, so feel free to click “Yes”.
- Wait a while for the utility to do its job. When the procedure is complete, click “Close” to close the application and restart your computer.
Done – Java SE Runtime is completely removed from your computer. We recommend using this method, since the utility also removes traces of Java from the system registry, which is not always possible to achieve with manual removal.
Uninstalling Java using a third-party uninstaller utility
In addition to standard Windows tools and a program from the developer, you can use third-party software to remove Java, for example, the free Russian-language utility “Revo Uninstaller Free”, which can be downloaded from the official website https://www.revouninstaller.com/products/revo-uninstaller-free /.
- Follow the link and after the page has opened in the browser, click the “Download” button. After downloading the program distribution kit, install it on your computer. It is also possible to download a version that does not require installation by clicking the “Download free portable” button on the program download page.
- Launch Revo Uninstaller, find Java in the list of installed programs and click the “Uninstall” button on the panel at the top of the window.
Select Java and click on the “Delete” button
- The program will create a system restore point and perform other preparatory steps. Then the screen will ask: “Are you sure you want to remove this product?” We answer “Yes”, after which the uninstallation process will start.
Click the “Yes” button to start deleting
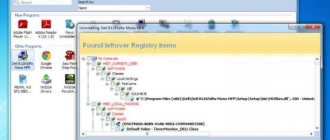
- Once the Java application is uninstalled, select the scan mode and click the Scan button. Revo Uninstaller will check to see if any files, folders of the deleted program or entries about it remain in the Windows registry after uninstallation. Most often, the utility performs a clean uninstall and displays a message that the remaining data was not found.
At the final stage of removal, we start scanning
This is interesting: Grouping images and other objects in Word (Word)
We talked about four options for removing Java from your computer: standard Windows 10 tools are faster, since they are always at hand, and software from the developer or a third-party uninstaller utility will first have to be downloaded to your computer. However, third-party solutions work more efficiently and do not leave traces of the uninstalled program on the system. Which method to use is up to you.
Uninstalling a program using Revo Uninstaller
The methods described above are not the only ones for removing programs. The Revo Uninstaller utility also provides the ability to remove old Java from Windows.
Instructions:
- Launch Revo Uninstaller by double-clicking the shortcut on your desktop.
- In the "Uninstaller" section, find Java.
- Select it and delete it by clicking on the corresponding button in the top panel.
- Select uninstall mode. We recommend Advanced - it's slower, but will remove tails and residual components that other modes might miss.
- Once complete, click Next to search and clear the remaining information.
- Restart your computer.
Video: How to remove Java from a Windows 10 computer.
When Java and other programs are completely uninstalled, as a rule, problems with the software do not arise. The apps work fine and there are no update issues.
How to remove Java from your computer manually
For PCs running Windows 10, 8 or 7, the methods for uninstalling Java are practically the same.
Follow the step by step instructions:
- Open “Control Panel” - press the key combination Win + R. In the built-in Run utility window that opens, write the control command.
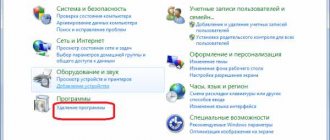
- Switch the viewing mode to "Category".
- Open the “Uninstall a program” section.
- Wait until the list is built, then select Java with a mouse click.
- Click the “Delete” button above the list.
- Confirm uninstallation.
For Windows XP:
- From the Start menu, click Settings and open Control Panel.
- Select the "Add or Remove Programs" section.
- Uninstall the program in the standard way.
Repeat this step for each version if you have more than one.
To completely remove Java from a computer running Windows 7, the next step is to clear the folders created during the installation process:
- Open File Explorer.
- Select “This computer” in the left column, then “Local drive C:” (it may be called differently: E:, F:, M:).
- Delete the folders called Java under Program Files and Program Files x86.
- Open the user's applications folder - to do this, launch the classic Run application, enter the appdata command.
- Open the LocalLow section and delete the Oracle and Sun folders.
- In the Roaming section, delete folders with the same names.
This is interesting: How to change the language from English to Russian on Steam - instructions
All that remains is to remove all residual elements of the registry entries:
- Launch the classic Run app.
- Type the command regedit and click OK.
- Expand the HKEY_CURRENT_USER registry tree.
- Open the branch in the Software section, delete the JavaSoft folder from it.
- Expand the registry key HKEY_LOCAL_MACHINESOFTWARE and also delete the JavaSoft folder (if it is there).
Uninstalling Java via Windows Settings
- Click on the “Start” button with the right mouse button and in the context menu click on the “Applications and Features” item.
Launch “Applications and Features” from the context menu of the “Start” button
- In the search field “Search in this list” we write the name of the component - Java and, when it is found, select it, then click on the “Delete” button.
Find and remove Java in the “Options” window
- A warning will appear that the application and all its data will be deleted. We confirm the action by clicking the “Delete” button and wait for the uninstallation process to complete.
Uninstall Java via Control Panel
- Another way to remove Java from your computer is to use the Windows 10 Control Panel. You can open it like this: press the Windows keys + R, enter the command in the Run window control
and press the “OK” or “Enter” button.Launch "Control Panel"
- In the window that appears, we are interested in the “Uninstall a program” section.
Click on the link “Uninstall a program”
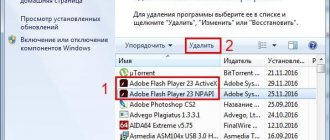
- Scroll through the list of installed programs, find the Java component and left-click it, and then click the “Uninstall” button in the panel at the top.
Select the Java component and click on “Remove”
- To the question “Are you really going to uninstall...” we answer “Yes” and wait for the program to be uninstalled.
Cleaning the registry after an unsuccessful removal
You can clean the registry manually, using the method described above, or using a program from Microsoft.
- Install the Fix It utility.
Fix It Program - Click the “Click to fix” button.
- After fixing the registry, a line under the button should light up, signaling the completion of the work.
- Close the utility.
Cleaning tails using JavaMSIFix
When problems arise after uninstalling an old edition of Java, it is recommended to use the JavaMSIFix utility. It was developed by Oracle specifically to troubleshoot this kind of problem.
- Download the application for Windows 7 from the official developer website.
- Run the executable file (the program does not require installation) and click “I Agree” to indicate that you agree to the terms of use of the provided product.
More on the topic: How to remove DirectX
- Then click on the “Click to Fix” button to execute the algorithm for identifying and correcting errors.
- At the end of the procedure, close the window.
By following these simple steps, you are guaranteed to be able to remove Java from your computer and fix problems that arise with updating the environment. Now you can safely download the updated Java for Windows 7 with an increased degree of security and expanded functionality.
windowsprofi.ru
Java script in Mozilla
- In the browser menu, find the “Tools” tab.
In the browser menu we find the “Tools” tab - Open the “Settings” line.
- In the “Content” line, select “Enable Java script”.
In the Content line, select Enable Java script
Let's use the specialized utility JavaMSIFix, which will help correct the situation.
The utility is free
.
It is better to download it from the official website
or other
reliable source
.
- Download the JavaMSIFix
. - Let's launch it. In the window with the regulations, you must click on the button with the words “ I Agree
”, accepting the rules of the user agreement. - Next, click on the “ Click to Fix
” button, which will launch the fix. - When a message appears under the “ Click to Fix
” button, this will indicate that the application has completed its work. - You can close the program window.
After this procedure, you can try installing new software
from
Java
. If the previous steps were done correctly, then there should be no problems installing the updated version of the software.
The Java platform is the No. 1 environment among software developers for computers and portable devices due to the simple architecture of the programming language of the same name and the translation of executable code into specialized bytecode. Thanks to this capability, software developed using Java can run on virtually any device or virtual machine. As a result, the library that provides support for the technology must be installed on any user’s computer controlled by Windows 7.
Due to the constant improvement of technology, its developers release new versions of the environment, execution module and plug-ins from month to month. They include both completely new and updated components. An update most often means improving security and performance, correcting detected problems, and optimizing executable code.
Before updating Java, developers recommend uninstalling the old version of the product from Windows 7 in order to avoid conflicts or the inability to replace one of the files due to its use by third-party software (browser) and to ensure that programs work using a completely updated environment.
What’s noteworthy is that starting with revision number 45, Google Chrome stopped supporting NPAPI for Java applets.
Let's look at how to remove Java from a personal computer running Windows 7 in order to update the product or after the last attempt to update the environment has failed.